How to set up your Ozeki Chat Server
It is easy to create your own chat domain and register your chat users. You will see how to register two users and login to each of them using Ozeki Chat Client if you read this tutorial. All local users on your Ozeki Chat Server will be available through the chat domain.
Please look at the following site to see how to login to Ozeki Chat or continue with this tutorial:
Step 1: Download Ozeki 10
|
| OZEKI 10 contains the OZEKI Chat Server application Download OZEKI Platform Trial! |
Step 2: Install Ozeki Platform: Ozeki Server application is added
Ozeki 10 is supported on a wide variety of operating systems. On the following sites you can find detailed installation guides for Windows, Ubuntu Linux or Raspbian operating systems. After finishing the installation, it will start on your desktop. If your free trial is over, please purchase and activate your license.
Step 3: Open Ozeki 10 and Start Ozeki Chat Server
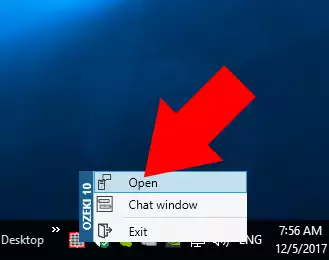
Please open Ozeki 10 from the desktop panel of your operating system (Figure 1).
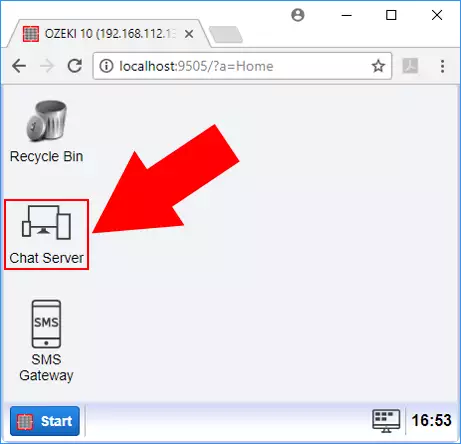
Ozeki 10 has it's own browser based desktop, which you can run on any webbrowser. Please start 'Chat Server' from the desktop (Figure 2). If necessary, please login with the user credentials you have provided during installation.
Step 4: Create your own chat domain
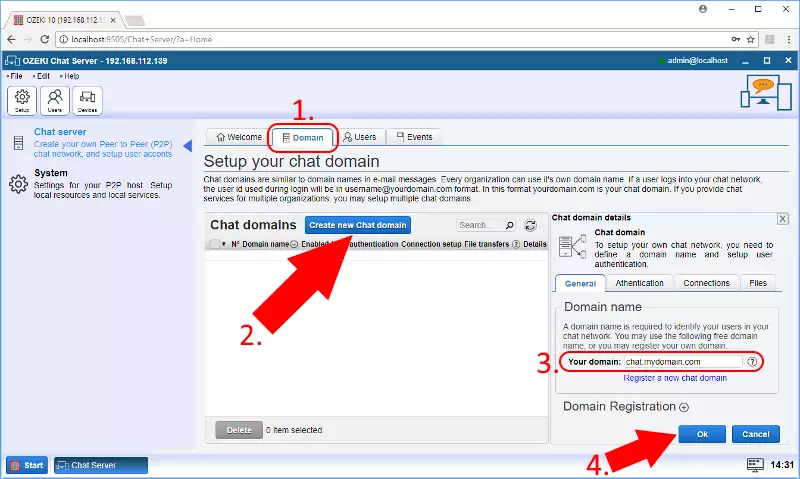
After you have started Ozeki Chat Server on Ozeki 10, please click on the 'Domain' tabpage and type the chat domain name and click 'OK' (Figure 3).
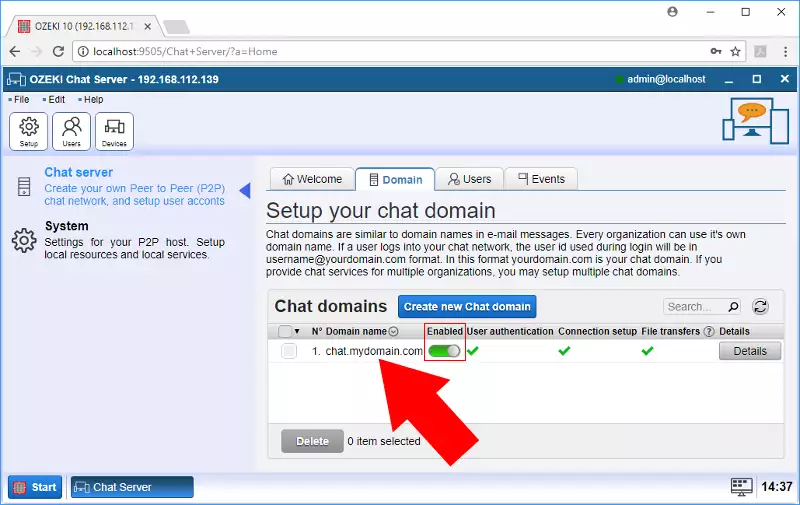
After the domain has been created, you can see it enabled in the domain list (Figure 4).
Step 5: Create the chat users
In this example you can see two users created, Alice and Bob. Click 'Users' tabpage and 'Local user accounts' subtabpage. You can add new users by clicking 'Create new System user'. Every user you add here will be available from all Ozeki Chat Client by using the domain you have provided in Step 4, above.
A new form will open up. Please add the username and password of the user to create and click 'OK' (Figure 5).
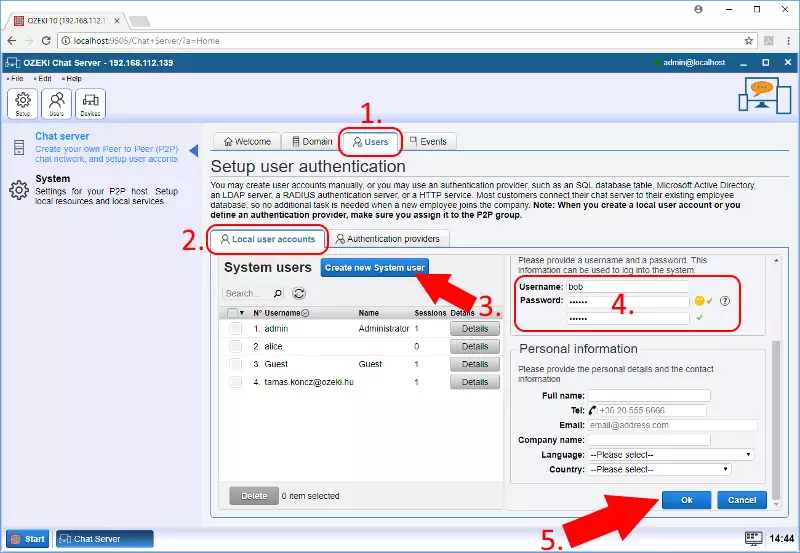
Now you should see Alice and Bob created (Figure 6).
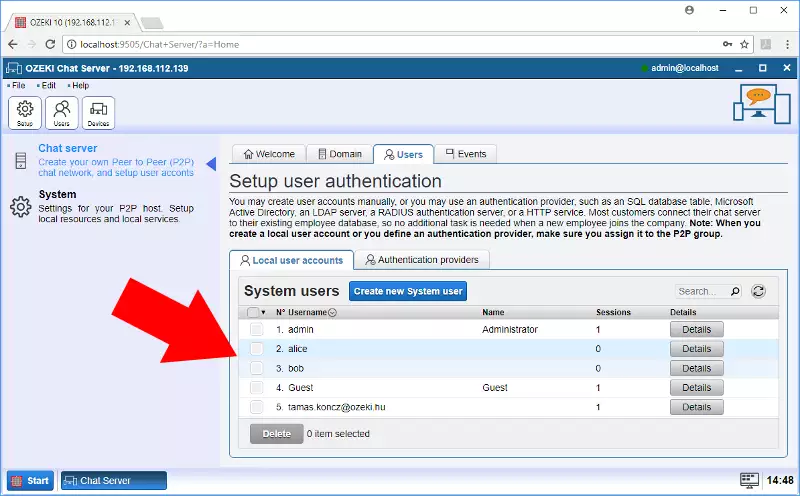
Connect to each of them by following the next step.
Step 6: Log in through Ozeki Chat Client
Open two Ozeki Chat Clients on two different devices which can be a smartphone, desktop or laptop. One person should log in as Alice and the other person can log in as Bob. Then Alice and Bob can chat with eachother (Figure 7).
Congratulation! You have created a working chat server for your Ozeki Chat Clients.
More information
- How to set up your Ozeki Chat Client
- How to set up your Ozeki Chat Server
- The 4 security layers you can use
- Technology
- Quick Start Guide - Chat Server
- How to build my Messaging Network

 Sign in