SMPP to CIMD2 gateway
Ozeki CIMD2 gateway can be used by SMS service providers to serve multiple customer using SMPP SMS clients. In this guide, we show you how to setup an authentication provider to create SMPP client accounts automatically.
Step 1 - Add new connection
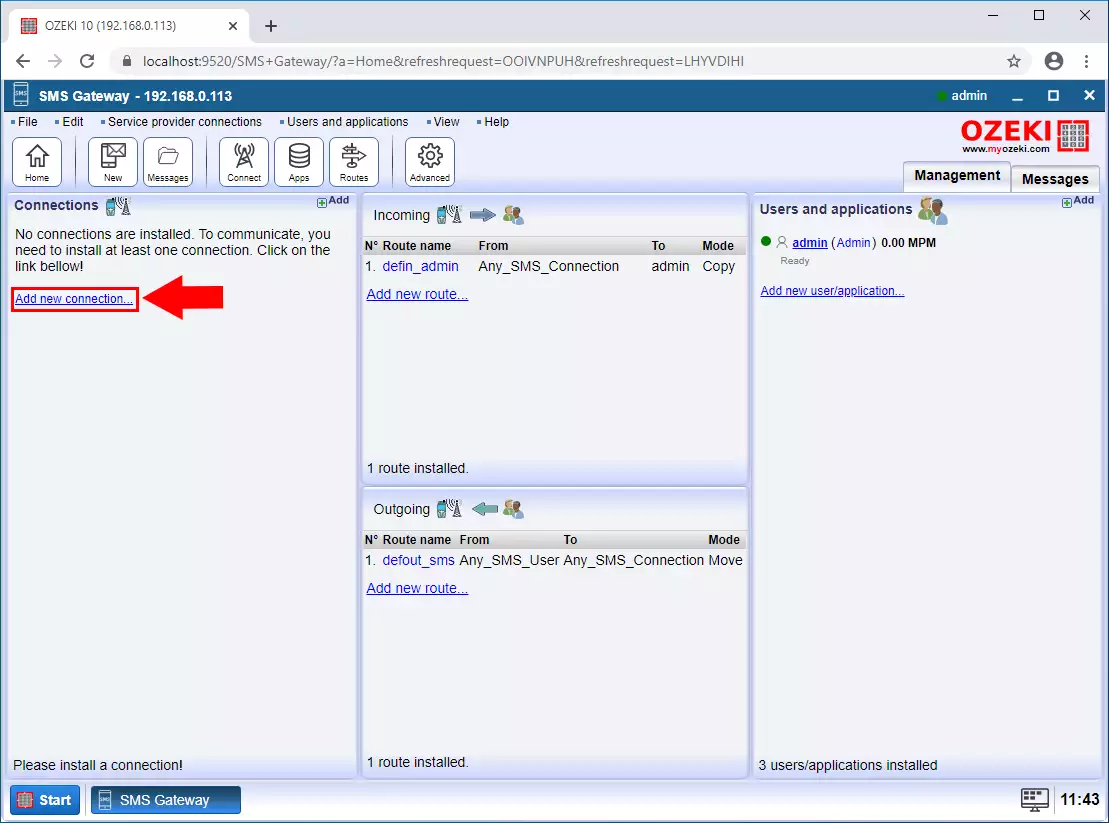
The first step is to connect to the CIMD2 service provider. To do this, you need to create an CIMD2 client connection. Click on the "Add new connection ..." as you can see on the Figure 1.
Step 2 - CIMD2 Client connection
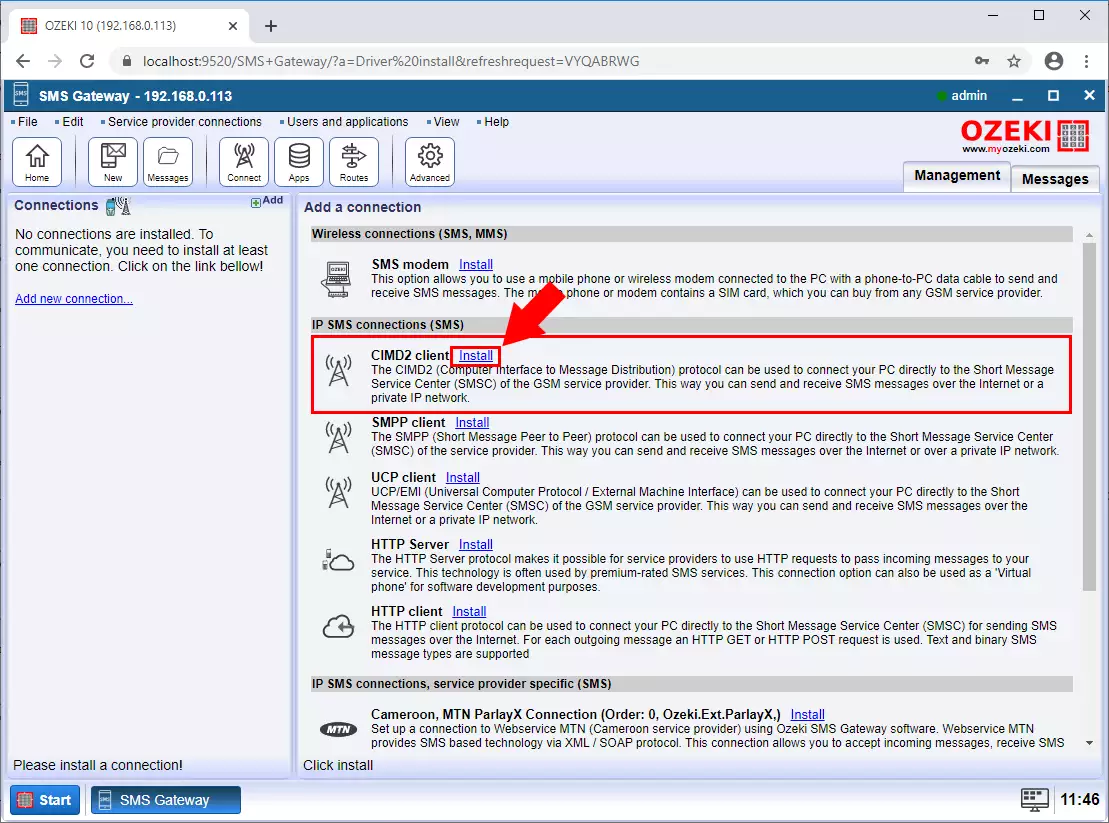
Select the CIMD2 Client connection from the list and click Install (Figure 2).
Step 3 - CIMD2 client user data
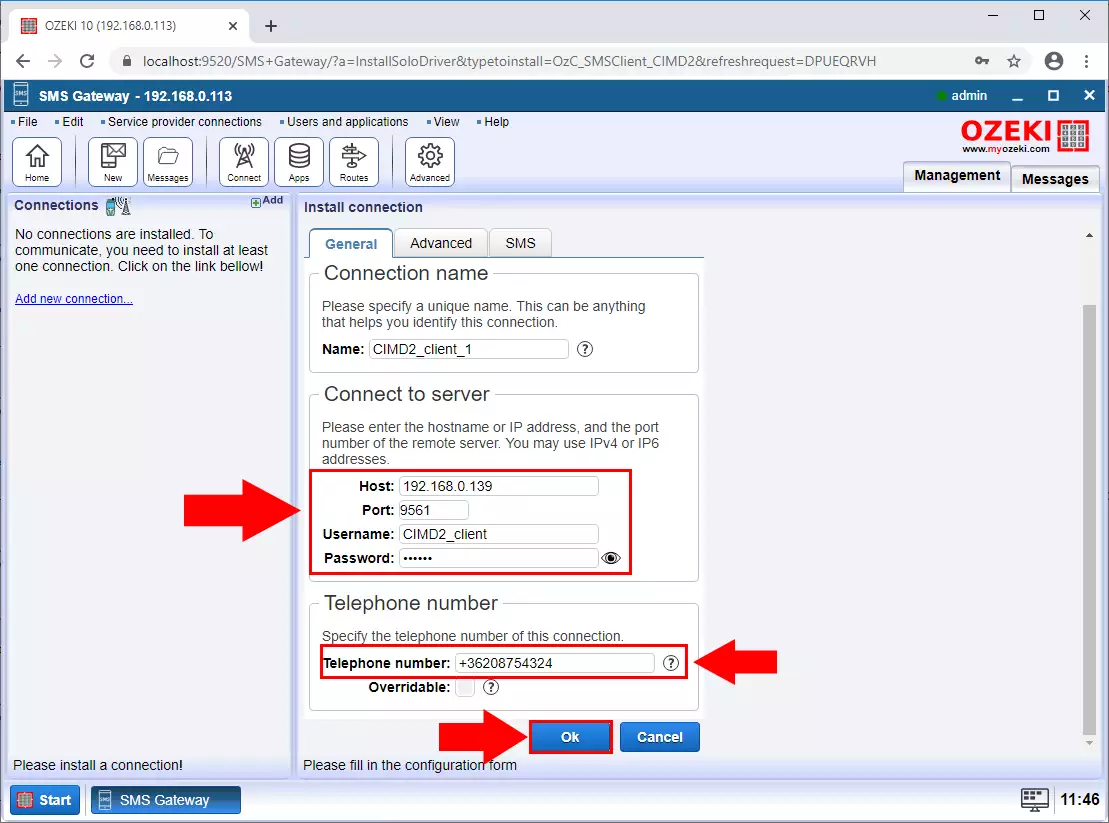
Now enter the contact details like Host, port, username and password. And enter the phone number that the SMS Gateway uses to send the message. Finally click on the OK button (Figure 3).
Step 4 - Client Connected
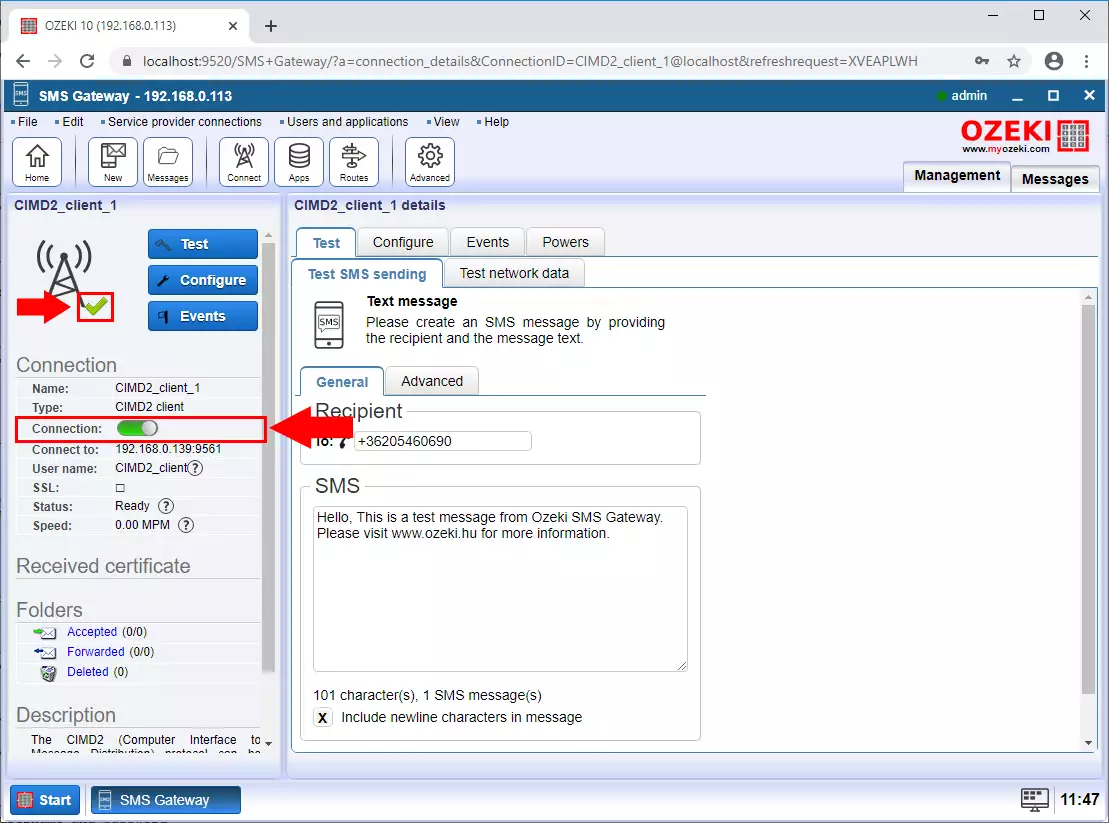
Next step is to enable the connection. If the connection is established with the service provider you can see the green pipe ikon (Figure 4).
Step 5 - Open Control Panel
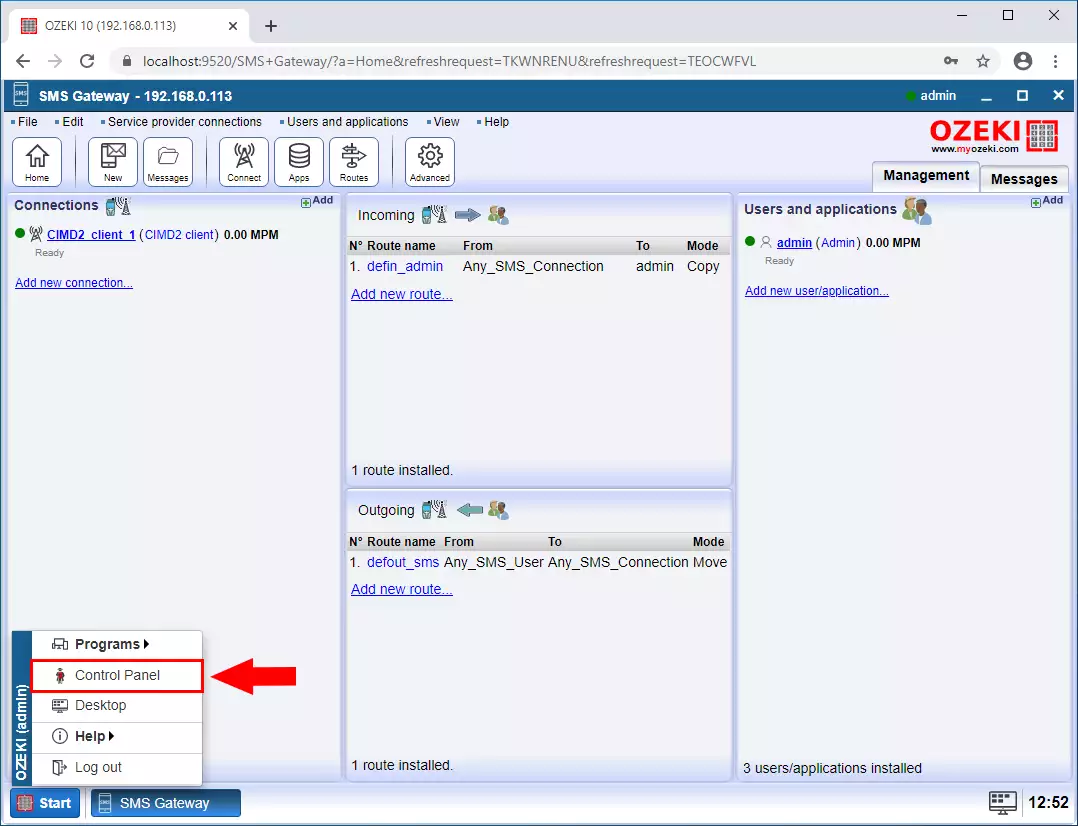
We then need to establish a database connection so that we can authenticate users through the database. Open the Control Panel from the Start menu (Figure 5).
Step 6 - Create new Connection
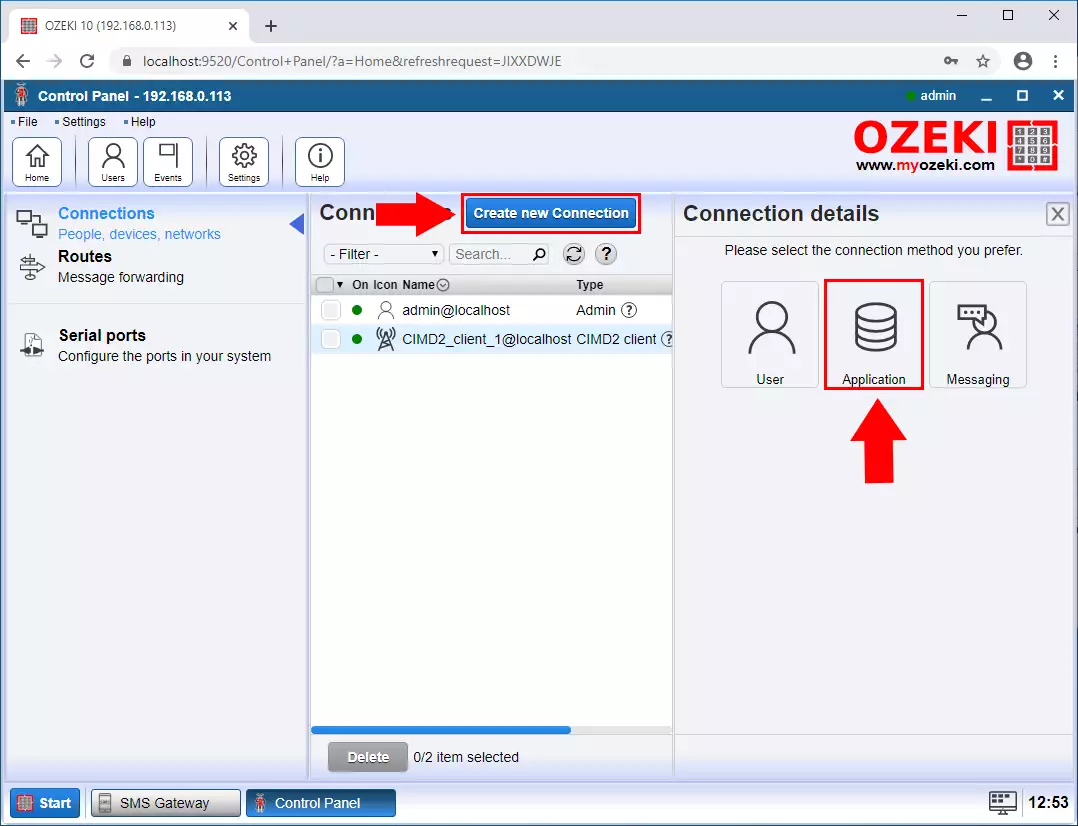
In the Control Panel click on the Create new Connection button and select the Application type (Figure 6).
Step 7 - Database conncetion
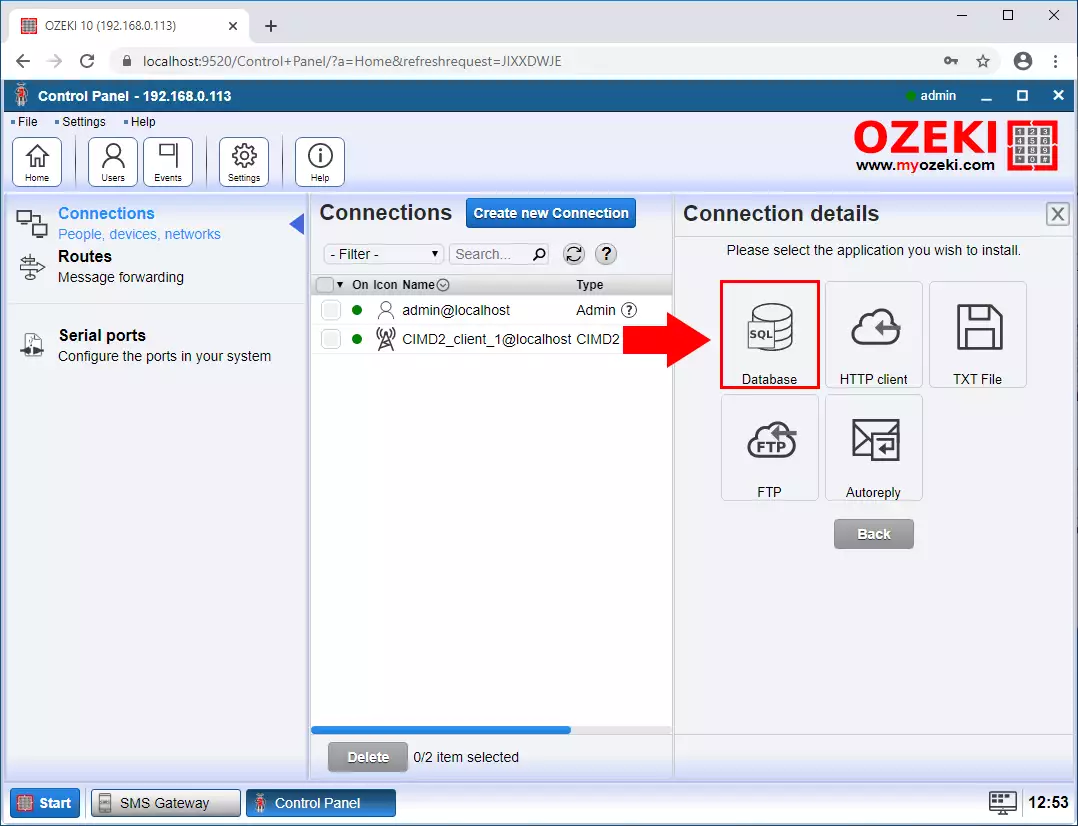
Then select the Database application type (Figure 7).
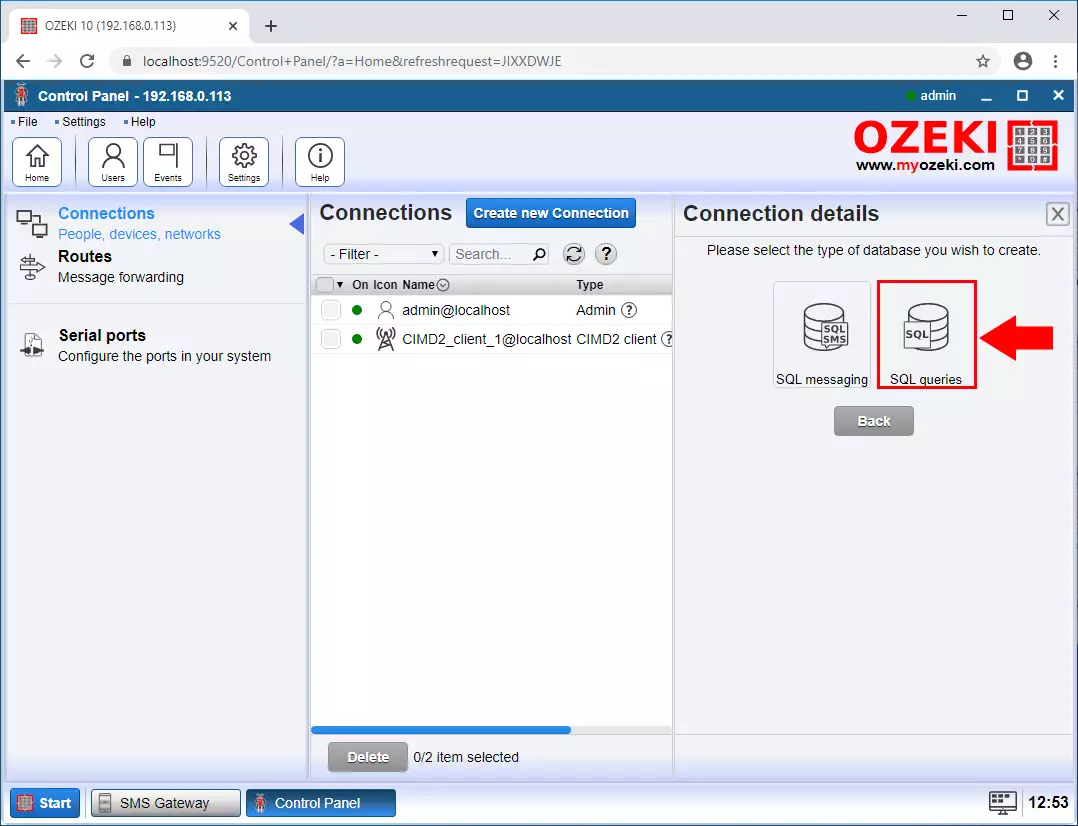
Step 8 - SQL queries type connection
Now select the SQL queries type (Figure 8).
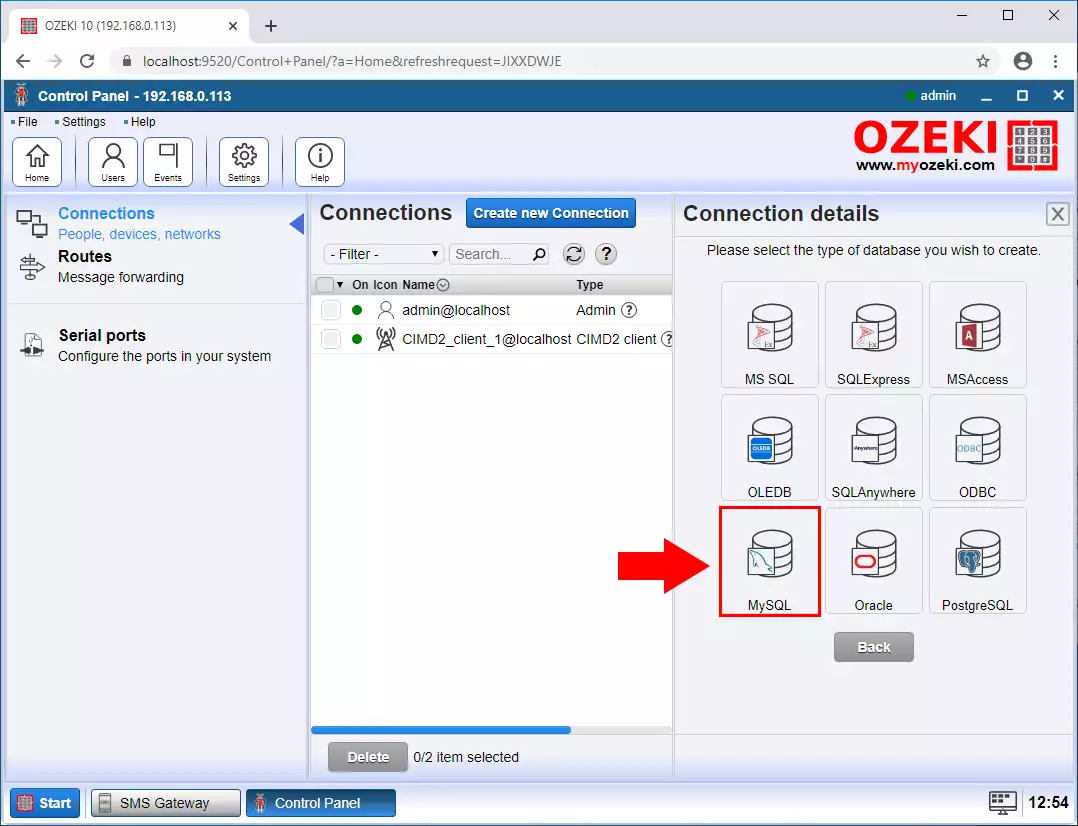
Step 9 - Mysql connection
In this description we are now using a Mysql database so we choose the Mysql type but you choose the database in which your users are stored (Figure 9). The connection method is very similar for all database types.
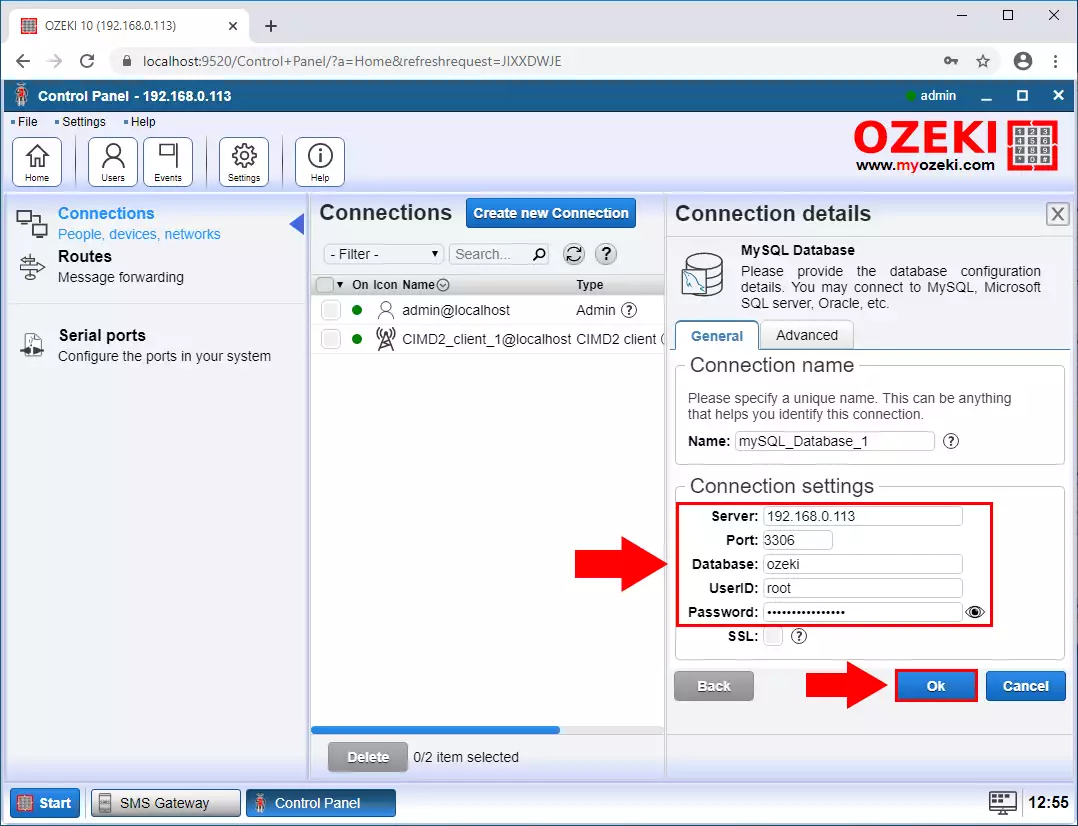
Step 10 - Provide database connection details
In the Connection details page provide the server IP address, the port, the database name the UserID and the users Password then click on the OK button (Figure 10).
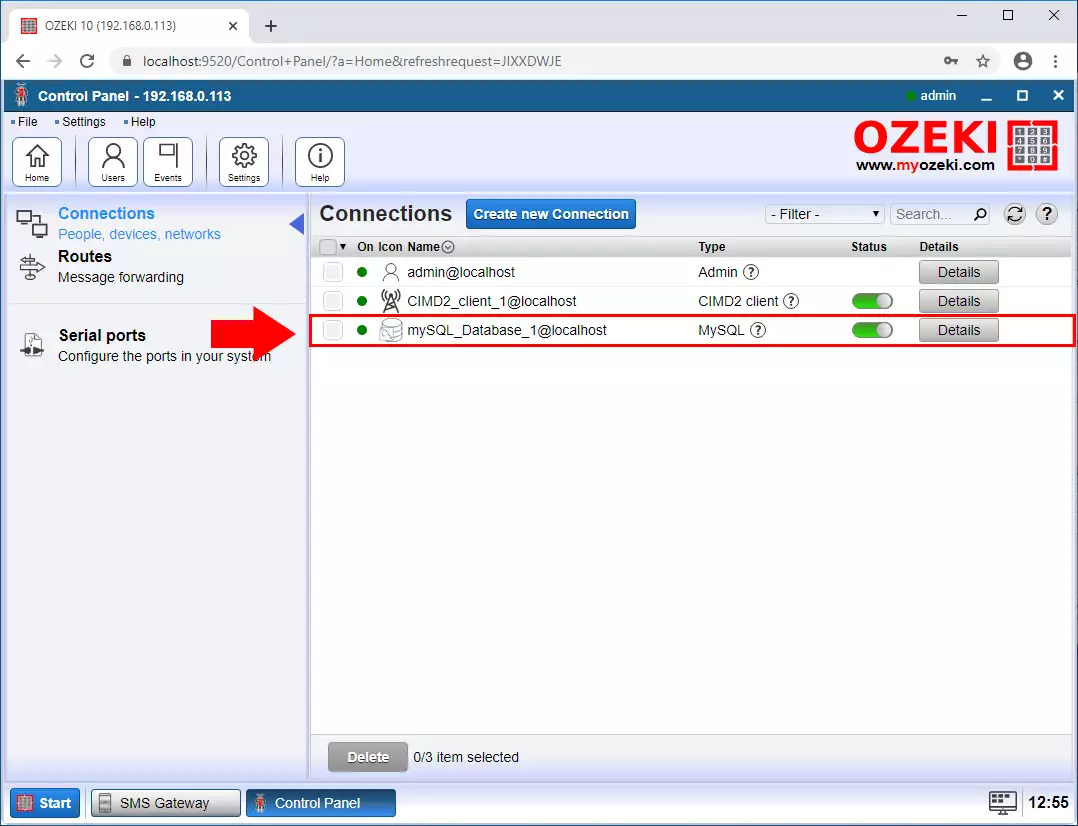
Step 11 - Database connected
In teh Connection page you can see if the database connection is established (Figure 11).
Step 12 - Open Advanced menu
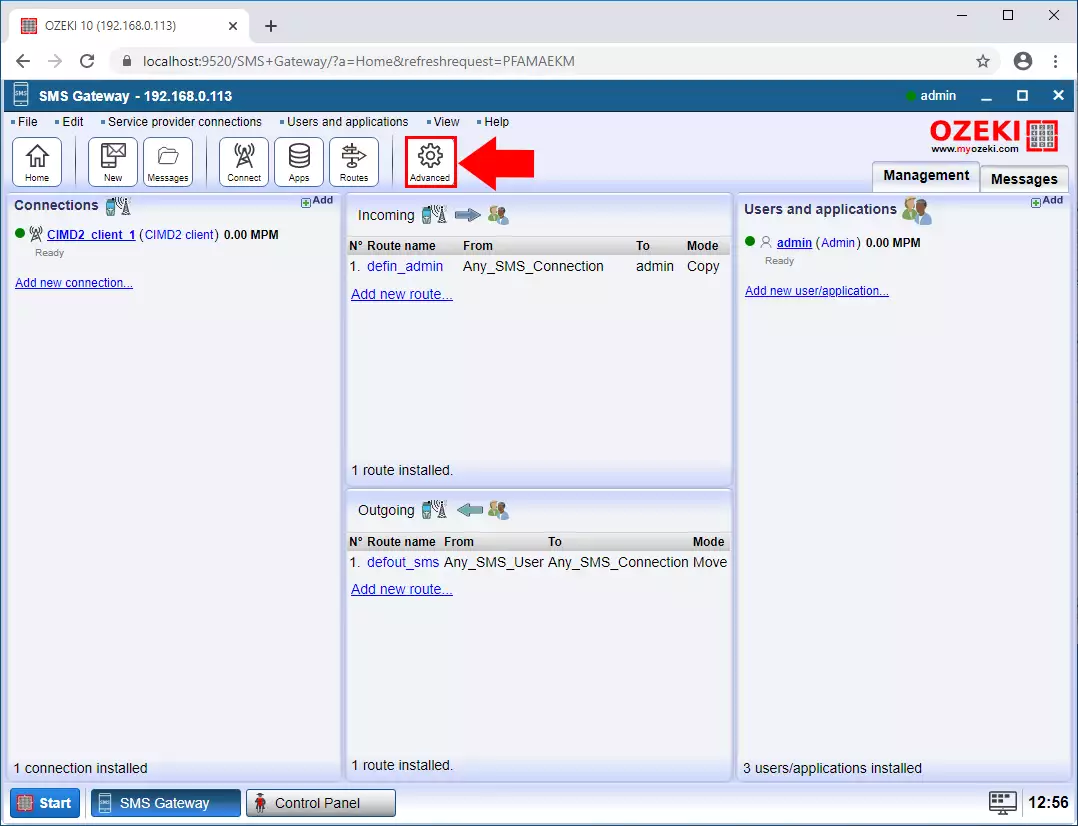
The next step is to create an authentication provider for the users. To do this, click the Advanced button on the SMS gatway home page (Figure 12).
Step 13 - Create new Authentication povider
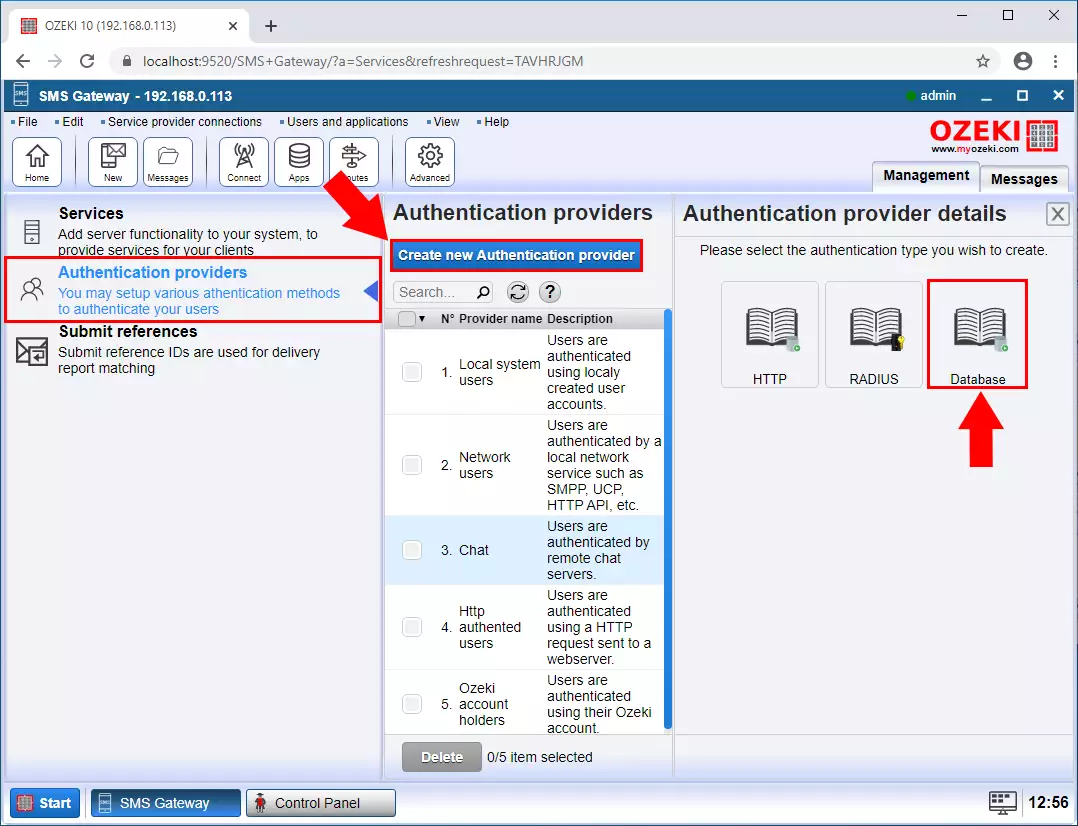
In the advanced menu, select the Authentication providers section and click the Create new Authentication provider button. Then select the Database option (Figure 13).
Step 14 - Specify SQL query
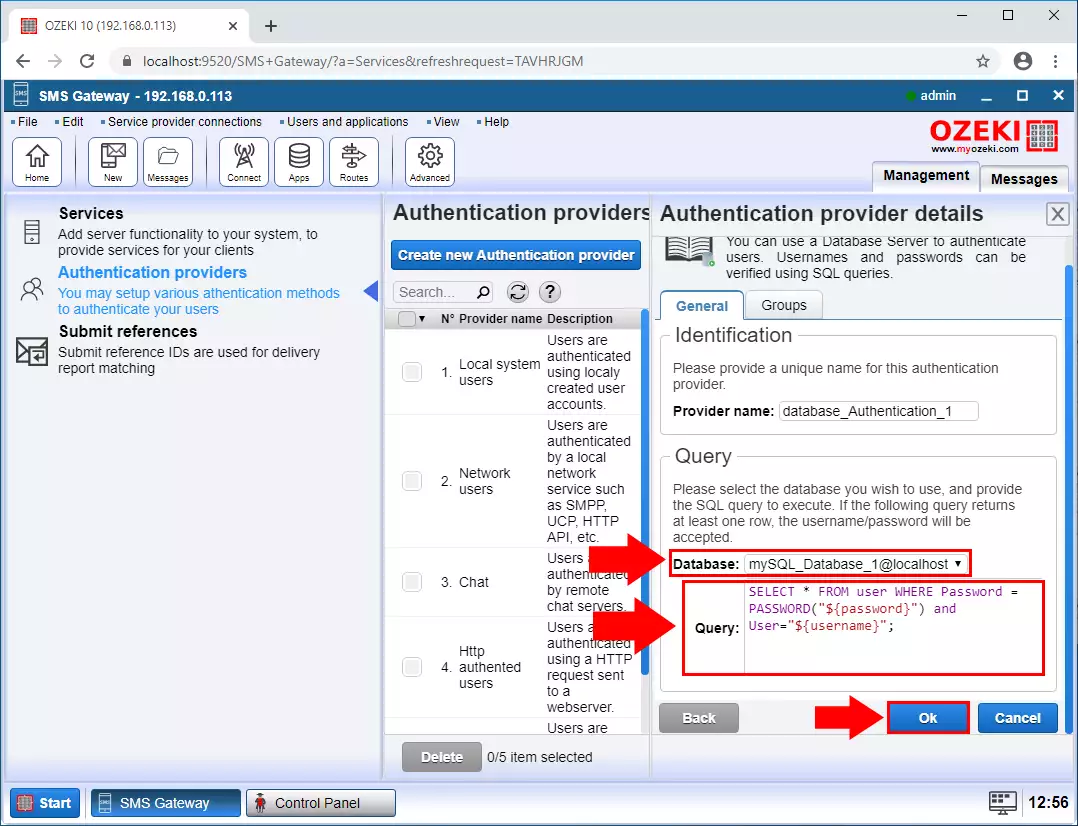
On the Authentication provider details page, select the previously created database connection and enter the SQL query what is used for authenticate the users (Figure 14).
Step 15 - User database table
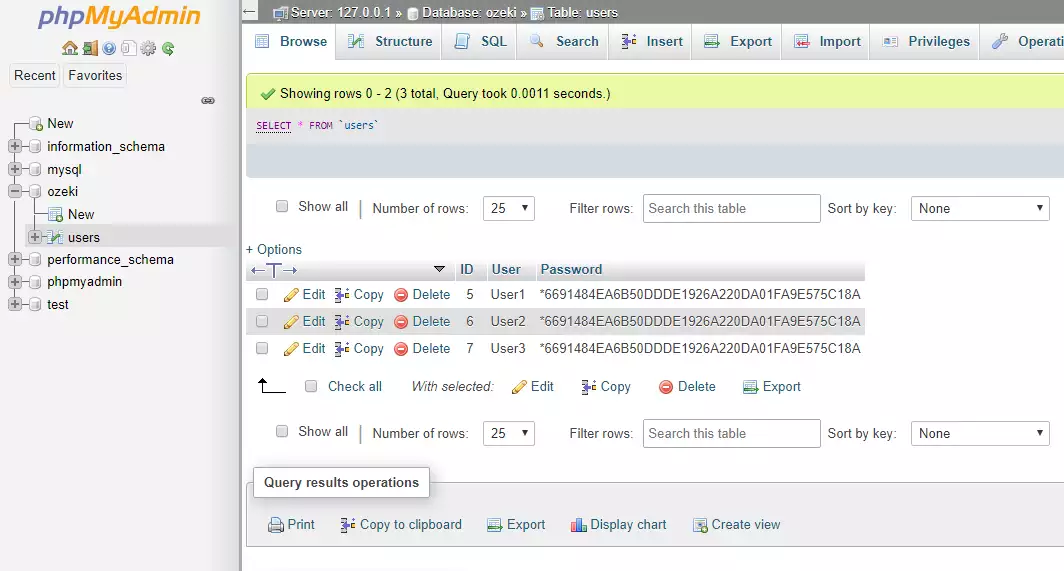
In this example, we use the database table shown in Figure 15 to store users.
Step 16 - Create new Service
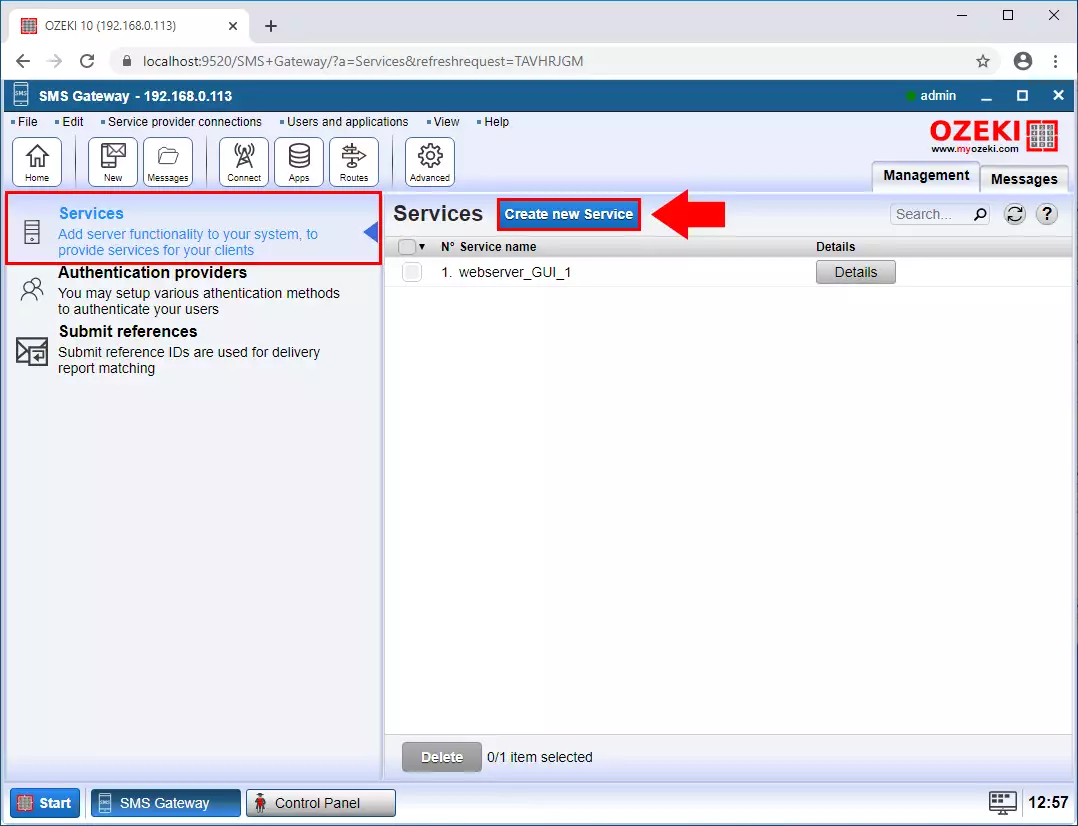
Now create the SMPP service that clients can connect to. In the advanced menu, select the Services section and click the Create new Service button (Figure 16).
Step 17 - Create SMS Service
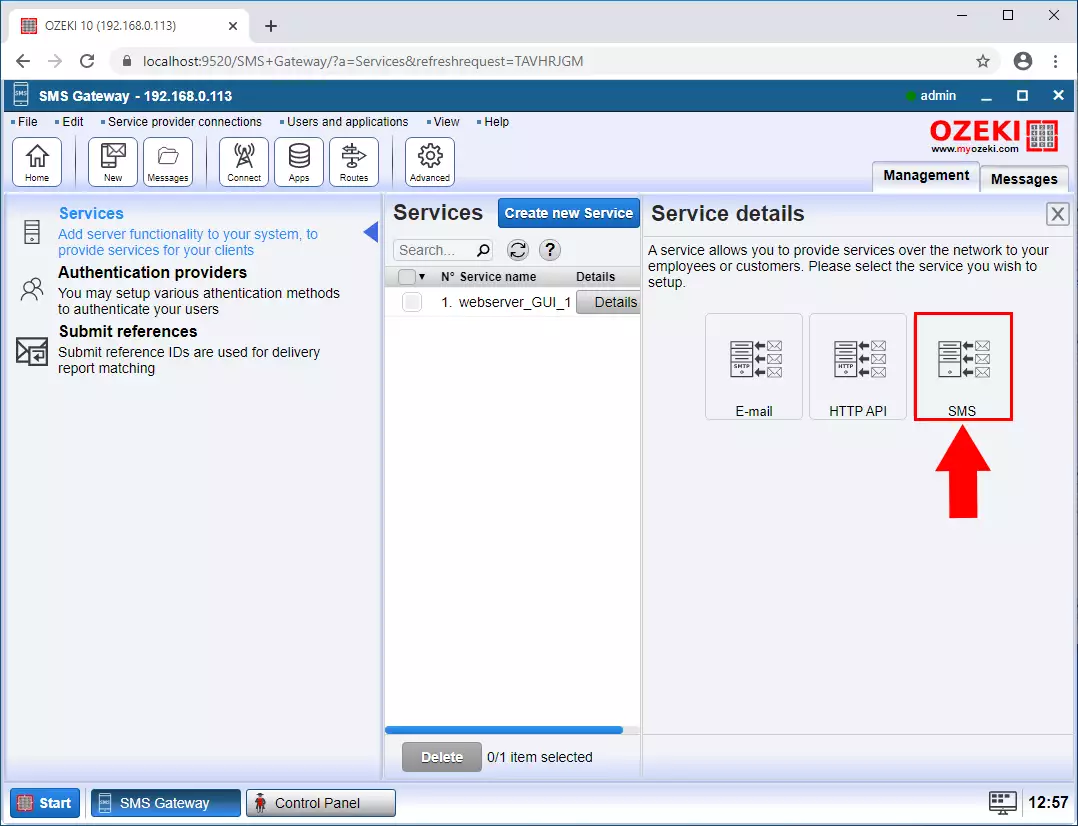
Select SMS service option (Figure 17).
Step 18 - SMPP Service
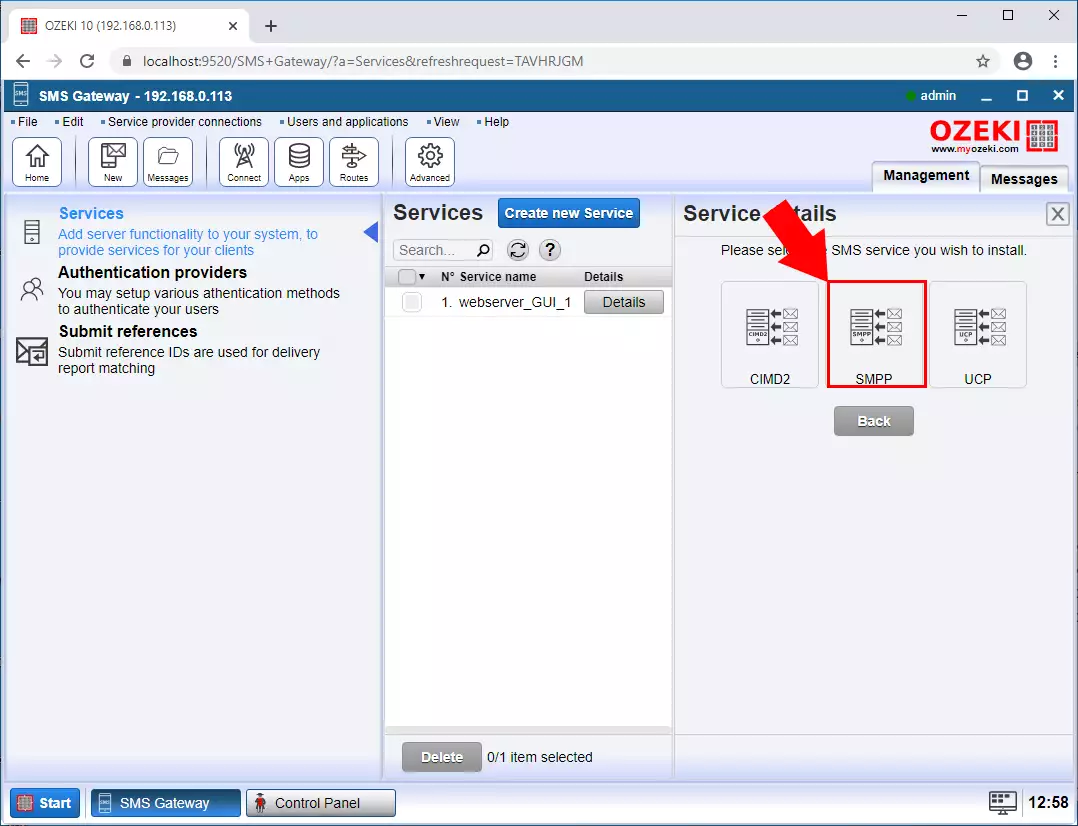
And then the SMPP type (Figure 18).
Step 19 - Specify Connection details
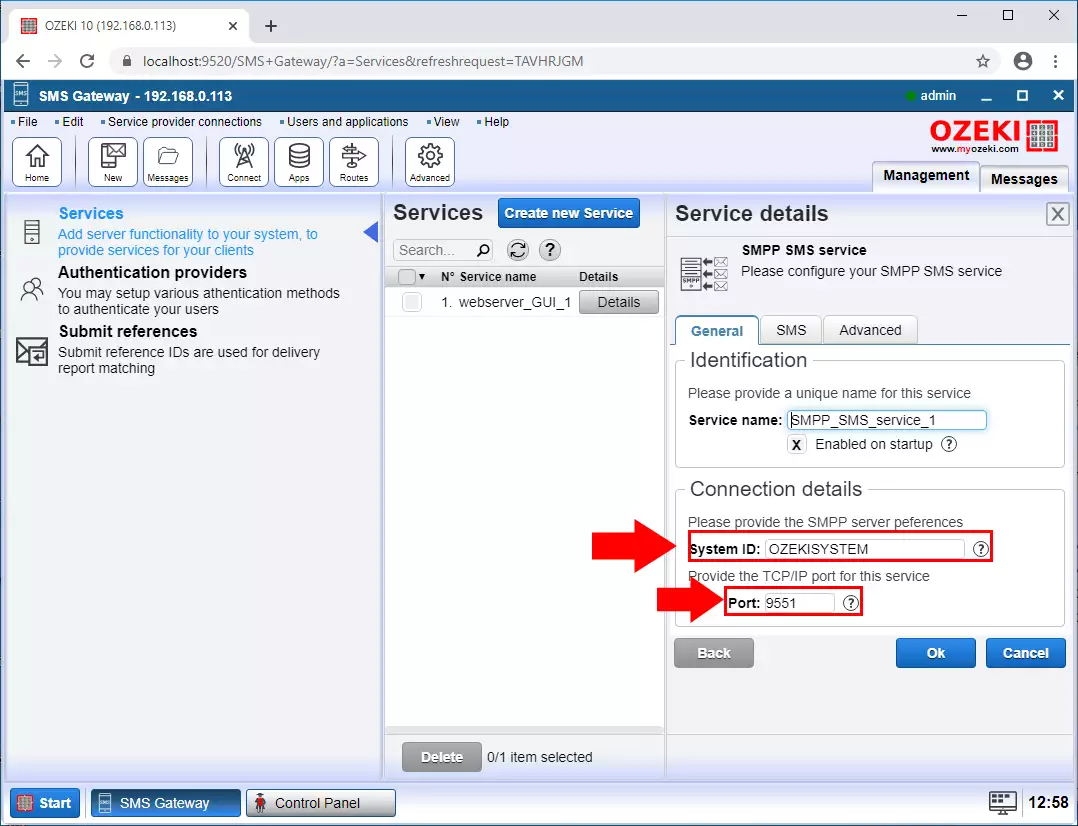
On the SMPP Details page, enter the System ID of the service and the port you will use (Figure 19).
Step 20 - Set authentication method
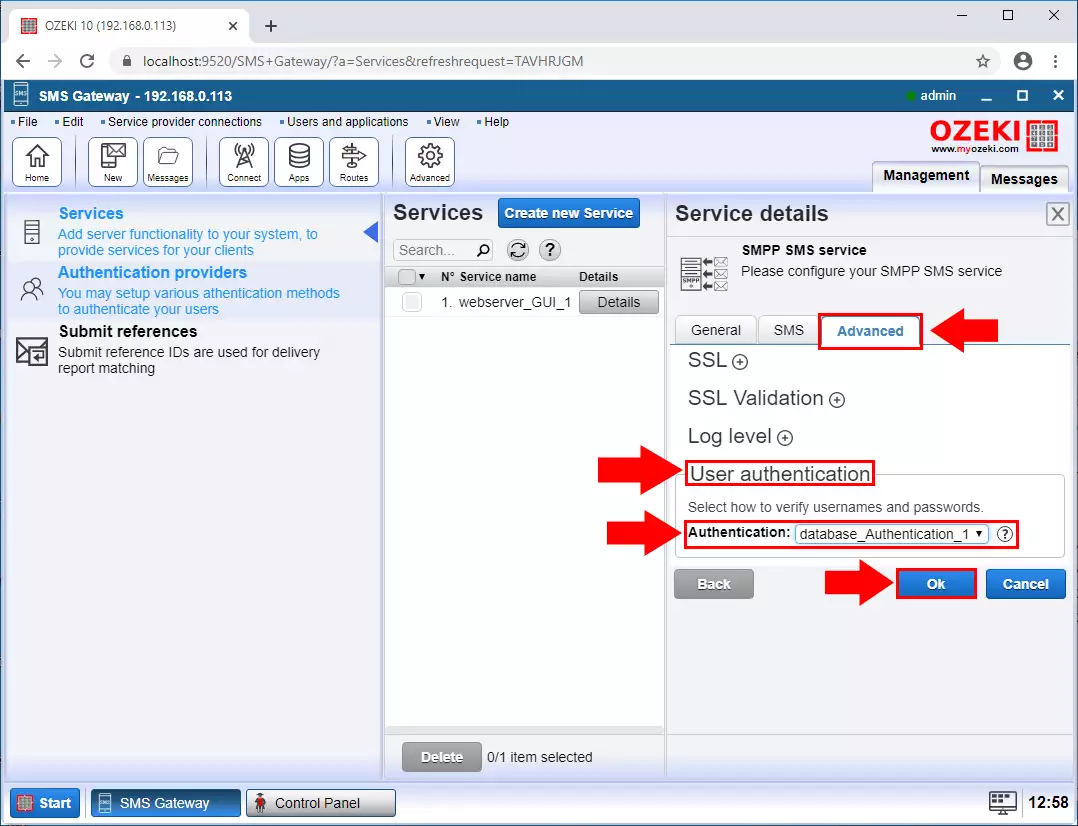
Then, on the Advanced tab, in the User authentication section, select the database authentication mode you created earlier and click OK (Figure 20).
Step 21 - SMPP service created
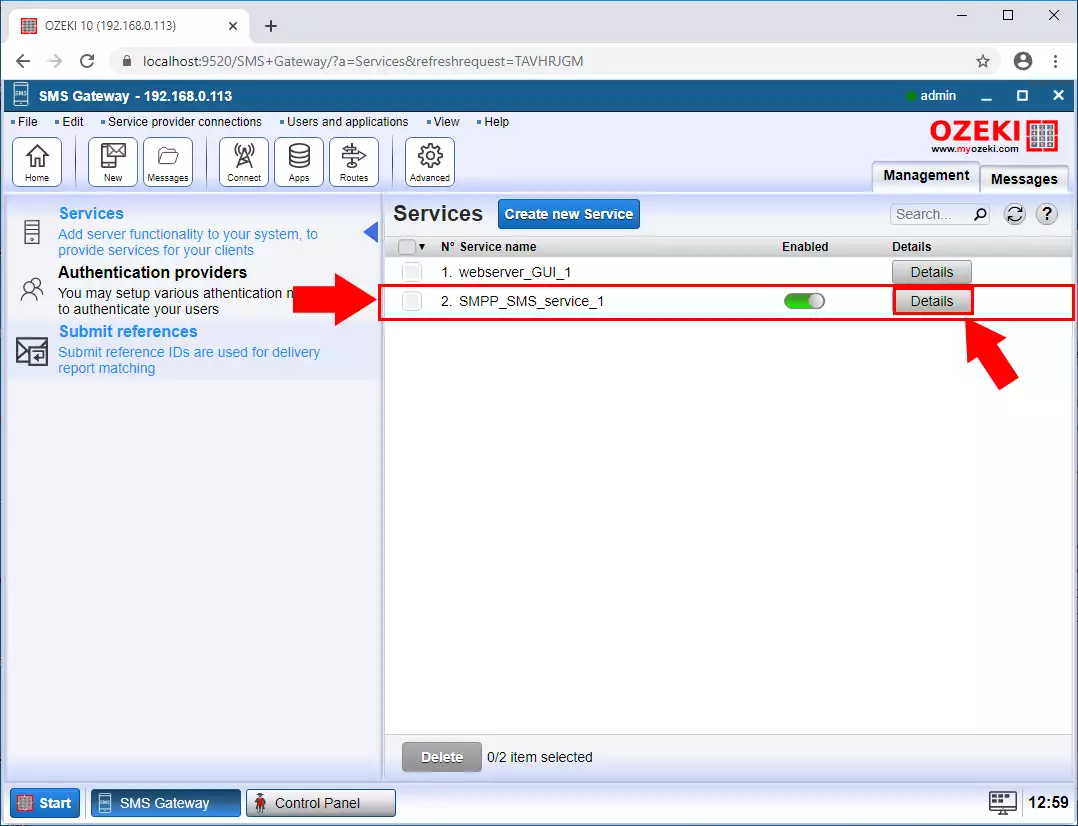
In the service menu you can see that the SMPP service is created. Click the Details button (Figure 21).
Step 22 - SMPP clients connected
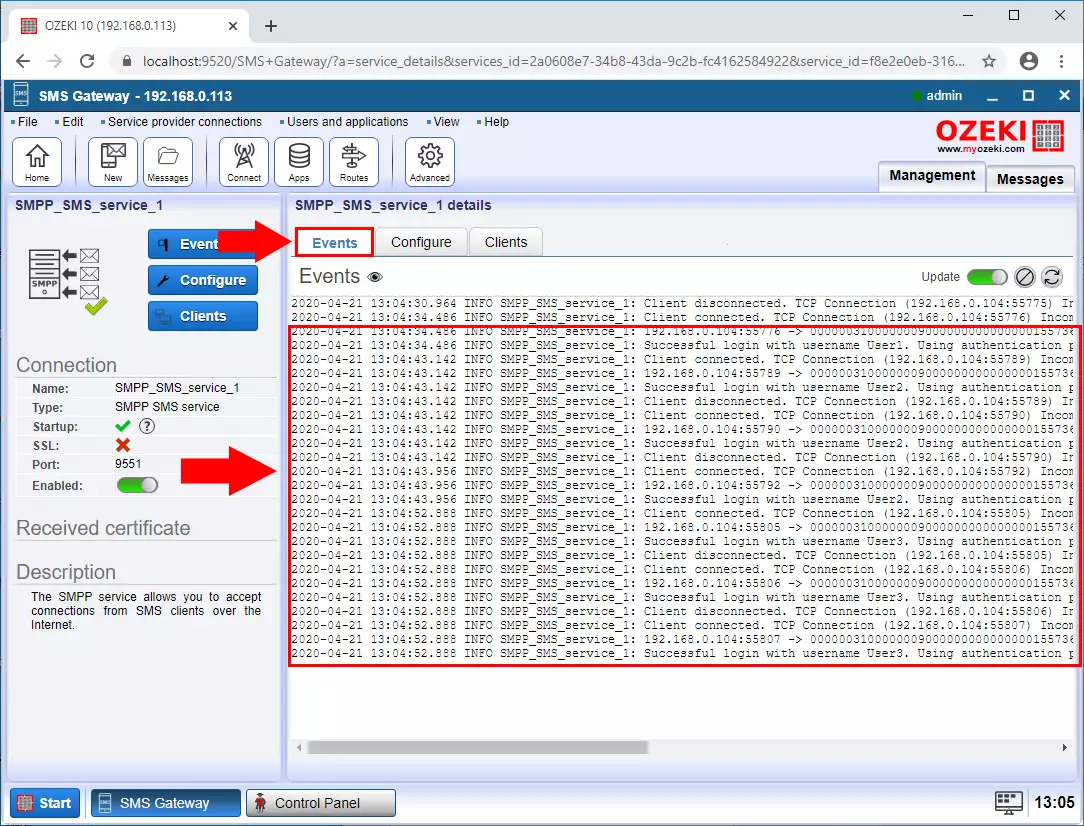
On the events tab, you can see that clients have successfully connected using database authentication (Figure 22).
Step 23 - Users created
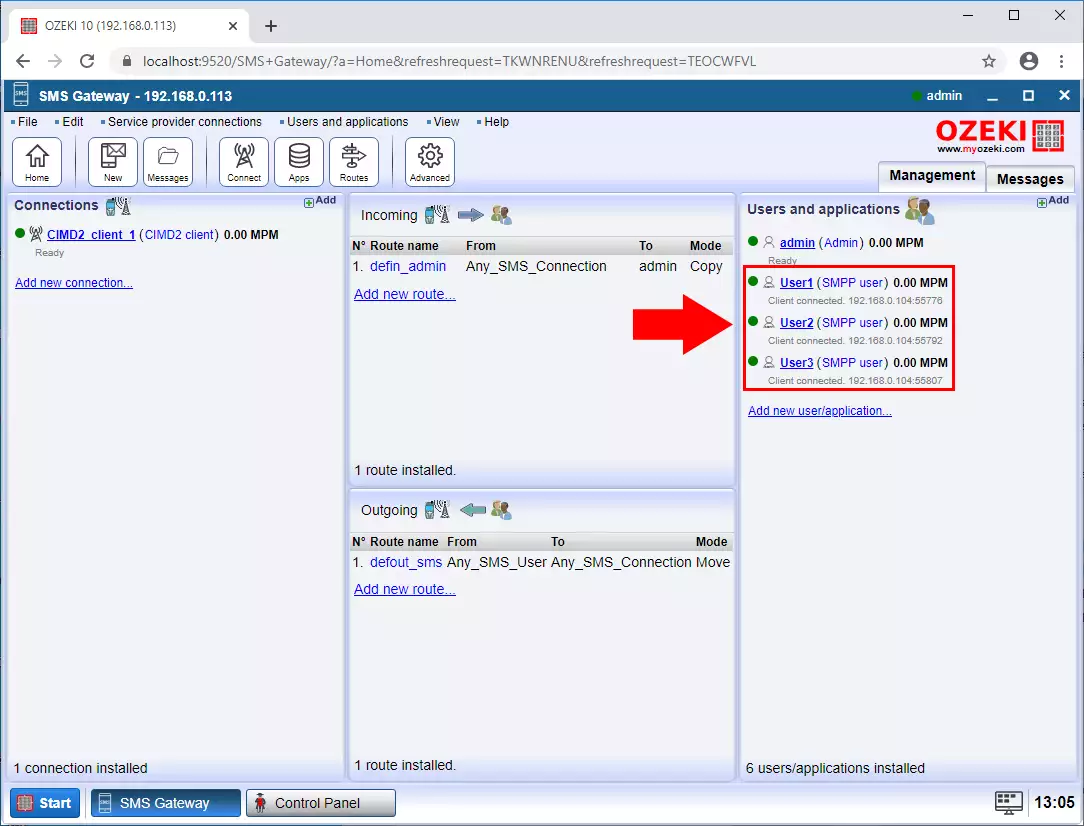
On the main page of the SMS Gateway, it can be seen that a separate SMPP User has been created for each client (Figure 23).
Step 24 - Message received from SMPP
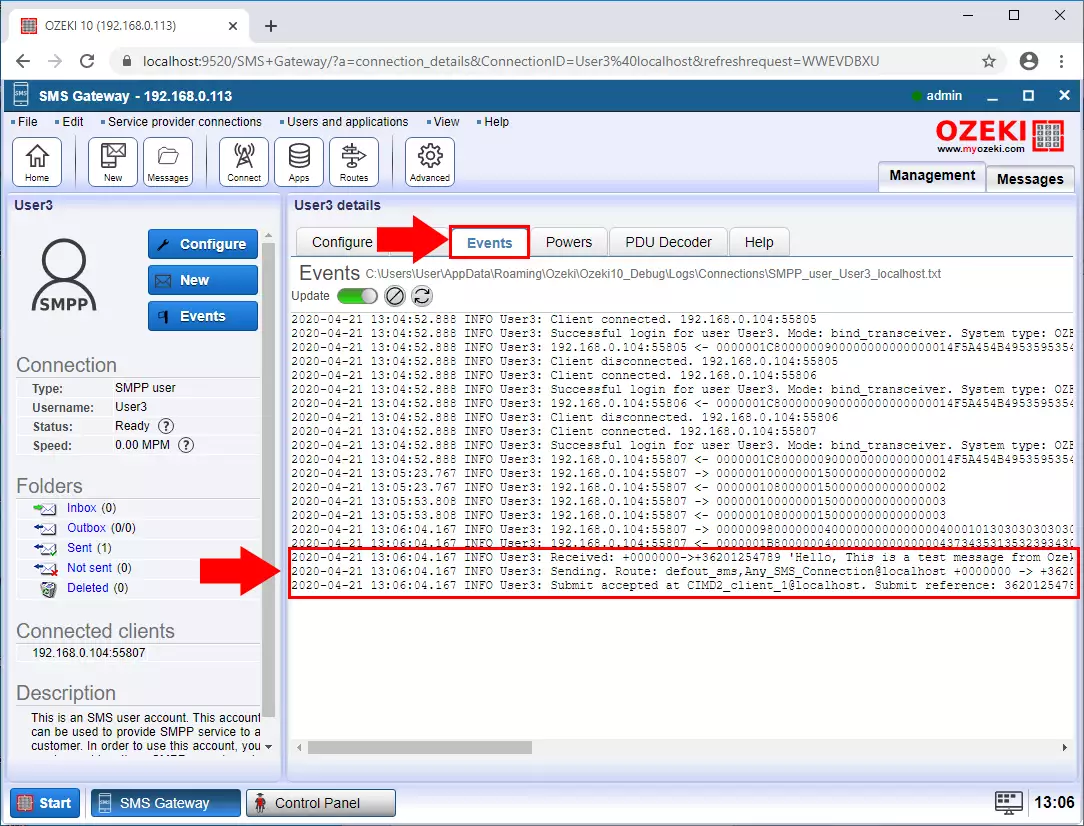
When an SMS is received from a client, it is displayed on the corresponding user events tab (Figure 24).
Step 25 - Message sent in CIMD2
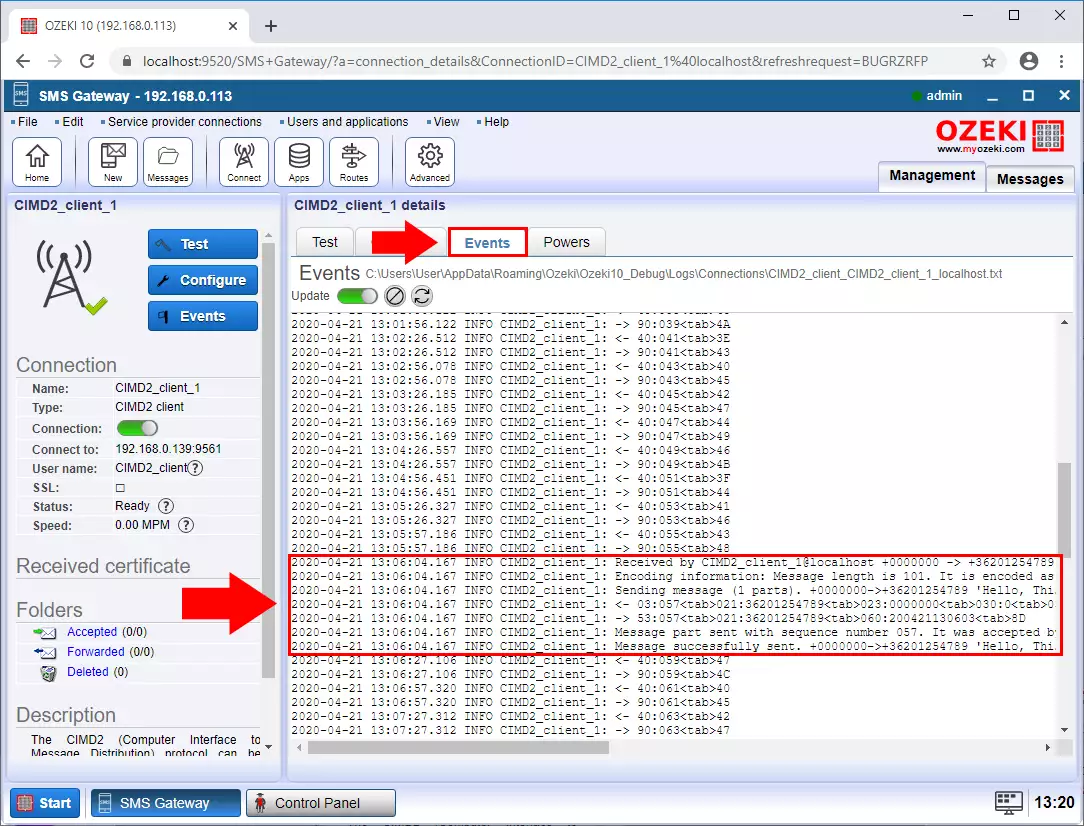
The events tab of the CIMD2 connection shows that the sms was sent to the service provider using the CIMD2 protocol (Figure 25).
