Quick Start Guide
This Quick Start Guide provides you instructions on how to setup your Ozeki Bulk Messenger software quickly to test all of its main functionality: bulk SMS, bulk e-mail, automated voice calls.
The basics are rather easy. You just need to add an address book which contains the destination addresses. Then add a message you would like to send to these addresses through a connection channel. For defining this channel you also need to add a connection. The connection is basically the direction where the SMS messages, e-mails or phone calls leave Ozeki Bulk Messenger and are sent out to the outside world. At the end you will be able to start your first Ozeki Bulk Messenger job if you combine the 3 basic elements: address book, content and connection.
We are going to talk about the basic steps if you follow this Quick Start Guide. In case you specifically know what you are looking for you can check our specific guides: bulk SMS, bulk e-mail, automated voice calls.
 | Ozeki 10 can be obtained by opening the download page: Download Ozeki Bulk Messenger! |
Open Bulk Messenger
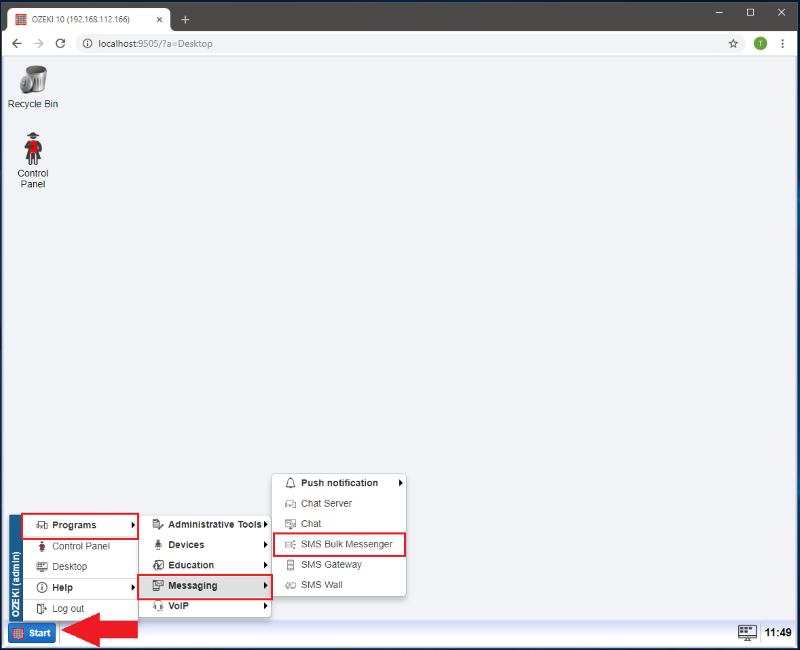
Click on the 'Start' button and then open Programs -> Messaging -> SMS Bulk Messenger (Figure 1)
Step 1 - Add an address book
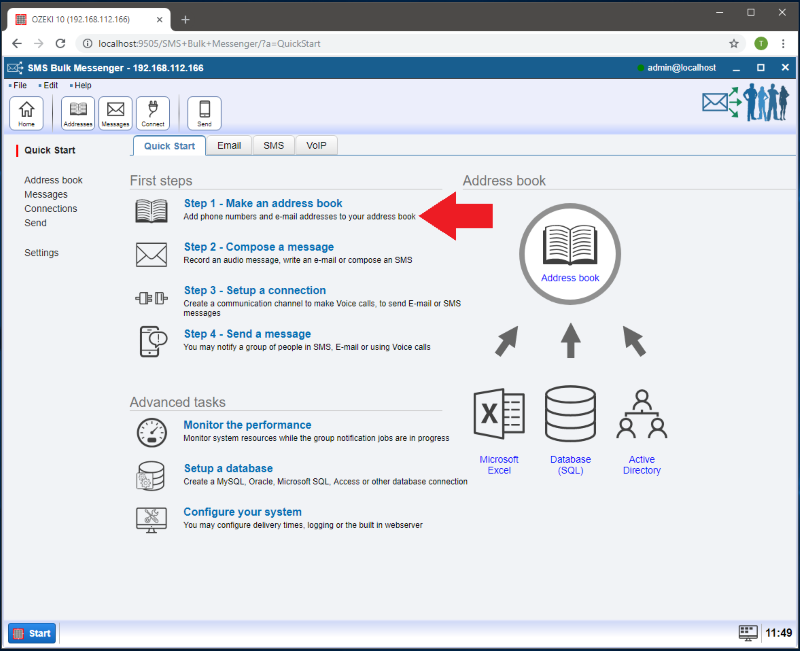
Click on the 'Quick Start' tab and choose 'Step 1 - Make an address book' (Figure 2)
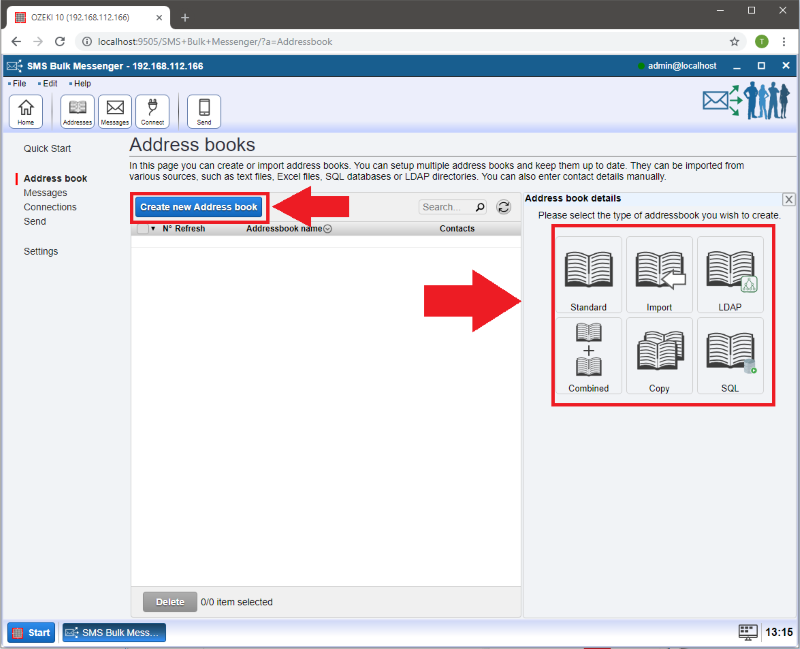
Then click on 'Create new Address book' so you can write a standard address book in Ozeki Bulk Messenger or import an address book from external sources like an Excel spreadsheet (.XLSX, .CSV) or txt file. You can also work with an online database (SQL or LDAP). Figure 3 shows you the available address book types.
Step 2 - Write a message or create an audio content
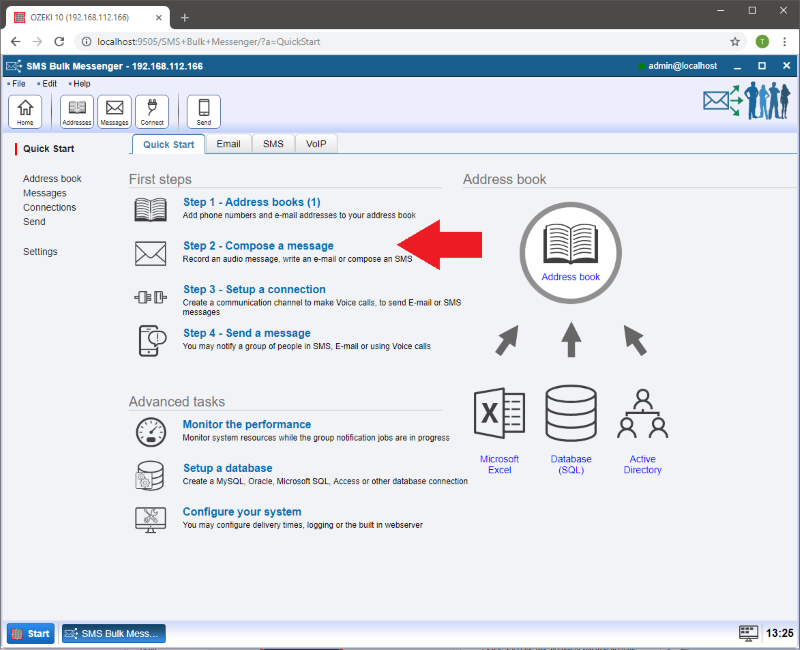
Click on the 'Quick Start' tab and choose 'Step 2 - Compose a message' (Figure 4)
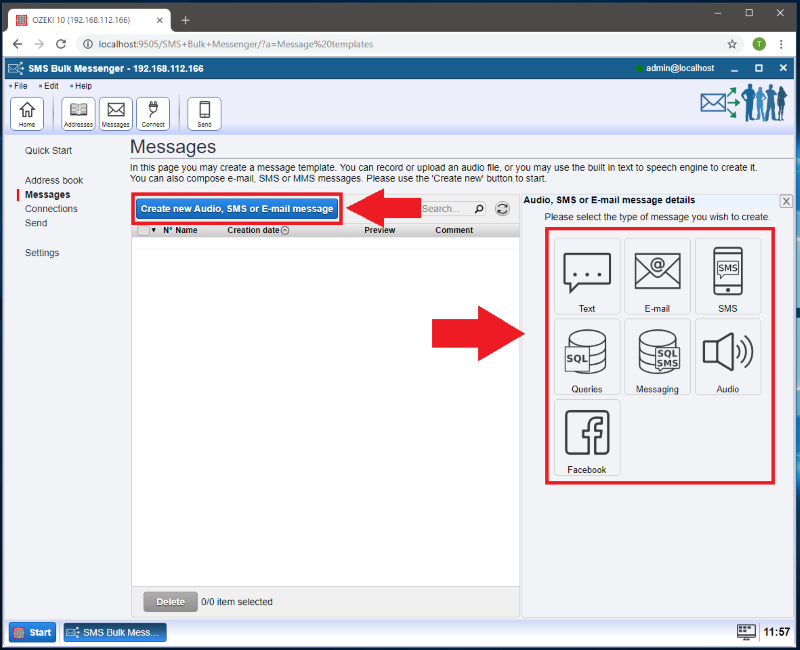
Step 3 - Setup a connection
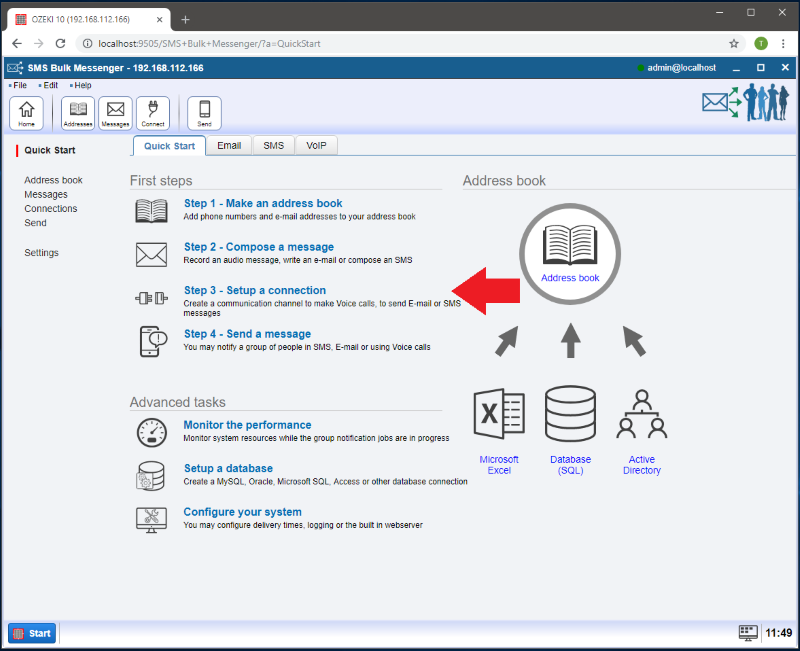
Click on the 'Quick Start' tab and choose 'Step 3 - Setup a connection' (Figure 6)
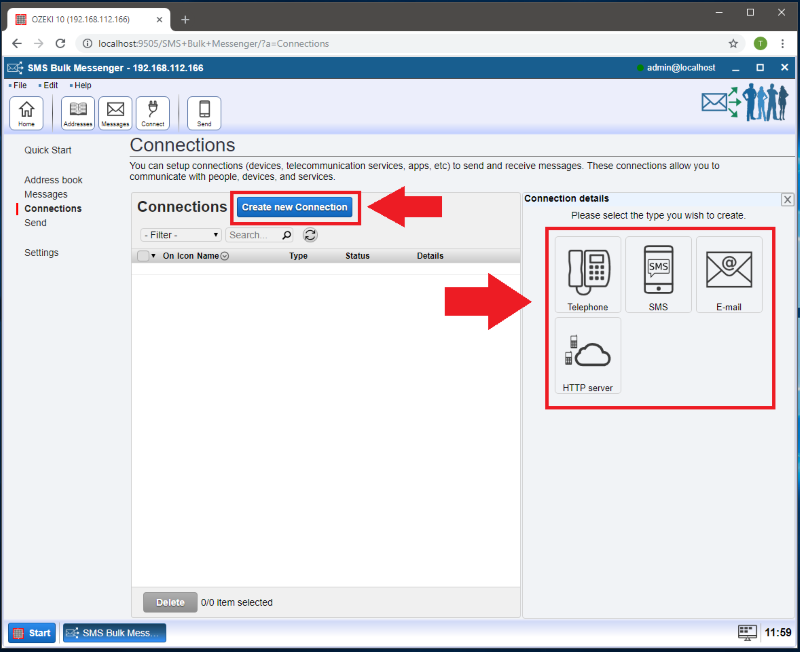
Just keep in mind that for sending SMS or voice messages you need to have a physical connection to an SMS Modem or a VoIP GSM Gateway. For e-mail connection an internet access should be enough.
Step 4 - Send a message
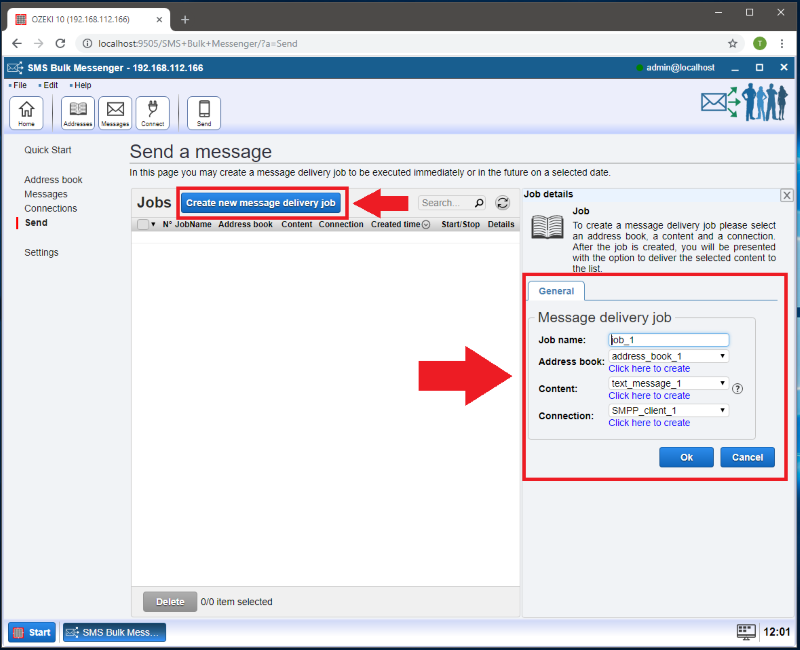
Finally select 'Step 4 - Send a message' in order to create a message delivery job. (Figure 8)
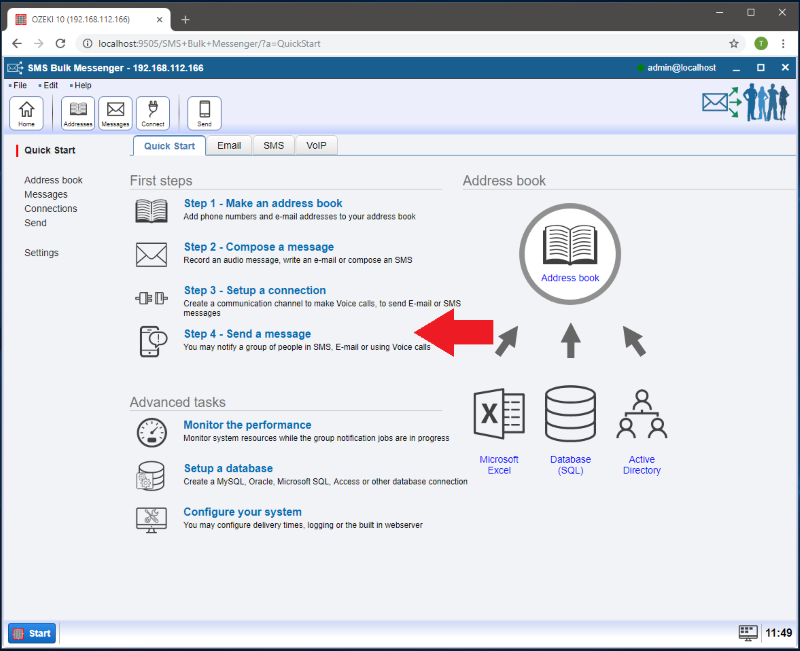
Jobs are used for sending out bulk content to addresses in an address book through a connection channel you have previously defined. After you have successfully completed the first 3 steps then adding a job should be easy. You just have to combine an address book, a content and a connection and finally run the job by clicking the green 'Start' button. (Figures 9 and 10)

 Sign in