How to create a Standard Address book in Ozeki Bulk Messenger
In the Ozeki Bulk Messenger software you can create personalised address books by adding contacts to your lists one by one. In this instruction we will show you how to make a Standard Address book and add contacts with numbers and E-mail addresses.
Step 1 - Create new address book
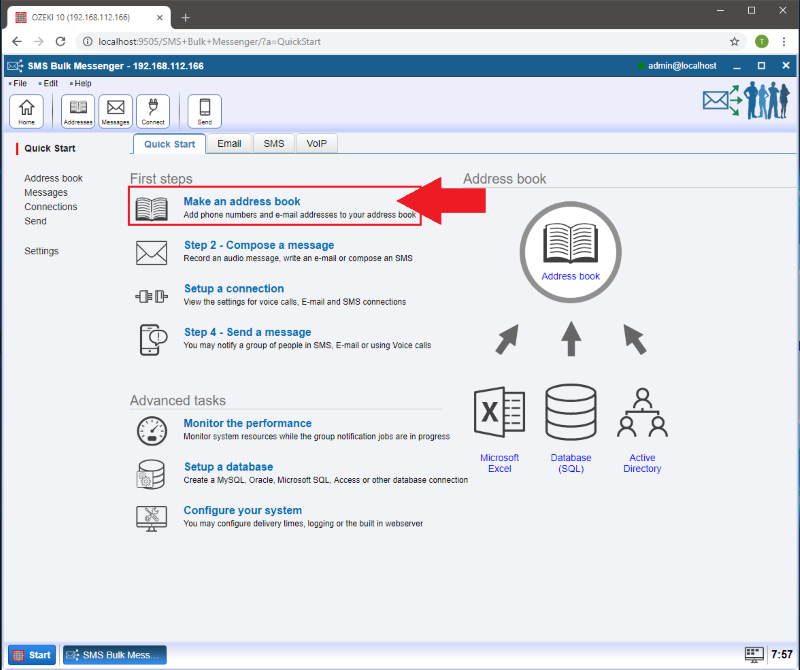
On the 'Quick Start' tab please select 'Make an address book'.
Step 2 - Create Standard address book
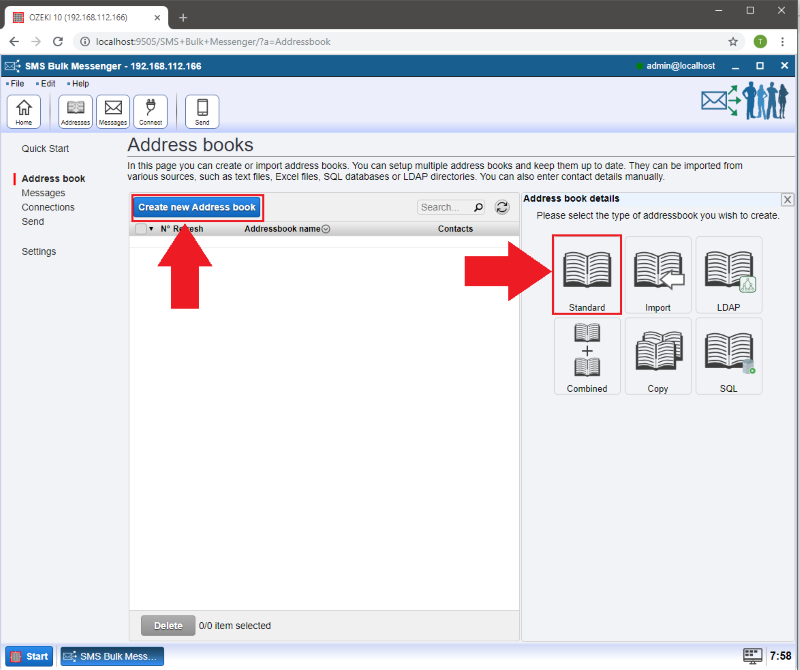
After that, click on the 'Create new address book' button (highlighted in blue) and select the 'Standard' address book type.
Step 3 - Provide a name for your Address book
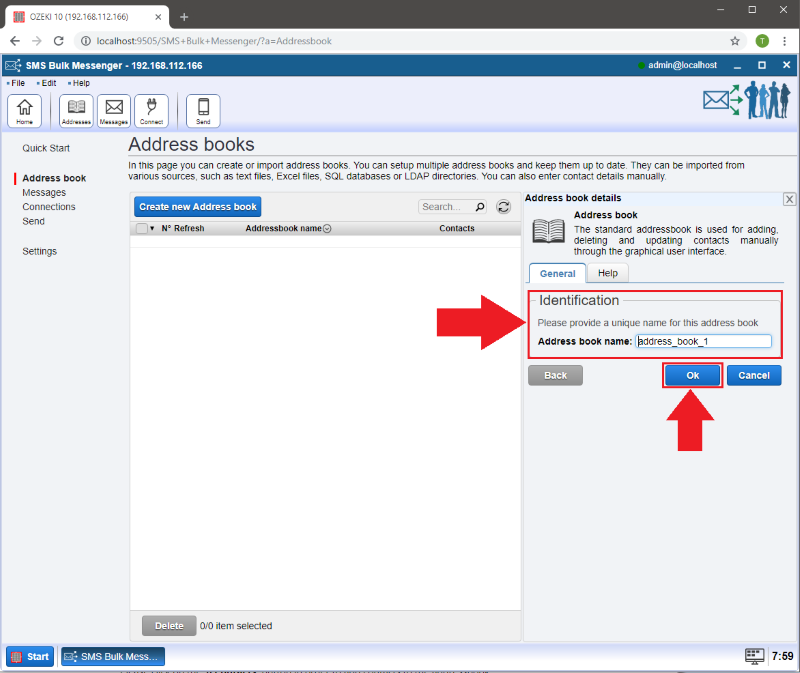
Please enter a name in the 'Address book name' field of the Identification section on the General tab. Having a name will make it easier to find a certain address book when having multiple address books. If finished, click 'Ok'.
Step 4 - Add contacts to your standard address book
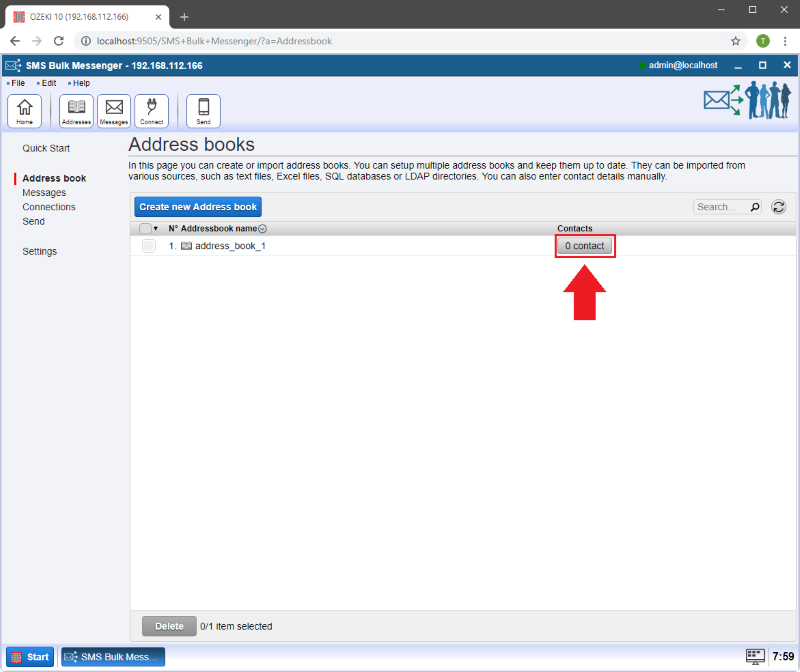
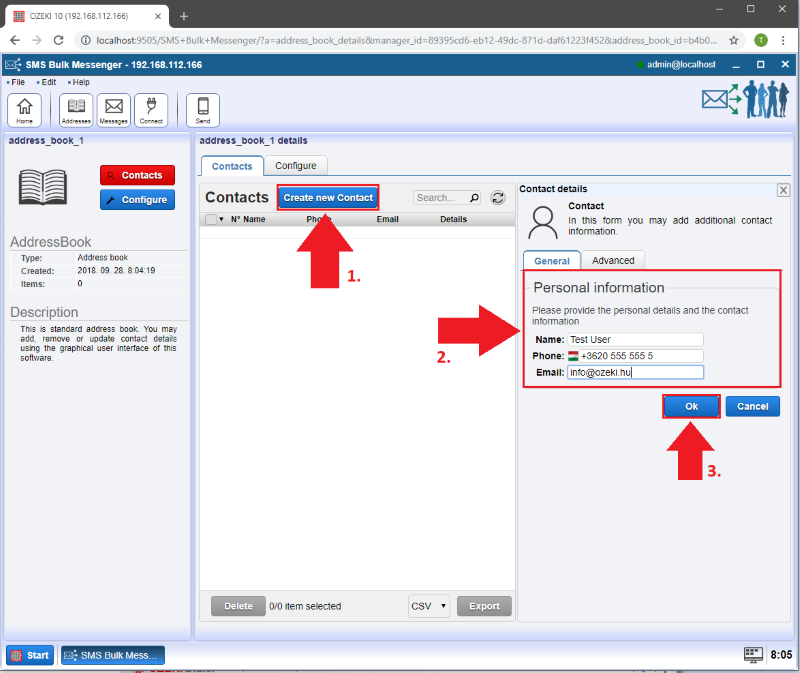
Please click on the '0 Contacts' button in order to add contacts to the address book.
Here you can add information about your contacts on the 'General' tab:
- 'Name:' Here goes the name of your contact.
- 'Phone:' Enter the phone number here.
- 'Email:' Provide the E-mail address.
Click 'Ok' when you are done.
Step 5 - Add extra information
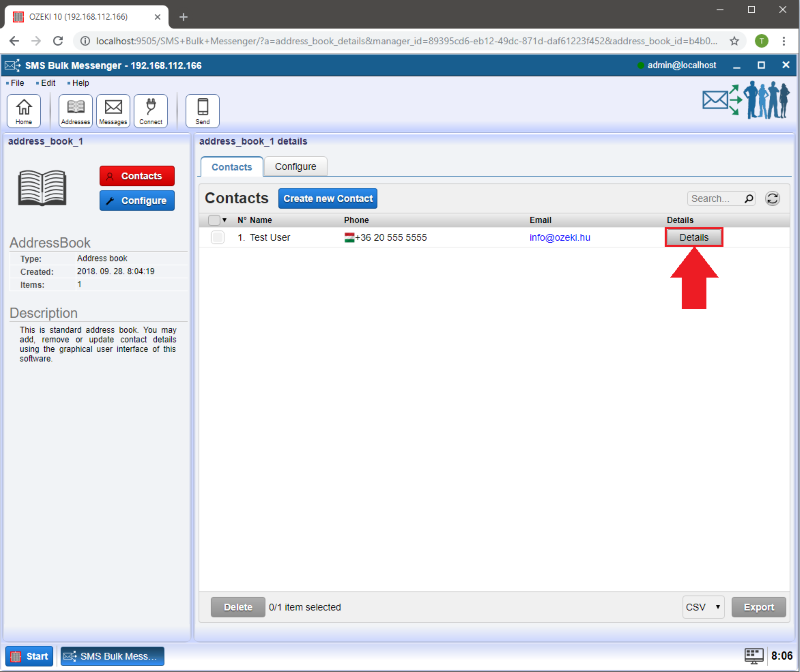
Now you can see that the contact you have just created has appeared in the 'Contacts' list.
It is possible to add further information to your contact like Skype,
Facebook, Twitter etc.
Click on the 'Details' button to add more information.
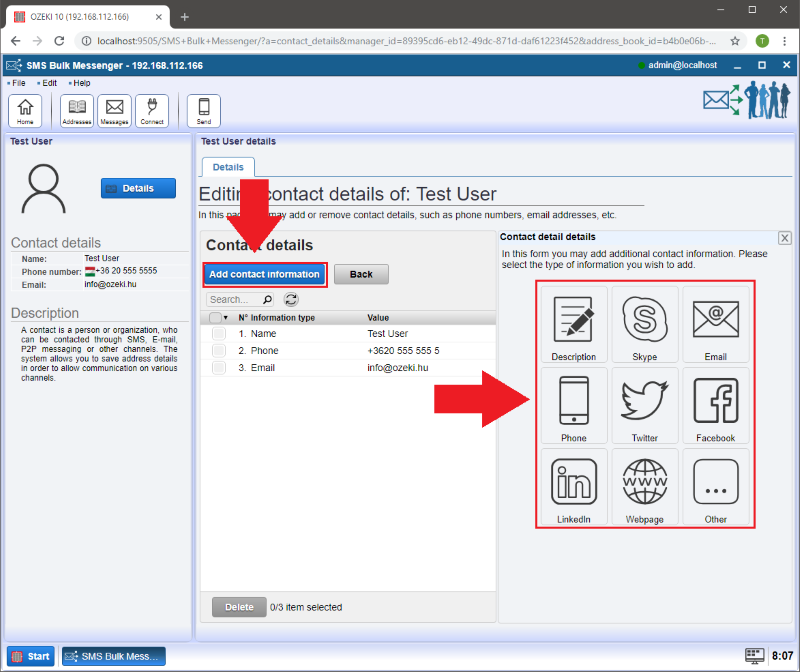
On the next page click on 'Add contact information'. In the 'Contact detail details' window you can choose the type of information you would like to add to the contact.
More information
- How to create a Standard Address book in Ozeki Bulk Messenger software
- How to import contacts from XLSX list to Ozeki Bulk Messenger software
- How to import contacts from a CSV document
- How to connect SQL database
- Tutorial for creating LDAP address book
- Combining address books tutorial
- How to create an Android address book in Ozeki Bulk Messenger
- How to copy an address book
- How to import contacts from a TXT document

 Sign in