How to import a TXT document in Ozeki Bulk Messenger
Ozeki Bulk Messenger does not require you to add your contacts one by one. You can import your TXT contact lists instead. In this tutorial we will show you how to create a TXT file, add the E-mail addresses and import them in Ozeki Bulk Messenger.
Step 1 - Create a TXT File
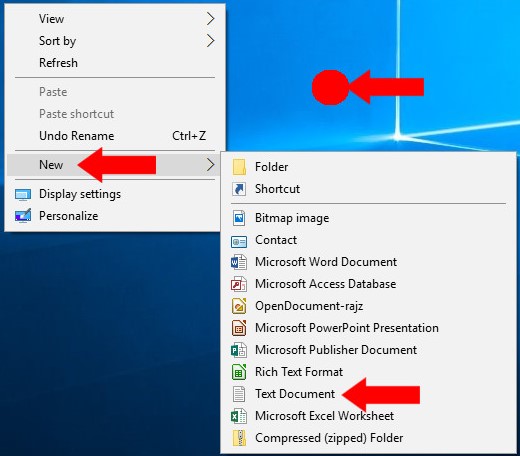
You can create a new TXT file by 'Right clicking' on the desktop and selecting 'Text Document' in the 'New' drop-down list.
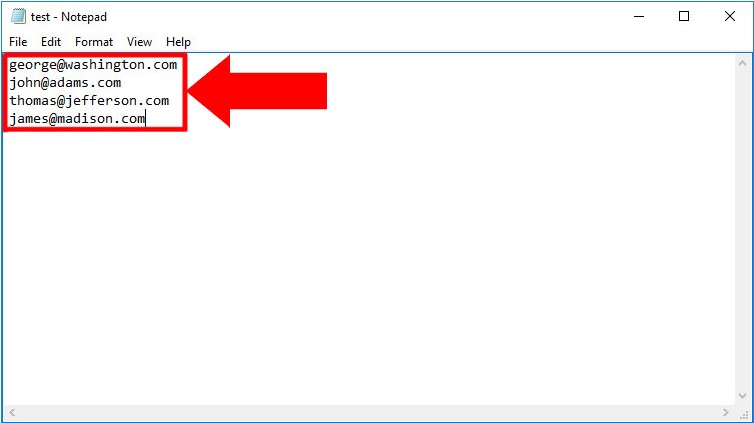
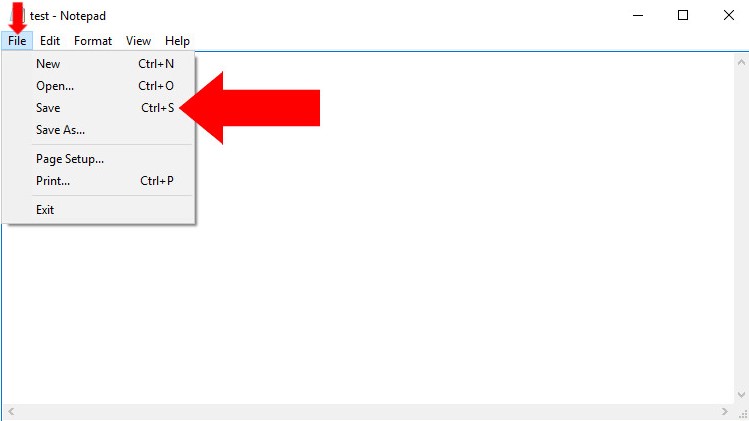
Click on 'File' and 'Save' to save the TXT document.
Now please return to Ozeki Bulk Messenger.
Step 2 - Make an address book
On the 'Quick Start' page please select 'Step 1 - Make an address book'.
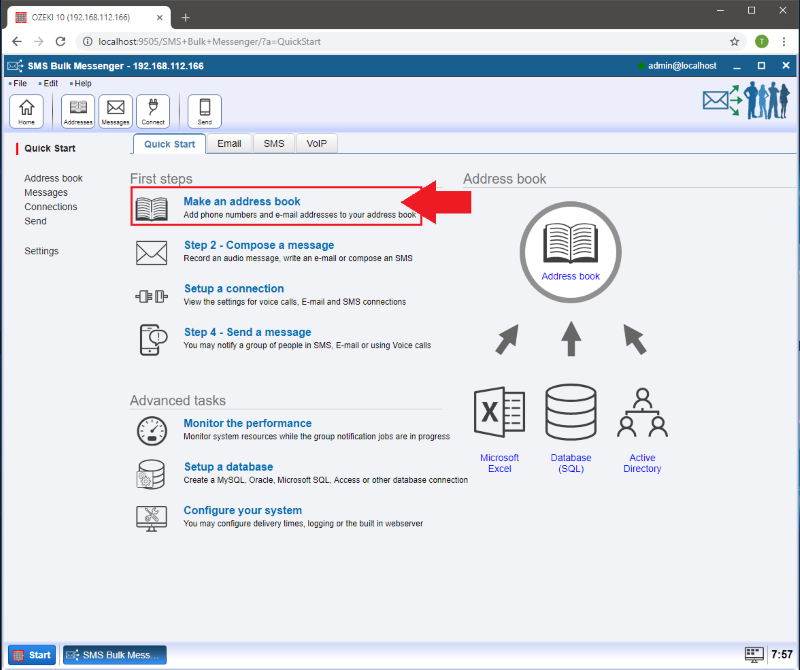
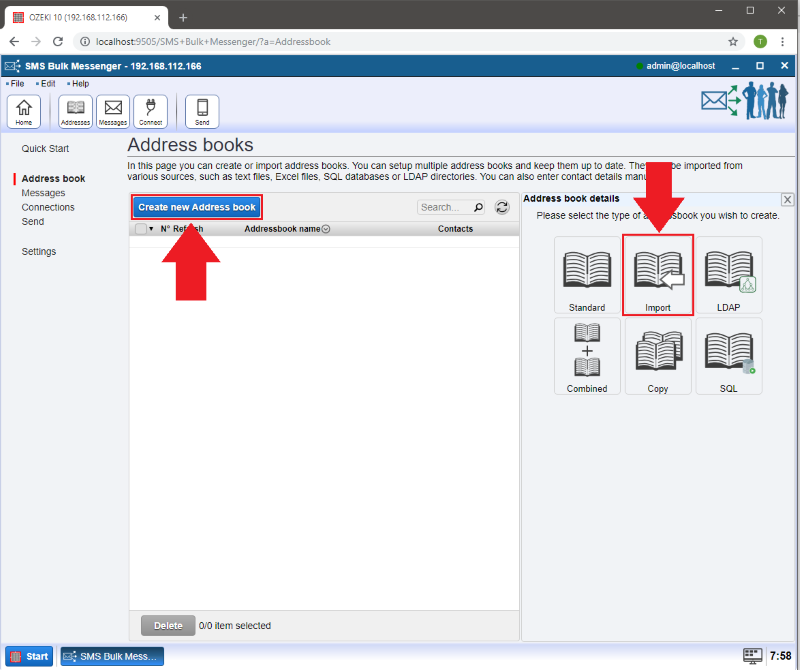
On the new page click on the 'Create new Address book' button and select the 'Import' type.
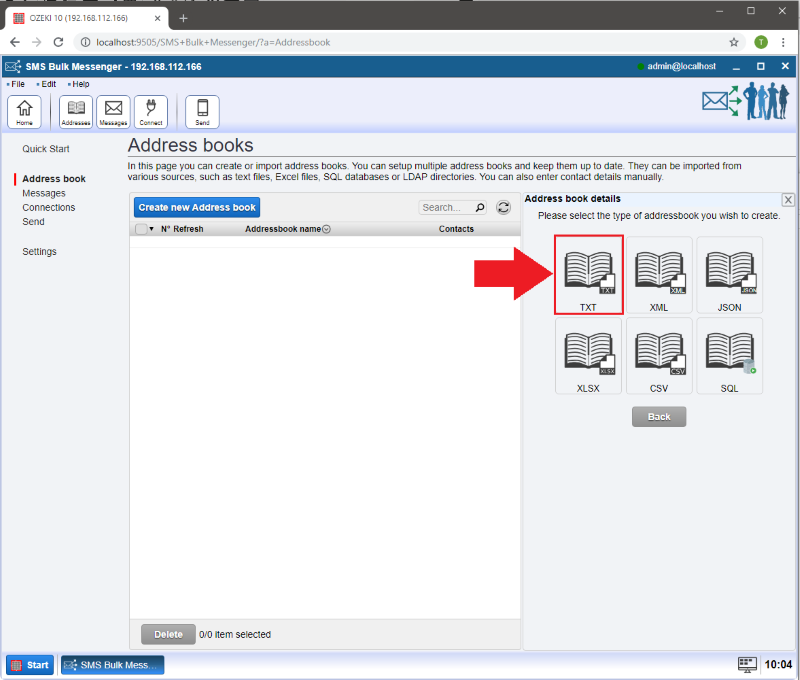
Now select the 'TXT' addressbook type on the right.
Step 3 - Import the TXT document
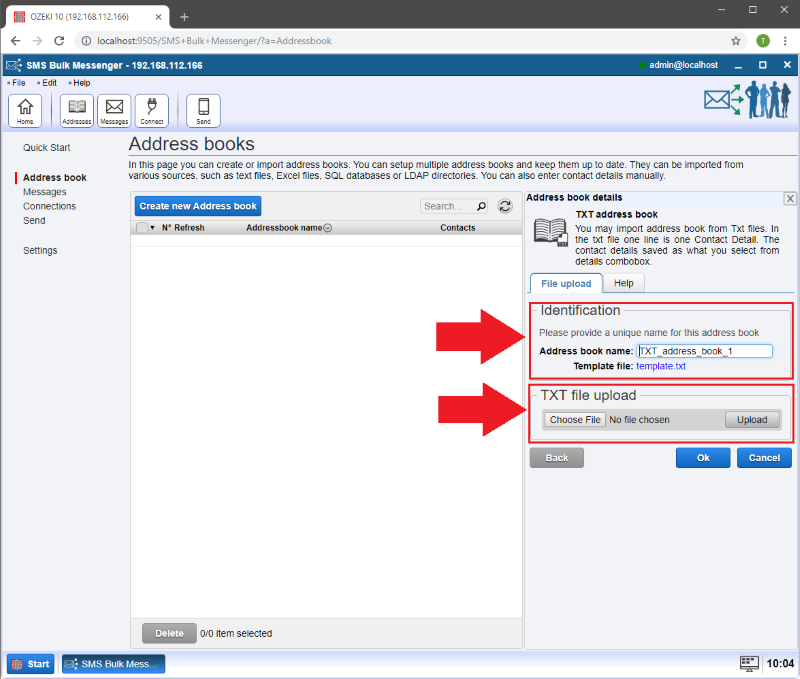
You can provide a name for your address book in the 'Address book name' field.
Click on 'Choose file' and find the TXT file you previously created then click
on 'Upload' an press 'Ok'.
Step 4 - Managing your new address book and adding further information to your contacts
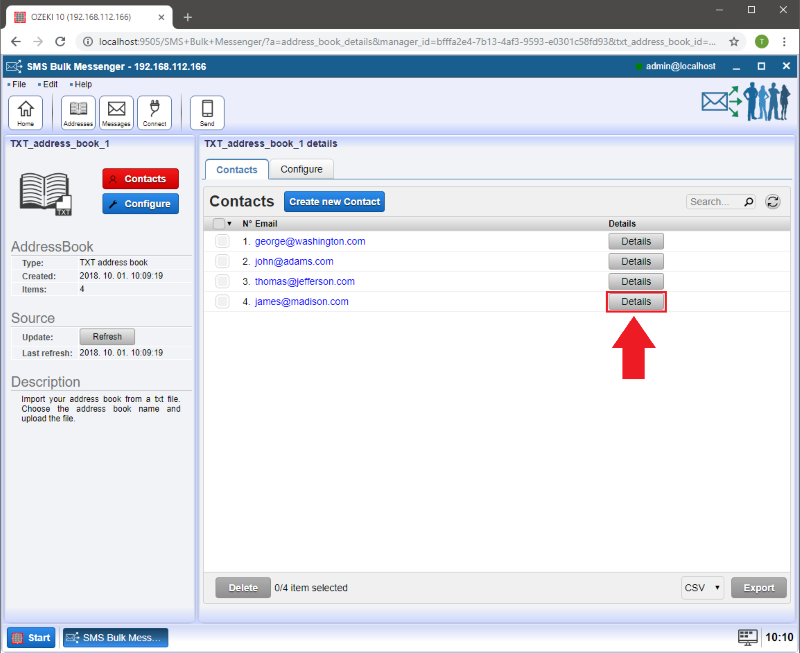
Click on 'Contacts' to see the details of your contacts.
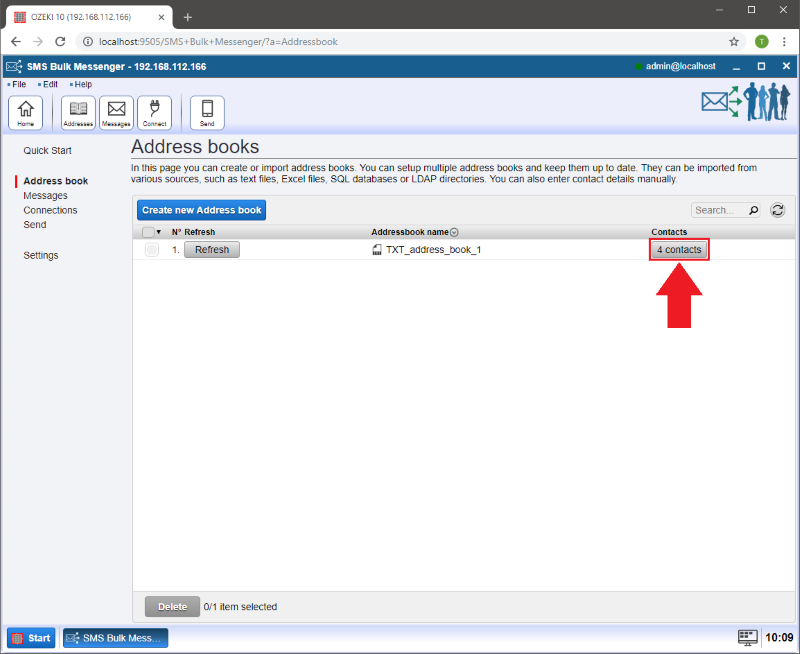
Here you can manage your contacts, change them and add new ones.
Now click on 'Details' next to the contact you would like to edit.
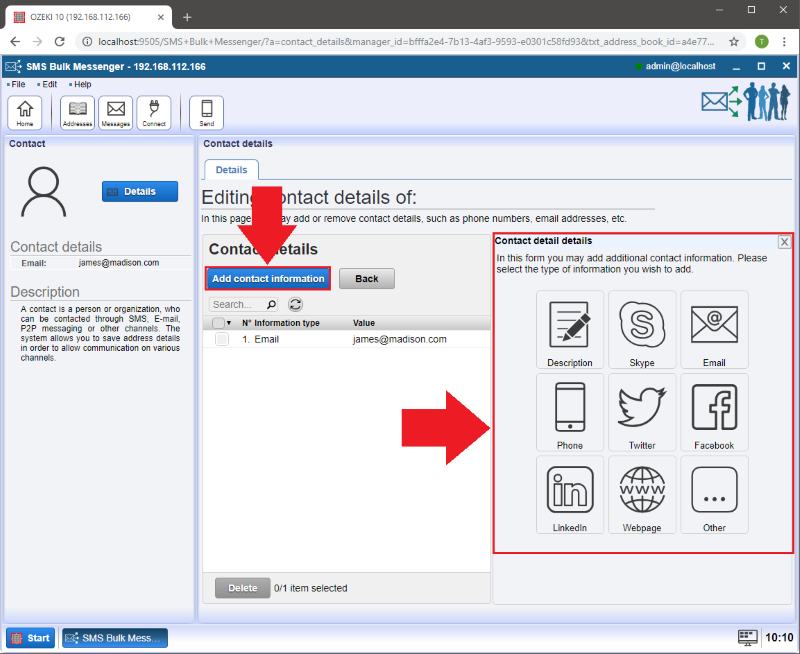
After clicking on the 'Add contact information' button, the 'Contact information details' window will appear on the right.
This is where you can choose what kind of information you would like to add to your contact.
More information
- How to create a Standard Address book in Ozeki Bulk Messenger software
- How to import contacts from XLSX list to Ozeki Bulk Messenger software
- How to import contacts from a CSV document
- How to connect SQL database
- Tutorial for creating LDAP address book
- Combining address books tutorial
- How to create an Android address book in Ozeki Bulk Messenger
- How to copy an address book
- How to import contacts from a TXT document

 Sign in