Ozeki Serial Terminal
Ozeki serial terminal for Windows can be used to talk with hardware devices through the serial port. You can use it to communicate parallely with Arduinos or other microcontrollers. It is also great for sending AT commands to GSM modems. It is an essential tool if you develop hardware. We have built it for ourselves, because the built in RS232 terminal of the Arduino IDE and other RS232 serial terminals we have found on the Internet were not reliable or we could not work efficiently with them. Ozeki serial terminal works great.
Quick StartThe followig section explains what is Ozeki Serial Terminal, how you can install it and how you can use it to communicate with your hardware.
Ozeki serial terminal is a Windows Application, that lets you to communicate with hardware through serial ports.
When a microcontroller, such as Arduino or a GSM modem is connected to the computer with a data cable, a
serial port is opened. This serial port provides asynchronous communication, which means, you can send text to the
device or you can receive text from the device. Ozeki Serial Terminal is a tool that lets you see, what the device
has sent, and it will allow you to type in text and press the Send button to send it to the device through the
serial port.
Ozeki Serial terminal works with RS232 serial ports, USB ports, TCP/IP network ports.
Preparations before start
To use Ozeki Serial terminal, you need to download it from the following URL:| Ozeki Serial Terminal can be obtained by opening the download page: Download Ozeki Serial Terminal! |
After Ozeki Serial Terminal has been downloaded, it needs to be installed. Note that you need a Windows PC to use it. We use Windows 11 (and some older versions such as Windows 10, Windows 8, Windows 7 and Windows 20xx server editions). It works on all windows versions released after Windows XP (yes, it was very long time ago).
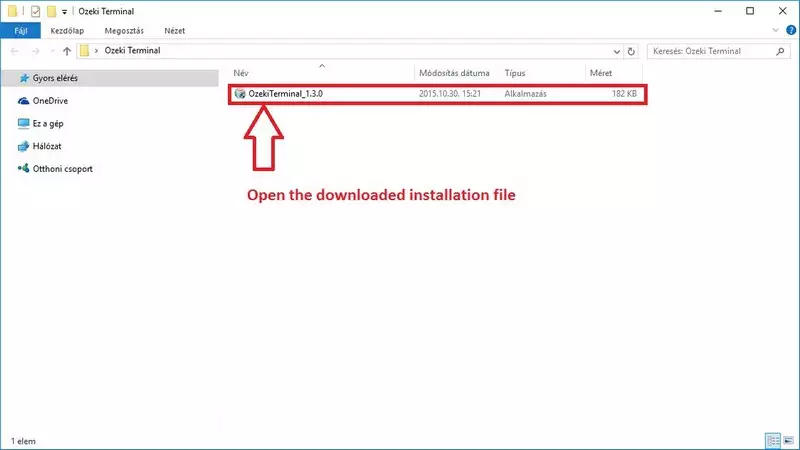
Ozeki Terminal is very easy to install. To start the installation you will need your Ozeki Terminal downloaded (Figure 1) and you will need at least 300 kB of free disk space (at least 1 MB is advised). To start the installation process you will need to double click on the installer than you will be asked to select the installation folder (Figure 2).
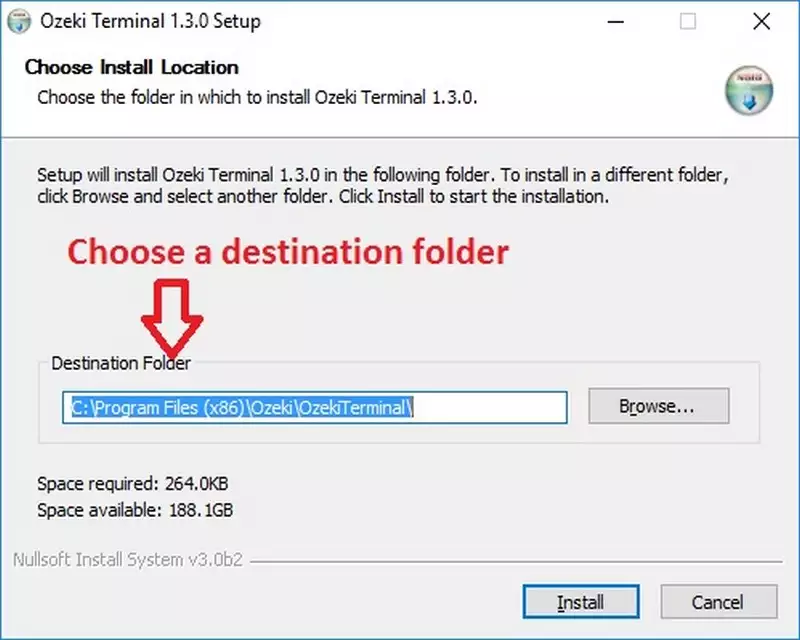
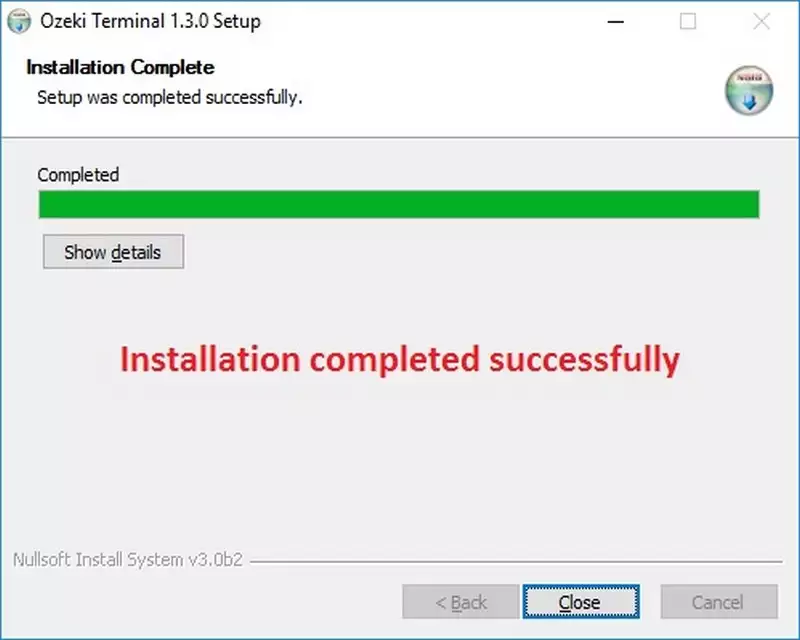
Once you are done, press the install button. The installation will be completed automatically and once it is finished a shortcut will be created onto your desktop. (Figure 3)
Starting the Ozeki Terminal
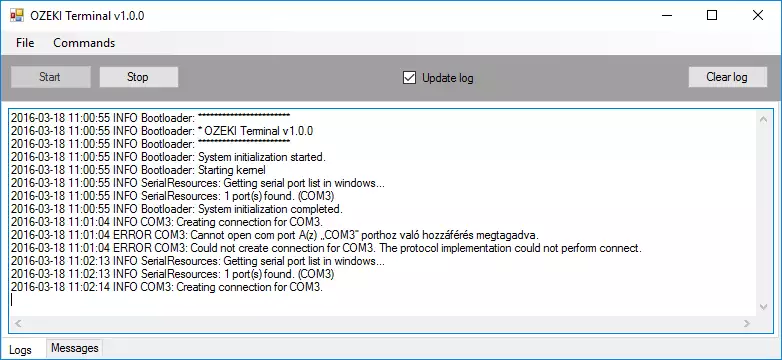
Ozeki Terminal has two windows. The logging window is universal and only one instance of it can be run at a time. If this window is closed it will also cause the application to be terminated. The communication window is responsible for communicating with one connected device. Multiple instances of this window can exist at the same time and each one can have a different communication port assigned to it.
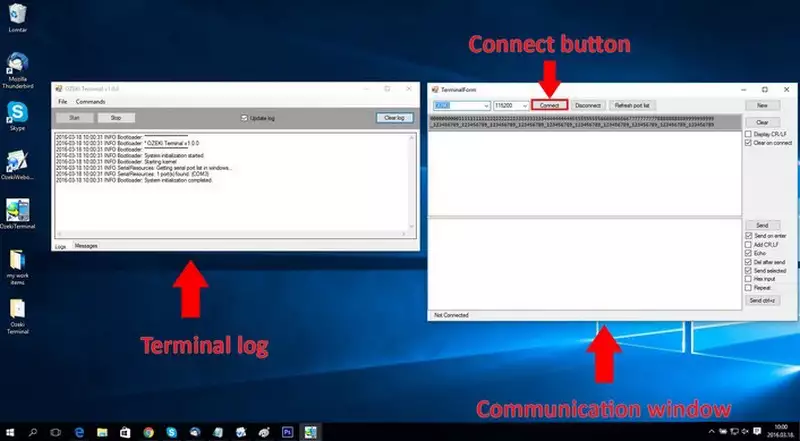
The first one we are discussing is the logging window which is responsible for creating logs about every step you make in the Ozeki Terminal. If you need to have your work logged, you can copy the logs any time. These logs can be cleared any time. This window also has a tab for messages.
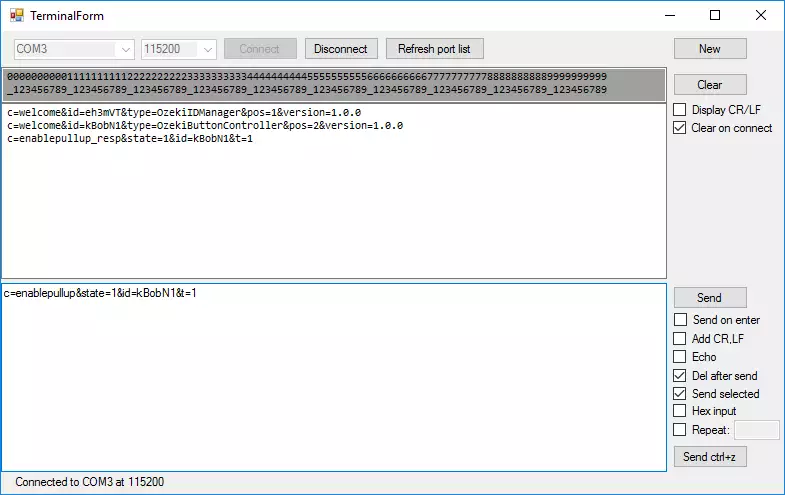
The second one is the communication window. This window is responsible for the communication with the device. It contains the following sections:
Connection menu
This menu is responsible for the detection of connected devices and is capable to detect local connections automatically. This software is capable of handling multiple devices at the same time but to prevent collisions between the collections, one window can not have more than one active connections. Therefore we have added a New button to this menu which will open an other communication window if pressed.
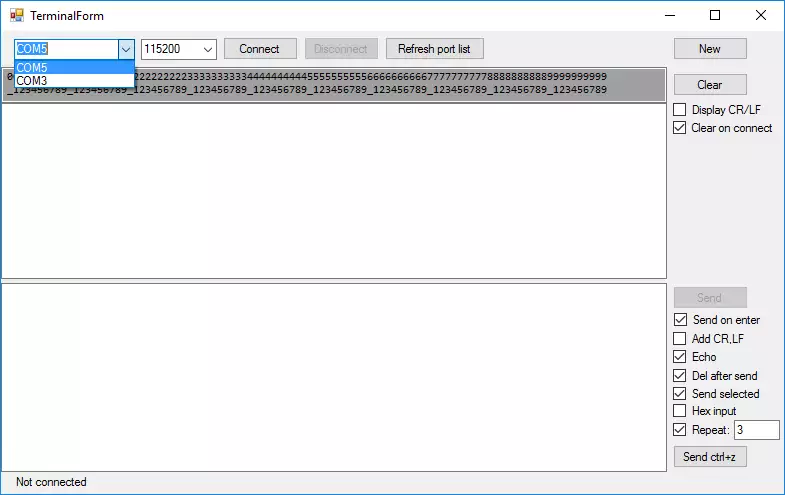
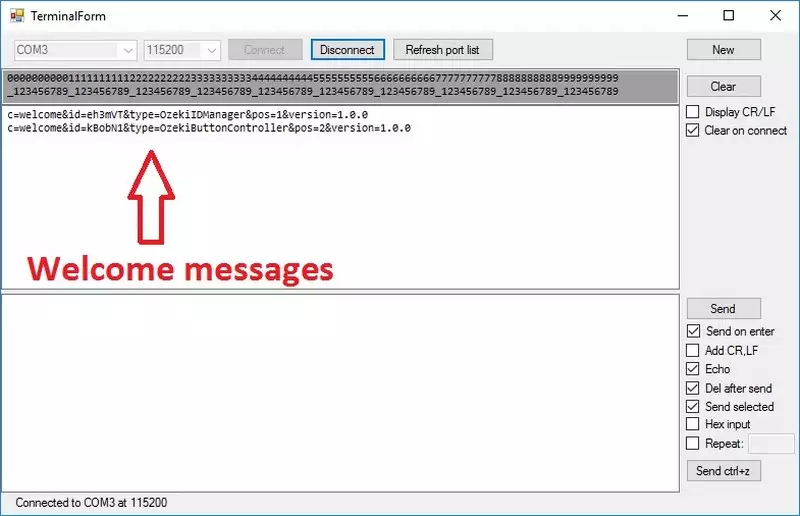
If you select a device and press the connect button, the Ozeki Terminal will try to establish a connection to the selected hardware. If it is successful, the Connect button becomes gray showing a successful connection and if you are using a hardware with Ozeki software a welcome message may be displayed in the top text area.
Communication settings
In this menu you can customize your work environment. This menu contains the following settings:
- Send on enter: If this checkbox is checked the Enter key is added to the end of the text when pressing the 'Send' button. Tick off this controller to write instructions containing more than one line.
- Add CR,LF: This checkbox enables the insertation of the carriage return and the line feed characters.
- Echo: This option echoes your command into the response area so it can be copied and used again.
- Del after send: With this option you can adjust the deletion of your message after being sent.
- Hex input: This checkbox can be used to create hexadecimal inputs. If it is ticked off your hexadecimal numbers are passed as strings.
- Repeat: If you activate this option you must enter a number to the nearby field. Until it is deactivated your messages will be sent to the microcontroller as many times as high the number is.
Sending a command
To send a command you will have to type it in to the bottom text area of the communication window. The designated command can be sent by using the "Send" button or the Enter key (if applied). It is also possible to send the CTRL+Z key combination which can be used as a "Back" command. To do so, you must click on the "Send ctrl+z" button.
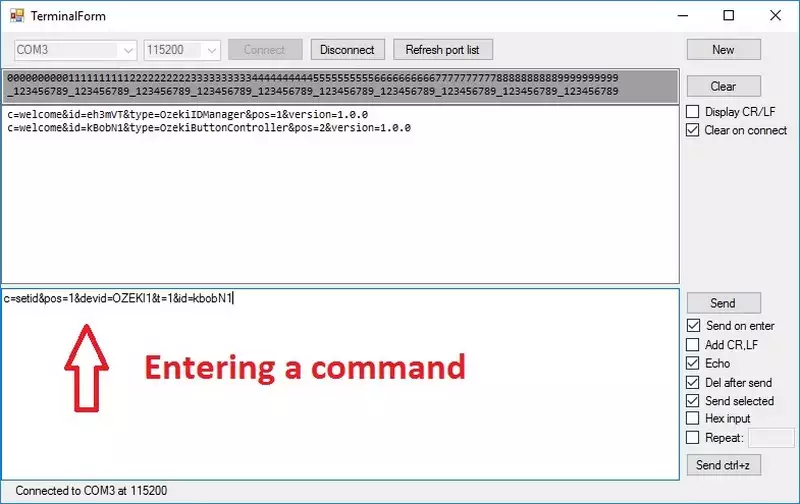
After entering a command, the Ozeki terminal will send it to the microcontroller. Once the command is executed or an error is generated the controller will send its answer back to the Ozeki Terminal. In this instance we have attached a resistor to one leg of the Arduino. Once it is executed a hardware with Ozeki software will send the answer which contains a "resp" string signaling the successful response.
Ozeki Serial Terminal is compatible with Windows, and it works with all standard serial port connections. It operates using the standard windows serial library, so you will not experience any problems, when talking with devices that install custom serial port drivers. Standard serial devices, USB serial devices, USB to RS232 converters, microcontrollers, USB modems and all other devices will work.
