Backup and restore
Ozeki 10
You can backup Ozeki 10 with all of it's settings and recorded data.
Restore it any time, but make sure Ozeki 10 is not installed on the machine before restoring,
so if you would like to restore it, please delete the current Ozeki 10 from your operating system.
This small tutorial describes backup and restore on Microsoft Windows, but you can do it on
any Ozeki 10 installations as well.
For Linux refer to the shell commands you can find on the internet.
The service commands are 'service ozeki stop' and 'service ozeki start'.
The compression and decompression commands are 'tar -czvf Ozeki10.tar.gz /var/lib/ozeki' and 'tar -xzvf Ozeki10.tar.gz'
Backup Ozeki 10
STEP 1 - Find the folder
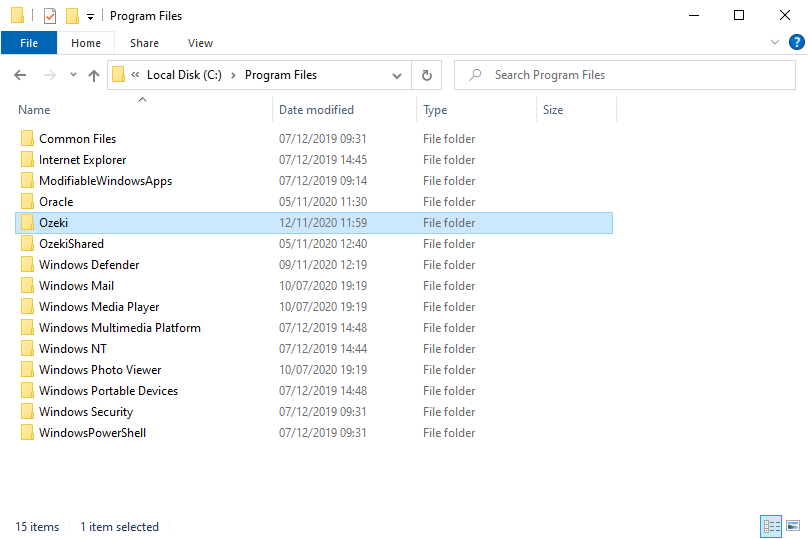
Ozeki 10's configuration and stored data is held at the installation path, which is in the Program Files as default at
C:\Program Files\OzekiThis is the folder you can backup anytime for later usage.
STEP 2 - Stop the Ozeki service
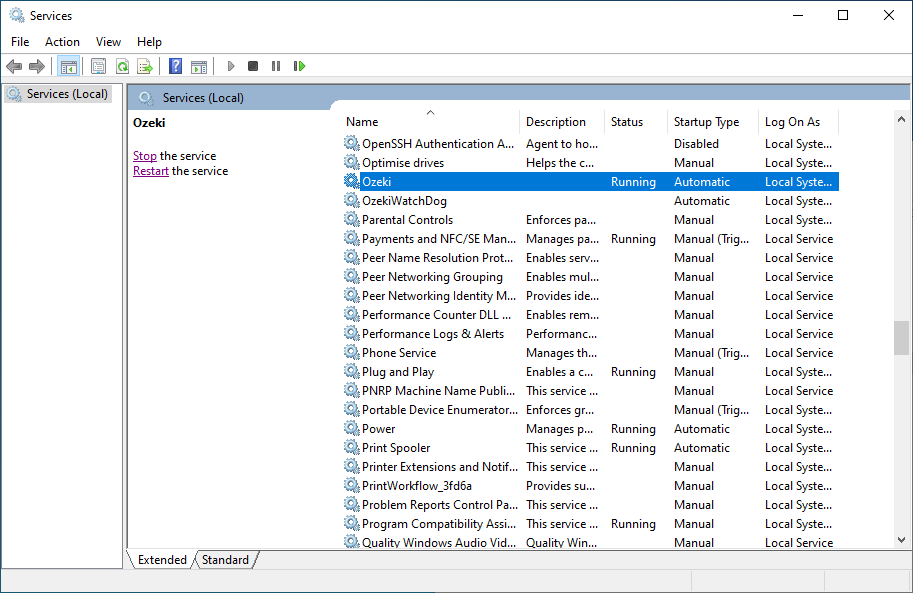
Ozeki 10's service can be running in the background, so please stop the service before creating a backup. You can do this by clicking the right mouse button on the system tray and selecting 'Task Manager'. On the 'Services' tabpage you can find Ozeki 10 if it has been previously installed on your machine. Click on it and select 'Stop' next to it. It will stop the service, so you can create a backup from it.
STEP 3 - Compress the folder
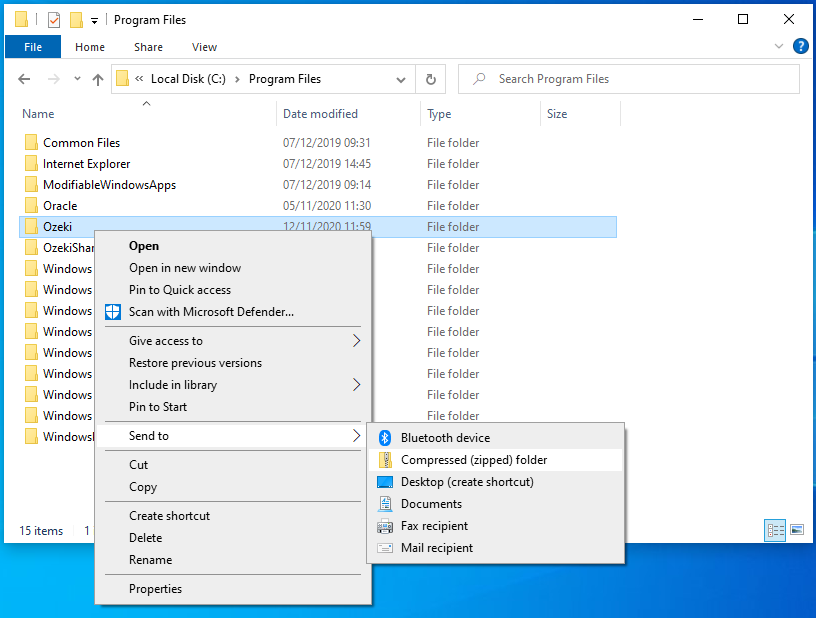
Go back to the directory specified in STEP 1 and compress the Ozeki 10 folder. As seen on the figure below, right click the folder and select 'Send to/Compressed (Zipped) folder'.
STEP 4 - Start the service
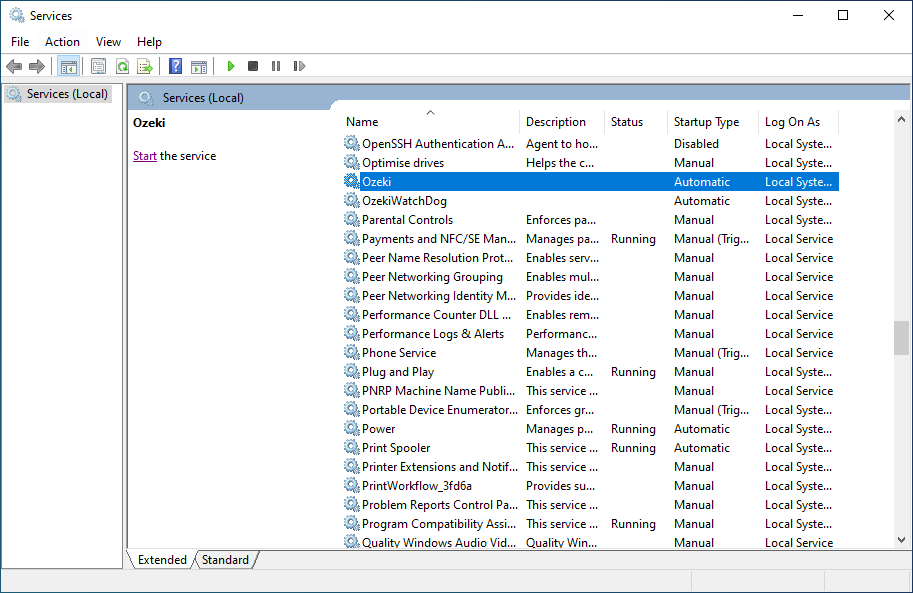
Now that the zip backup is created, you can go back to 'Task Manager/Services' like in STEP 2 and start the currently installed Ozeki 10 service, to continue using it as before.
Restore Ozeki 10
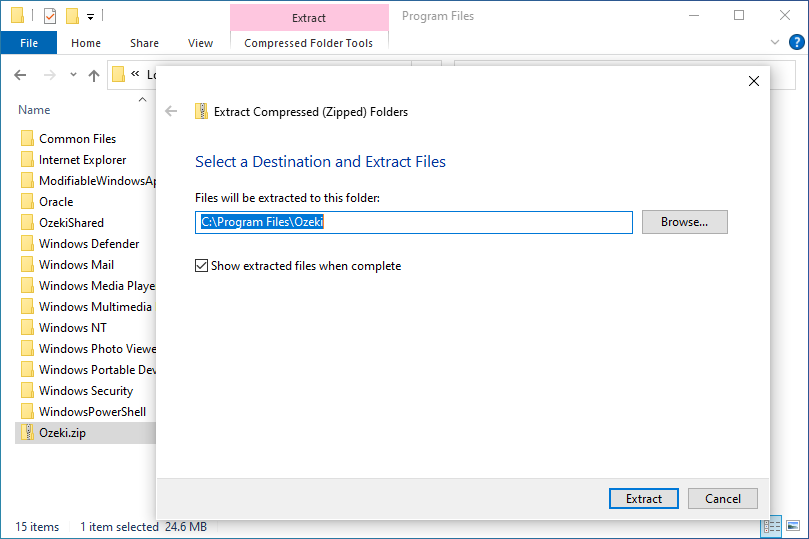
STEP 1 - Decompress the zip file
You can start restoring it if Ozeki 10 is currently not installed on your machine. Decompress the zip file anywhere you whish, although the following directory is the default installation directory:
STEP 2 - Open CMD
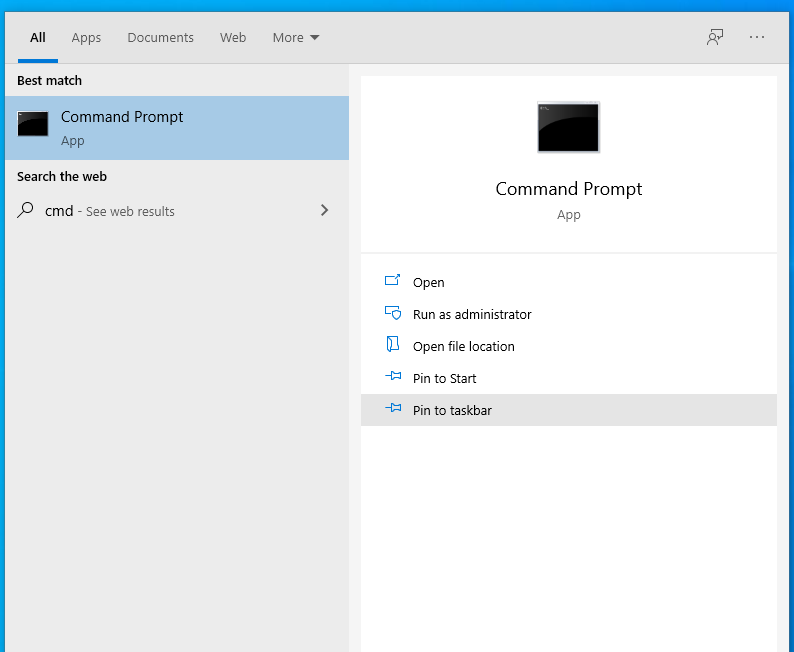
From the Windows Start Menu open the Command Prompt by typing 'cmd' in the Windows Search bar. Run it in Administrator mode as seen on the screenshot below. The Command Prompt is the command shell of your Windows operating system. On Linux you are probably already using the terminal to follow the concept of these steps. Use Command Prompt to add your decompressed Ozeki 10 as a service.
STEP 3 - Register as a folder
Go to the folder where you have decompressed Ozeki 10 to. Type this command to reach the folder shown in STEP 1:cd C:\Program Files\Ozeki\BaseSystem\v1.0.0Type Ozeki_Starter.exe /install and hit ENTER to add Ozeki 10 as a service.
STEP 4 - The service is registered
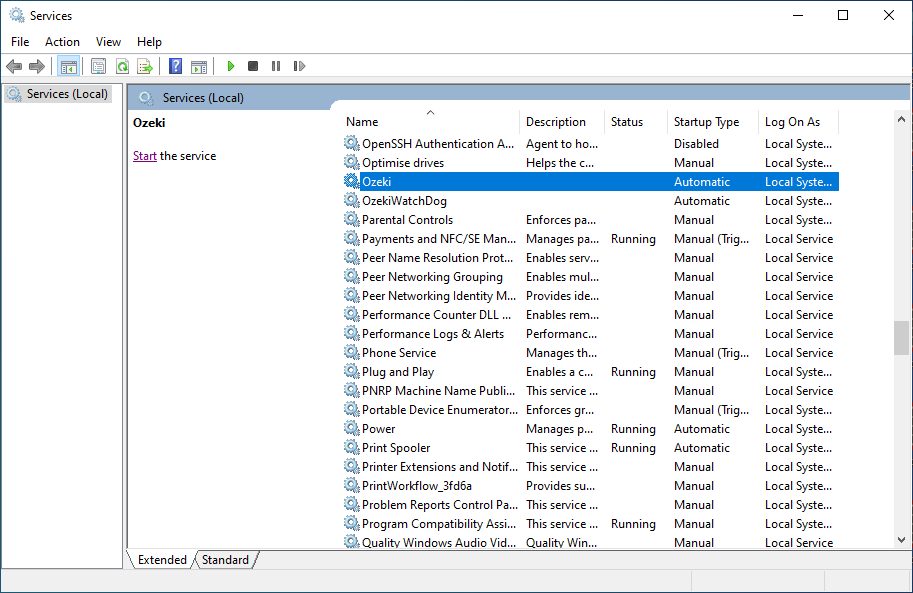
It is simple as that. Now you can find Ozeki 10 in the list of services. Find the list by clicking the right mouse button on the system tray and selecting 'Task Manager'. On the 'Services' tabpage you can find Ozeki 10. Click on it. 'Start the service' option will appear left to it as seen on the screenshot below. If you have problems finding it, press 'o' multiple times until Ozeki 10's service is selected.
STEP 5 - Access the GUI
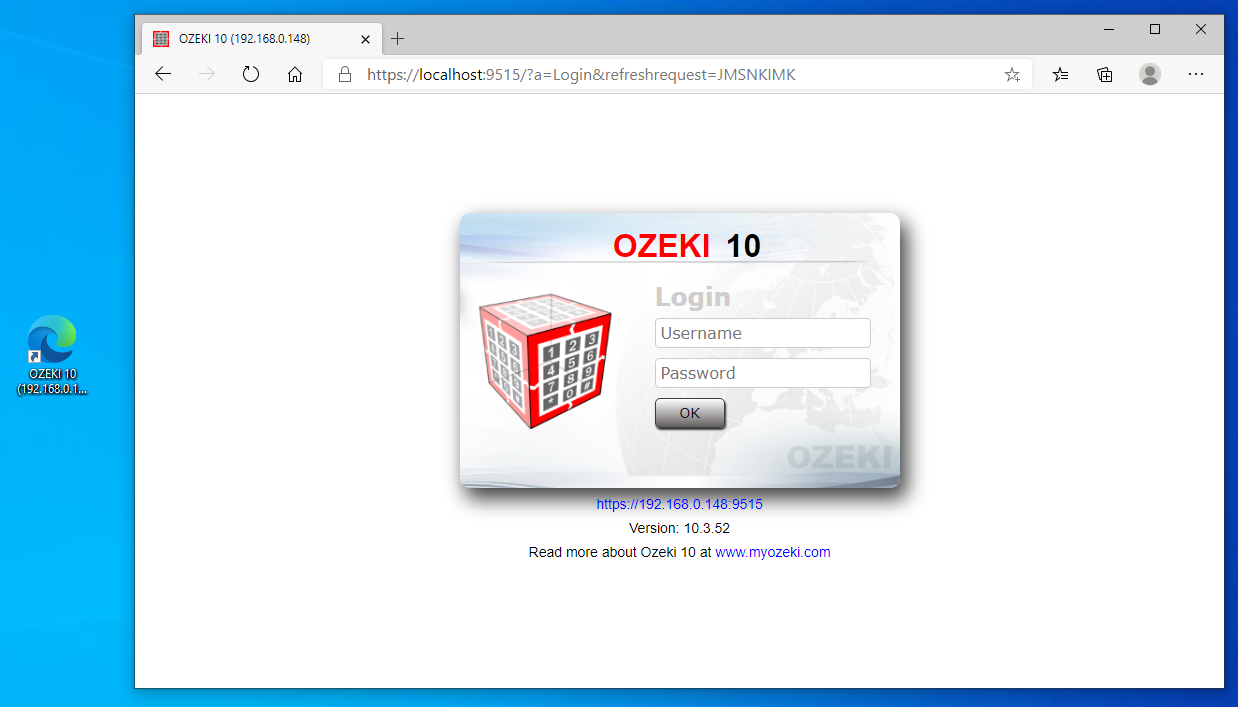
Now that the service is running, you can reach it from any webbrowser running on any computer. To make it easier, you can create an URL link on your desktop, so any time you want to use the client GUI of Ozeki 10, just click the URL created on your desktop.
STEP 6 - Access the GUI easier
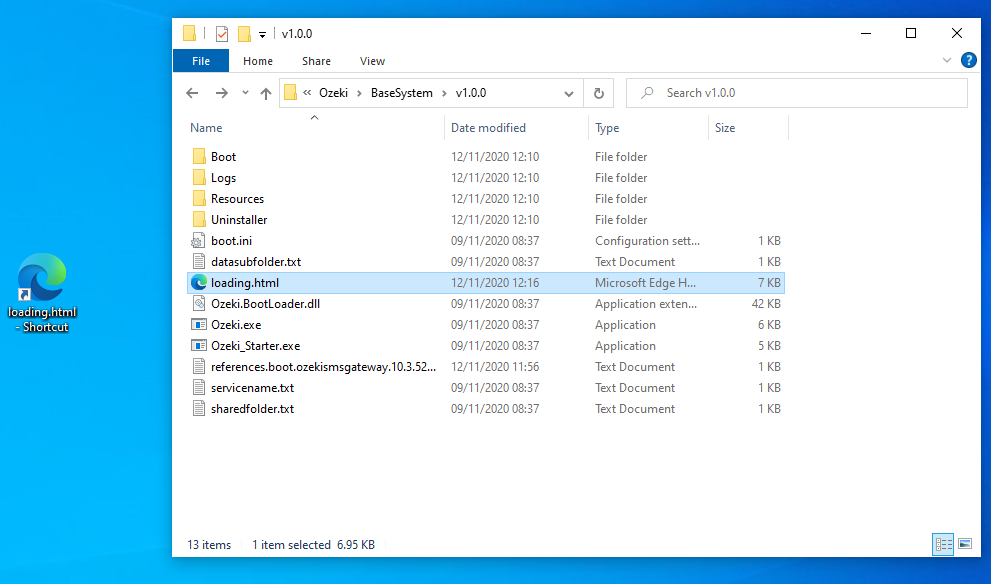
On the Ozeki 10 server machine, where you are running the service on, please copy the 'Loading.html' shortcut to your desktop. You can find it in the decompressed folder. Use it to open the Ozeki 10 GUI anytime you wish.
More information
- Integration Guides
- Ozeki OS Destop screen
- Securing the Ozeki 10 GUI, switching to HTTPS
- Backup and Restore an Ozeki 10 installation
- Setting up an Ozeki Cluster
- Firewall configuration
- How to change the admin password in Ozeki 10
- How to recover a lost admin password
- How to find IPv4 the address of my computer on Ozeki OS?

 Sign in