Create MySQL Database Tables
In this video series you can see how to connect Ozeki SMS Gateway and MySQL database server for SMS messaging. This video shows how to create the proper database table structure by using the command line of MySQL.
Video content1. Connect to MySQL
2. Copy CREATE TABLE statement
Please scroll downto copy the SQL statements (Figure 1) used in the video. If you have created the database in MySQL, you can jump to the next video.
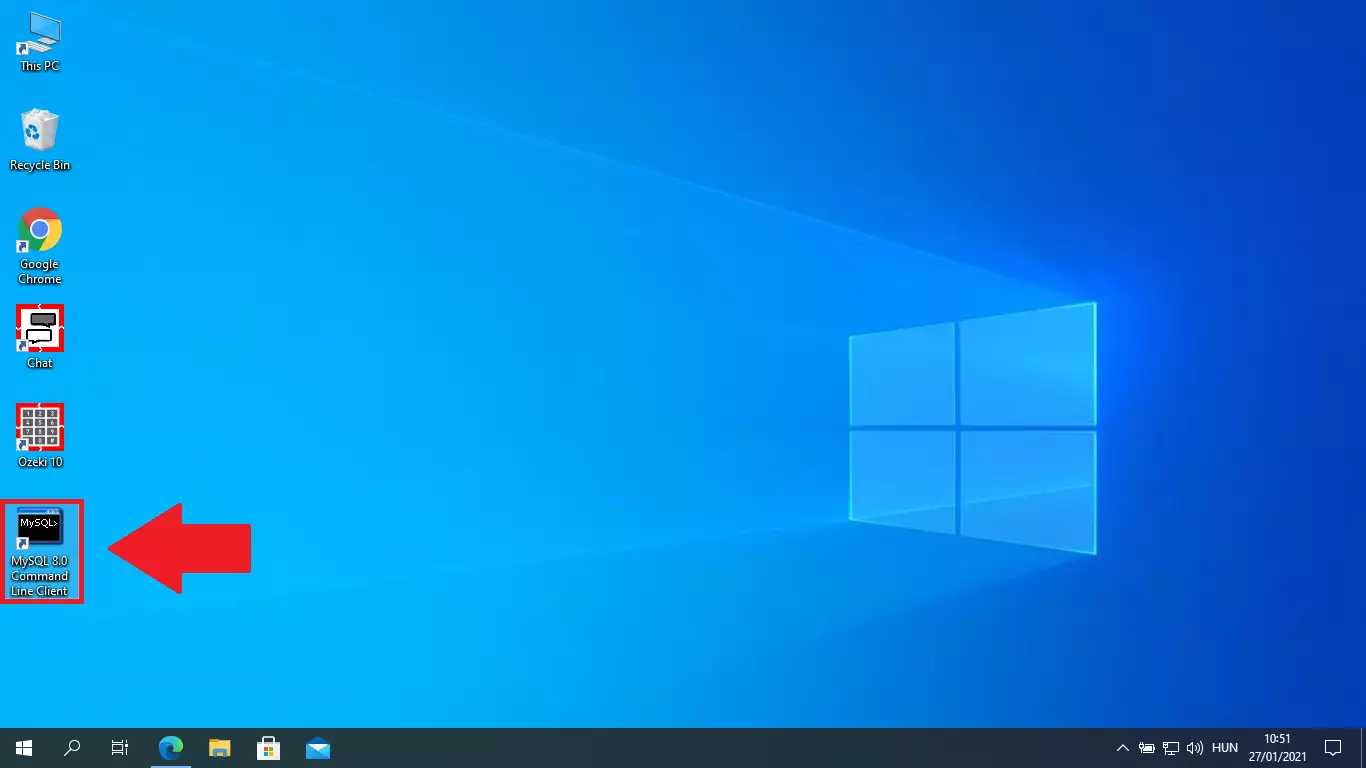
The first step is to open MySQL Client. To do that, please search for the icon you see on Figure 1. Click on it to run the program.
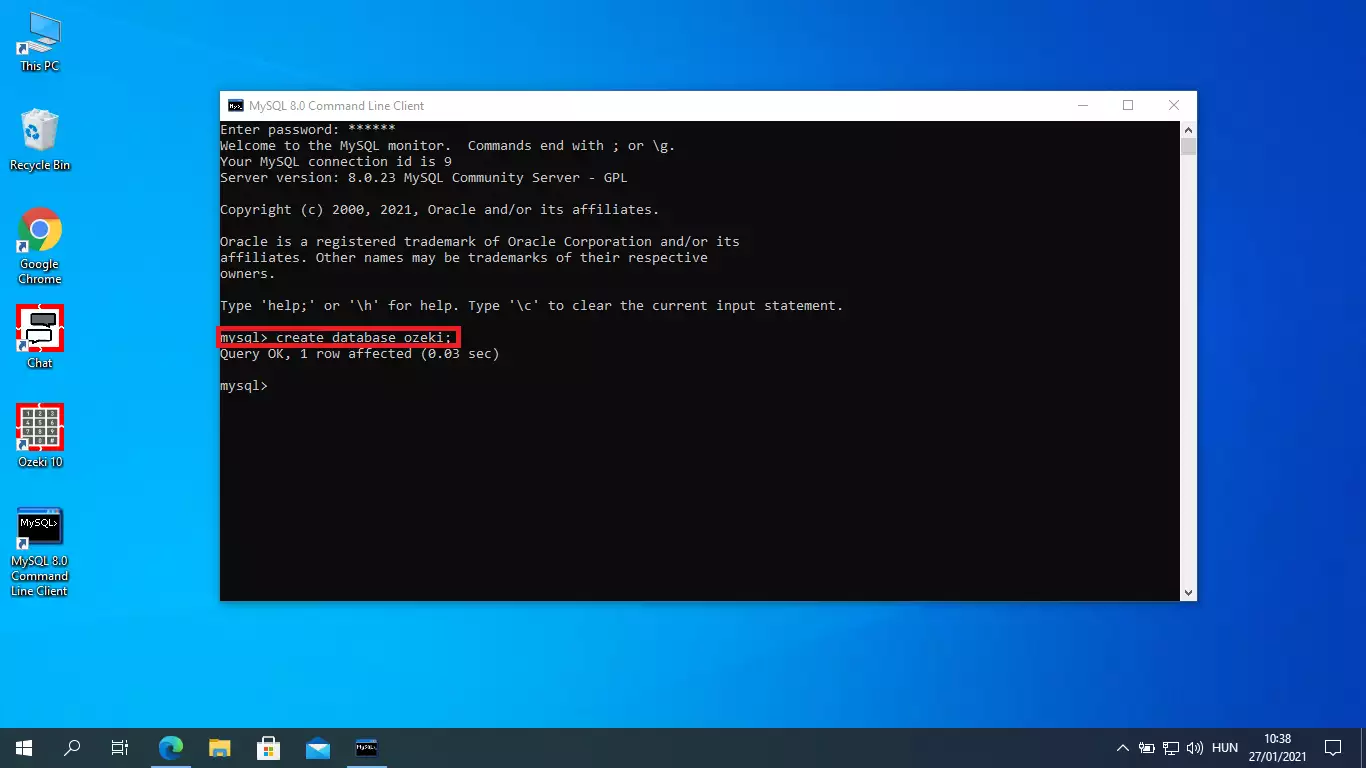
Now if you have the program opened, please copy the code, you can see on Figure 3. You can see that we have pasted the code, and it has created our database, on Figure 2.
MySQL CREATE TABLE statements to copy:
CREATE DATABASE Ozeki;
Figure 3 - Create database statementMySQL CREATE TABLE statements to copy:
CREATE TABLE ozekimessagein (
  id int(11) NOT NULL auto_increment,
  sender varchar(255) default NULL,
  receiver varchar(255) default NULL,
  msg text default NULL,
  senttime varchar(100) default NULL,
  receivedtime varchar(100) default NULL,
  operator varchar(100) default NULL,
  msgtype varchar(160) default NULL,
  reference varchar(100) default NULL,
  PRIMARY KEY (id)
  ) charset=utf8;
  ALTER TABLE ozekimessagein ADD INDEX(id);


CREATE TABLE ozekimessageout (
  id int(11) NOT NULL auto_increment,
  sender varchar(255) default NULL,
  receiver varchar(255) default NULL,
  msg text default NULL,
  senttime varchar(100) default NULL,
  receivedtime varchar(100) default NULL,
  reference varchar(100) default NULL,
  status varchar(20) default NULL,
  msgtype varchar(160) default NULL,
  operator varchar(100) default NULL,
  errormsg varchar(250) default NULL,
  PRIMARY KEY (id)) charset=utf8;
  ALTER TABLE ozekimessageout ADD INDEX (id);
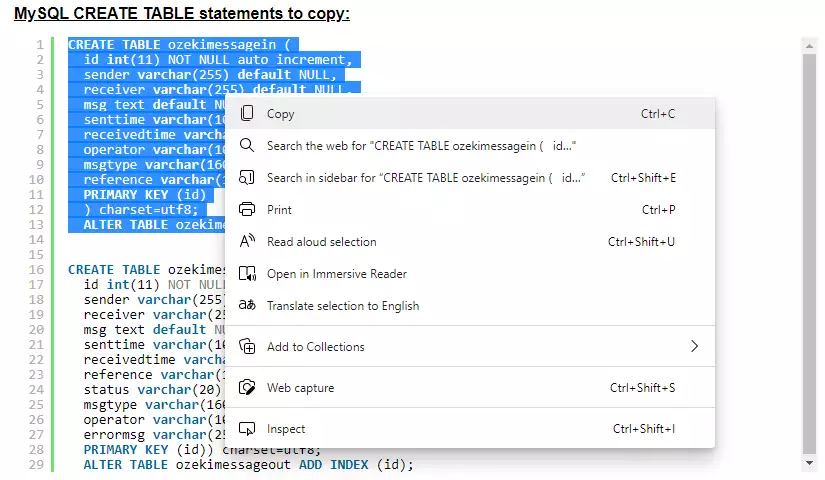
Figure 4 - CREATE TABLE statements to copy
Now if you have the database created, you have to create two tables. One for inbox and one for outbox mails. Please copy the code you see on Figure 4. It will make all the necessary data fields. Highlight the code and press "CTRL + C" to copy it to your clipboard.
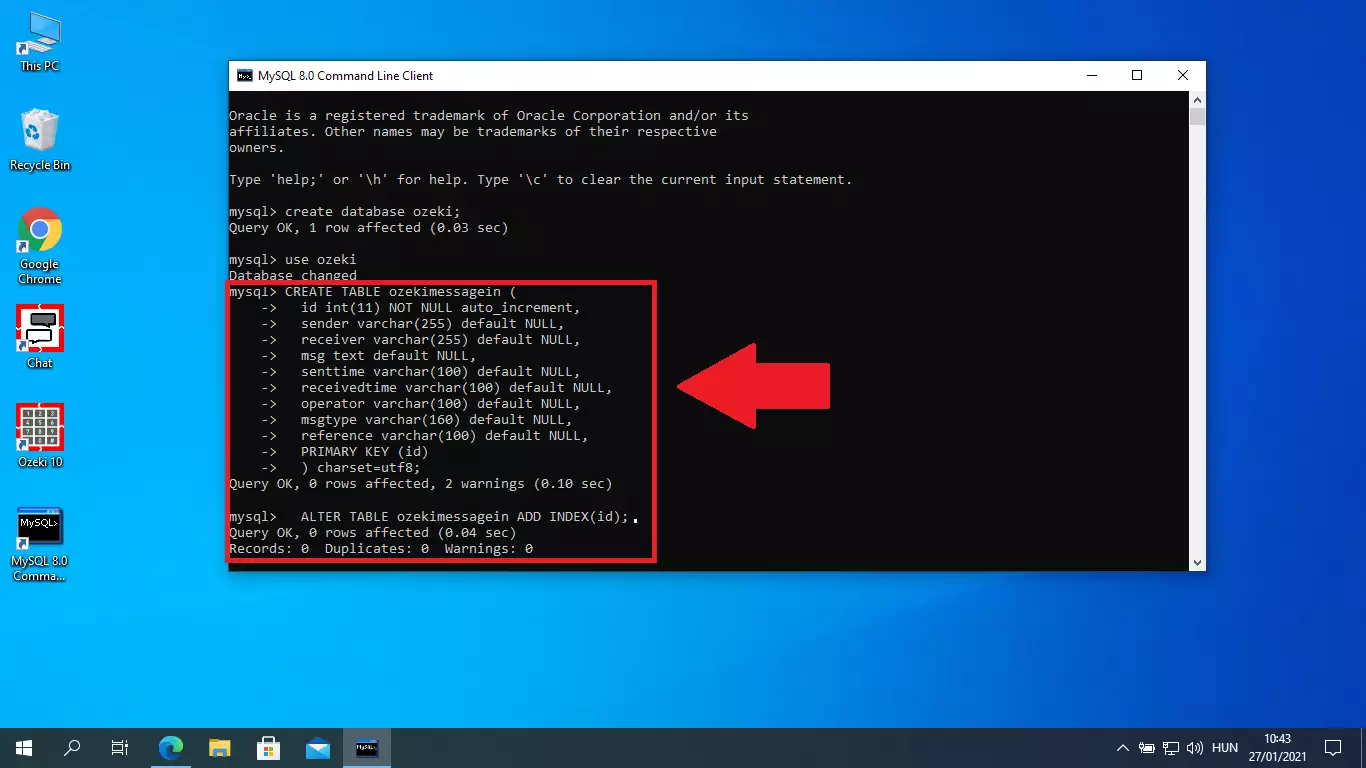
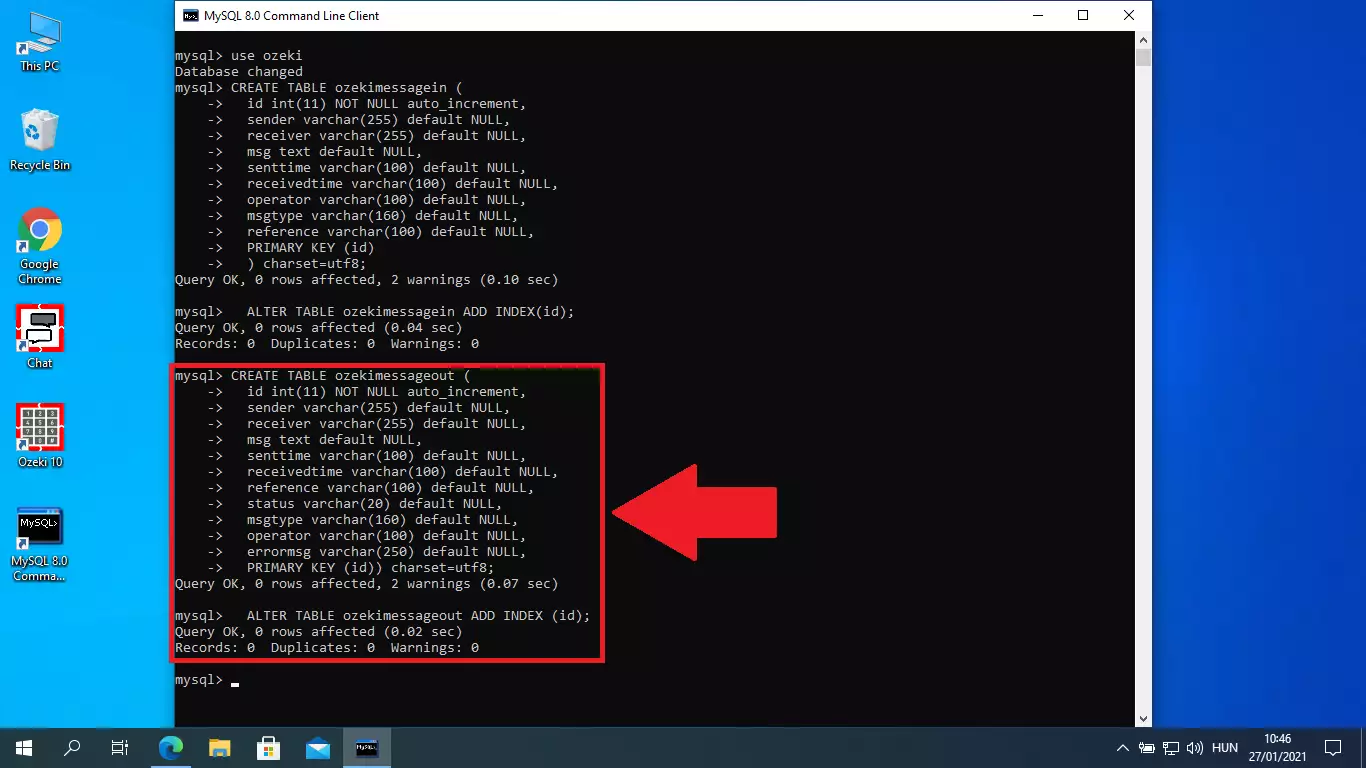
Now if you have the code on your clipboard, please paste it. If you have pasted it into the MySQL Command Line, press enter, and the application will build the tables for you. Feel free to modify the code to your liking, if you are familiar with the SQL language.
Now you need to do the last 2 steps you have done, but with the “ozekimessageout” table. You can copy it with “CTRL + C”, just as you did on Figure 3.
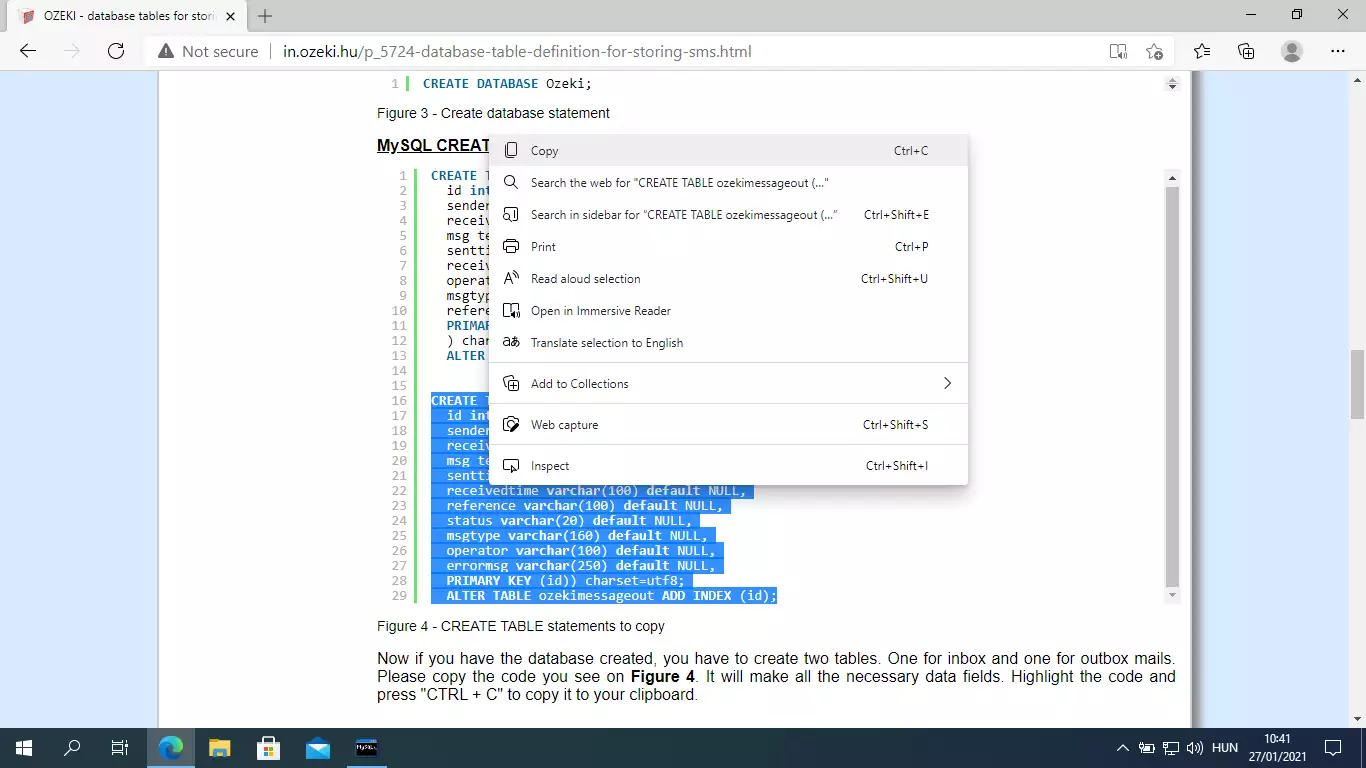
Now you just need to paste in the last copied code into the MySQL Command Line. Press "CTRL + V" to paste the code from your clipboard. If you have the code, please press Enter. now the Command Line will build your second tabel. Now you have all the required tbales for Ozeki SMS Gateway.
We hope that this guide was helpfull. If you have any problem with any of the steps, feel free to contact us at info @ ozeki.hu
Conclusion
This guide has walked you through the essential steps of creating MySQL database tables for Ozeki SMS Gateway integration. By following the detailed instructions, you have successfully set up the Ozeki database and configured the necessary t ables ozekimessagein and ozekimessageout to handle incoming and outgoing SMS messages. The provided SQL statements ensure proper schema structure, including indexed fields for optimized performance.
With these tables in place, your MySQL database is now ready to connect with the Ozeki SMS Gateway for seamless SMS messaging. Should you encounter any issues, don’t hesitate to reach out to info@ozeki.hu for assistance. For further integration steps, proceed to the next video complete your setup.
