How to create audio conference in the Ozeki Virtual Classroom
In the Ozeki Virtual Classroom you have the opportunity to create an audio conference with the students. During an audio conference, everyone has the option to turn their microphone and speaker on and off so they can join the conversation.
Step 1 - Open Virtual Classroom
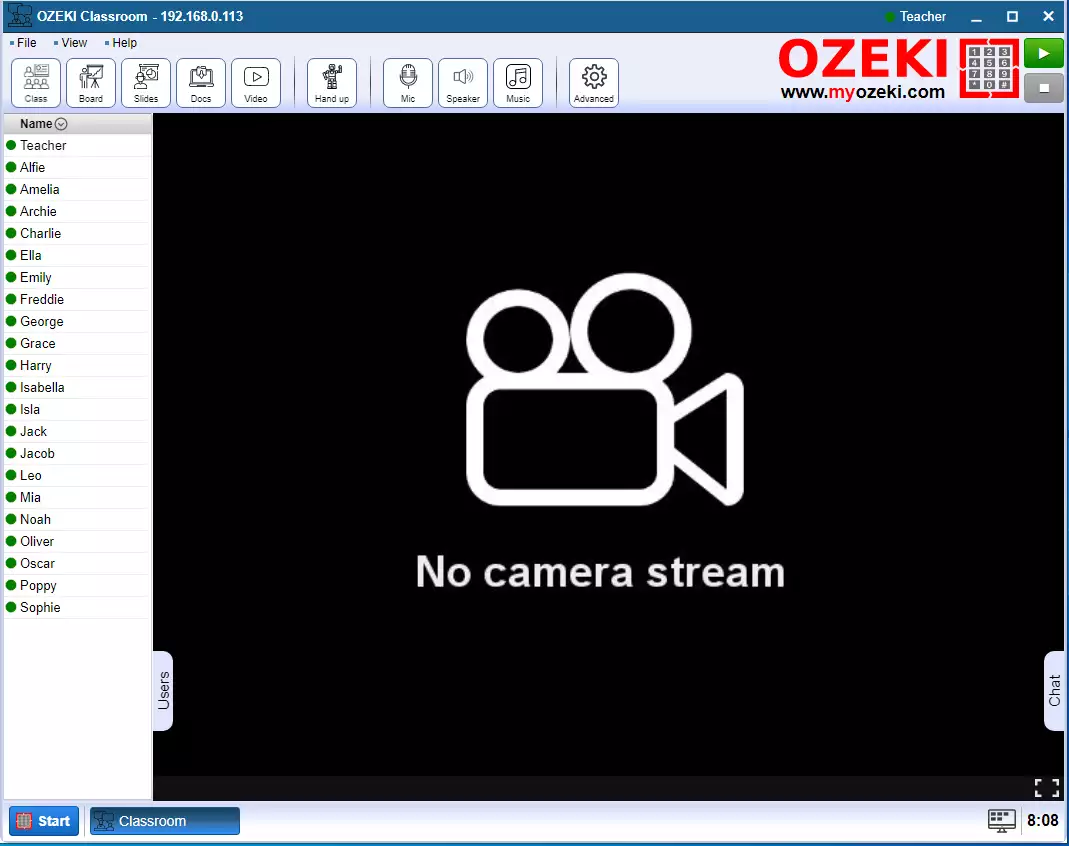
The first step is to open the Ozeki Virtual Classroom (Figure 1.

Step 2 - Enable speaker
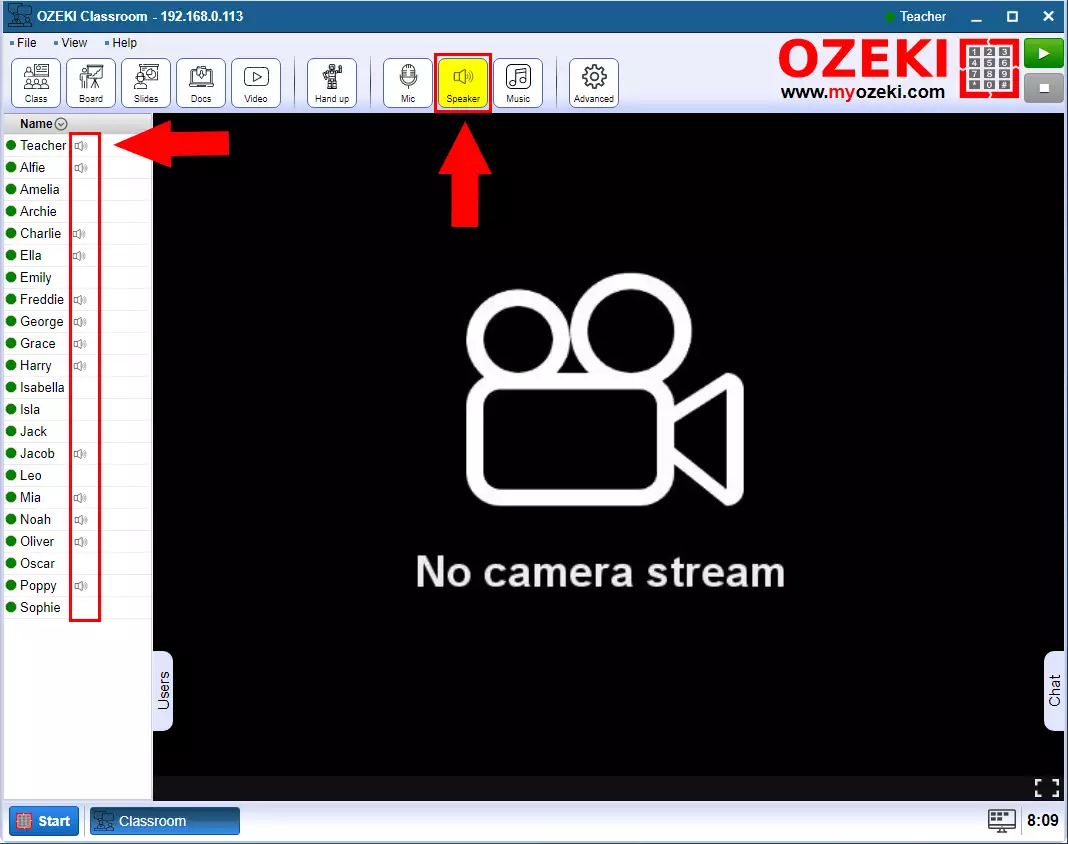
Then turn on your speaker by clicking the Speaker button, so you hear what the others are talking about. If your speaker is on, the button is yellow. On the left you can see who turned on their own spaker (Figure 2).

Step 3 - Enable microphone
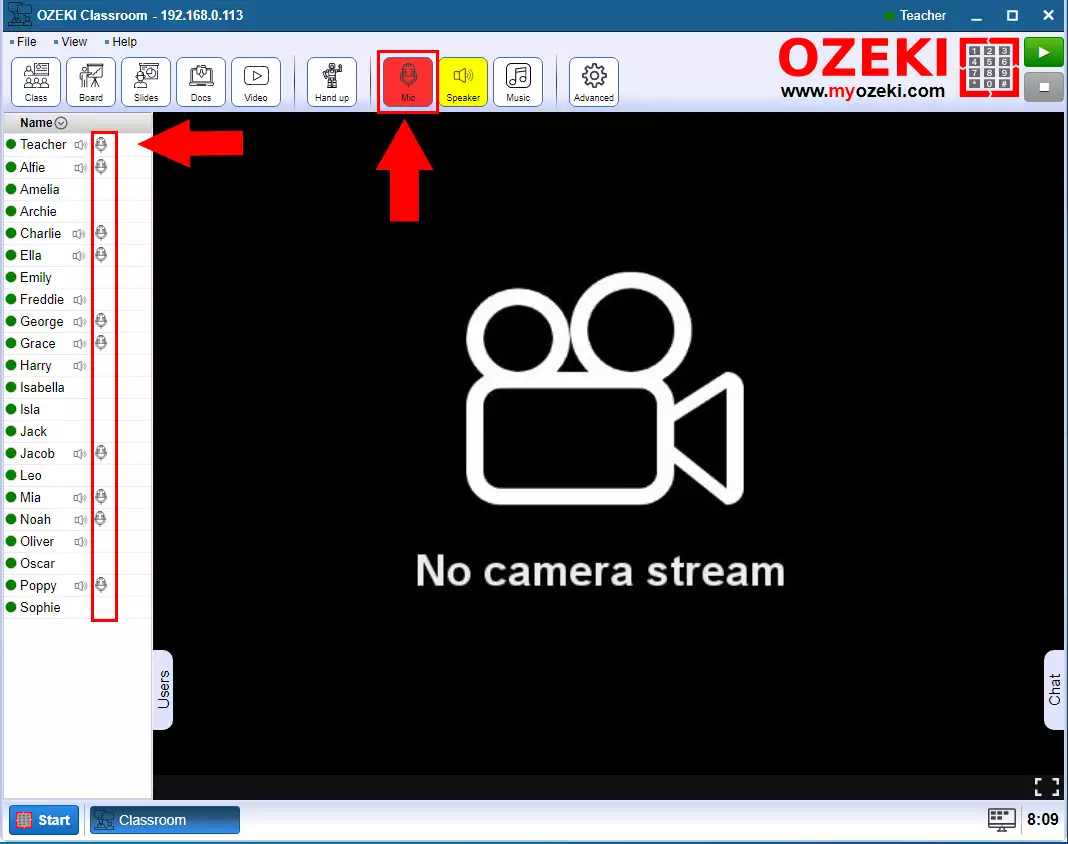
If you want to talk to others, you need to turn on your microphone. You can do this by clicking on the Mic button. The button turns red when your microphone is turned on. On the left you can also see who turned on their own microphone (Figure 3).

