Easily open Ozeki Snap through the GUI
|
Have you tried creating algorithms by snapping block diagrams to eachother? You can build codes at your fingertips via block diagrams. Even your child can do it. You will see several examples through the courses that will lead you through the sequence of building robots. This guide will show you how to start Snap on your installed Ozeki 10. Log in to create or import Snap code blocks from any local or remote webbrowser. |

|
Video tutorial: 'How to start Snap from OZEKI 10'
Requirements
Step-by-step guide
Ozeki 10 should be already installed on a machine, which you should connect to by using a remote webbrowser. Do this by simply typing in the IP address of your Ozeki 10 machine and the 9505 port number to your browser's toolbar (Figure 1). This way you can reach the login form of the client GUI. To help you install Ozeki 10 for Windows, Ubuntu, Raspberry Pi, Tinker OS or Android, check out the following site: http://www.ozeki.hu/index.php?owpn=5980. On the login form, please type the same login details you have always used for Ozeki 10. If you are new to Ozeki 10 then use the admin user credentials you have provided during installation and click 'Ok'.
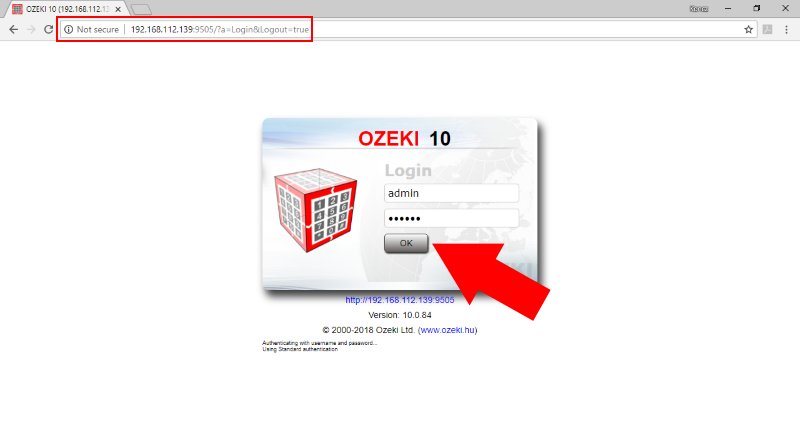
Figure 1 - Logging into Ozeki 10 with a simple password
You have comfortably arrived on Ozeki 10's desktop GUI. You can see that it is quite similar to a Windows desktop. Open the 'Snap' application from the Start menu (Figure 2) through this route:
Start Menu of Ozeki 10 / Programs / Education / SnapYou can pull the blue robot dog icon onto the desktop just in case you plan to use Snap more often.
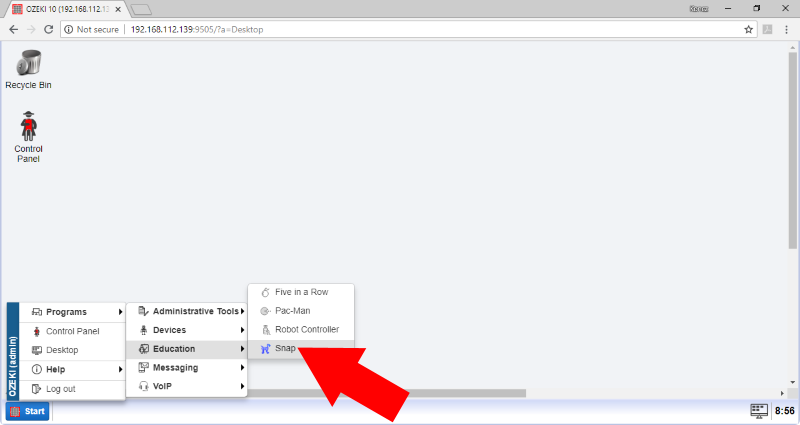
Figure 2 - Open Ozeki Snap through the Start Menu
The Ozeki 10 applications that are running, including Snap, can be found on the desktop tray (Figure 3). On the Snap GUI, click on the top folder icon to import or export XML projects. Importing projects will be quite useful for the robot programming lectures. To create programs you can use blocks from the left. You can choose from different block categories from the upper-left corner of Ozeki Snap. For example there is a category for Lego Mindstorms projects or for operators and variables. The yellow Control blocks contain code starter statements, 'if', 'forever', 'repeat' and more.
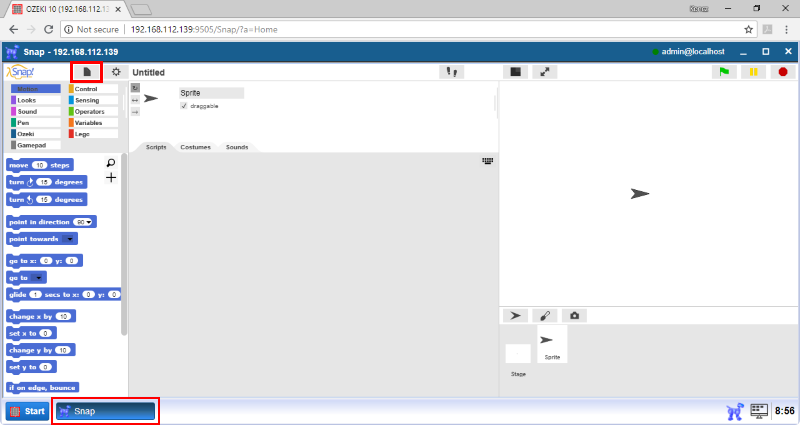
Figure 3 - You will get familiar with the Snap GUI in the lectures
Most lectures have downloadable xml codes which you can import (Figure 4) to your Ozeki Snap.
To download a code you can find a similar link with a short description. Like this:
|
|
This example shows how to calculate the distance traveled by your robot. Distance is measured from the time that has passed and the motor speed. It is easier to follow the guide if you import the codes to Ozeki Snap: Download XML file |
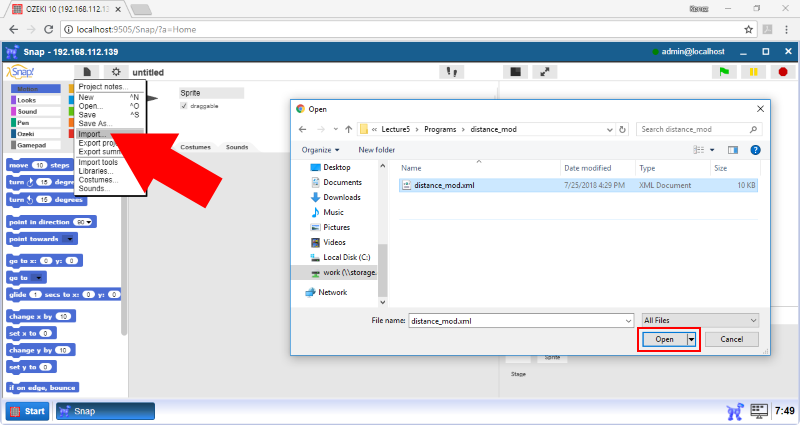
Figure 4 - How to import project into Ozeki 10
To practice it is highly advised to modify the imported XML file after doing each lecture. You can easily export your changes by clicking on the grey folder which you can find on the top of the GUI and select 'Export project...' (Figure 5). On the bottom of the browser you will find the downloaded file. Click on it with your right mouse button to open it's folder, so you can copy it to it's final location.
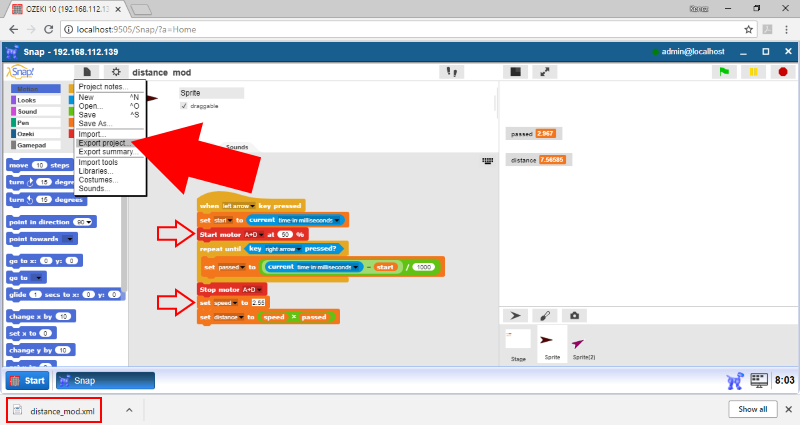
Figure 5 - See how easily you can export your programming blocks