How to connect to SQL database
Ozeki Bulk Messenger can be connected to an SQL database. It will load the contact list from the database. This is a good way to speed dial your SQL address books. In this guide we will show you how to connect the Ozeki Bulk Messenger software to an SQL database.
Below is a quick overview of how this solution works. First you need to create a database table: for example the "test" table in MS SQL.
|
CREATE TABLE test (
|
Once you have the configuration completed, you can insert records in the "test" database table using an SQL INSERT statement. Ozeki Bulk Messenger will read these records using an SQL SELECT statement and add them to your Address book.
insert into test (Name,PhoneNumber,EmailAddress,Age) values ('test1','12341243234','test@test.com','15');
insert into test (Name,PhoneNumber,EmailAddress,Age) values ('test2','343434','test@test.com','51');
insert into test (Name,PhoneNumber,EmailAddress,Age) values ('test3','25423434','test@test.com','18');
|
Step 1 - Create new address book
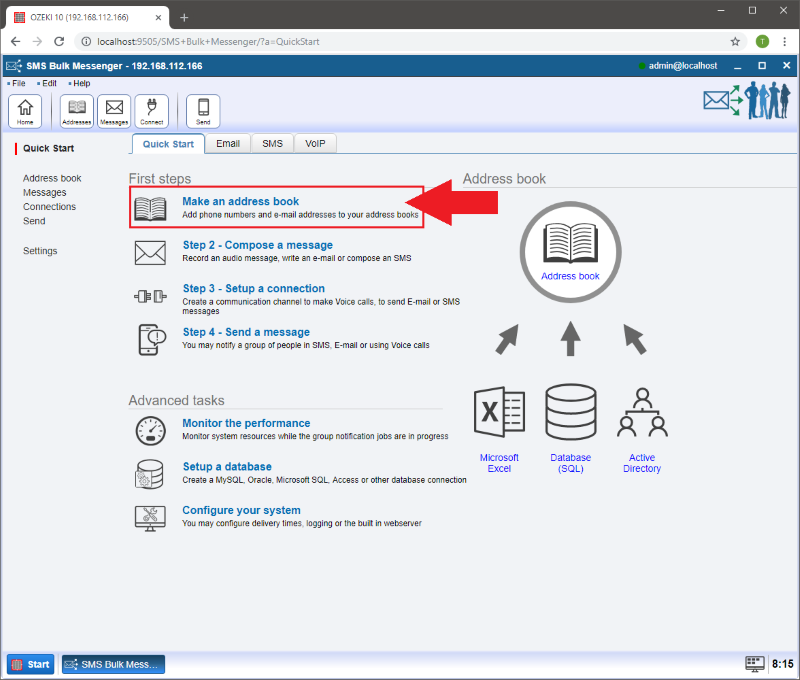
First you need to select 'Make an dddress book' in the Quick Start menu.
Step 2 - Create an SQL address book
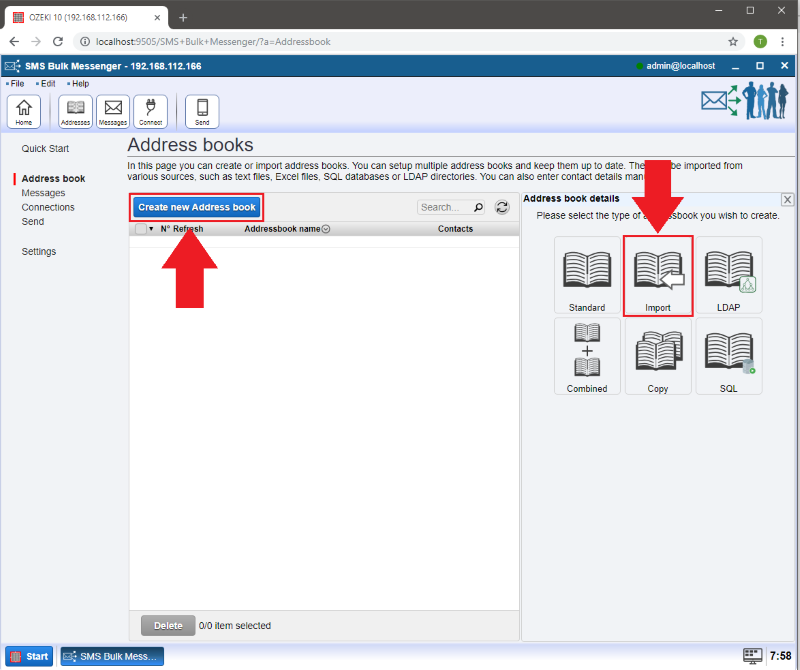
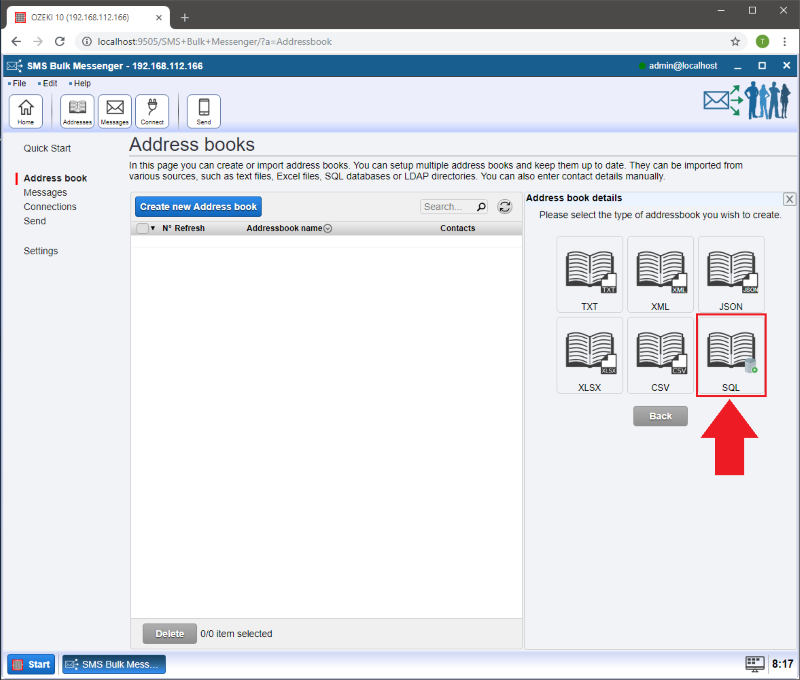
On the next page click on the 'Create new Address book' button and select the 'Import' type.
Step 3 - Provide a name for your Address book
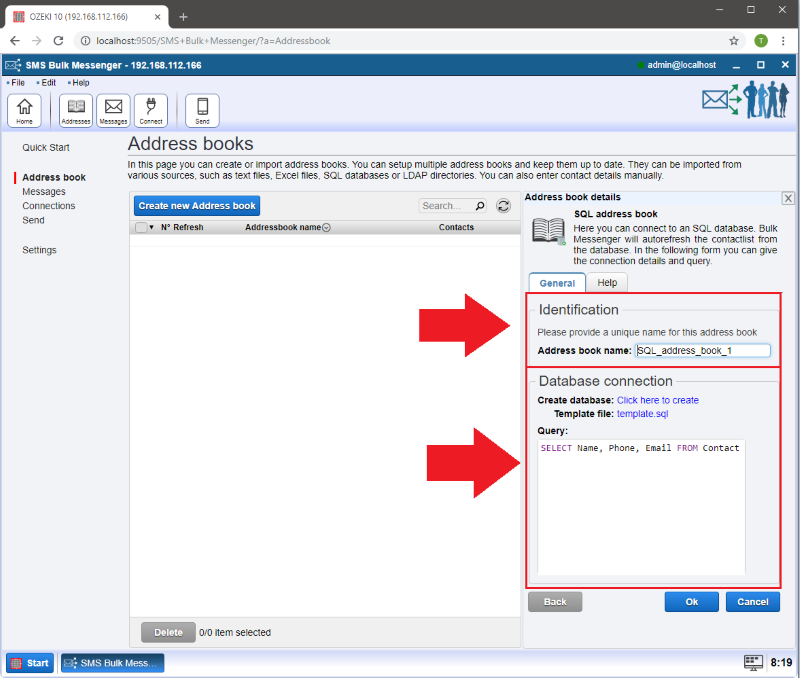
In the 'Address book name:' field you can give a name for your address book to make identification easier when adding more address books.
In the 'Database connection' section you can choose your existing database. If you have not learnt how to create a new database connection In Ozeki Bulk Messenger then you can do it here: Create a new database.
In the 'Query' field you can specify which data you would like to get from your database. You can specify other column names, however those will not appear on the 'Contacts' page.
Step 4 - Manage your contacts
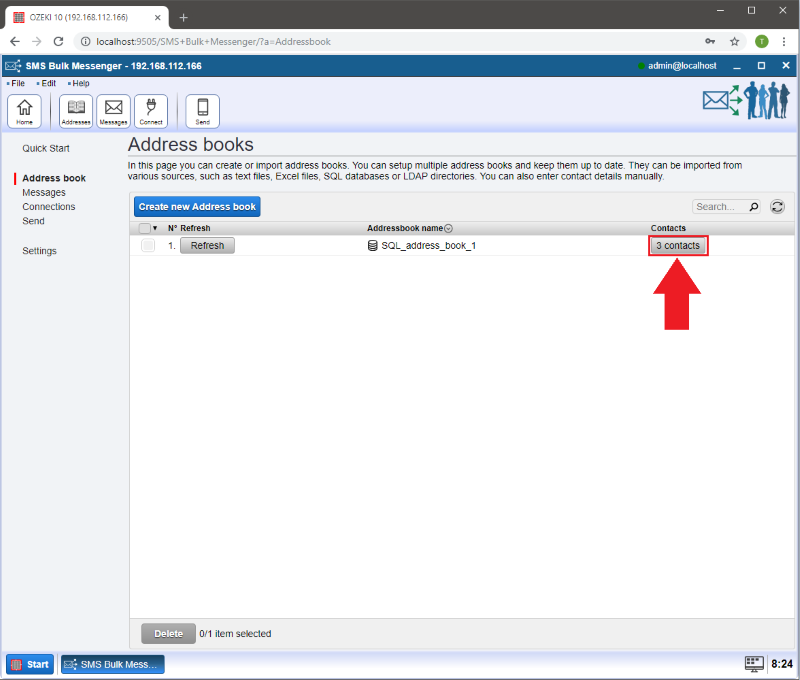
Please click on the 'Contacts' button to see the details of your imported contacts.
If you click on the 'Refresh' button you can refresh your database.
WARNING: By clicking 'Refresh', the refreshing process will delete all your contacts and load the original contacts from your connected SQL database. If you edit a contact the new details will not be saved to the connected SQL database.
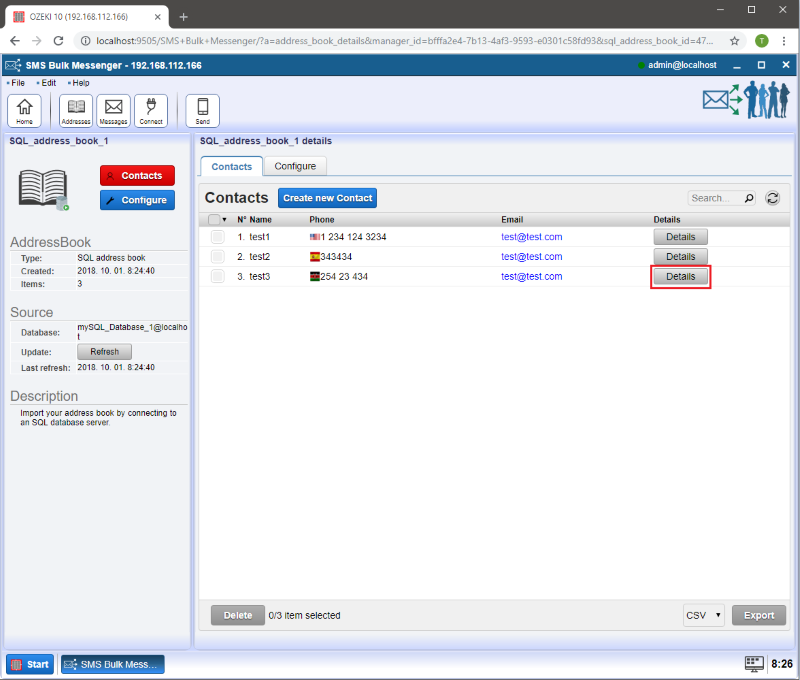
Here you can manage your imported contacts or add new ones. By clicking on the 'Details' button you can add or remove contact details and see the other table columns.
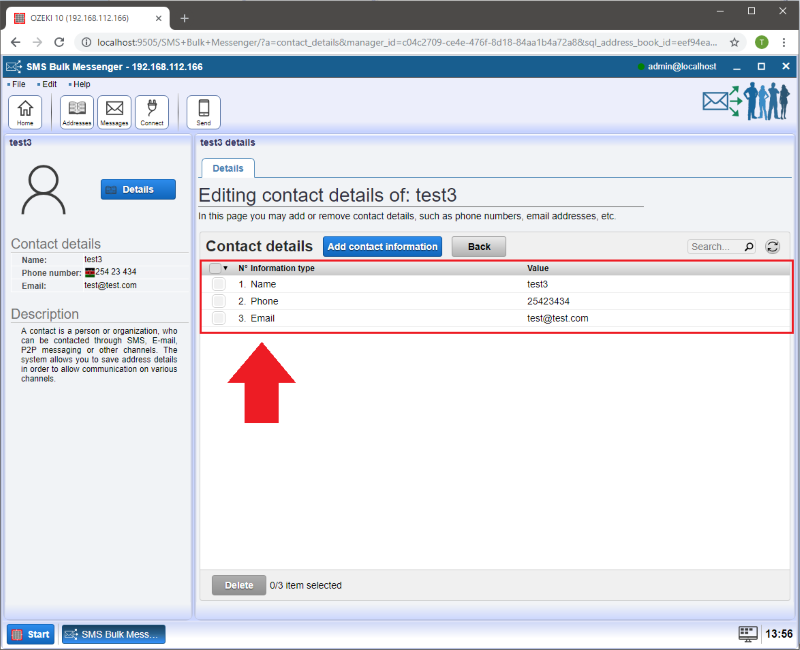
Here you can find the column names you specified when you created the address book.
More information
- How to create a Standard Address book in Ozeki Bulk Messenger software
- How to import contacts from XLSX list to Ozeki Bulk Messenger software
- How to import contacts from a CSV document
- How to connect SQL database
- Tutorial for creating LDAP address book
- Combining address books tutorial
- How to create an Android address book in Ozeki Bulk Messenger
- How to copy an address book
- How to import contacts from a TXT document

 Sign in