Arduino Nano Joystic Control Code
Analog Joysticks can be moved or pressed. Before using a joystick do not forget to lay it on a flat surface and leave it in the center position. Finally send a reset message to the joystick. After the origo is set you can move it in 4 directions and press the top button. Every joystick manipulation will generate an event. Joysticks can be used for interacting with physical or digital environments.
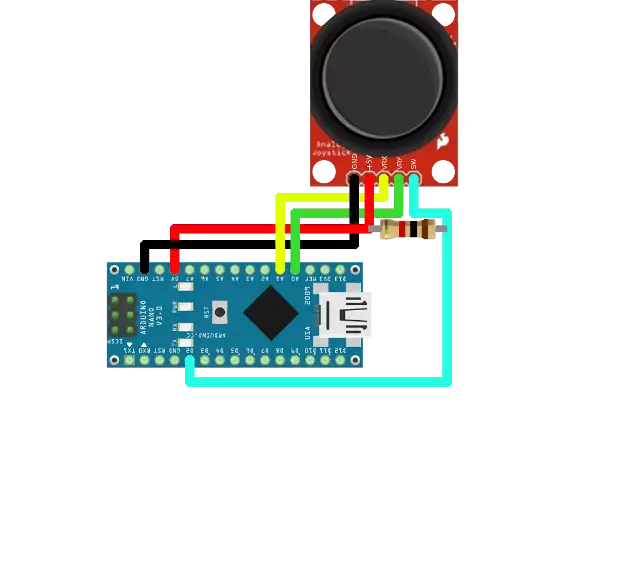
Required hardware
- Arduino Nano
- Joystick
- Resistor 1kΩ
Source code to install on controller
Before you upload this code to your Arduino, please format the EEPROM...
#include <OzIDManager.h>
#include <OzAnalogJoyController.h>

// global pointers
OzIDManager* manager;
OzAnalogJoyController* analogJoyController;

// Joystick pins
const int buttonPin = 2;
const int xPin = A1;
const int yPin = A0;

void setup()
{
  Serial.begin(115200);

  manager = new OzIDManager;
  manager->_sendACK = true;
  manager->_checksum = true;

  OzCommunication::setIDManager(manager);

  analogJoyController = new OzAnalogJoyController(xPin, yPin, buttonPin);
  analogJoyController->reset(); //resets origo to current position

  int x=1;
  manager->sendLinkSetup();
  manager->PrintWelcomeLine(analogJoyController, x++, "MyJoystick");
}

void loop()
{
  OzCommunication::communicate();
  analogJoyController->update();
}