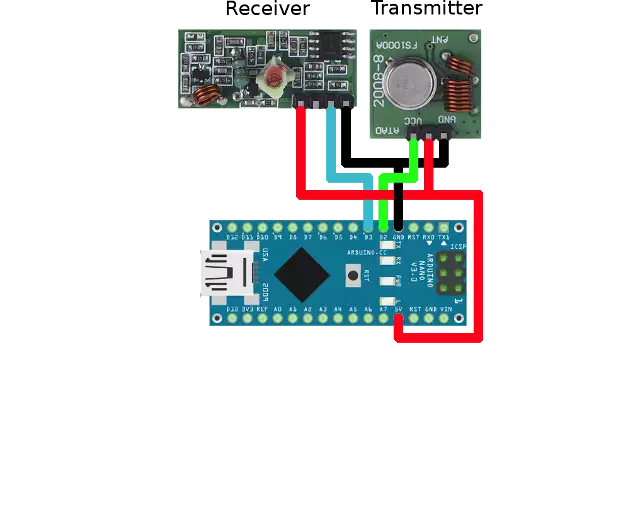
Arduino Nano RF 433 MHz Control Code
433MHz Radio Frequency Transceivers can transmit or receive radio signals. You can wirelessly control electronic components with radio signals, or get data from sensors. Control your electronic components by sending commands in binary numbers (ones and zeros). Find out the exact commands by reading the datasheet of the controllable device. If the commands you find in your device's datasheet are not binary, you can use online converters or a Windows Calculator to convert commands into binary.

Required hardware
- Arduino Nano
- 433MHz Receiver
- 433MHz Transmitter
Source code to install on controller
Before you upload this code to your Arduino, please format the EEPROM...
#include <OzIDManager.h>
#include <Oz433MhzTransceiver.h>

OzIDManager* manager;
Oz433MhzTransceiver* oz433MhzTransceiver;

uint8_t receiverInterrupt = 1; // default value: INT 1 on D3
uint8_t transmitterPin = 2; // default value: D2

void setup()
{
  Serial.begin(115200);

  manager = new OzIDManager;
  manager->_sendACK = true;
  manager->_checksum = true;

  OzCommunication::setIDManager(manager);

  oz433MhzTransceiver = new Oz433MhzTransceiver(receiverInterrupt, transmitterPin);

  int x=1;
  manager->sendLinkSetup();
  manager->PrintWelcomeLine(oz433MhzTransceiver, x++, "MyRF433");
}

void loop()
{
  OzCommunication::communicate();
  oz433MhzTransceiver->ownLoop();
}
