How to backup and restore your data
The following quick guide will show you the way, how you can make a backup of your Ozeki data, and how you can quickly restore it in case something went wrong in your Ozeki system in a few simple steps.
Make a backup of your Ozeki Data
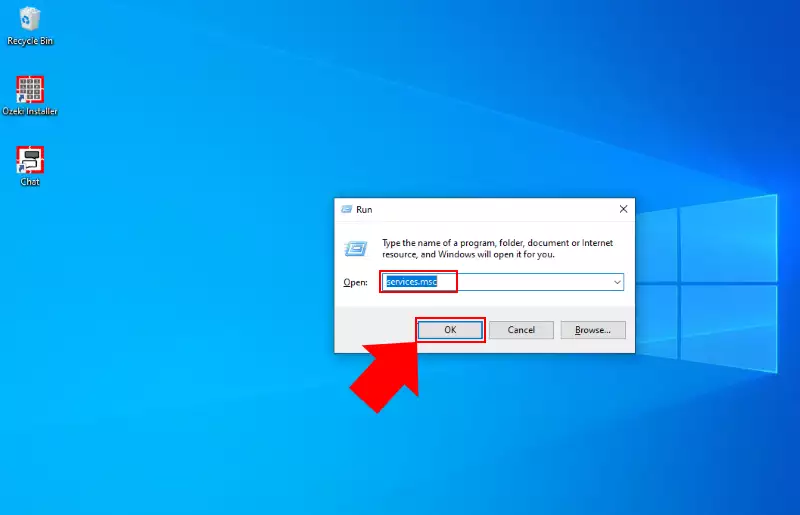
To make a backup of all your Ozeki data, first, you have to stop the Ozeki Installer service on your computer. For that, you need to open Windows Service Manager. You can do it by pressing Win + R on your keyboard, and here type services.msc like in Figure 1 in click on OK.
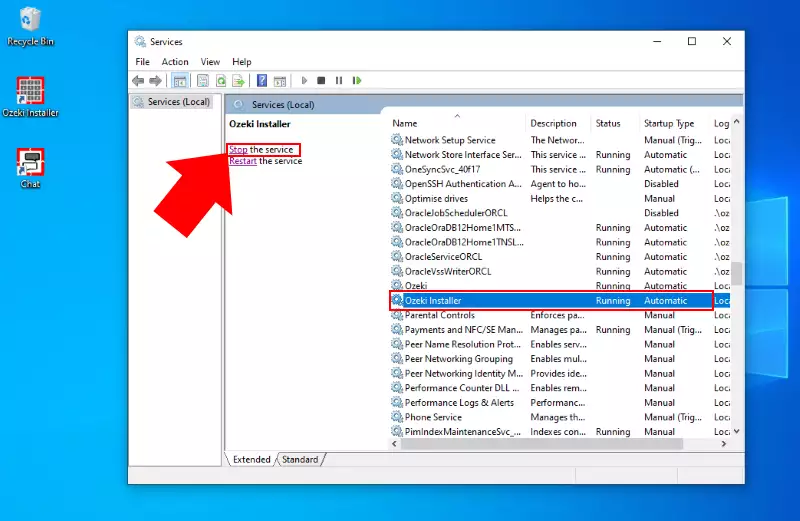
Here, in Windows Service Manager please find the Ozeki Installer service in the list of services installed on your computer. if you found that, click on it, and then, as Figure 2 shows it, click on Stop to stop the running of the service.
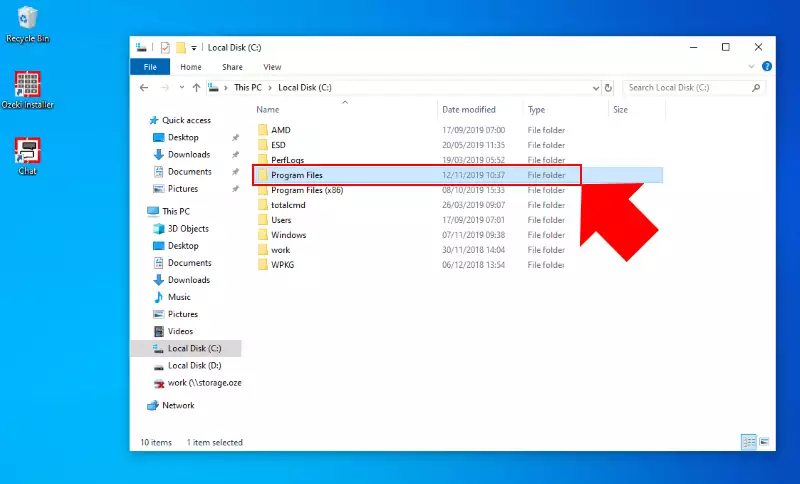
After you stopped the Ozeki Installer service, you need to find the Data folder of Ozeki Installer. For that, open File Explorer and select Program Files (Figure 3).
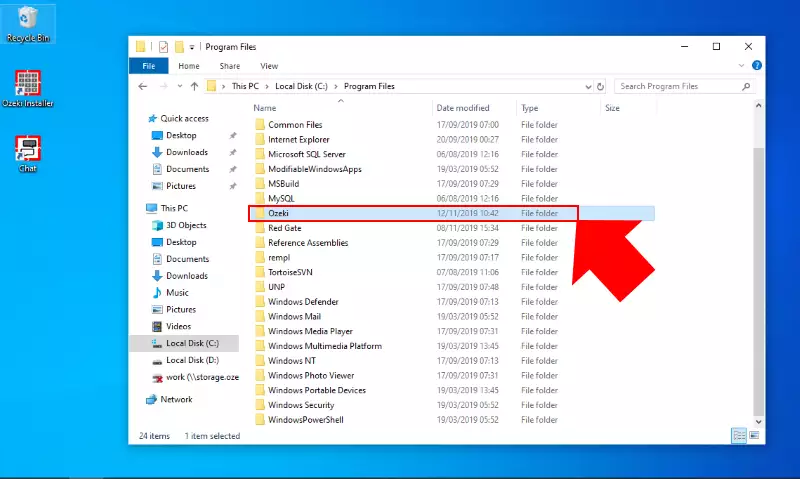
In Program Files, you can see the list of the applications installed on your computer. Now, as you can see it on Figure 4, you need to select the Ozeki folder from that list.
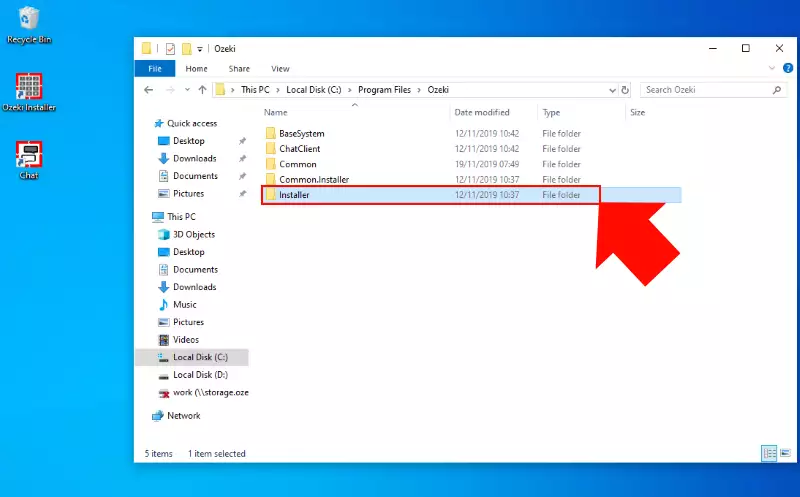
In Ozeki folder, you can find all the folders that contain to your installed Ozeki system. Now you need to open the Installer folder as Figure 5 shows it.
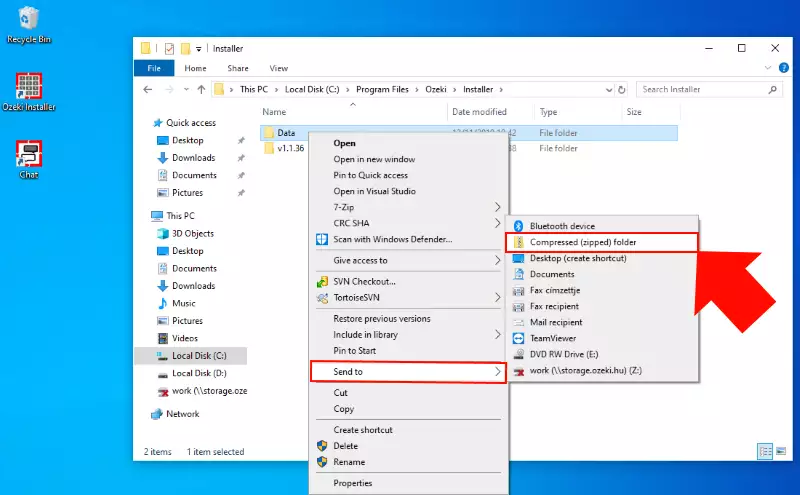
Here you can find the Data folder, that you need to backup. To perform that action, first please compress that folder as Figure 6 demonstrates it by right clicking, select Send to, and finally click on Compressed (zipped) folder. This action will create a compressed folder on your desktop.
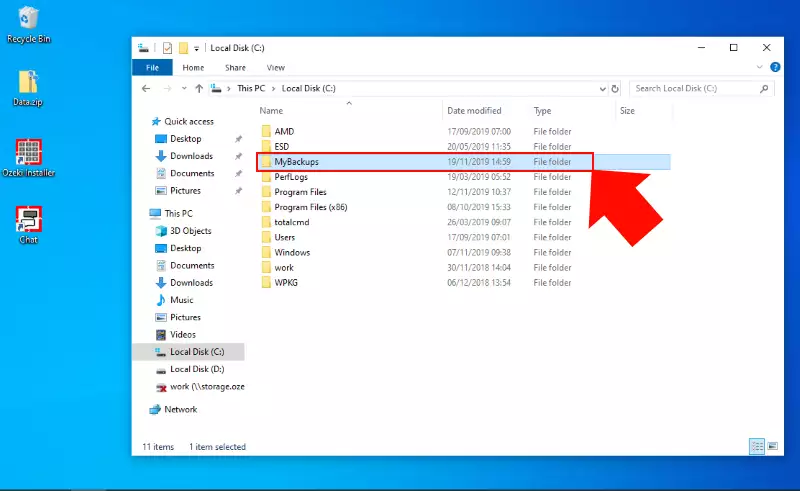
These compressed backups should be collected in your MyBackups folder, that can be found on the root directory of your local disk. If you do not have got this folder on your computer, just simply create a new one there. If you found that directory, please open it like on Figure 7.
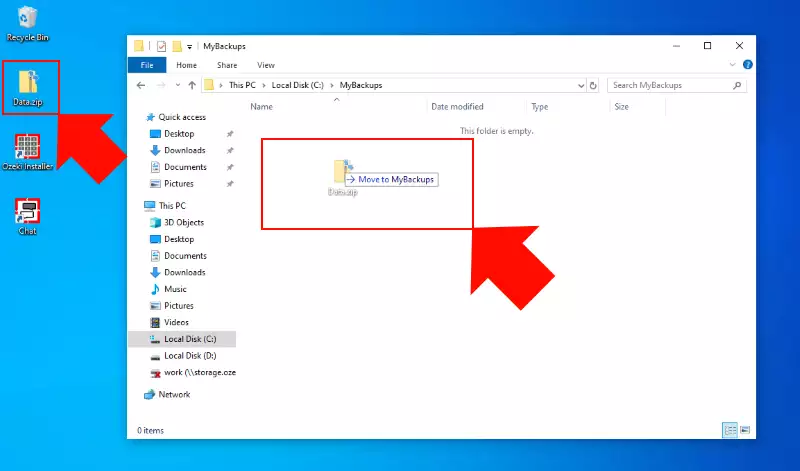
In this folder, now you can collect your Ozeki data backups. So, please drag and drop the zipped Data folder from the desktop to the MyBackups folder as Fiogure 8 shows it. With this action, now you have got a designated place for your Ozeki backups.
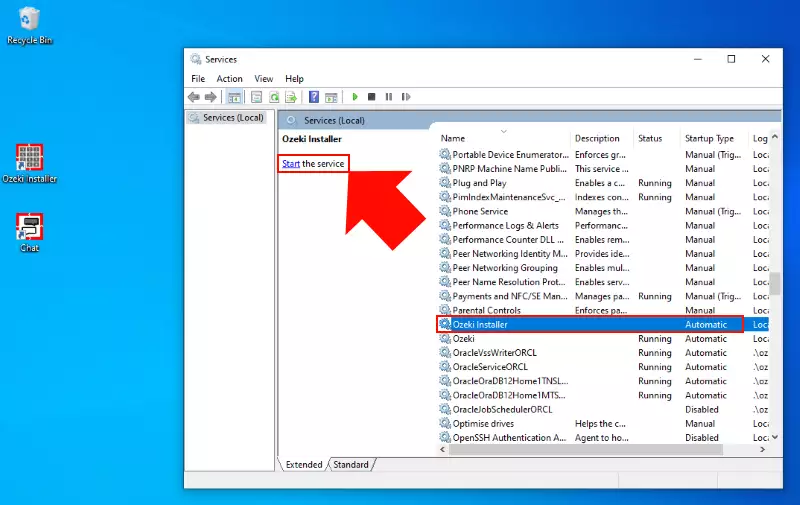
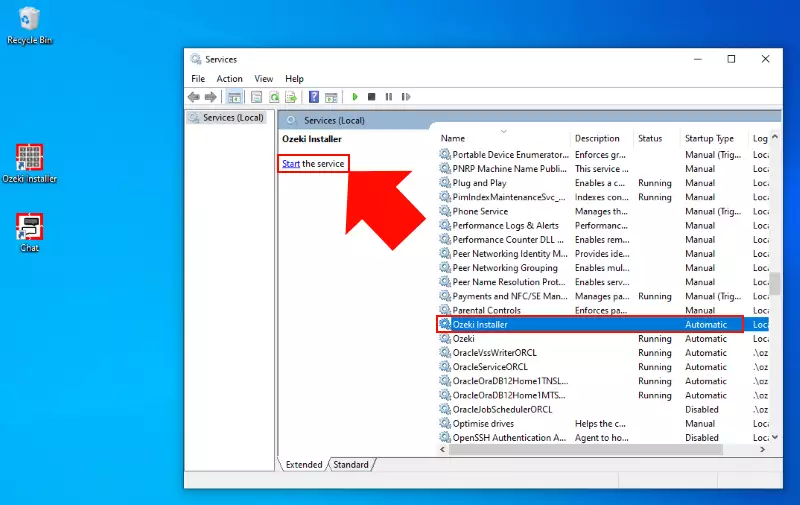
After you finished creating the backup, now you can restart your Ozeki service. For that, open the Windows Service Manager the way that was previously shown on Figure 1 and select the Ozeki Installer service. Here, as you can see it on Figure 9, click on Start, and now you can use your Ozeki system again.
Restore Ozeki data from the backups
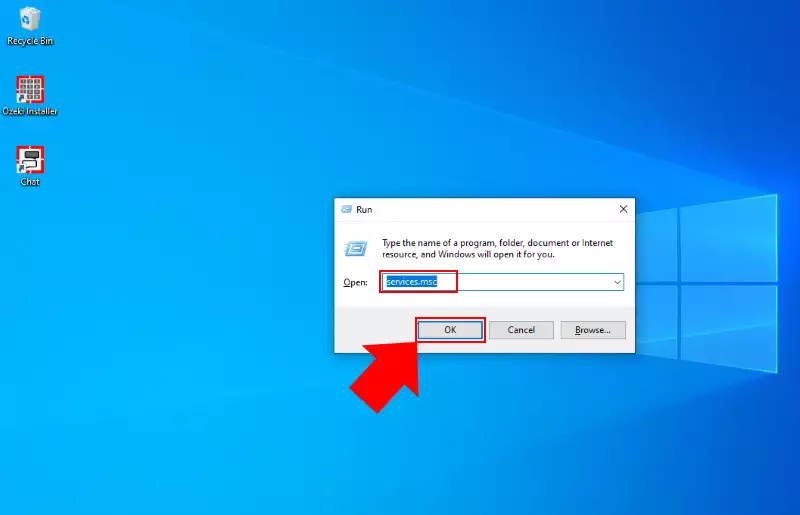
To restore your data to your Ozeki Installer demands similar actions as the creation of your backup. So, first please open Windows Service Manager by pressing Win + R and type services.msc as Figure 10 demonstrates it, and click OK.
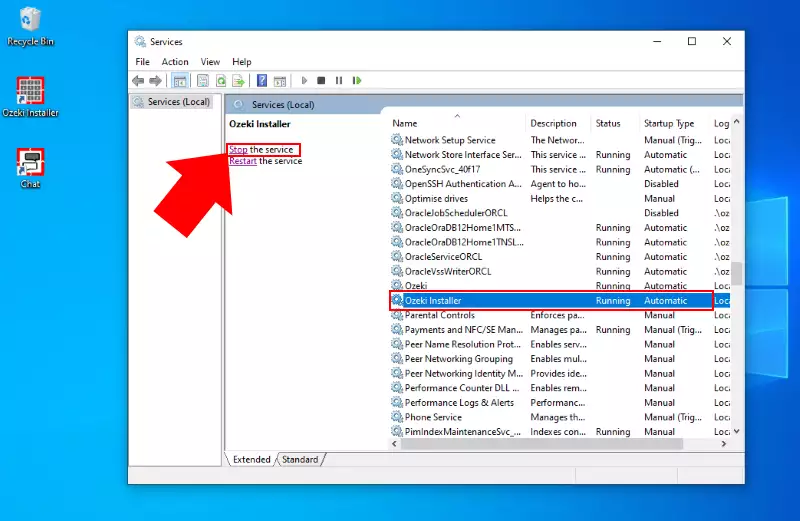
In the service manager, select the Ozeki Installer service from the list of your services, and like on Figure 11, stop the service by clicking on Stop.
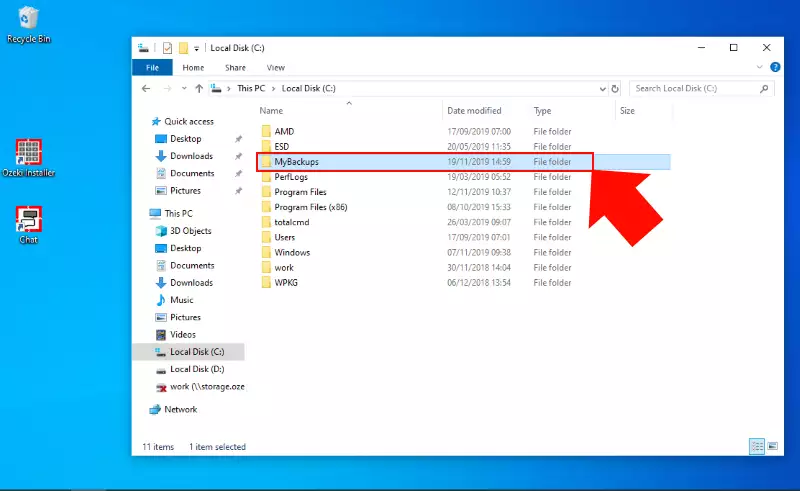
To restore your data, first you need a backup to perform this action. Your Ozeki backups can be found in the MyBackups folder. So, please open your File Explorer and as Figure 12 shows it, open the MyBackups folder on your local disk's root directory.
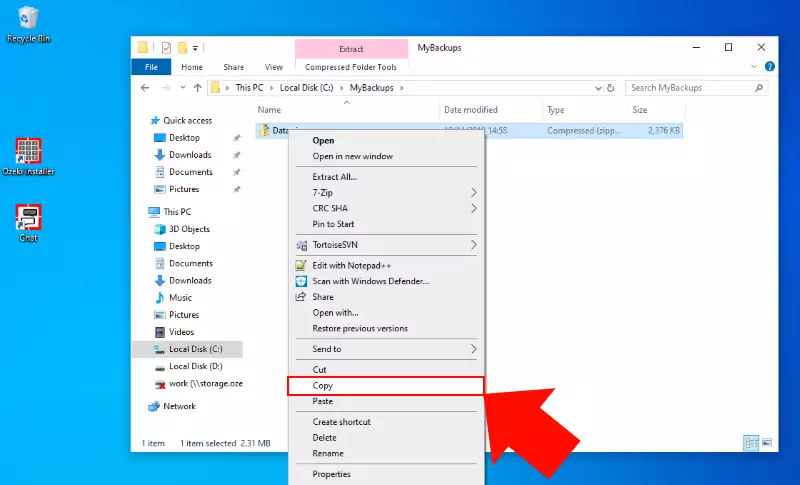
Here, in MyBackups folder the previously collected backups can be found, and these backups are ready to perform the restore action. So, please copy the zipped Data folder the way as Figure 13 shows it by right clicking on it, and select Copy.
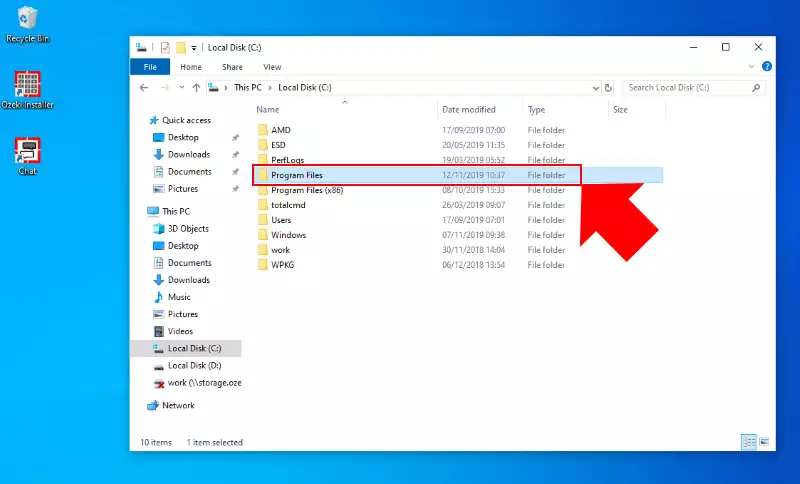
In the next step, you have to paste the copied backup data to your Ozeki Installer folder. So first, like in Figure 14, open your Program Files folder.
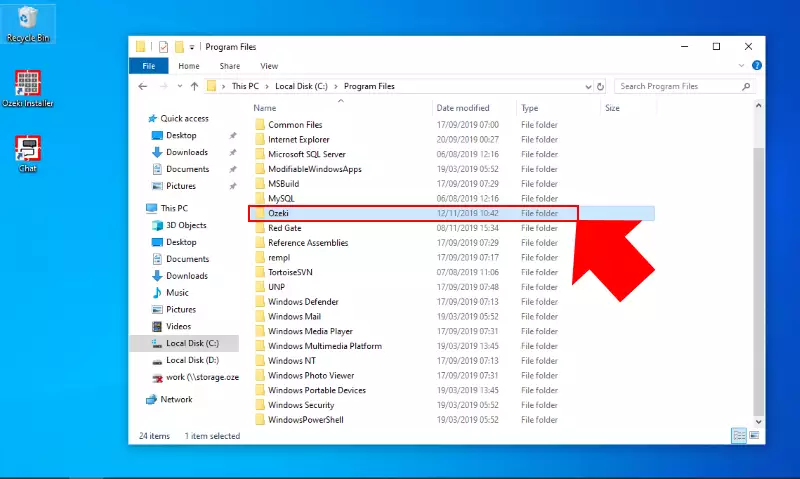
Next, open your Ozeki folder in the Program Files directory as Figure 15 demonstrates it.
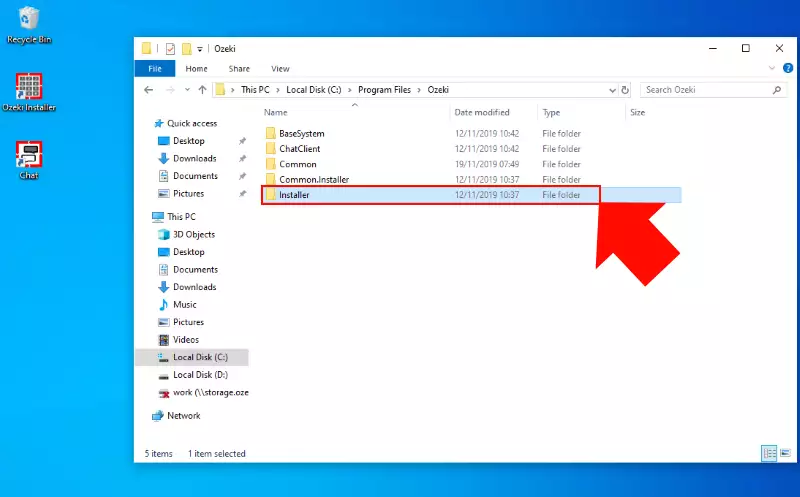
After that, as you can see it on Figure 15, open the Installer directory where you need to restore your data.
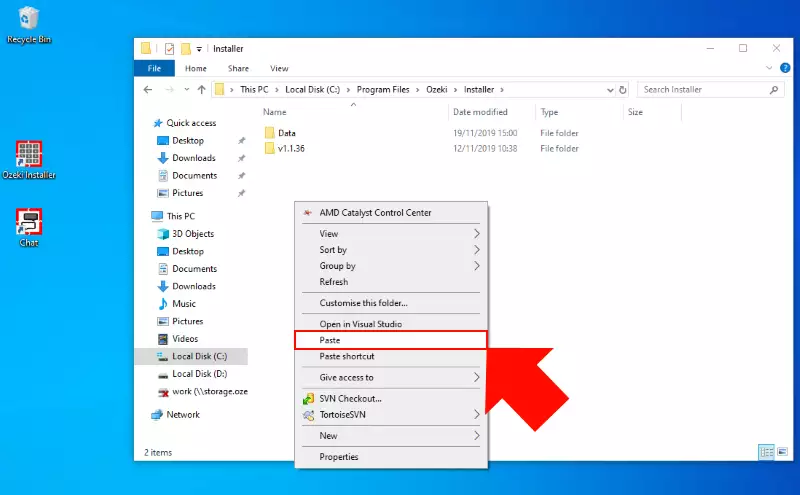
In the Installer folder you can see the Data folder that you have to replace with the backup. for that, please right click in the folder, and select Paste (Figure 16), and with this action, now your backup is in the right folder.
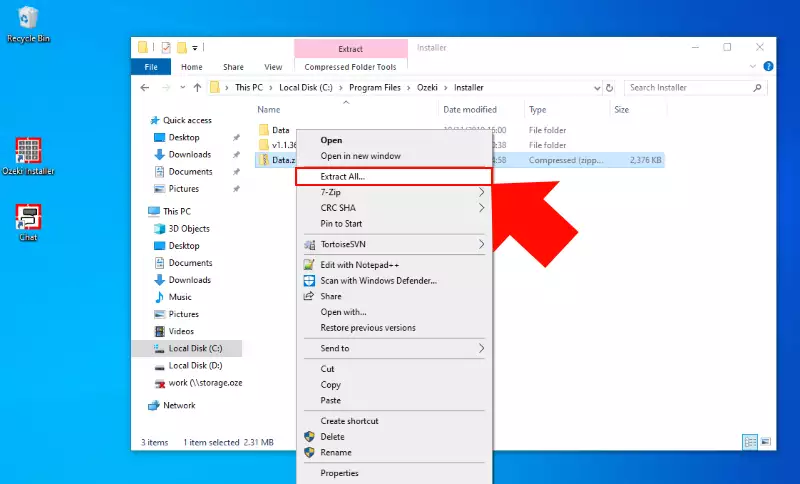
The backup is now placed in your Installer folder, but it still needs to replaced with the current Data folder. For that, you need to extract the backup in this directory. So, like in Figure 17, right click on the compressed backup folder, and select Extract All.
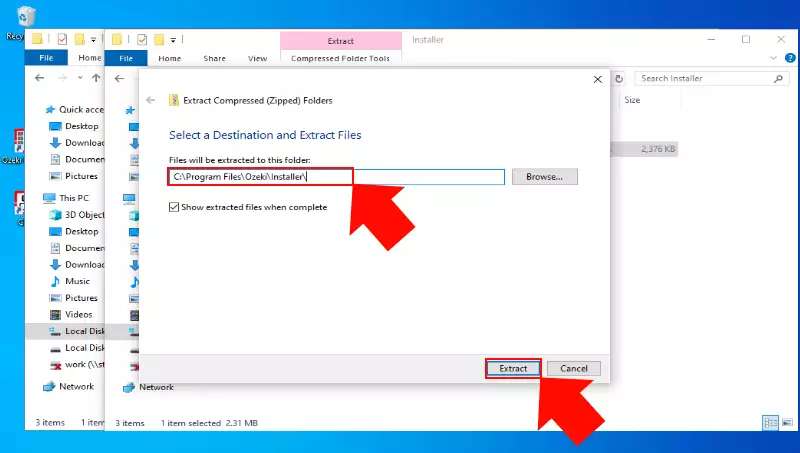
As you can see it on Figure 18, a little conversation window popped up, where you have to specify the path of the extraction. That needs to be the folder of the Installer. When you have done with that, just click on Extact and overwrite the existing Data folder with the extracted backup.
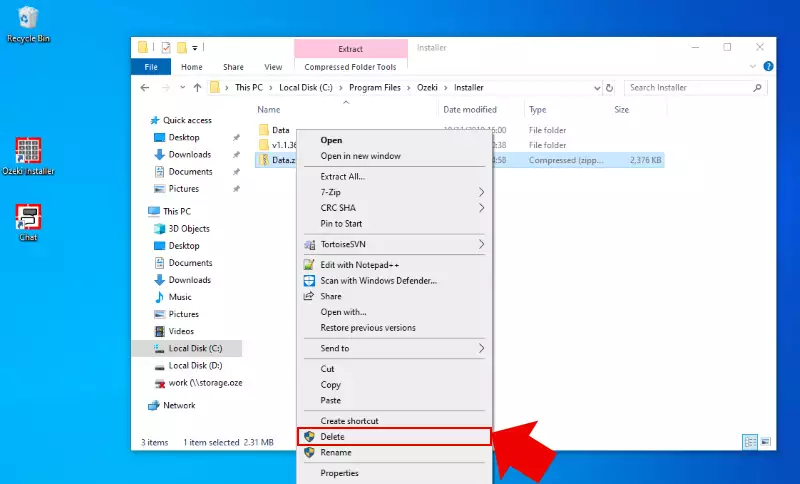
After the restoration of your data is completed, now you do not need to store a backup in the Installer folder, so you simply just delete it, as you can see it on Figure 19.
The very last step of the restoring is to restart your Ozeki Installer service. For that, open Windows Service Manager (Figure 10), and select Ozeki Installer from the list. To start the service, just click on Start as Figure 20 shows it.
