Robot control using SMS
Text messages received from mobile phones provide a great way to create remote control systems. In this lecture, you will build a robot that can be controlled using text messages. It will read the command received an SMS and act accordingly.
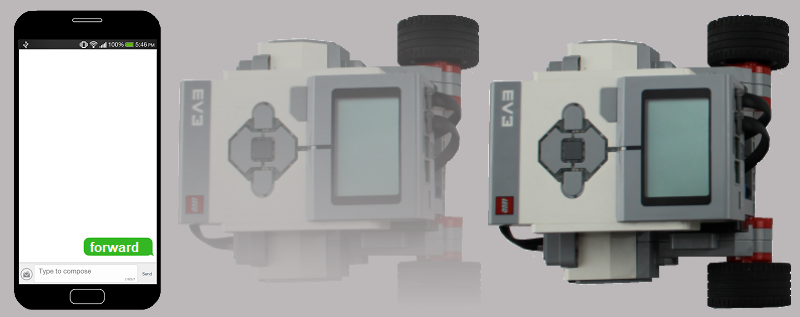
Figure 1 - See how your robot is moved using SMS command
Requirements
- Ozeki Sniffer: http://www.ozeki.hu/index.php?owpn=6204
- Ozeki 10 installed: http://www.ozeki.hu/index.php?owpn=6066
- Lego connection installed: http://www.ozeki.hu/index.php?owpn=6067
- Ozeki NG SMS Gateway installed: http://www.ozeki.hu/index.php?owpn=1017
- Snap basics: http://www.ozeki.hu/index.php?owpn=6180
Describe what the SMS, SMPP and HTTP is!
SMS - Short Message Service is a basic
communication technology, which provides sending and receiving text messages for the mobile users.
SMPP - Short Message Peer-to-Peer, is a protocol
that allows the transmission of a significant volume of text messages.
Typically, SMS messages go through an SMPP.
HTTP - HyperText Transfer Protocol,
that defines how messages formatted and transmitted the actions of web servers and browsers.
Create the SMPP and HTTP connection in Ozeki NG SMS Gateway!
After you installed Ozeki NG SMS Gateway, please navigate to http://127.0.0.1:9501 and log in with your user details. The first thing that you need to do here is to create a new SMPP user. You can do it by clicking on Users and Applications tab and here select the Add user option. Here you can choose from several account types that the Ozeki NG SMS Gateway provides, but now you need to choose the SMPP user for this lecture, so click on the install button (Figure 2). Finally you need to specify the application name and password for the SMPP user account.
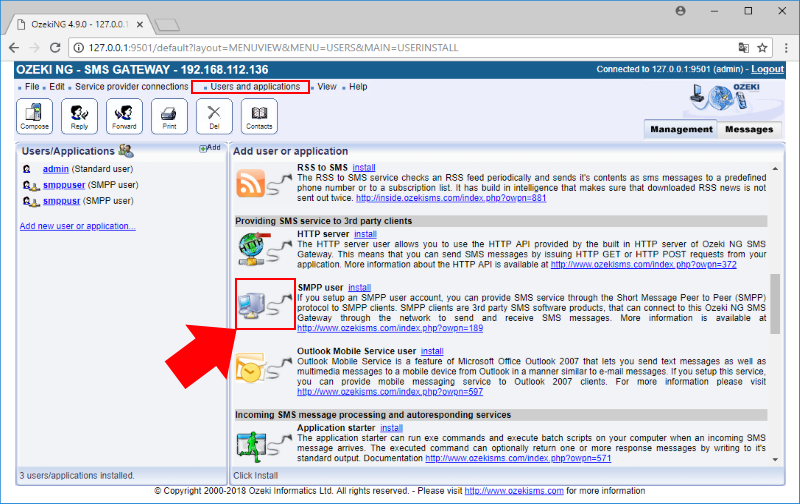
Figure 2 - Creating an SMPP user in Ozeki NG SMS Gateway
To send SMS messages you need a HTTP Server Connection to create a communication line between Ozeki NG SMS Gateway and Ozeki 10. To do this you just have to click on Service provider connections tab and select Add service provider connection. Here choose the HTTP Server Connection and install it like on Figure 3. The last step of the creation is to assign a name and a telephone number to the HTTP server connection. Click 'OK' to finish the installation.
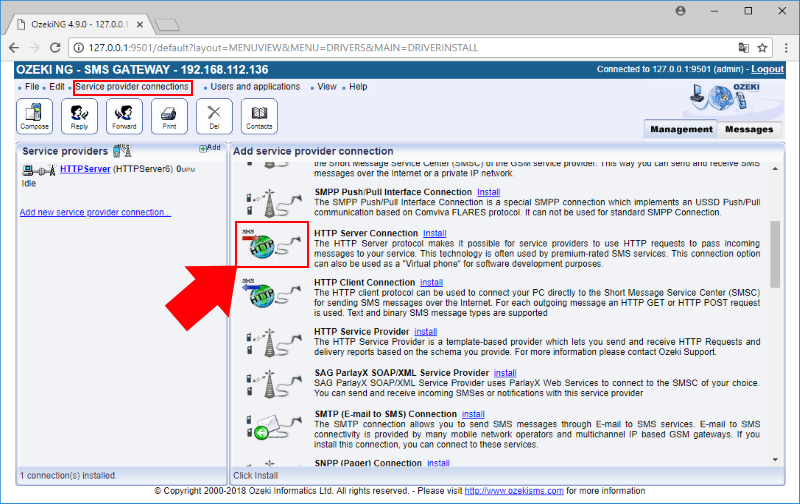
Figure 3 - Creating an HTTP server connection in Ozeki NG SMS Gateway
Create the SMPP connection in Ozeki 10 and route it to SNAP!
After you set up everything in Ozeki NG SMS Gateway, you need to create an SMPP connection in Ozeki 10 and connect it to the SMPP user that was created in the first task. To reach it, you just have to log in to Ozeki 10 then open the Control Panel to create it with the usual way by clicking on Create new Connection and selecting the Messaging method as you can see it on Figure 4.
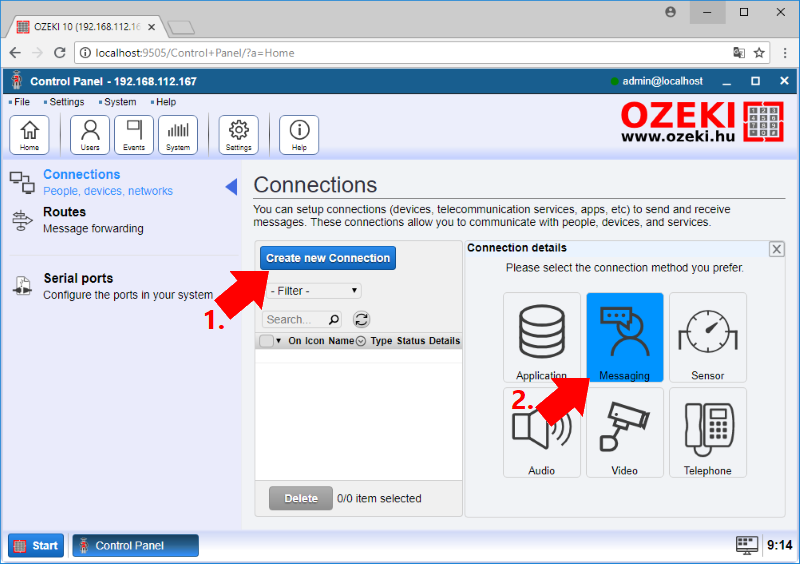
Figure 4 - Select 'Messaging' connection category in Ozeki 10
In the Messaging option you have to select the SMS connection icon. Here you can choose from various SMS connections, such as SMS modem, HTTP server or UCP client. But now you need to create an SMPP connection like on Figure 5, because that way you can connect to the previously created SMPP user account, so just select it by clicking on its icon.
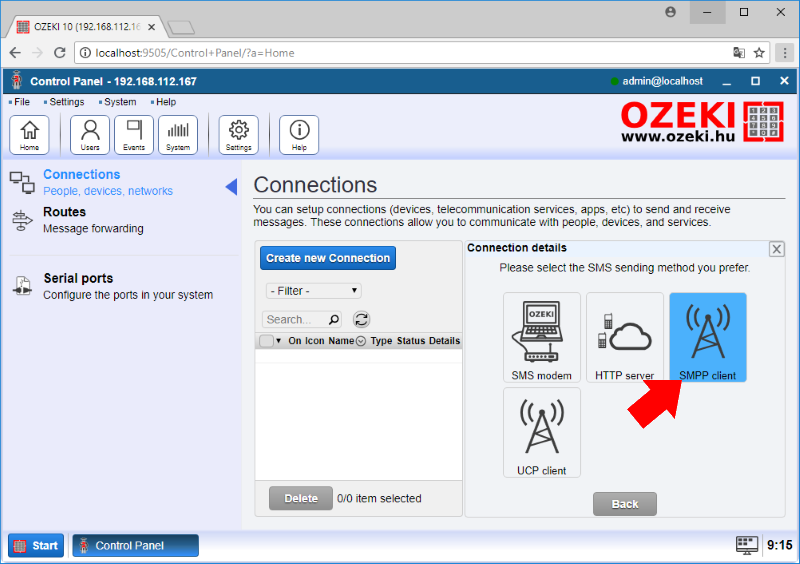
Figure 5 - Adding 'SMPP client' connection in Ozeki 10
Before finishing the installation, you need to set up some options for the connection. First you can type a name for the connection as usual. Next you need to specify the SMPP server details: you have to type the machine's IP address, that you can see on the top left corner in Ozeki 10 and select port 9550 (Figure 6). Finally enter the username and password of the SMPP user account.
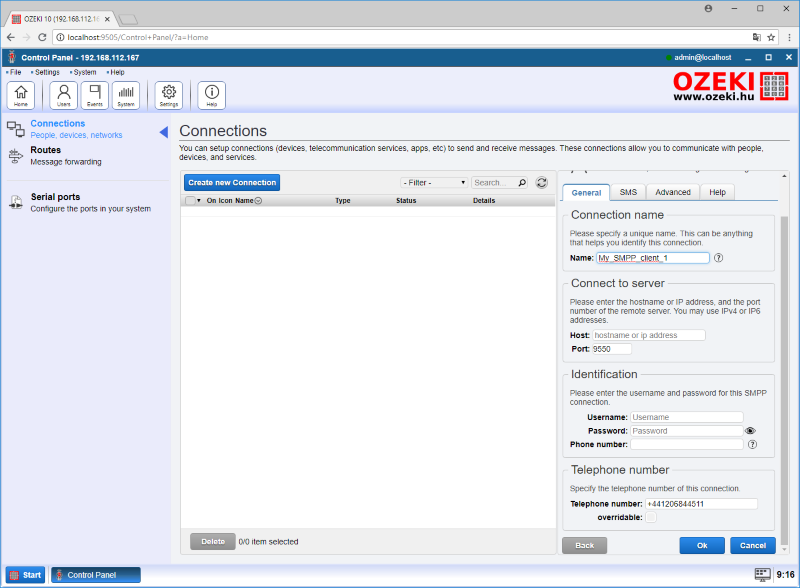
Figure 6 - SMPP client can be easily configured
When all accounts and connections are ready, you need to steer the messages from the SMPP connection to SNAP. In the Control Panel just select the Routes menu and click on Create new Route. Please choose the two ends of the route, so you need to send the message from the SMPP connection that you created to the SNAP application as you can see on Figure 7. Create route by selecting these two connections from the list and assigning them to the correct end of the route.
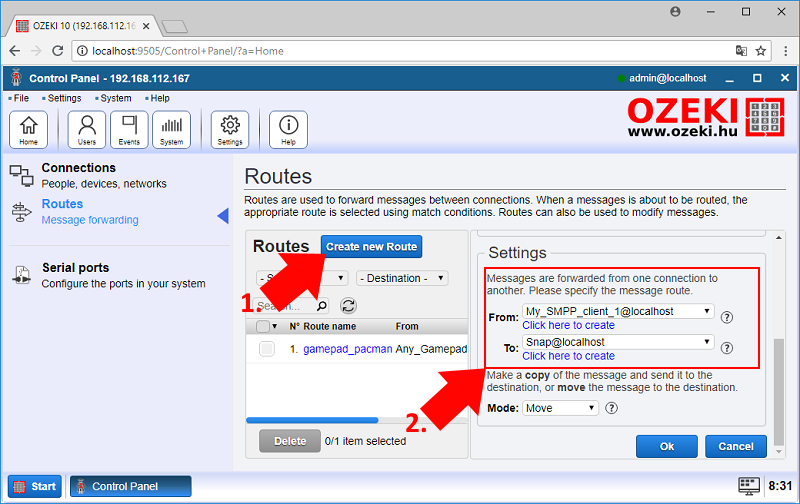
Figure 7 - Route the SMPP client to SNAP in your Ozeki 10
Write code that can subscribe to the SMPP connection!
After you opened SNAP the first block that you need to add to your program is the 'When green flag clicked' as usual. So the program will start if you click on the green flag on the top right corner. Next you must subscribe to the SMPP connection that you created before. You can easily do it by dragging a 'Subscribe' block from the Ozeki menu and select the SMPP connection (Figure 8).
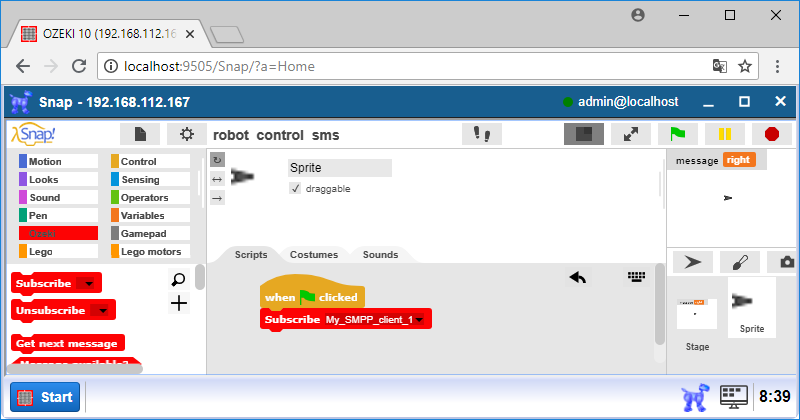
Figure 8 - Subscribing to the 'SMPP client' connection through Snap
Upgrade code to receive SMS sommands!
Please place a 'Get next message' block which is going to wait for a received SMS command. If that block receives a command, the control of the program will move forward to the 'Set to message value (string)' block which stores the incoming SMS in a variable. You can create new variables in the Variables category by clicking on the 'Make a variable' button and call it as 'message'. Then you just have to select it in the 'Set to message value (string)' block (Figure 9).
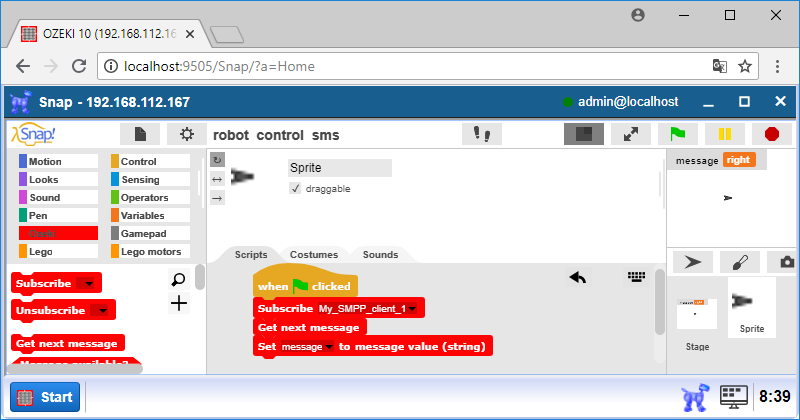
Figure 9 - Store SMS command in a variable called 'message'
Finish code compare the incoming SMS
and drive the robot to that way!
Now you can send commands by SMS, so the next step you need to perform is to match these commands with directions or any other words that you want to control your robot with. Like on Figure 10, please add an 'if' block to it and fill the head of it with a '[variable] matches [word]' block where you can compare the variable to a character string. Guess of a command and set [word] to the command word you would like to use. If the SMS is matched with one of the defined commands, the robot will do the following action. The final block is the 'Unsubcribe [connection]' block where you must select the SMPP connection, so you can unsubscribe from the SMS messages. Now you have created your own SNAP program to control your Lego robot with SMS.
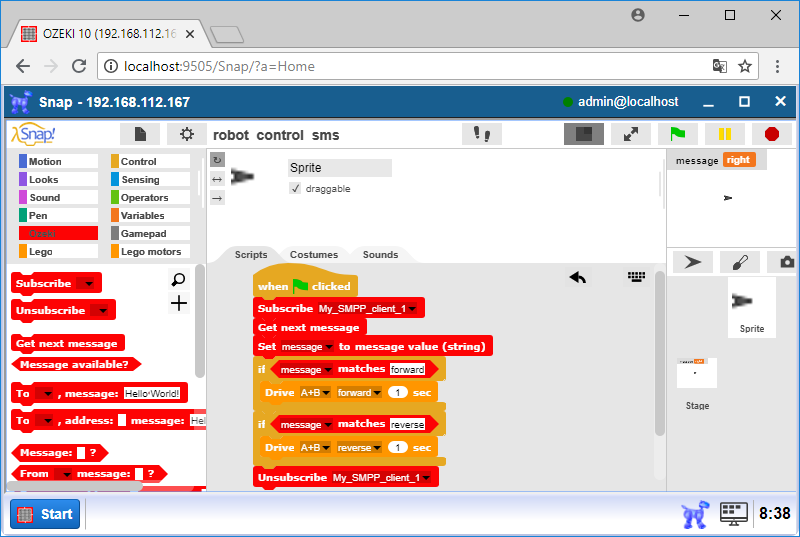
Figure 10 - SMS commands are compared with the following words: 'forward' and 'reverse'
Program code
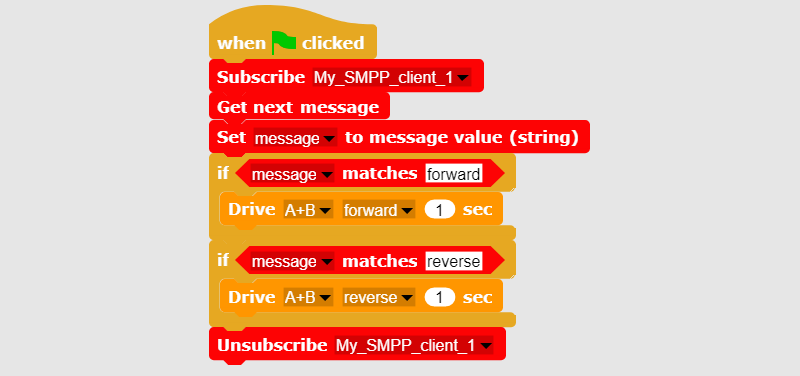
Figure 11 - This program code can drive your Sniffer forward or backwards
|
|
Download program code to receive SMS commands The code can receive SMS messages and control the robot with them. It is easier to understand this guide if you see the codes in front of you: Download Ozeki Snap code to control the robot through SMS |