PostgreSQL Installation
Send SMS from PostgreSQL (part 1/4)PostgreSQL Installation
PostgreSQL is a highly stable database management system, which is known for its high level of resilience, integrity, and correctness. It is used as a primary data store or data warehouse for many web, mobile and analytic applications. The Ozeki SMS Gateway works well with it, if you set it up correctly. This video series will guide you through the setup process. The first video on this page is responsible for the installation of the PostgreSQL on your computer.
Video content1. Download PostgreSQL
2. Install PostgreSQL
3. Install PostgreSQL's ODBC Driver
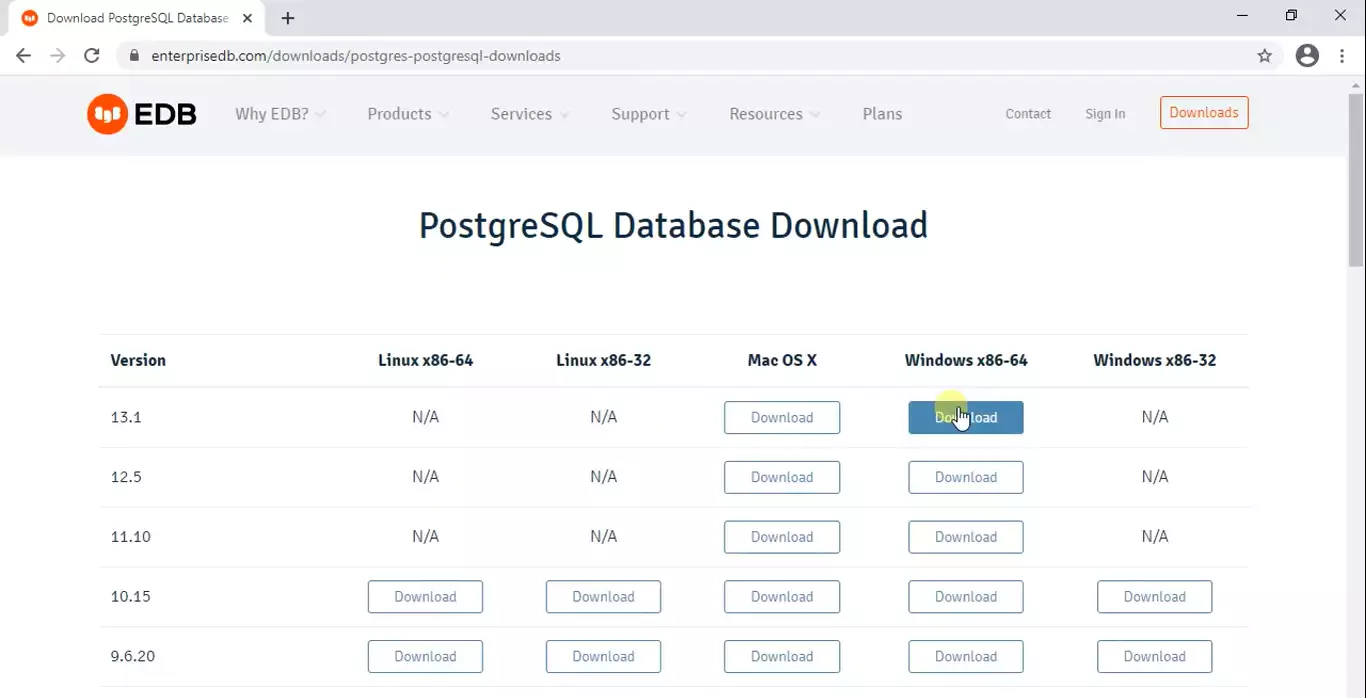
First, you need to visit the PostgreSQL Download page. Here, make sure to choose the latest version of the program, which will be located on the top of the list. Click the Download button located under the Windows x86-64 title. It will be suitable for your Windows 10. You can see all your options, and the button you need to click on Figure 1.
Now your browser will start the download process. This should not take long, but it depends on your internet speed. If it is finished, click the downloaded file and it will open the installer. You can see the process on Figure 2.

Now you get to choose the installation directory for your program. You can see that on default settings, the program will be installed on the C drive. To change that, you can click on the folder icon on the right. Now you can choose an installation folder, or create a new one. Make sure that you have enough free disk space where the installation location is. If you have the location, please click the Next button.

Now you get to select the different components you wish to install. To have a versatile software, we advise you to select all the possible options. If you have all the boxes ticked, click the Next button to proceed to the next step. You can see all your option on Figure 4.

As you can see on Figure 5, now you get to choose the folder you wish to store your data. If you use the software heavily, the space requirements will grow massively, so make sure to reserve enough space for it. You could change the default storage space with the folder icon on the right.

Now you have to create a strong password for your PostgreSQL software. Make sure that your password is hard to guess, and that only you know it. This way you can have a secure software which only you could have access to. As you can see on Figure 6, you have to enter the password twice, to avoid typing errors.

In this step, you get to choose the port number of he connection for your server. A port number is a way to identify a specific process to which an Internet or other network message is to be forwarded when it arrives at a server. In this case, the port number should be 5432. Click the Next button if you have the port number typed in. You can see on Figure 7, what you need to type in.

In this step, you get to create a database cluster. A Database Cluster combines multiple servers to a single database. This way, if one server is not capable of managing the dataflow, the other server could help. In case of an error, you could use the cluster server in the downtime of the original serve, so you will have a more stable system. As you can see on Figure 8, all you have to do is provide a location where the database cluster should be.

Here, you get to see a summery of all the configuration of your server. If you are satisfied with all the properties, click the Next button and it will start the installation process.

The installation procedure should not take long. On Figure 10, you can see the progress bar, which lets you know that the setup is working. If it is finished, it should automatically jump to the next step.

If you see this window, it means that your installation is finished without any error. Make sure to tick in the option below the Launch Stack Builder at exit? title, that you can see on Figure 11. It will launch Stack Builder which will install software necessary for your server.

Now you are in Stack Builder. Here you need to choose which software you are installing. As you can see on Figure 12, on the dropdown menu, you will find your options. Please choose the PostgreSQL 10 on port 5432. Click Next if you are ready to proceed to the next step.

here you can choose which applications you wish to install. Make sure to choose at least the psqlODBC(64bit), you can see on Figure 13. It is a powerful drive that lets you connect live to anything that supports ODBC connectivity. It means that you can have access to your database virtually from anywhere through a standard ODBC Driver interface.

Here, you need to select a destination folder where the installer should download the psqlODBC diver. Make sure that you have enough free space at the location you are choosing, Click the Next button to proceed. You can see the button on Figure 14.

Now you are at the psqlODBC Setup Wizard. This will guide you through the steps you need to take to have a connection with any ODBC driver interface. Click the Next button the proceed to the next step. You can see the button of Figure 15.

Now you need to choose a directory for the installation of the driver. Make sure that you have enough space in that directory. If you have the right installation destination, click the Next button to proceed to the next step. You can see the default installation directory on Figure 16.

Now you are ready to start the installation. On this step, just click the Next button and the installation will start. You can see this step on Figure 17.

Here you only need to wait for the installation to finish. You can supervise the process with the green progression bar. If it is finished, you just need to click the Next button to proceed to the next step.

This is the final step of the installation is only clicking the Finish button. After it, you have a working copy of PostgreSQL and the psqlODBC driver. You can see the final step on Figure 19.

We hope that this guide was helpfull. If you have any problem with any of the steps, feel free to contact us at info@ozeki.hu
Conclusion
This guide has walked you through the complete installation process of PostgreSQL and its essential ODBC driver, ensuring a stable and functional setup for integrating with the Ozeki SMS Gateway. By following each step—from downloading the latest version of PostgreSQL to configuring the database cluster and installing the psqlODBC driver—you now have a robust database system ready for use. The detailed screenshots and clear instructions ensure that even beginners can successfully complete the installation without issues. With PostgreSQL properly installed, you are now prepared to proceed with the next steps in the series, where you will learn how to send SMS messages directly from your PostgreSQL database. Should you encounter any difficulties, remember that support is available at info@ozeki.hu. Stay tuned for the next part of this series to further enhance your database capabilities.