How to test your STUN server for Ozeki Audio/Video calls
In this article, you will be taught to test the trickle ICE functionality of your STUN server. To read and follow along, we only ask for 3 minutes of your time. The article consists of a short video showing the steps in motion, a brief rundown of the steps required, an in-depth written tutorial with edited screenshots, and a short and sweet FAQ section at the end. Let's get started!
What is ICE trickling?
ICE trickling streamlines the process of establishing real-time connections behind firewalls and NAT. Traditionally, ICE (Interactive Connectivity Establishment) gathers all possible connection candidates (paths) before sharing them with the other device. Trickling allows devices to exchange these candidates as soon as they become available, instead of waiting for the entire list. This significantly speeds up the connection setup for smoother audio and video calls, online gaming, and other real-time applications.
Testing your STUN server (video guide)
The video below teaches you to test your own STUN server of being capable of handling Ozeki audio and video calls. Despite its short length, clocking in at a mere 43 seconds, it manages to capture all the necessary steps for you to be successful. Watch now to learn more!
Testing your STUN server (cheat sheet)
- Open testing website
- Enter credentials
- Remove other servers
- Test your server
Testing your STUN server (step-by-step version)
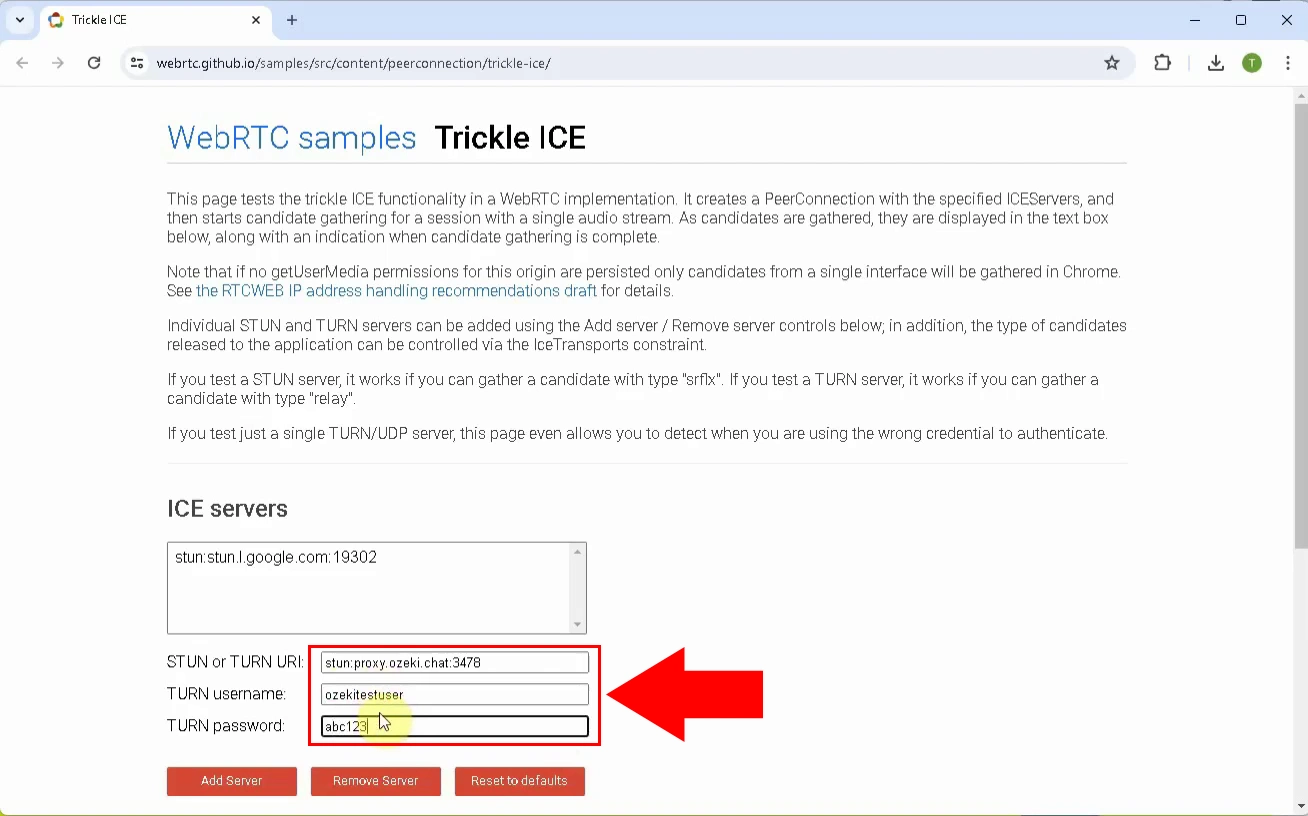
First, click here to open the website we are going to be using for testing in this tutorial. Once opened, enter your STUN URL, username and password to the corresponding fields, as shown in Figure 1.
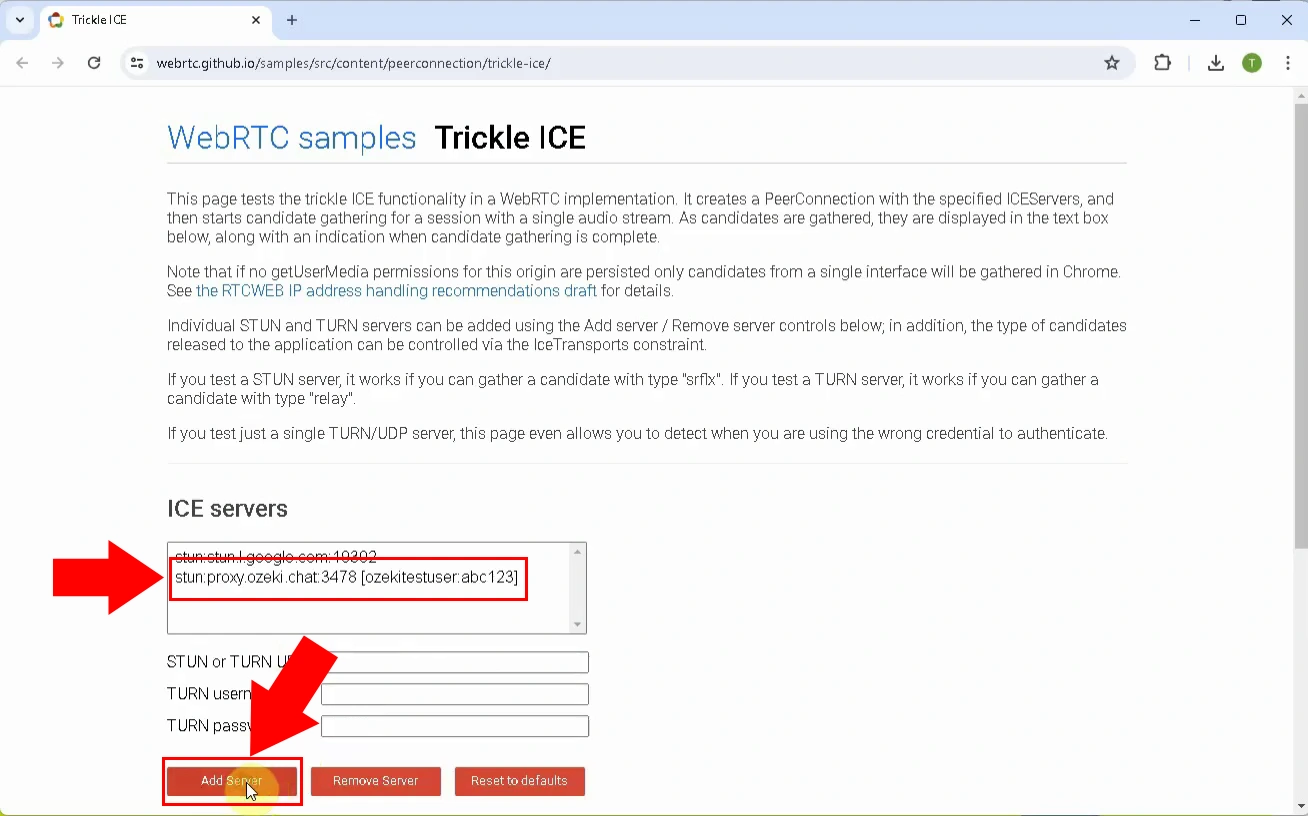
After entering your credentials, click Add Server. Your server should appear in the list above, similarly to Figure 2.
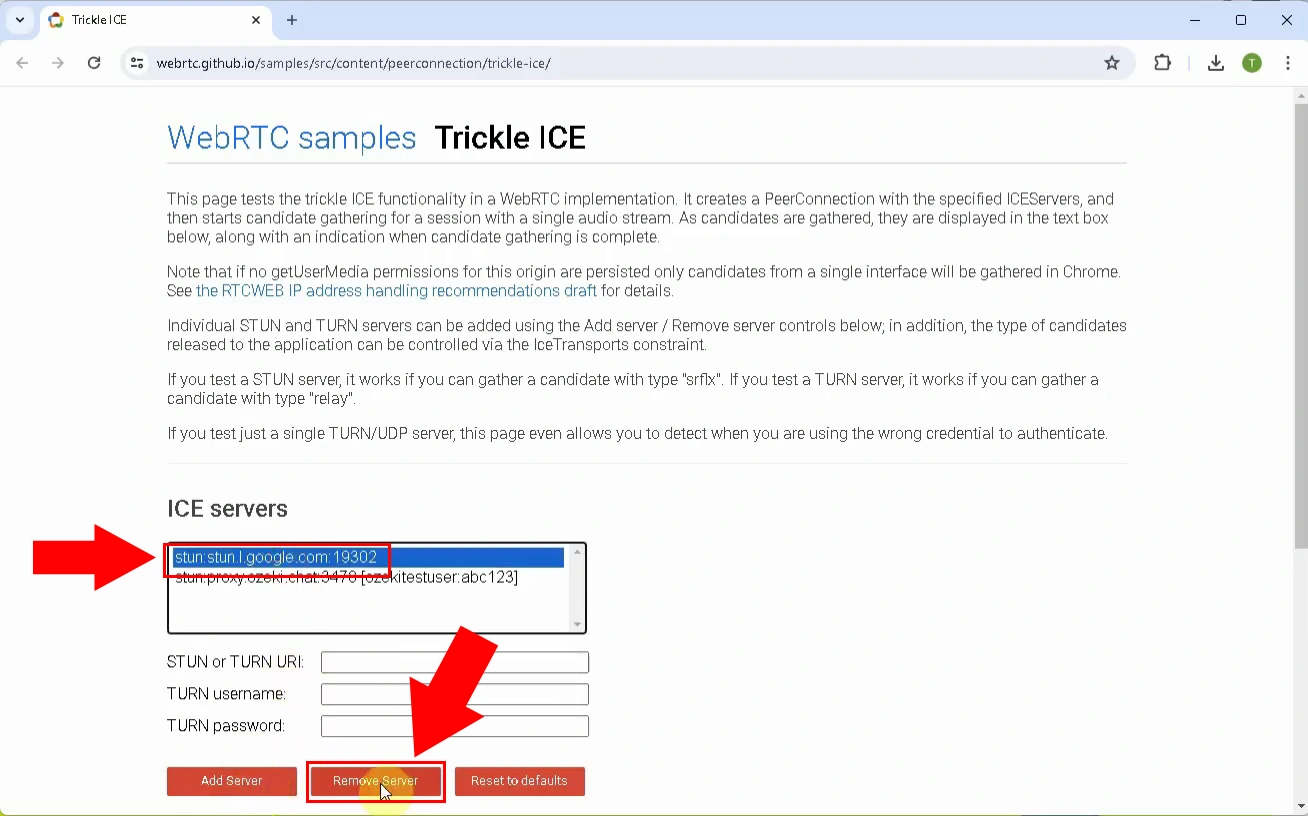
Click Google's STUN server that was in the list by default, then press the Delete Server button, as illustrated on Figure 3.
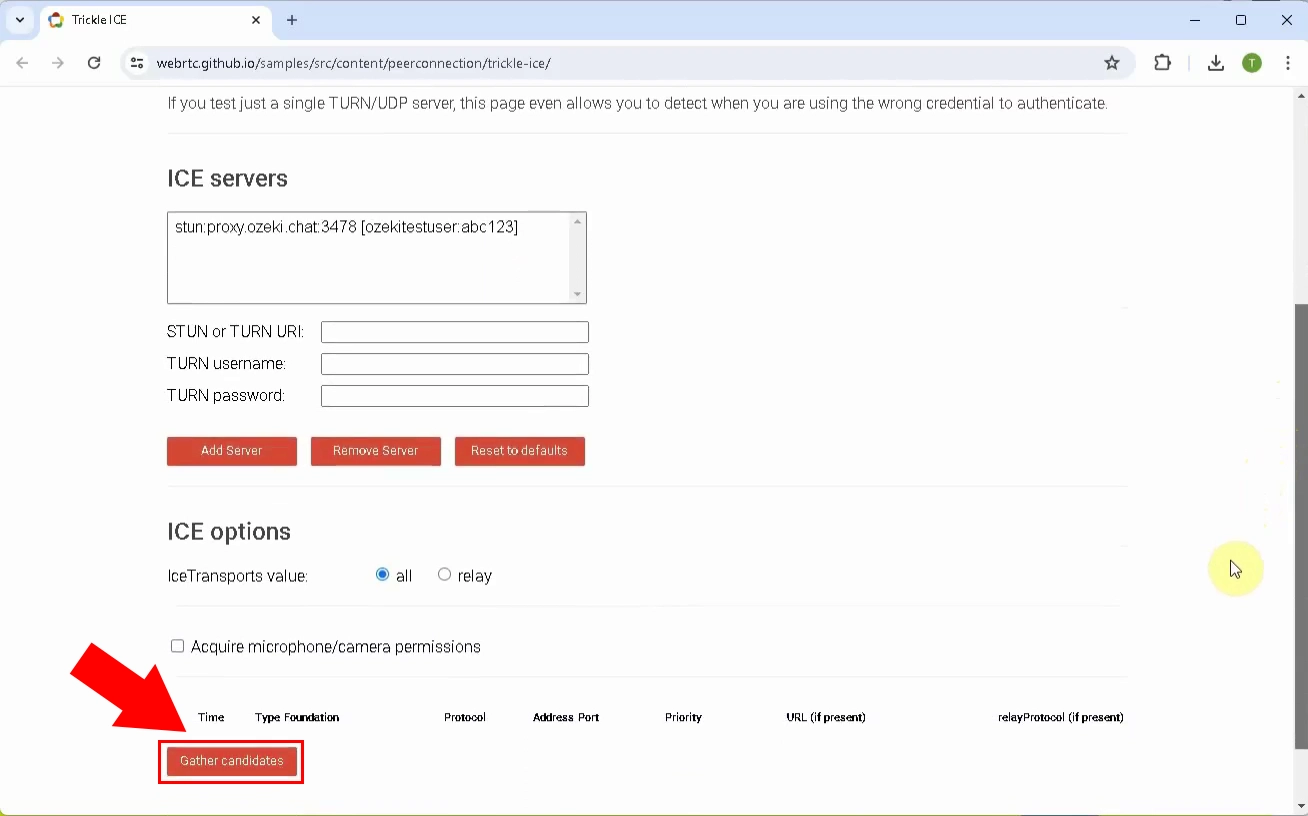
Scroll down, and click the Gather candidates button (Figure 4).
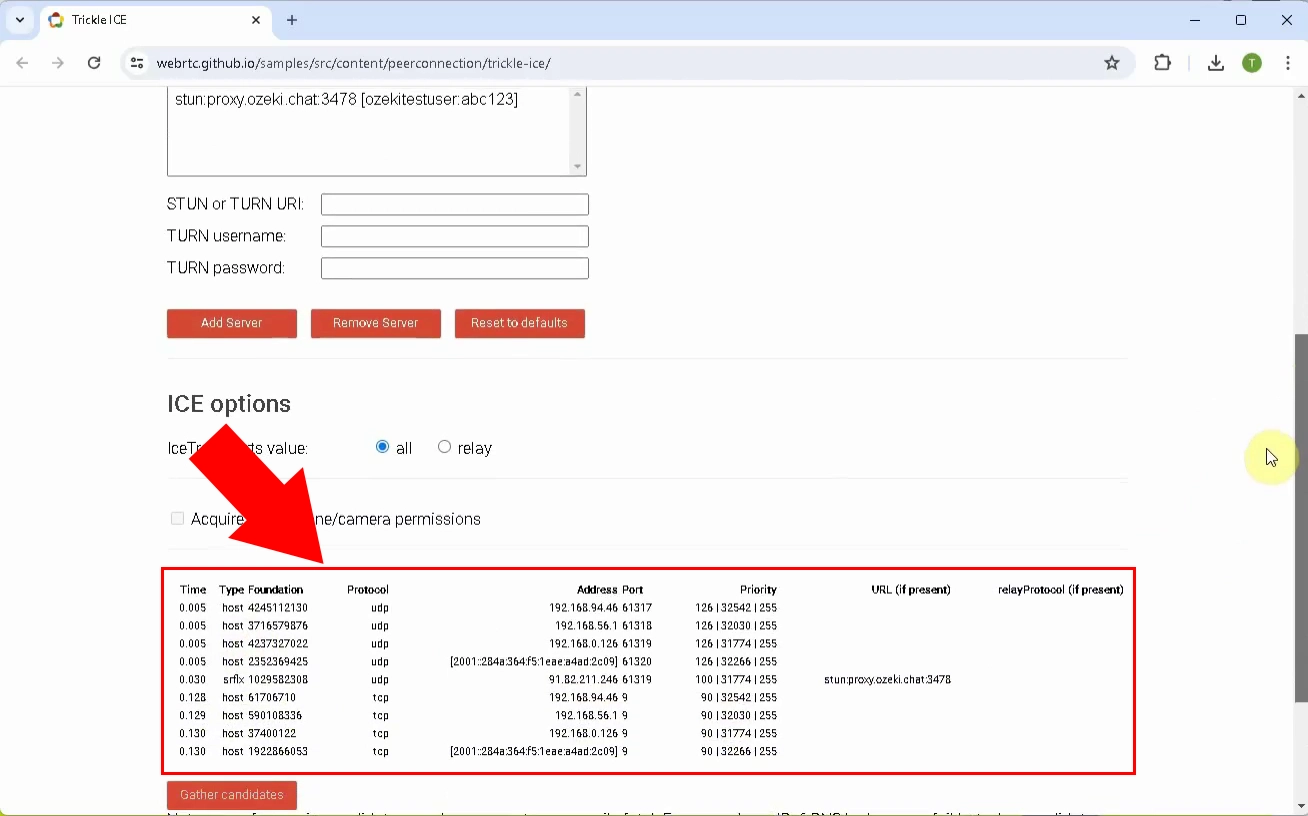
If you have done everything correctly so far, you should get a STUN server response similar to Figure 5.
Can I test a TURN server in a similar fashion?
Yes, the website provided in this article is suitable for testing TURN servers as well. Click here if you would like to learn more.
How can I set up my own STUN server?
Click here for a tutorial on setting up your STUN server.
More information
- How to setup a TURN server on Ubuntu Linux
- How to test your TURN server
- How to setup a STUN server on Ubuntu Linux
- How to test your STUN server

