
How to setup a STUN server on Ubuntu Linux
This tutorial gets you up and running with your own STUN server on Ubuntu Linux in just 10 minutes. Perfect for WebRTC projects or anyone seeking more control over their network, this guide offers a clear, step-by-step approach. You will find a detailed written guide with edited screenshots, a cheat sheet for quick reference, and even a video walkthrough for visual learners. Get started today and unlock the power of direct communication within your network!
What is a STUN server?
STUN servers (Session Traversal Utilities for NAT) help devices behind NAT (Network Address Translation) discover their public IP address. This is crucial for direct peer-to-peer communication, especially in WebRTC applications.
Setting up STUN server on Ubuntu Linux (instructions with video)
The following video guides you through setting up your very own STUN server on Ubuntu Linux. Follow along as we navigate the terminal to install the necessary software, configure settings like listening ports and verbose logging, and finally, launch your server. Sounds like a lot? Do not worry, it will not even take 5 minutes.
Setting up STUN server on Ubuntu Linux (brief overview)
- Open Terminal
- Update packages
- Install coturn
- Open config file
- Set listening port
- Enable verbose logging
- Enable long term credential mechanism
- Set realm
- Set log file path
- Add username and password
- Open coturn file
- Start turn server
- Restart coturn service
Setting up STUN server on Ubuntu Linux (in-depth tutorial)
First, open Terminal and enter the following to update your packages:
sudo apt-get -y update
Once the update is complete, use the next command to install coturn, as seen in Figure 1:
sudo apt-get install coturn -y

With the usage of the command below, create a backup of the config file (Figure 2):
sudo cp /etc/turnserver.conf /etc/turnserver.conf.bak

Open the config file by entering this command, as illustrated on Figure 3:
sudo nano /etc/turnserver.conf

Next, enter this command to set your desired listening port, as shown in Figure 4:
listening-port=3478

Enable verbose logging by entering the next command, as you can see in Figure 5:
verbose

To enable long term credential mechanism, use the following command (Figure 6):
lt-cred-mech

Set your desired realm via the command below, similarly to Figure 7:
realm=mycompany.com

Set your log file's path by entering the next command, highlighted in Figure 8:
log-file=/var/tmp/turn.log

Add your username and password with this command (Figure 9):
user=ozekitestuser:abc123

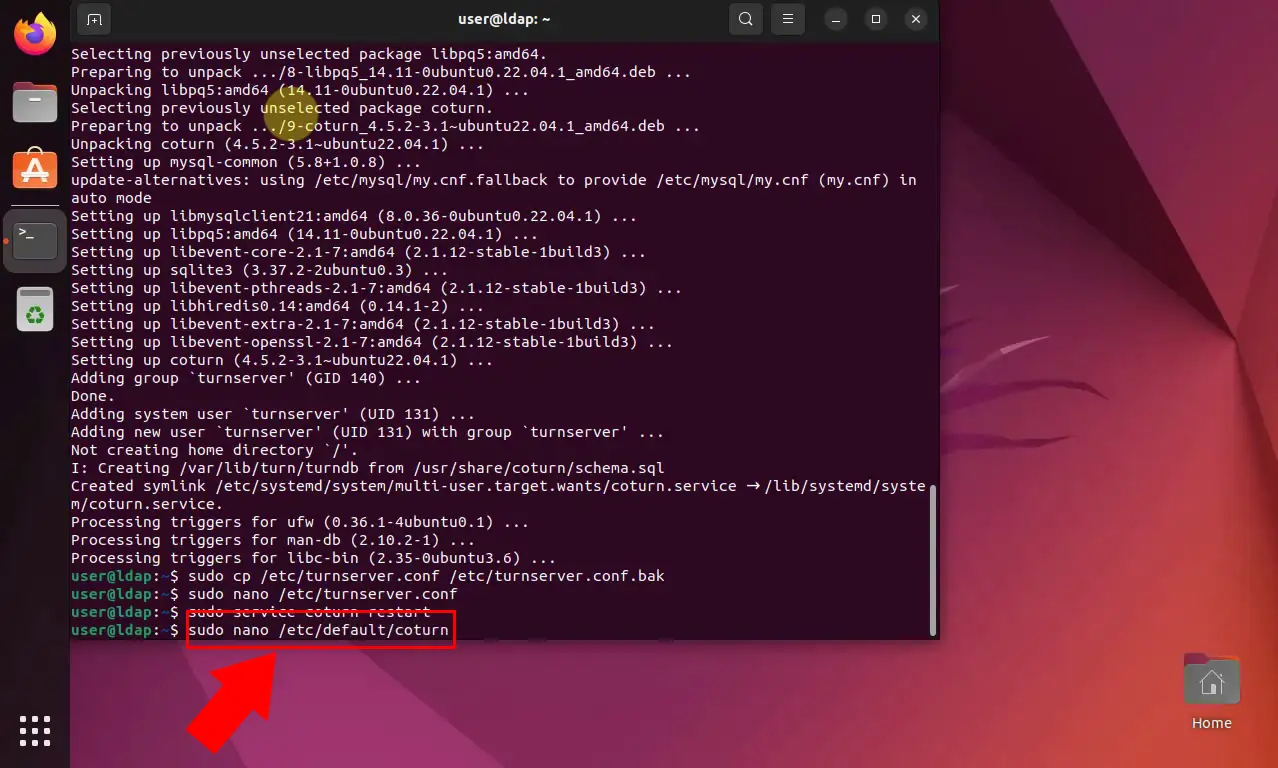
Go back to the Terminal and open your coturn file by entering the command below, as seen in Figure 10:
sudo nano /etc/default/coturn
Once inside, enter the following command to enable your turn server, as demonstrated by Figure 11:
TURNSERVER_ENABLED=1

Finally, head back to the Terminal and restart the coturn service with the next command:
sudo service coturn restart

What is the difference between STUN and TURN servers?
Both STUN and TURN servers help devices behind Network Address Translation (NAT) communicate directly. STUN acts like a mirror, revealing a device's public IP address so it can connect with peers. However, STUN cannot handle firewalls completely blocking direct connections. TURN steps in for these situations, acting as a relay server. Data from each device is sent to the TURN server, which then forwards it to the other device, enabling communication even through firewalls.
Are STUN servers TCP or UDP?
STUN servers favor UDP (User Datagram Protocol) for communication with clients. This is because UDP prioritizes speed over guaranteed delivery, crucial for the quick back-and-forth needed to discover public IP addresses. TCP, with its focus on error checking and retransmission, introduces some overhead that could slow down this process. Additionally, STUN messages are typically small and do not require guaranteed delivery, making UDP's characteristics a better fit.
More information
- How to setup a TURN server on Ubuntu Linux
- How to test your TURN server
- How to setup a STUN server on Ubuntu Linux
- How to test your STUN server