How to test your TURN server for Ozeki Audio/Video calls
Ensuring seamless Ozeki audio and video calls within your network relies heavily on a properly functioning TURN server. But how do you know yours is up to the task? This article equips you with everything you need to test your TURN server thoroughly. Dive into our clear, in-depth tutorial, complete with a helpful video walkthrough and a handy cheat sheet for quick reference. No more guesswork – test your server and experience crystal-clear Ozeki communication within your network. Get started today and achieve call clarity with confidence, in less than 10 minutes.
What is ICE trickling?
ICE trickling streamlines the process of establishing real-time connections behind firewalls and NAT. Traditionally, ICE (Interactive Connectivity Establishment) gathers all possible connection candidates (paths) before sharing them with the other device. Trickling allows devices to exchange these candidates as soon as they become available, instead of waiting for the entire list. This significantly speeds up the connection setup for smoother audio and video calls, online gaming, and other real-time applications.
Testing your TURN server (video version)
This 4-minute video is your one-stop guide to testing your newly minted TURN server and ensuring flawless Ozeki audio and video calls within your network. We will go over a step-by-step process, verifying your server's functionality and guaranteeing smooth communication. Get ready to experience crystal-clear Ozeki calls – watch now and put your TURN server to the test!
Testing your TURN server (brief steps)
- Open testing website
- Enter credentials
- Remove other servers
- Test your server
Testing your TURN server (in-depth tutorial)
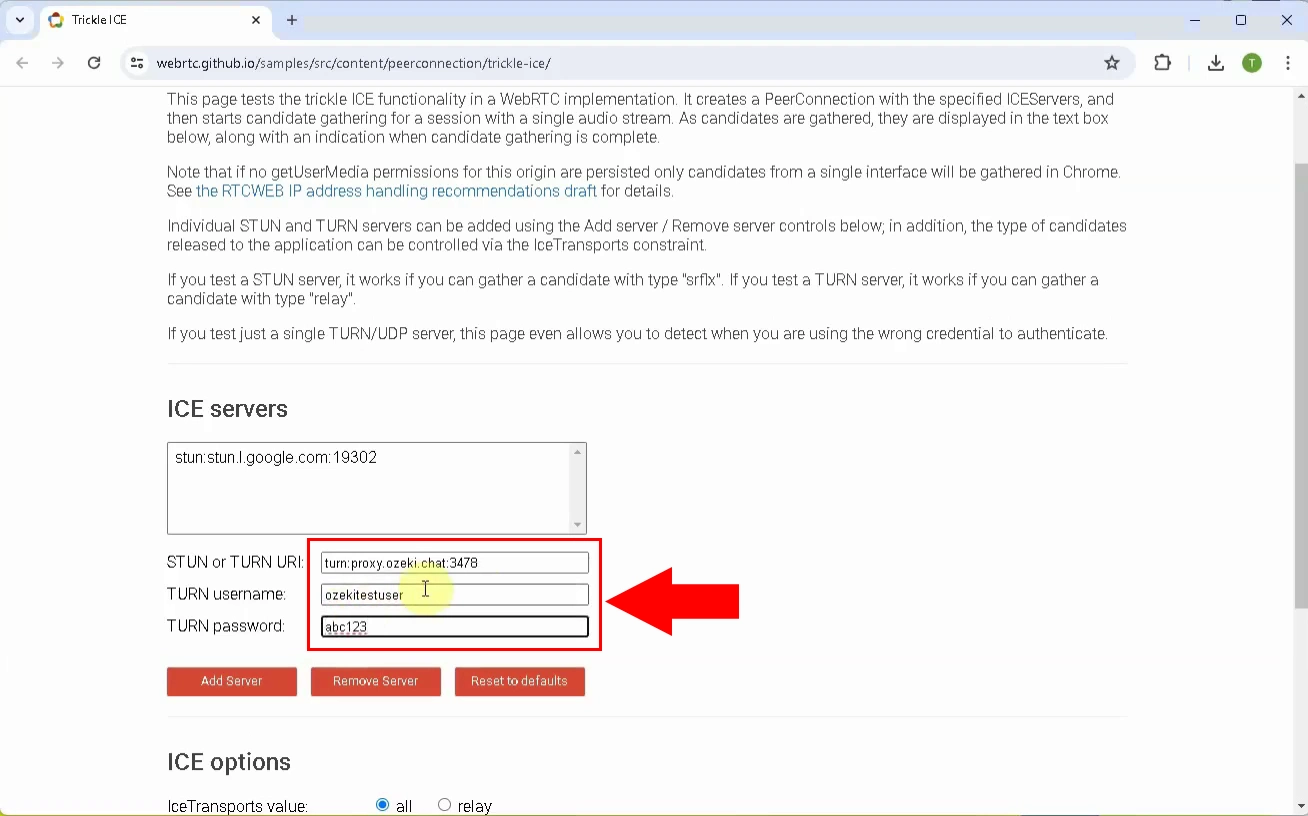
First, click here to open the website we are going to be using for testing in this tutorial. Once opened, enter your TURN URL, username and password to the corresponding fields, as shown in Figure 1.
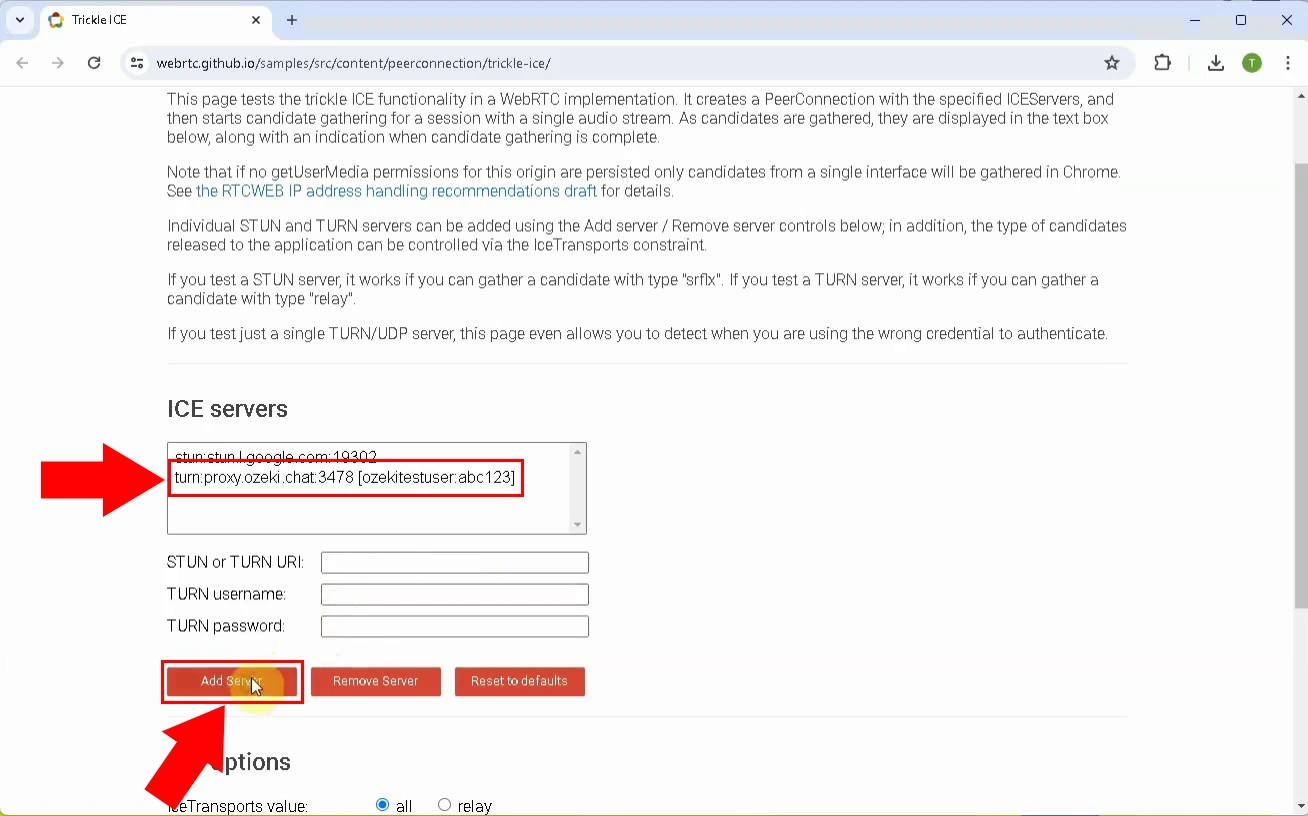
After entering your credentials, click Add Server. Your server should appear in the list above, similarly to Figure 2.
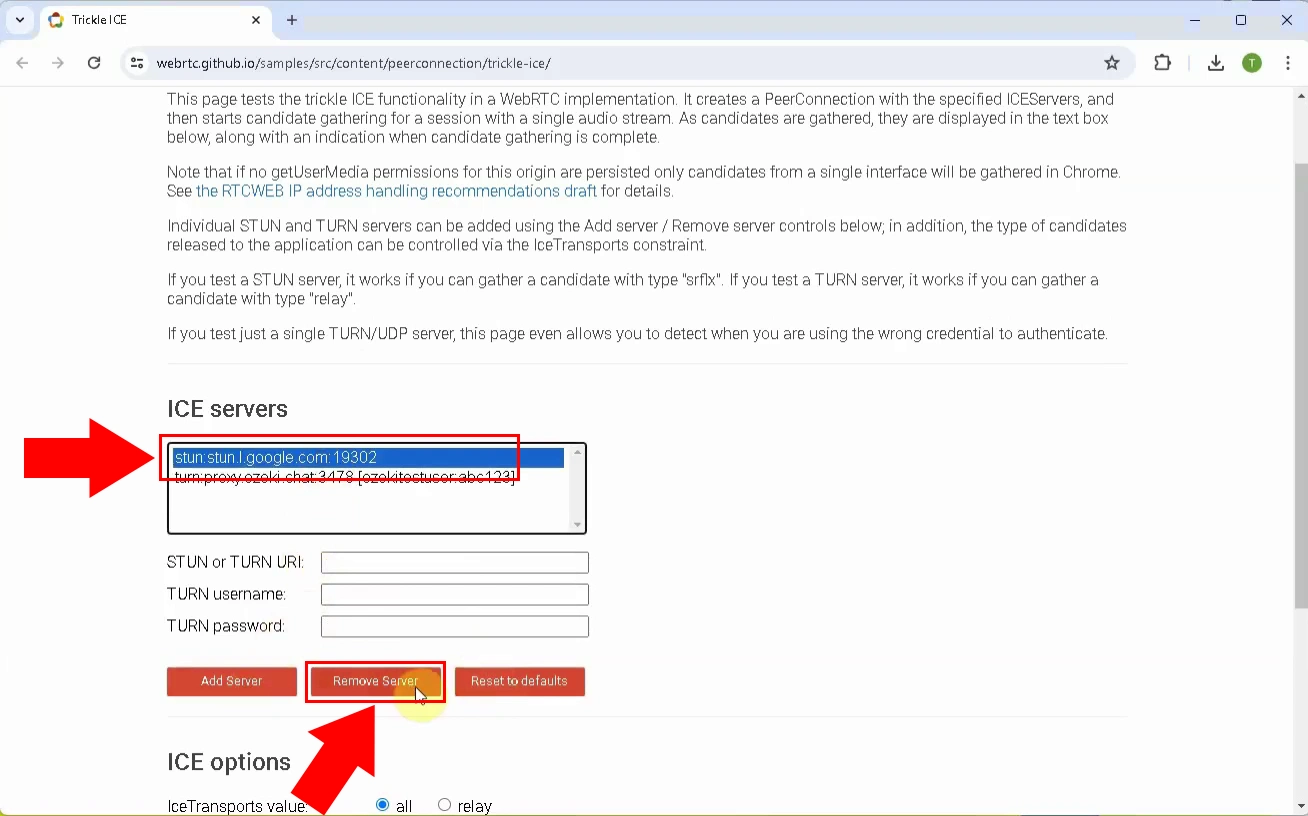
Click Google's server that was in the list by default, then press the Delete Server button, as illustrated on Figure 3.
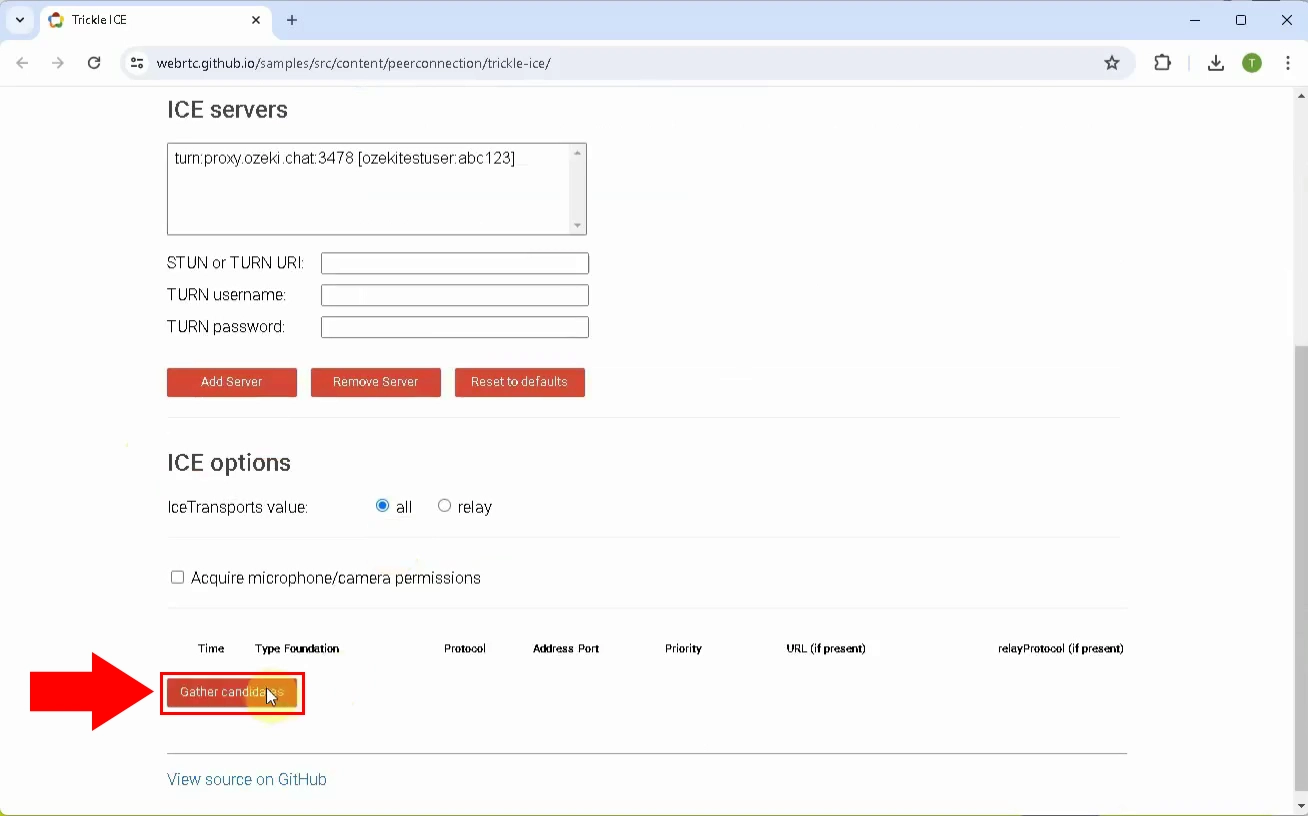
Scroll down, and click the Gather candidates button (Figure 4).
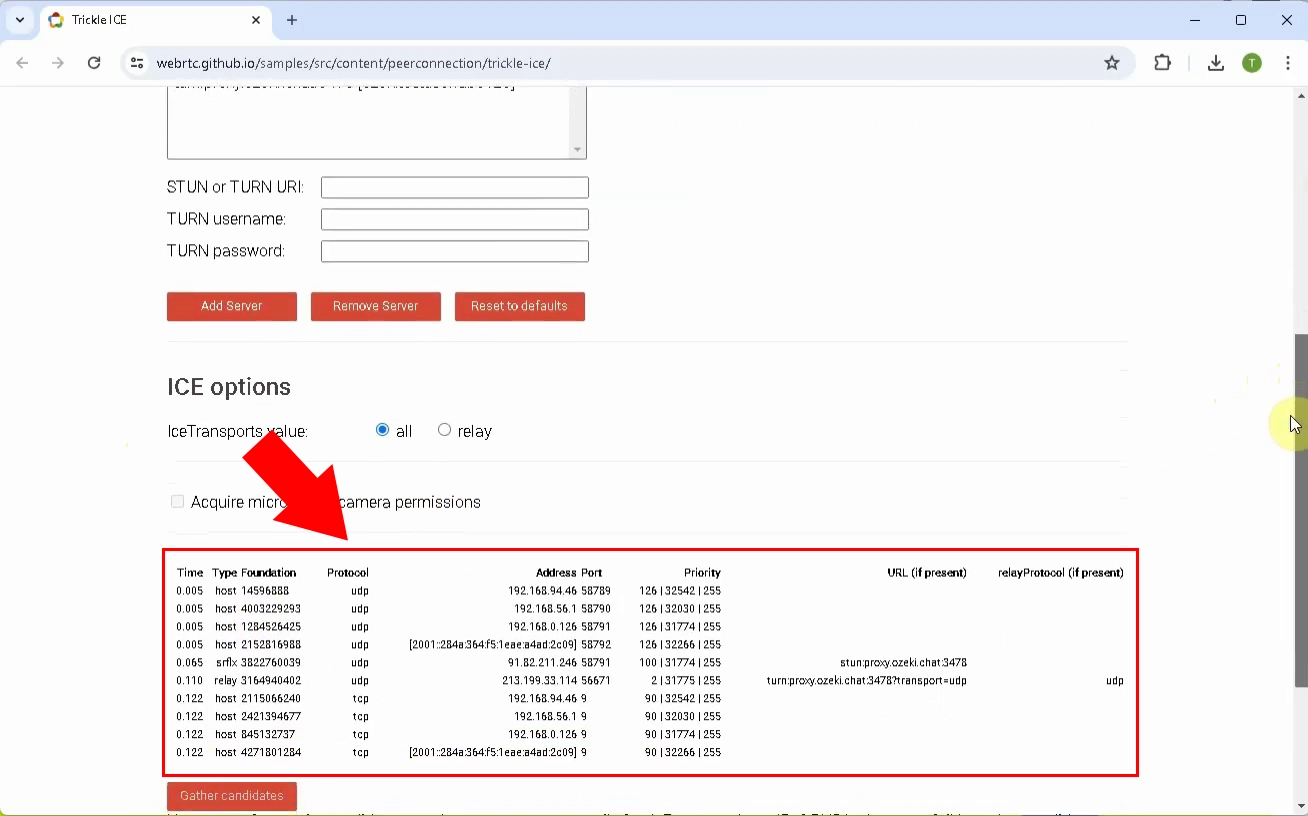
If you have done everything correctly so far, you should get a STUN server response similar to Figure 5.
Can I also test my STUN server using this method?
Yes, the website provided in this article is capable of testing STUN servers as well. Click here if you would like to learn more.
How can I set up my own TURN server?
Click here for a tutorial on setting up your TURN server.
More information
- How to setup a TURN server on Ubuntu Linux
- How to test your TURN server
- How to setup a STUN server on Ubuntu Linux
- How to test your STUN server

