A TCP/IP plugin Configuration
Ozeki SMS Server enables the client softwares, which are installed to the network, to send and receive SMS messages. In order to make it possible for the clients and the SMS Server to communicate, the TCP/IP plugin needs to be istalled and configured.
How to install theTCP/IP plugin
In the following part we will show you the easy process of the installation.
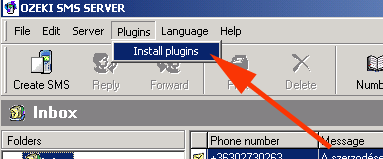
New plugins can be started by choosing Install plugins at the Plugin main menu. On the Server Options window you can choose the suitable plugin at the Plugins tab.
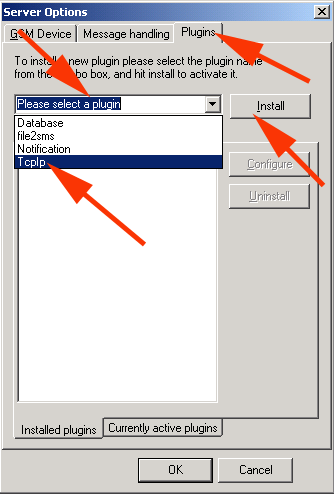
From Please select a plugin choose TcpIp then press Install.
You'll see TcpIp appear on the list of plugins already installed.
How to configure TCP/IP plugin
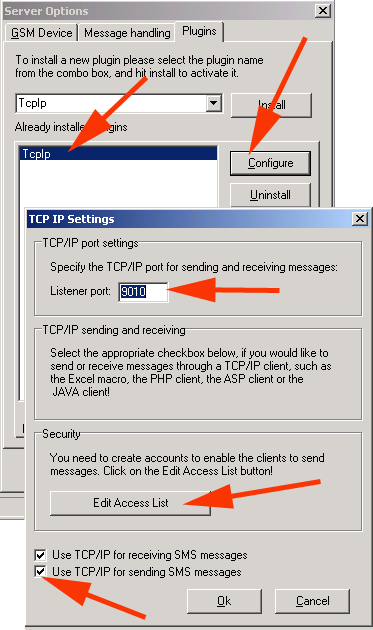
If there is more than one plugin on the list click on TcpIp then press
the Edit button - now you can find TCP IP Settings window
appear. Here you can proceed 3 important settings:
First you can specify the
Listener port.
By taking the next step - putting a checkmark in the checkboxes that can be found at the lower part of the window - you will enable the sending and reciving SMS messages possiblity. Last but not least by pressing Edit Access List button you can open a window that enables you to specify all the authorised users.
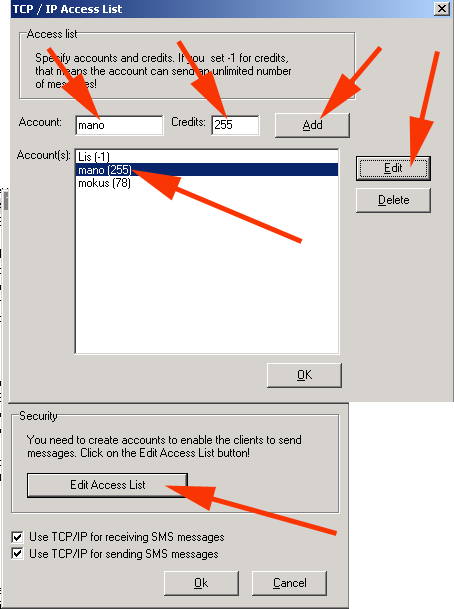
Users can be indicated by adding the name of the new member in the Account: field. The amount of the sent messages can be specify at the Credits: field then by pressing Add button all the given data is getting recorded. If you allow the user to send unlimited messages the you should indicate -1 in the specifying field. Once the credit of the user got over you can either add a new limit or increase the previously provided limit. Obviously the limit can be modified any time.
While modifying click on the name of the user (Account:) then press Edit. In the Account(s) list the name of the new user appears, in the Credits field you can check the amount of the messages to be sent (or rather you can specify an unlimited number of messages by putting -1 in the field) Both fields can be modified then recorded by pressing the Add button. You can delete users by clicking on the name of the account then pressing the Delete button.
Clients communication
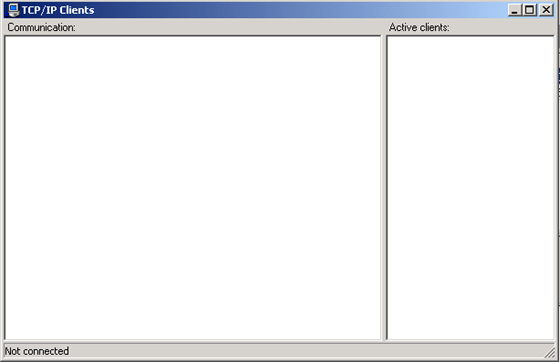
You can track the communication of the clients. Choose Plugins tab for the main menu then click on the TCP/IP Clients submenu.
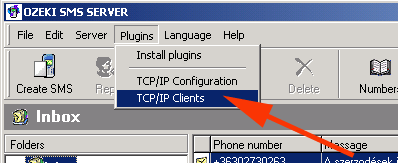
In the appearing window you can check the communication of the clients.
