Setting up an Ozeki Cluster
The Ozeki Cluster is a software developed to provide a more secure and accessible system, when an unexpected shutdown occurs due to a hardware failure. It synchronizes files and directories all the time, so in case of emergency, all your data is protected. This is a great tool you can use to build a reliable fault tolerant system from multiple servers. To operate, Ozeki Cluster has to be installed on both the live and the backup server. Every 10 seconds the two servers ping each other to find out if the other server is on-line. If one of the computers perceives the other one is not accessible, it alerts the system administrators using e-mail, sms or voice calls. If the primary server fails, the software starts the configured service(s) on the backup node. If you want to build a cluster systems you need to install Ozeki Cluster software on two computers (computer "A" and computer "B").
Install on computer "A"
The following steps explain how to install and setup Ozeki Cluster software on the master computer.STEP 1 - Download Ozeki Cluster software
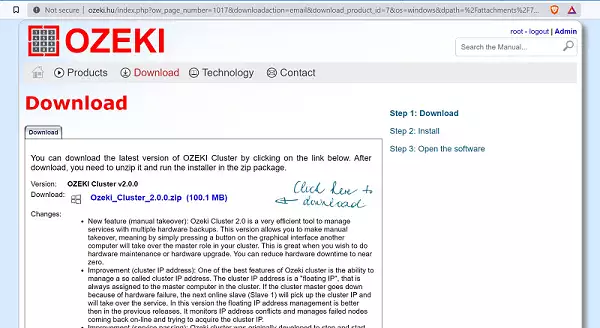
To start the process of installing a working cluster system, you first need to download the Ozeki Cluster software to computer “A”, the first of the computers you want to install in the system.To do this, simply follow the download link below and click on the download link as you can see on Figure 1.
|
| Ozeki Cluster can be obtained by opening the download page: Download Ozeki Cluster! |
STEP 2 - Install
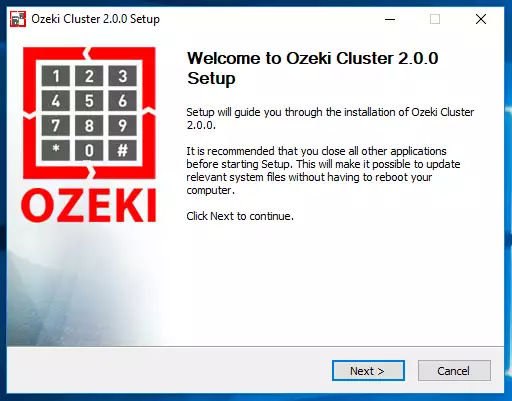
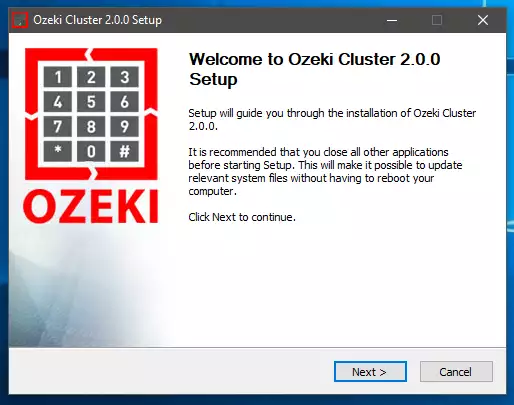
Next, you need to install the Cluster. you can do this by launching the Ozeki Cluster Setup. If you do that, a window will pop-up as on Figure 2. Please click “Next” to proceed.
STEP 3 - Login "A"
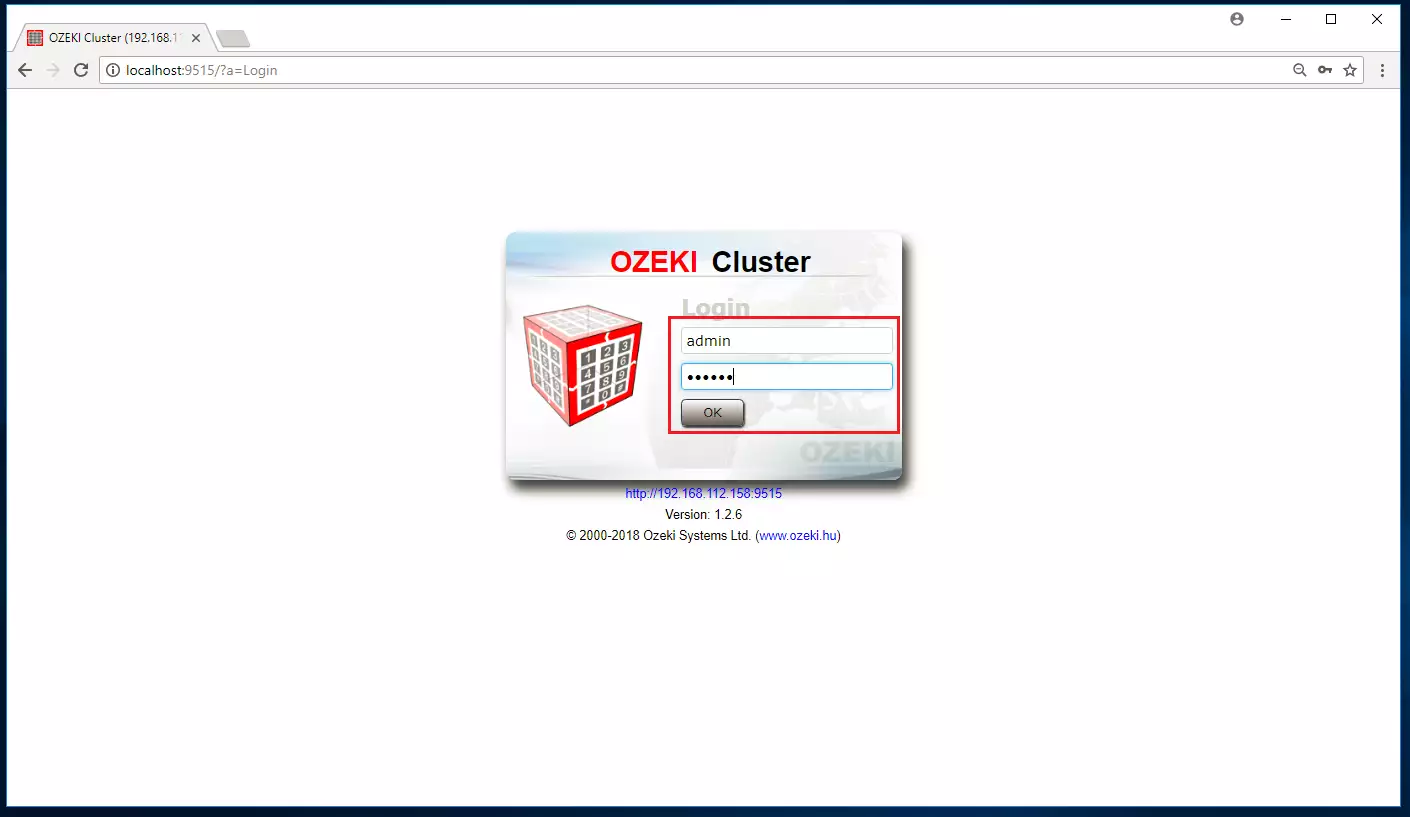
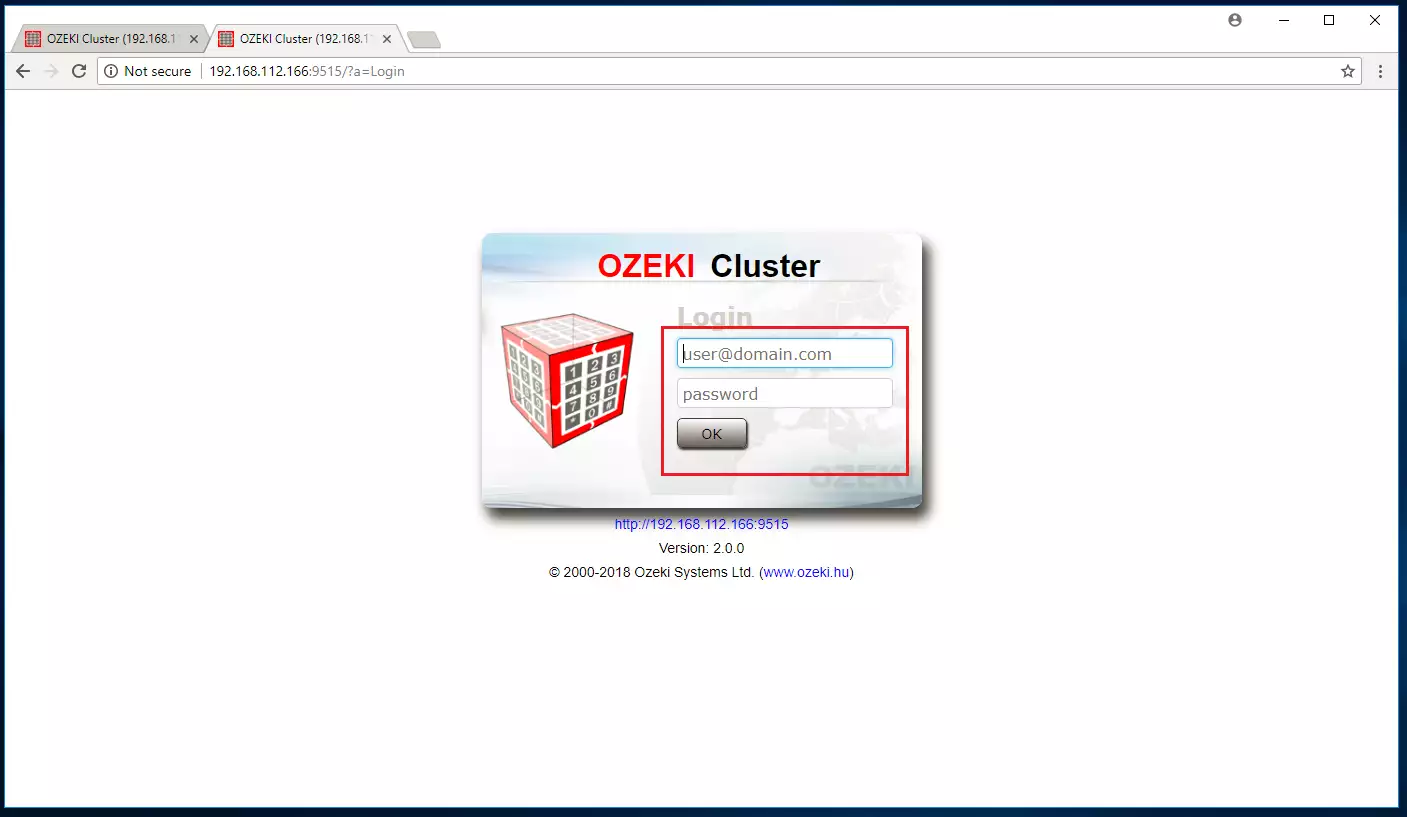
Now you need to log in to the Ozeki Cluster on computer “A”. To do this, launch the Cluster software and type in your username and password as you can see on Figure 3.
STEP 4 - Config IP
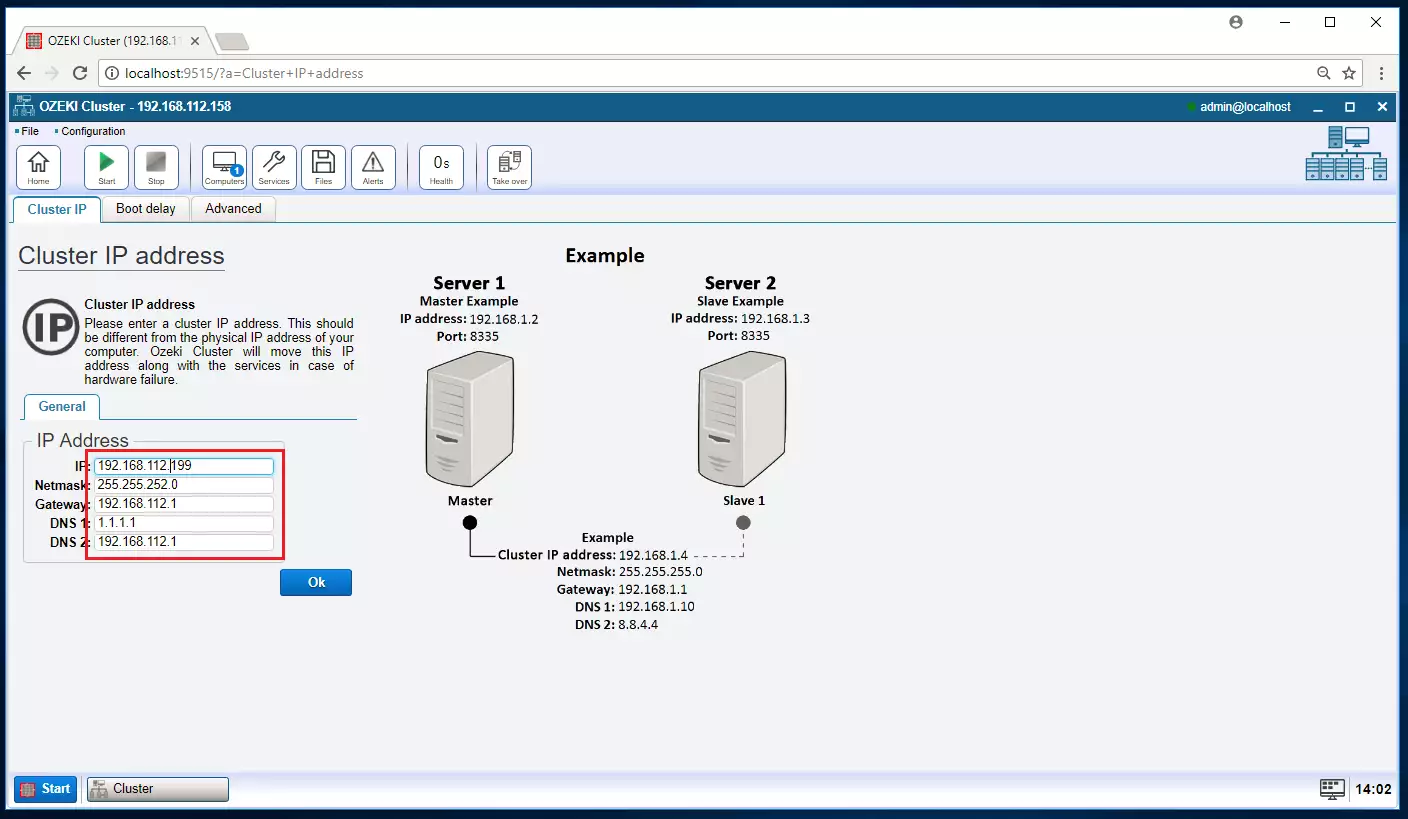
Now you need to configure the system to make it work. To do that, please provide the IP address for the cluster. You can see an example on Figure 4.
STEP 5 - Add Computer
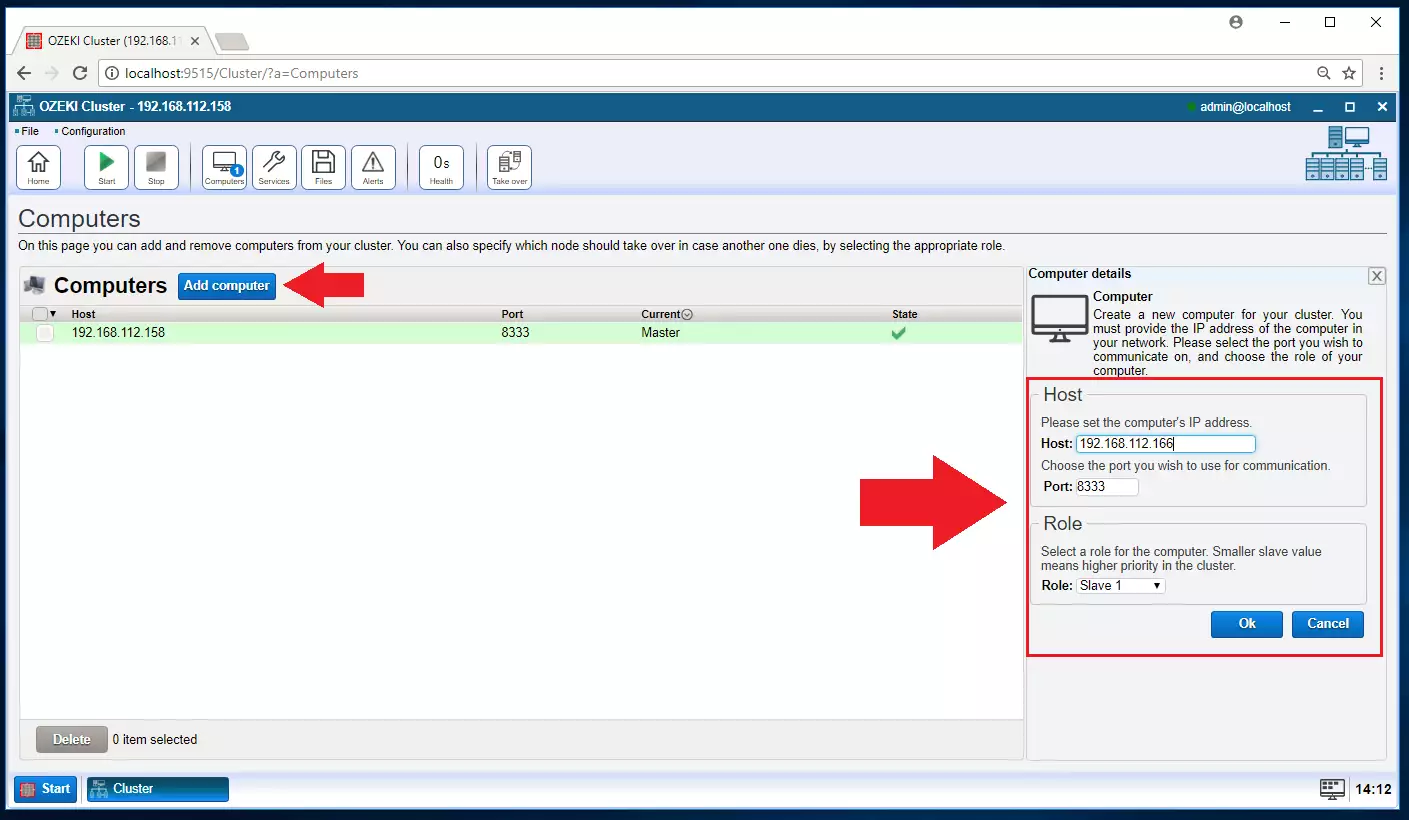
Here on this page, you can add new computers to your cluster and specify the roles of each computer. There can be master and slave computers. The master is the main computer. If it dies, the slave will take over the processes, and substitute the master computer.To add a new computer, click on the "Add computer" button. You can see this control panel on Figure 5.
STEP 6 - Add service
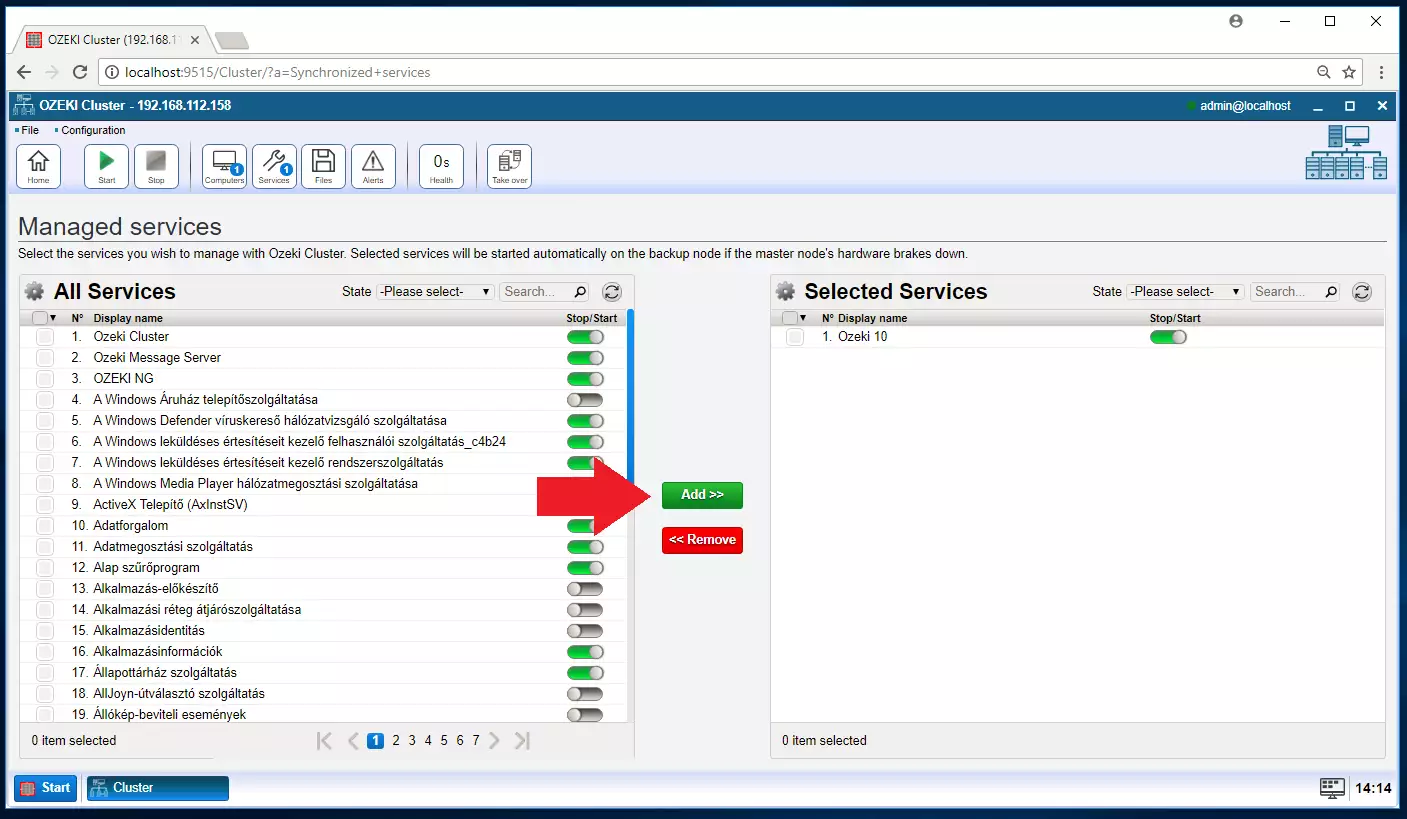
To add the services, the slave computer should take over in case of an emergency, select the service and click on “Add”. You can find the button on Figure 6.
STEP 7 - Configure Directory
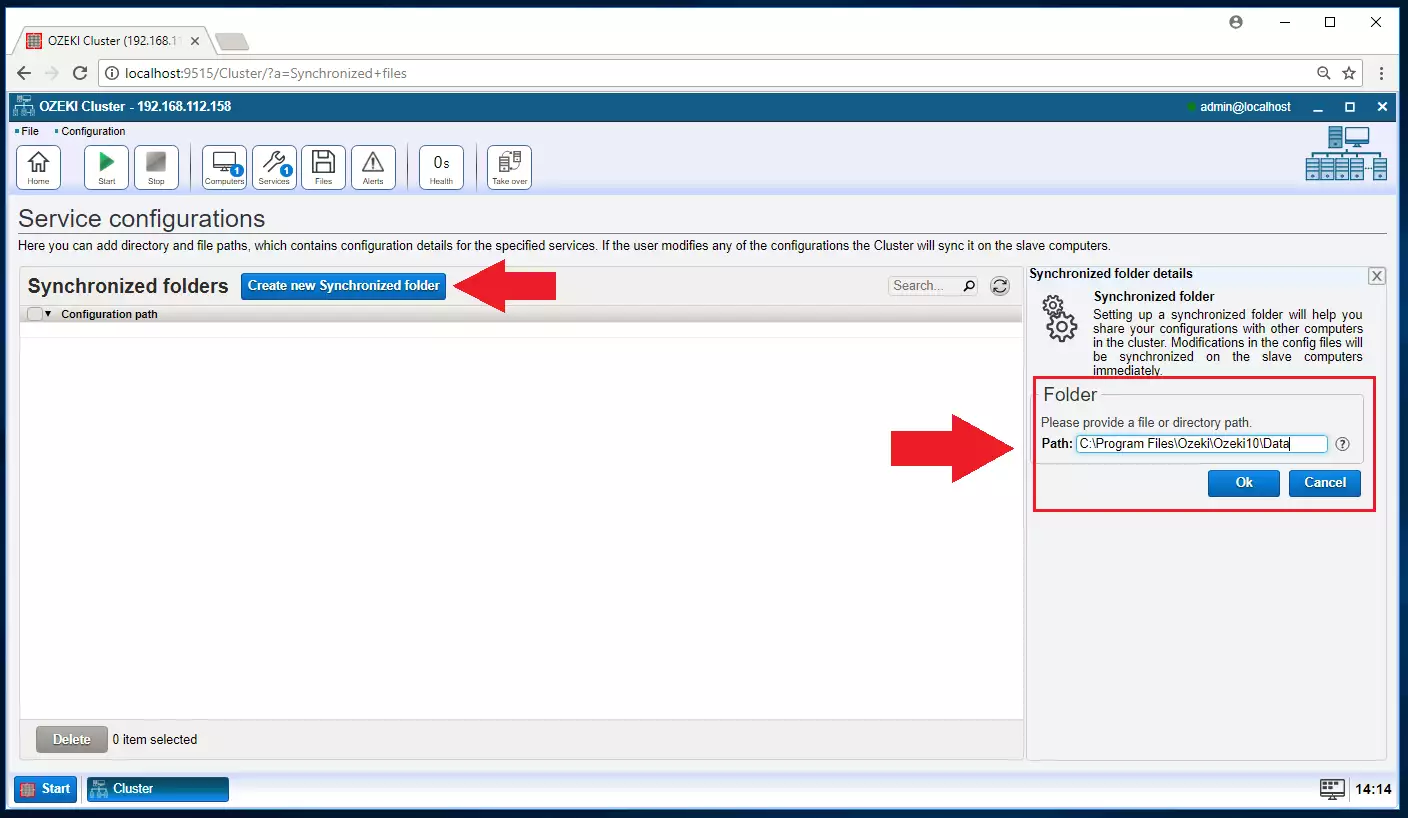
Now you can add a folder which will contain the specified service’s configuration details. If you modify the content of the master computers folder, the cluster will sync it with the slave computer. Figure 8 will help you specify the folder.
STEP 8 - Master ready
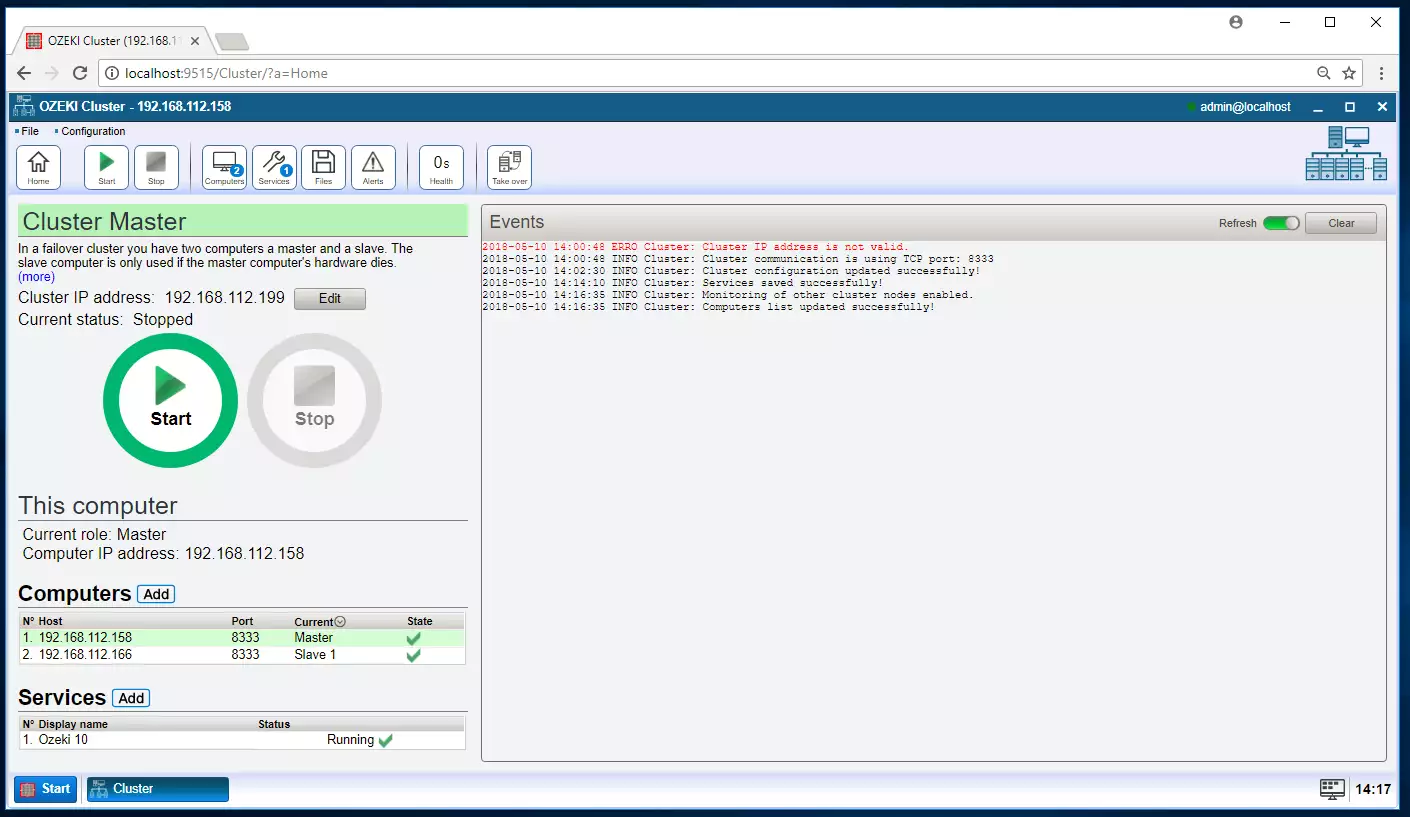
If you see the window as on Figure 9, you are successfully configured the cluster on computer “A”. Now you need to setup computer “B”. Please follow the tutorial to do so.
Install cluster software on computer "B" (Slave)
This step-by-step guide explains how to install slave computer.
STEP 9 - Install on computer "B" (Slave)
As you did on computer “A”, install the Ozeki Cluster Software. Download it from the provided download link above, and go through the installation steps. As you can see on Figure 10.
STEP 10 - Login "B"
Now you need to login to Ozeki on computer “B”. To do this, launch the Ozeki Cluster app and type in your username and password. We used an example username on Figure 11.
Start the cluster
STEP 11 - Click Start
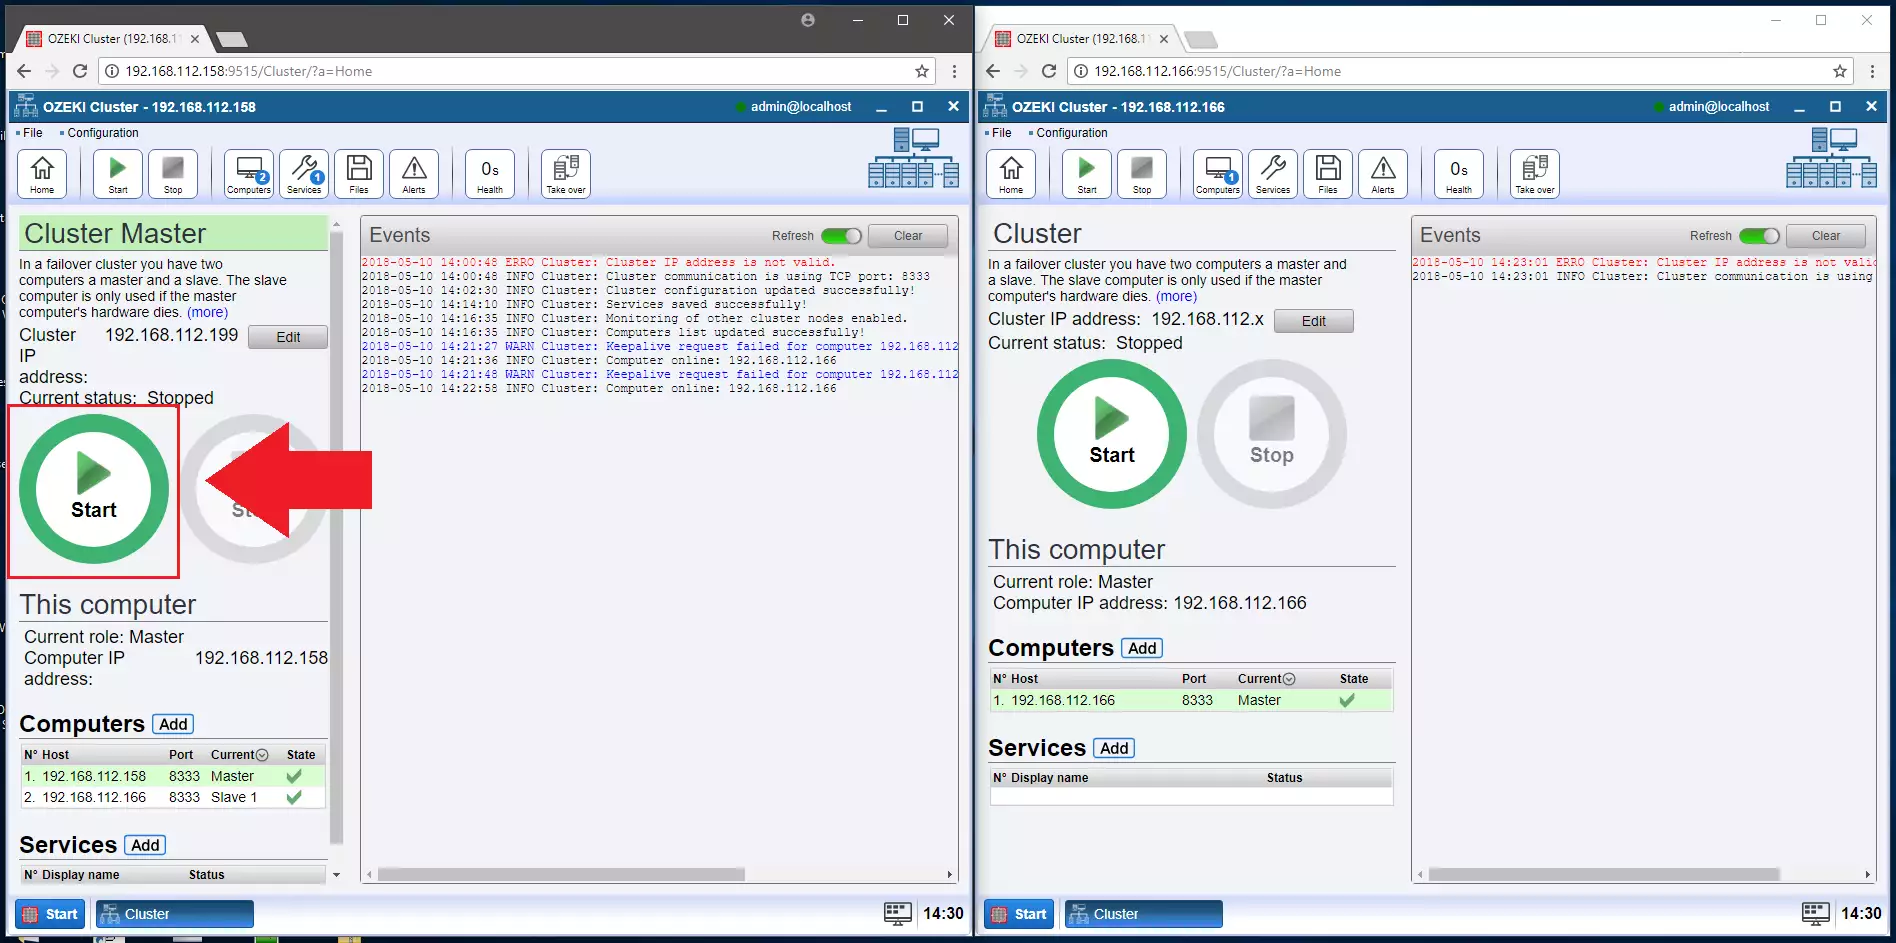
Now you need to start the cluster. To do this, you need to start the cluster on computer “B”. Click on the green “Start” button . You can see it on the left side of figure 12.
STEP 12 - View events
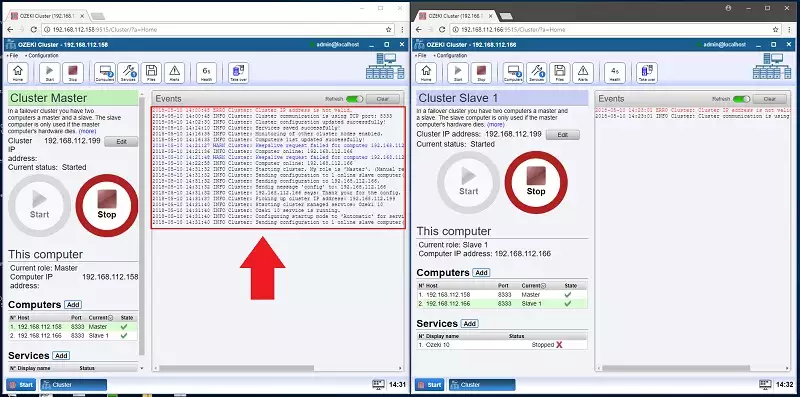
To monitor your cluster, you can inspect the events log on the middle of the main window in Ozeki Cluster, as you can see on Figure 13.
STEP 13 - Health check
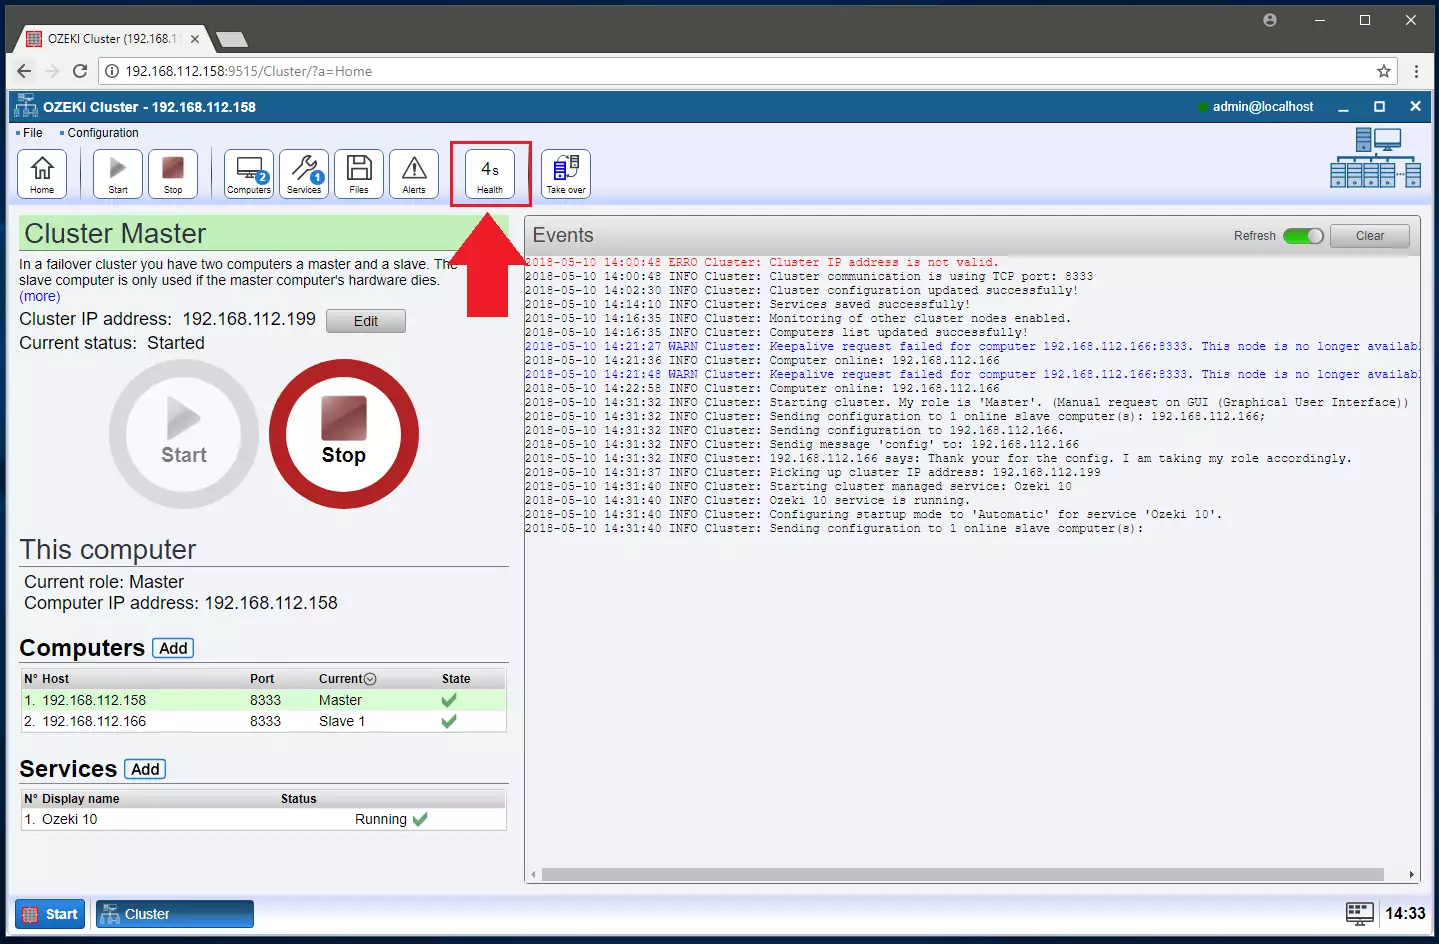
On the panel we show on Figure 14, you can inspect the health of your cluster connection.
STEP 14 - Slave config
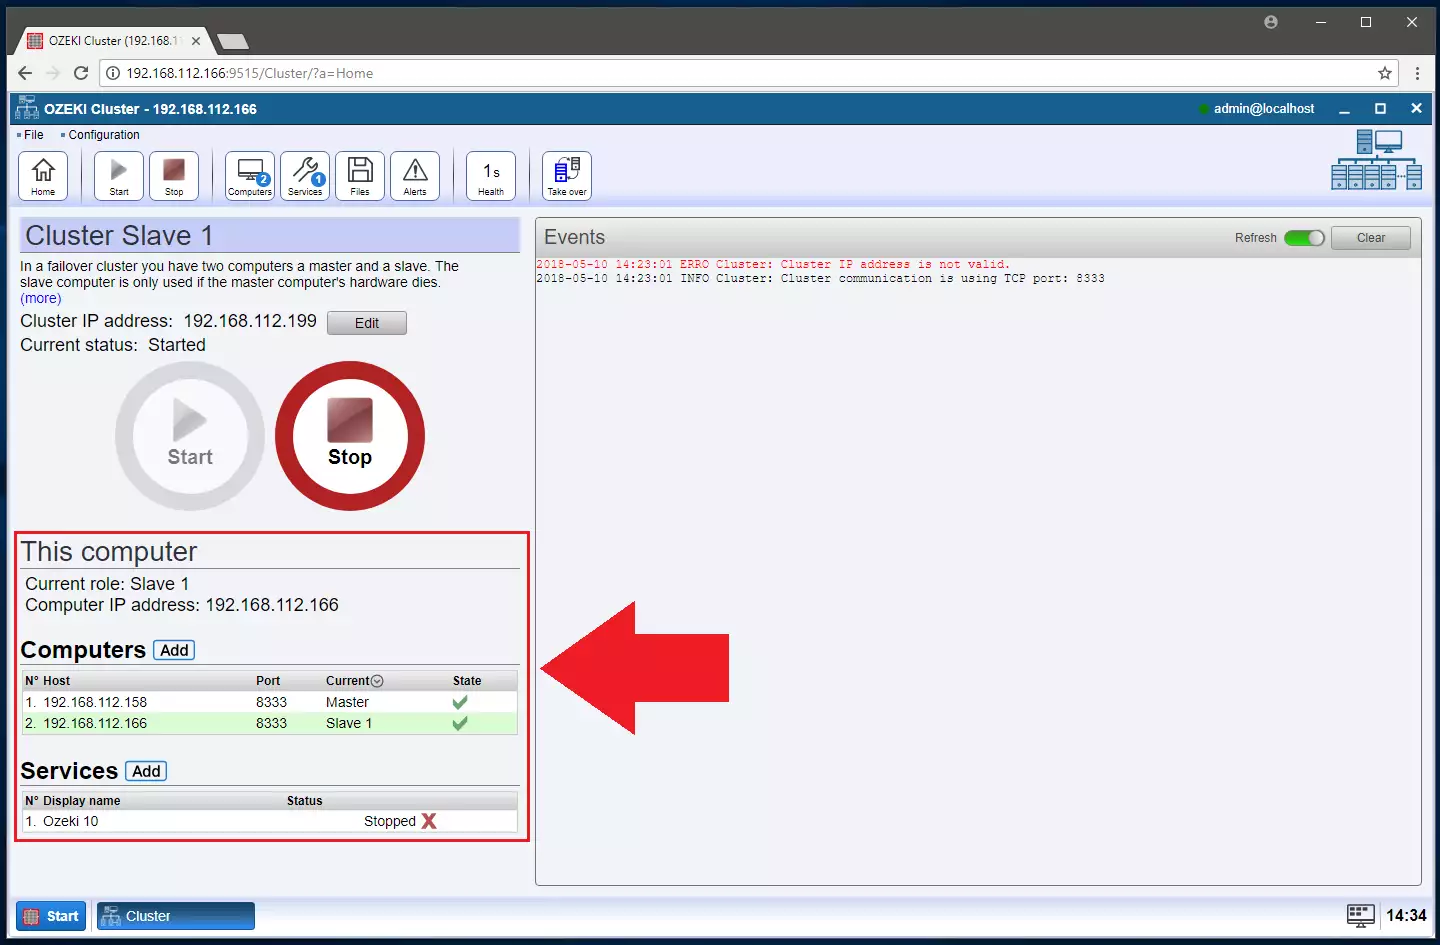
If you are on the slave computer, you can see the role and the IP address of your computer on the left side of the window as we show you on Figure 15.
