Using Sprites in Scratch
Using block diagrams are the best way to program for beginners.
The blocks you see in Ozeki 10 are individually designed for the software.
With this new application, which is similar to Scratch, you can make your Ozeki manage the message flow easier then ever.
This is really important since the messages can be routed and modified between each connection. You can also create new messages
from thin air by adding strings or variables to Ozeki blocks then logically connect them. This is why it is called block diagram.
It can contain loops and if statements just like any other programming language.
Sprites are the objects that perform actions in a project.
You can watch them move on the Ozeki GUI. Most projects have at least one sprite.
Try moving your sprite by snapping blocks together in the scripts area.
To make sprites more enjoyable you can change their default costume to a colorful one.
Costumes can be named, edited, created, and deleted, but every sprite must have at least one costume.
If you are searching for the blocks that can modify the costume on each sprite,
you can find them under the purple 'Looks' category. All blocks can be found on the
upper-left corner of the programming interface.
STEP 1: Download example block diagram
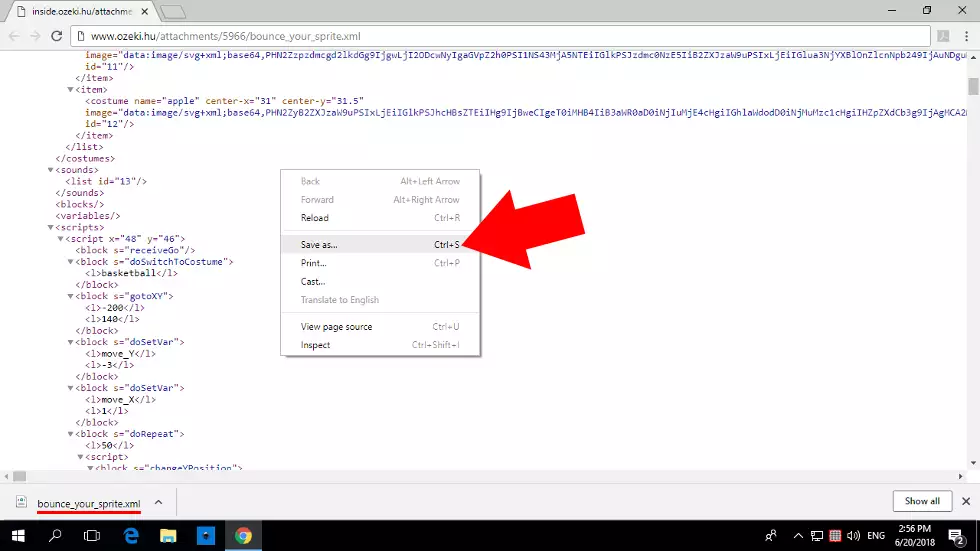
This simple example demonstrates how dinamically a sprite can bounce from wall to wall. It also shows how to change the costume at the half of the stage. Download it from the following link, which contains the block diagram in XML: http://www.ozeki.hu/attachments/5966/bounce_your_sprite.xml Save it from the tabpage that opens up. Remember the destination folder.
STEP 2: Open block diagram creator
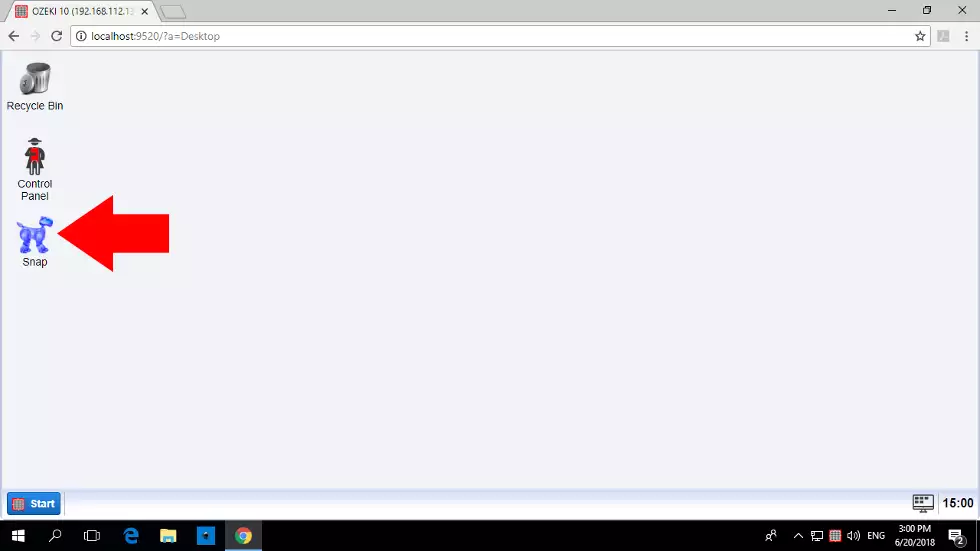
Ozeki 10 should be installed on your machine, if not, check page 5980 to find the installation guide for your operating system. Log into your Ozeki 10 GUI and start creating some block diagrams by clicking the blue robot dog on Ozeki's desktop. This is a great Ozeki 10 application to work with Ozeki connections, but now it will be used for moving a sprite on the screen.
STEP 3: Import the downloaded XML file
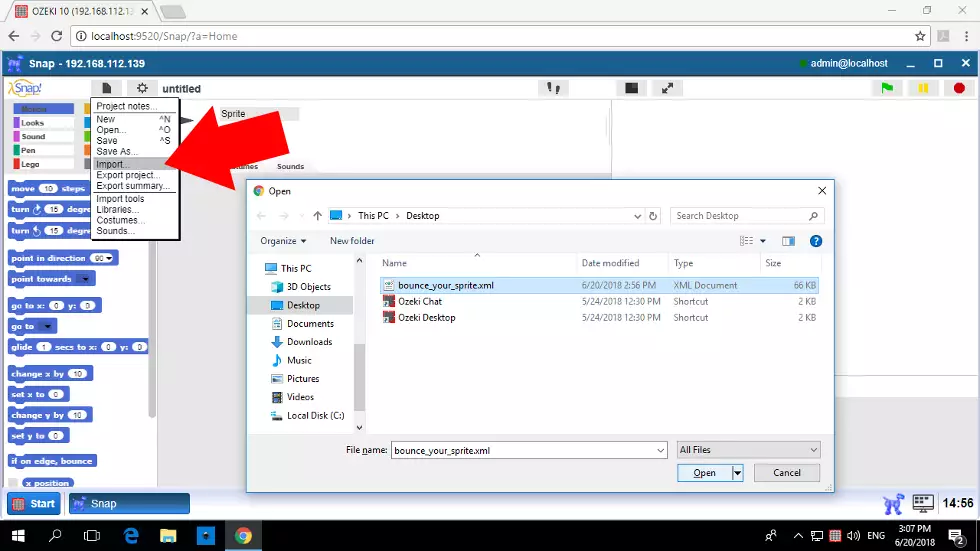
On the top menu of the opening application you will find a small grey folder. Please click on it and select 'Import...'. Now you must navigate to the folder where you have downloaded 'bounce_your_sprite.xml' and open it. You will see a short block diagram analysation in the next step. It is good to know that you can save all modifications with 'Export project...' or 'Save as...'
STEP 4: Examine the imported blocks
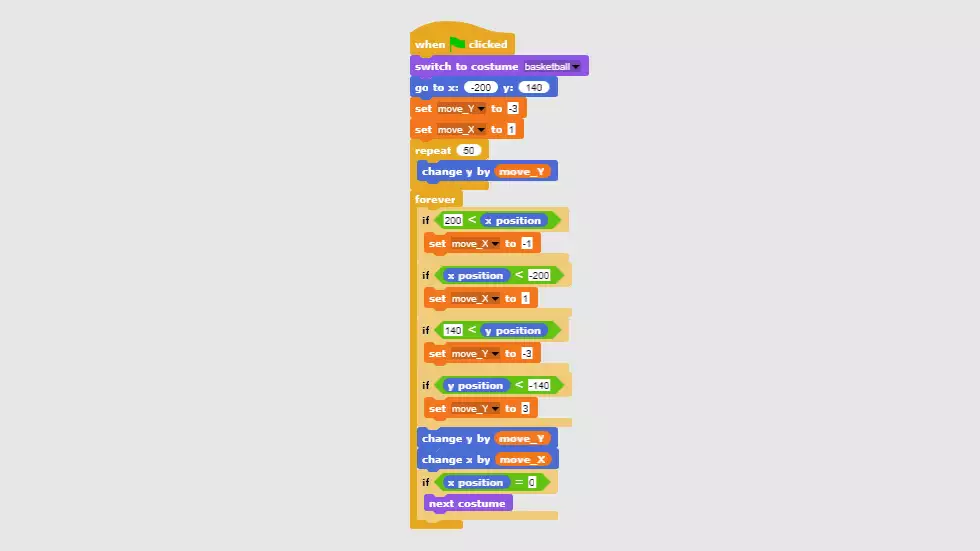
Click on the diagram below if you are online. If you are reading the Ozeki magazine and followed all steps, watch the GUI on your computer screen. First the sprite gets a basketball costume, then goes to x -200 and y 140 coordinates. It starts free falling then bounces from the walls for infinity.
As an extra, it changes costumes everytime it passes the halving line.
STEP 5: Run it to bounce the sprite
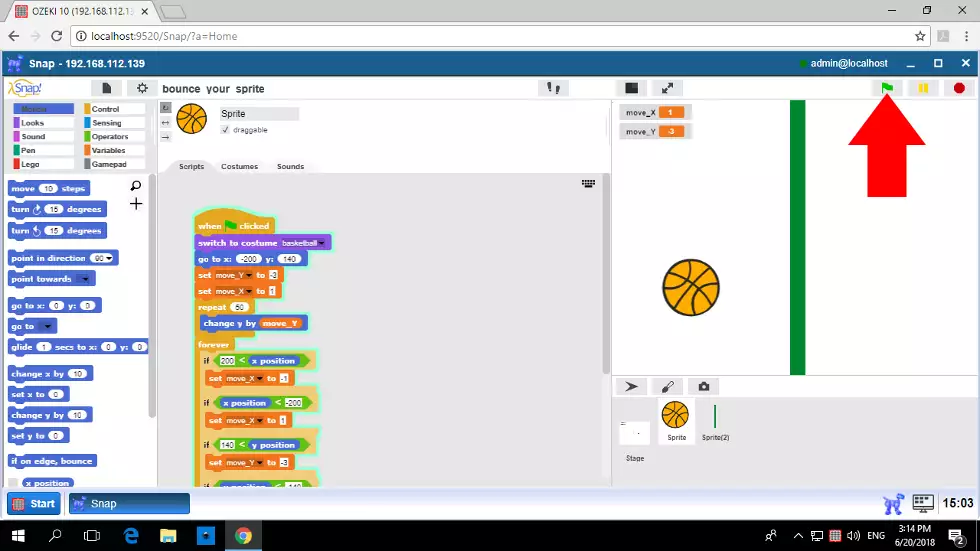
Click on the green flag on the upper-right corner of the screen as it is on the screenshot. The small green flag will start the code and the arrow costume will change to a basketball as it is provided in the imported block diagram.
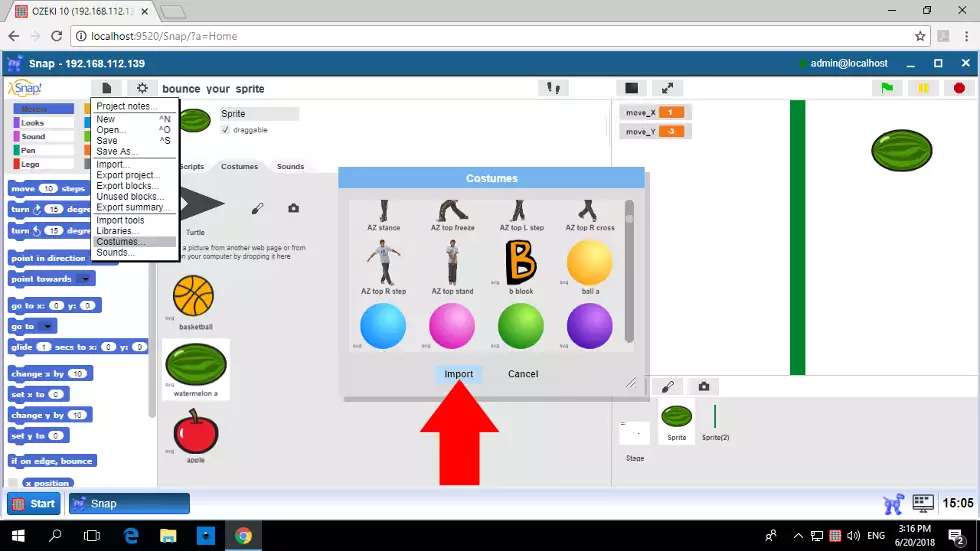
You can optionally modify the costumes
You can always delete or import new costumes by clicking the small folder on the top menu. You will see a short dropdown menu where you can select 'Costumes...' to import a new colorful one from the Ozeki costume storage.
