Use gamepad in Scratch
Program with block diagrams in the same way you can create new algorithms in Scratch. A block diagram is a system in which the principal parts or functions are represented by blocks. You can create relationships between the blocks. Scratch is used for teaching elementary school children how to program. It helps them to learn the basic logic found behind all programming languages. As the children grow up, they will realise that all programming languages has similar logic with different syntax. This way students can easily learn any programming language used in the industry by most coders and companies.
If a Gamepad is detected by your OS, it can be added to Ozeki 10 and used for controlling the sprites in Ozeki's programming language based on block diagrams. Most projects require at least one sprite because only sprites can be programmed to move. In this tutorial the costume of the controlled sprite will be a green frog, but you can always change it or draw a new one in your Ozeki software. A costume is basicly a jpg, png or svg image. You can interract with the background stages with scripts as well.
How to connect your Gamepad
On page http://www.ozeki.hu/index.php?owpn=5916 you can see how to use a Gamepad with Ozeki 10's Pac-Man game.
STEP 1: Plug Gamepad to Ozeki client
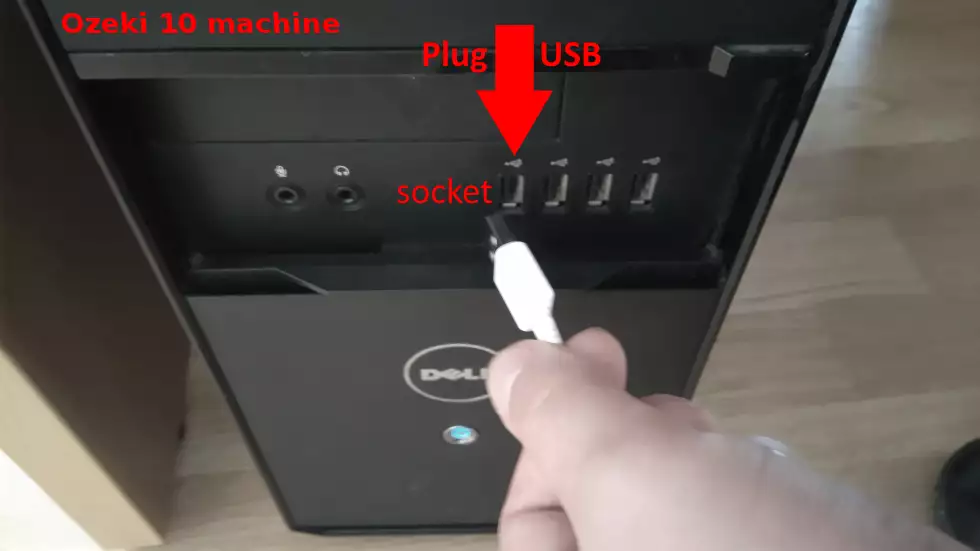
Connect your Bluetooth or USB Gamepad to your machine. You can see it on the picture. Or plug a Bluetooth adapter in the USB slot for wireless Gamepads. Ozeki 10 can run at another location. You can use any webbrowser in this tutorial to remotely connect to Ozeki. Probably you have a Game controller in your cupboard. If not, you can simulate it on your keyboard. If you like it, you can ship a game controller from an online shop.
STEP 2: Find Gamepad in device list
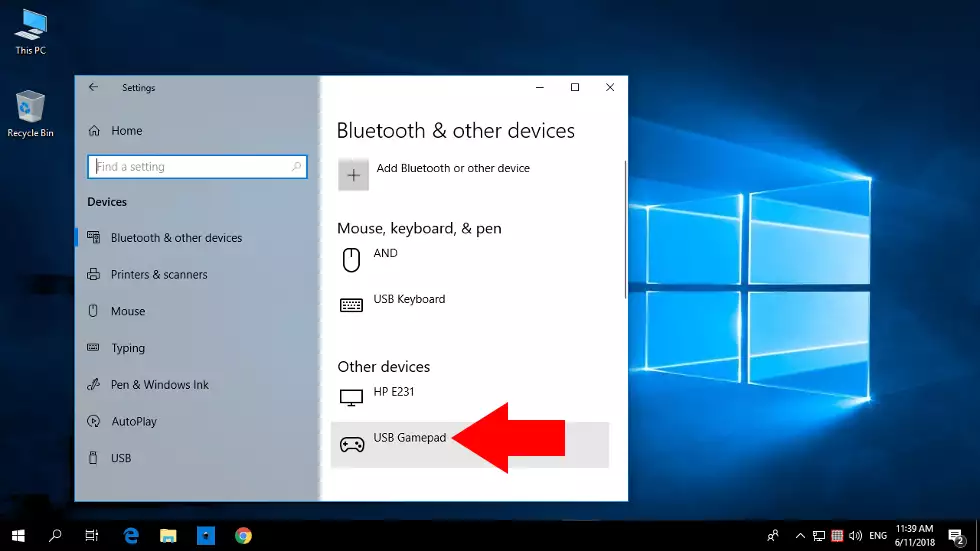
If your OS detects it, Ozeki 10 will see it as well. This STEP shows the Windows and Linux method, although Mac is also supported. Open 'Windows settings' from the start menu by clicking the cog. Select 'Devices' to see if the Gamepad is connected. See it below. In case you are using a Bluetooth gamepad, click 'Add Bluetooth or other device' and pair it. If you are using Linux, you can find the Gamepad with the 'lsusb' command.
STEP 3: Download XML
This is the file that will control your Gamepad in an easy to use Ozeki 10 environment designed for your children.
A great opportunity to get to know the basics. Use this link to download the XML to import it later on:
http://www.ozeki.hu/attachments/5941/gamepad_tester.xml
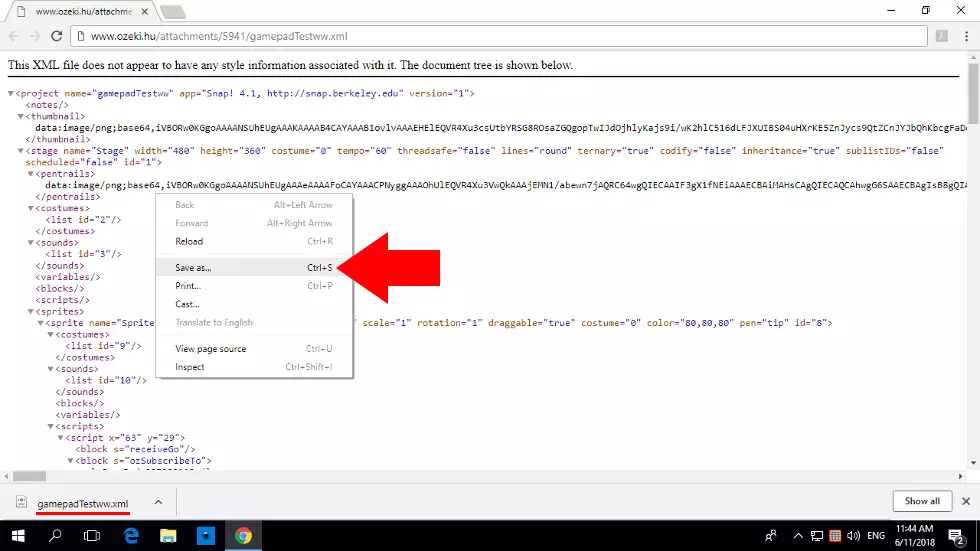
and you will find yourself on the following page. Save the code by clicking the right mouse button and selecting 'Save as...'
STEP 4: Open Control Panel
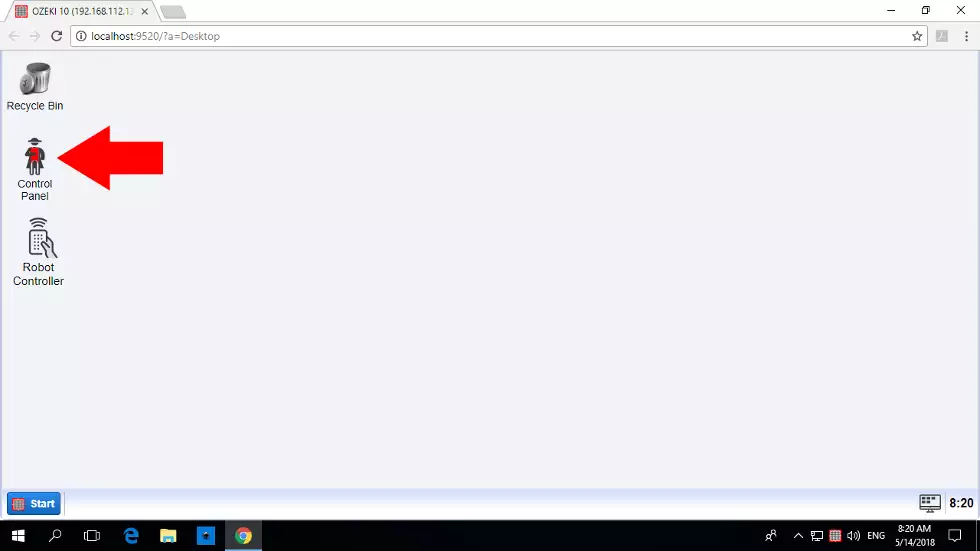
Now you can relax and type the IP address of your Ozeki 10 server. Use port 9505 to remotely connect your browser. Use any username you have provided during installation or added later on. It is quite necessary to login, so you can follow this easy tutorial. You will see Ozeki 10's special desktop after logging in. It runs in your browser, which makes it very useful. Reach Ozeki 10's Control Panel through the red Napoleon icon.
STEP 5: Add Gamepad
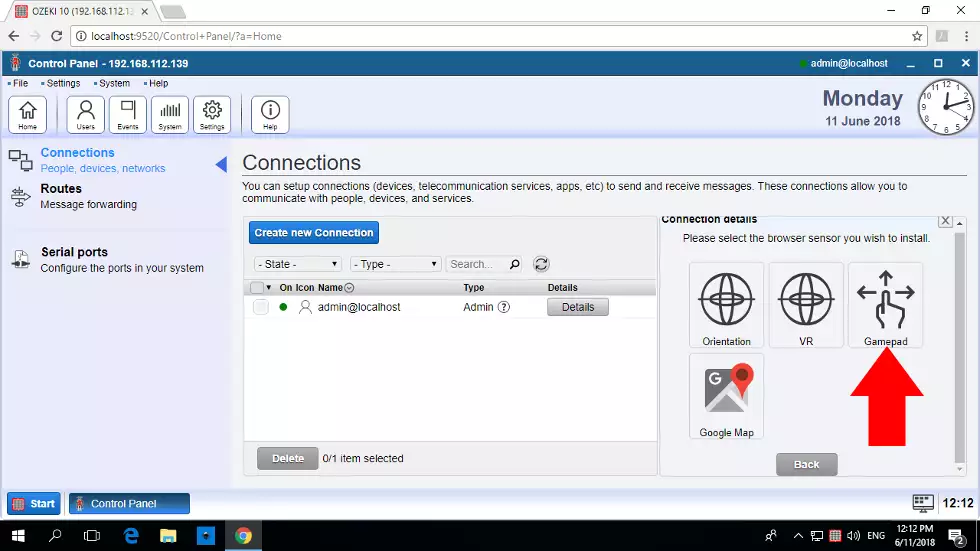
Find yourself on the list of connections. If you are new to Ozeki 10, the list should be almost empty. You can fill it up. Click on wide blue 'Create new Connection' button and go through the following route as seen in the picture
Sensor/Browser sensor/GamepadThe path of icons will lead you to an important form, where you just have to click 'Ok' and your Gamepad connection will be created.
STEP 6: Open block diagram creator
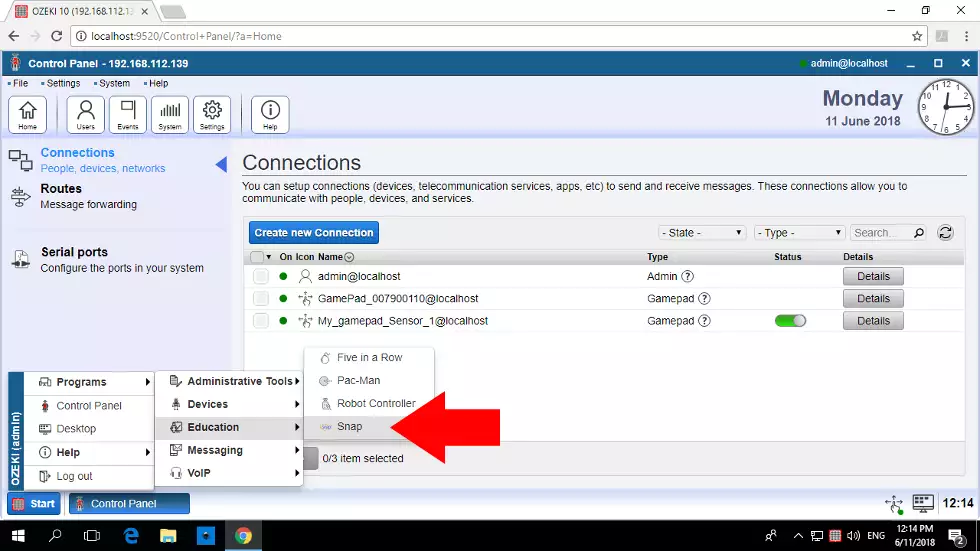
This is the connection that automatically detects all Game controller devices. Watch below to see the list grow with two new connections. The one with the Gamepad ID will be your actual gamer device detected through your USB port or Bluetooth adapter. Now you can start Ozeki's block diagram creator IDE through the Start menu of Ozeki 10:
Start/Programs/Education/Snap
STEP 7: Import downloaded XML
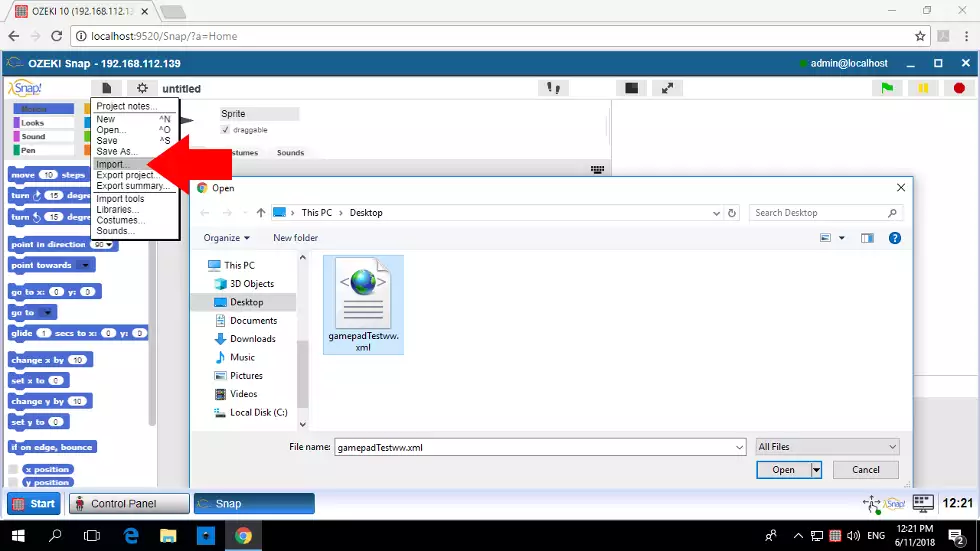
Welcome to the GUI of your programming interface. The default language is English, but it can be changed to at least 20 different languages. This is where you can create your own block diagrams. New function blocks were specially created for Ozeki 10, so you can interract with the connections. Please import the XML downloaded in STEP 3 and test your Gamepad. To do this click on the Folder icon and select 'Import...' like on the picture.
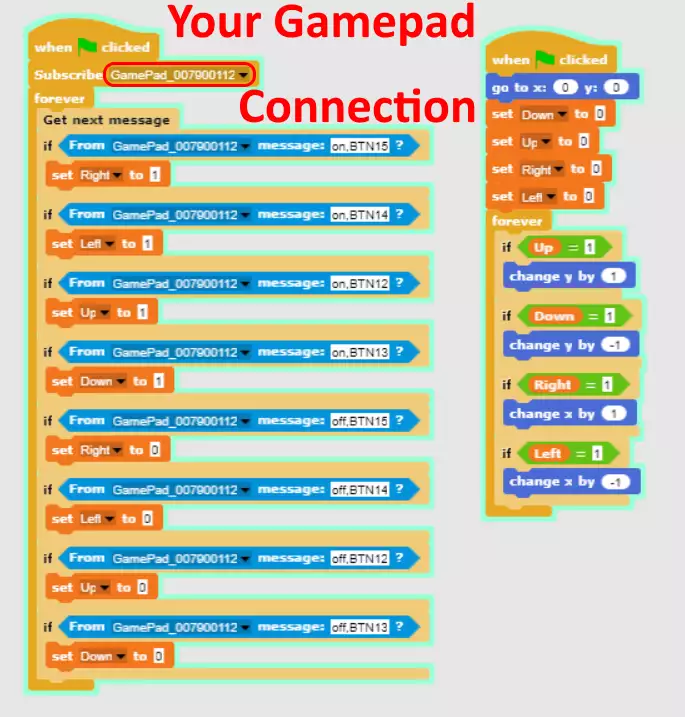
After importing the XML, you should see the same block diagram seen to the right. The only thing to modify is the connection name, which you can select from the dropdown menu of the 'Subscribe' block. It is circled with red. Just below it, a forever block checks for gamepad button events and modifies right, left, up and down values. On the right column, you can see that these values change the sprite coordinates in another forever block.
STEP 8: Look at the block diagram
STEP 9: Run the blocks and look at the log
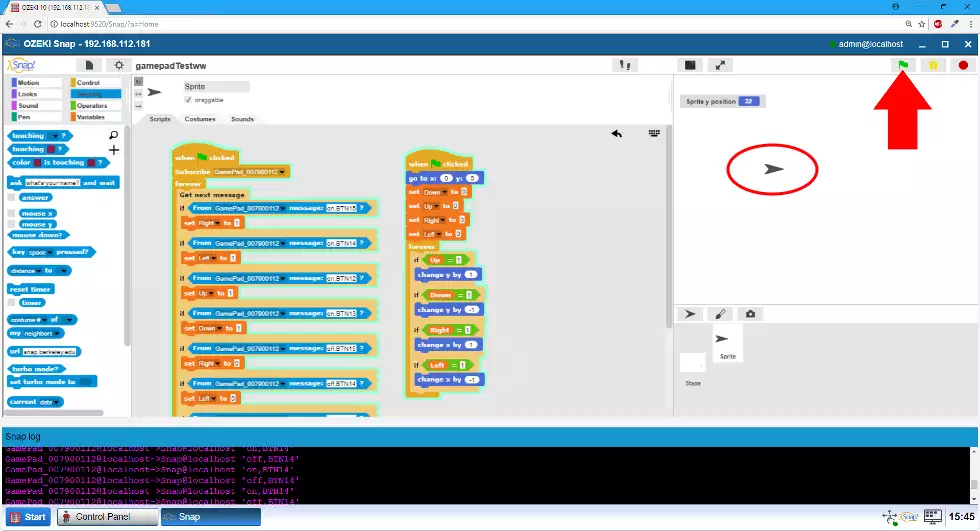
Finally you can click on the green flag to activate the block diagram. A big red arrow is pointed towards it on this picture. You can test it by pressing the arrows on the Gamepad and see the sprite move in the proper direction. You can get an instant feedback of each button you press by looking at the purple log messages. There is an extra opportunity to test this XML code with no Game controller. You can do it by changing the light blue connection message blocks to 'key pressed?' blocks. This way you can move the sprite with the four arrow keys instead. The sprite is circled below.
Optionally: Change the costume
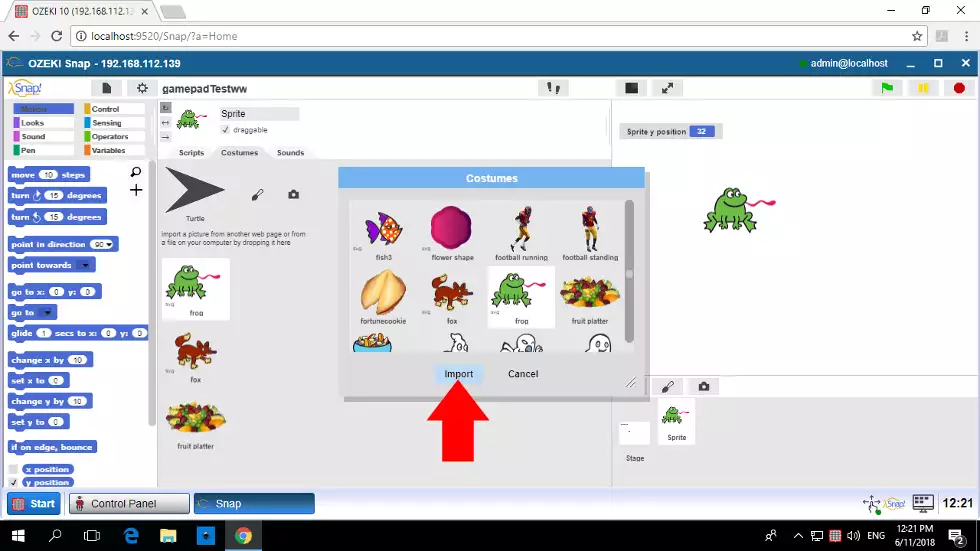
To make your programs more attractive for children, you can change the costume to a friendlier one. Like a green frog, although you can choose from dozens of available costumes by clicking on the Folder and choosing 'Costumes...' from the dropdown menu. They can also be used for creating motion if placed properly in an order. You can create continuous motion in loops by quickly changing costumes with block diagrams. Costumes can be changed in other situations too. For example if a costume hits a wall, a variable gets a value your are looking for or a desired key is pressed.
