Using Lidar sensors
Lidar technology is supported by Ozeki 10. You can see how simple it is to connect and test the YDLIDAR X4 in this short tutorial. Are you curious how the X4 looks like? It is a blue circle shaped object spinning as fast as it can to send you 5000 measurements per second. What can it measure? It measures distance of any obstacle from the sensor. The laser spins in 360° and detects object contours from 120 mm up to 11 m on a single plain. Generate a dinamically changing 2D map with the Ozeki test interface or calculate the next move of your robot depending on the functions you have programmed into the Robot Controller application.
What is Lidar
Lidar (also called LIDAR, LiDAR, and LADAR) is a surveying method that measures distance to a target by illuminating the target with pulsed laser light and measuring the reflected pulses with a sensor. Lidar is commonly used to make high-resolution maps from airplanes. Ozeki 10 is the best product to use Lidar technology for controlling and navigating robots.
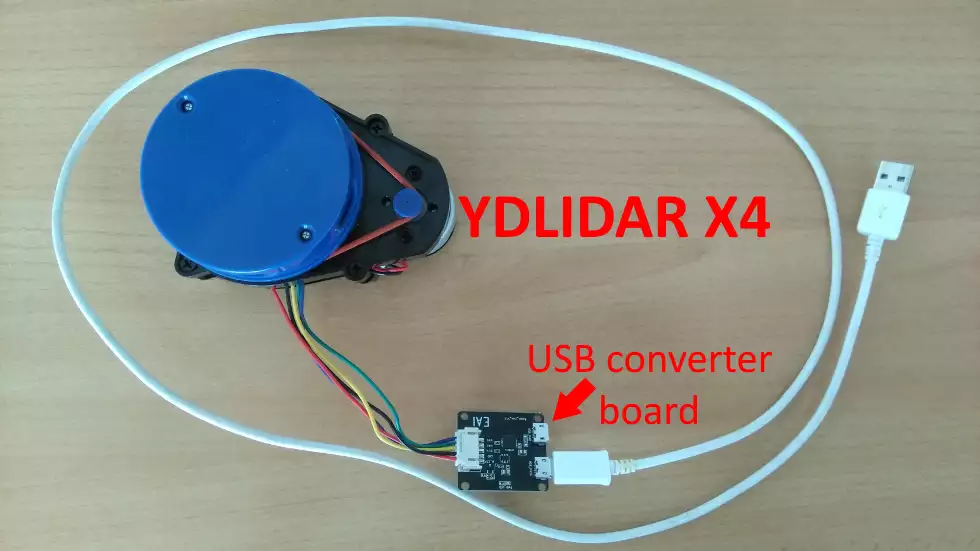
STEP 1: Get a YDLIDAR X4 with board and USB cable
At the time this guide was written, there were dozens of Lidar sensors on the market, but only the YDLIDAR X4 was fully supported by Ozeki 10. By talking with the developers I knew this is just the first one. If you like to use the X4, you can share your projects to info@ozeki.hu, so the team can get inspiration to support more sensors. It is a great fun to test it. Open your garage. Look around or jump online to make an order on ebay or amazon.
STEP 2: Download to install your Ozeki 10
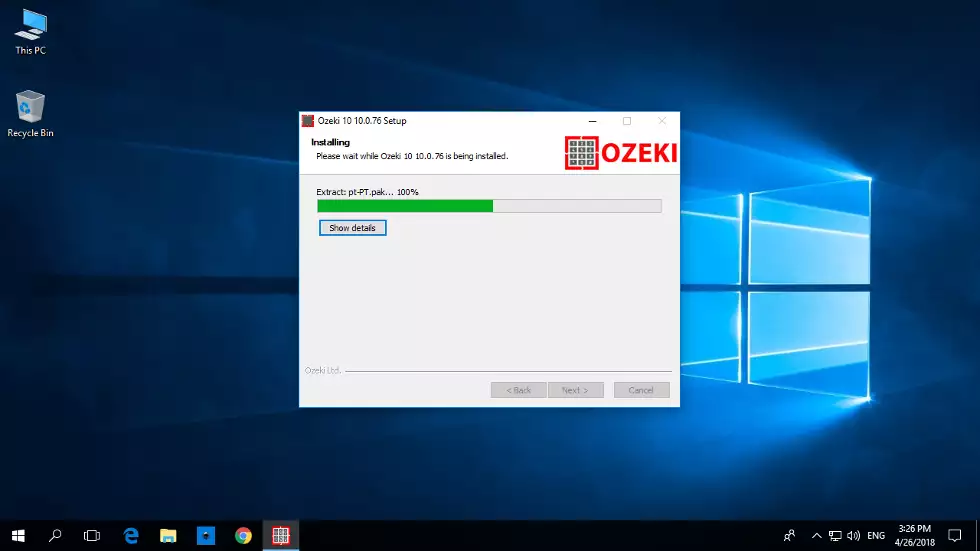
Make sure to download the newest Ozeki 10 version built for your OS at http://www.ozeki.hu/index.php?owpn=231. Click on the installer. It is necessary to provide a name and e-mail address for the convenience of the customer. After installation you can reach it from any operating system that has a webbrowser, including Mac OS. The goal of this guide is to see the 2D lidar map generated in real time. Start Ozeki after finishing installation.
STEP 3: Start Control Panel from Ozeki desktop
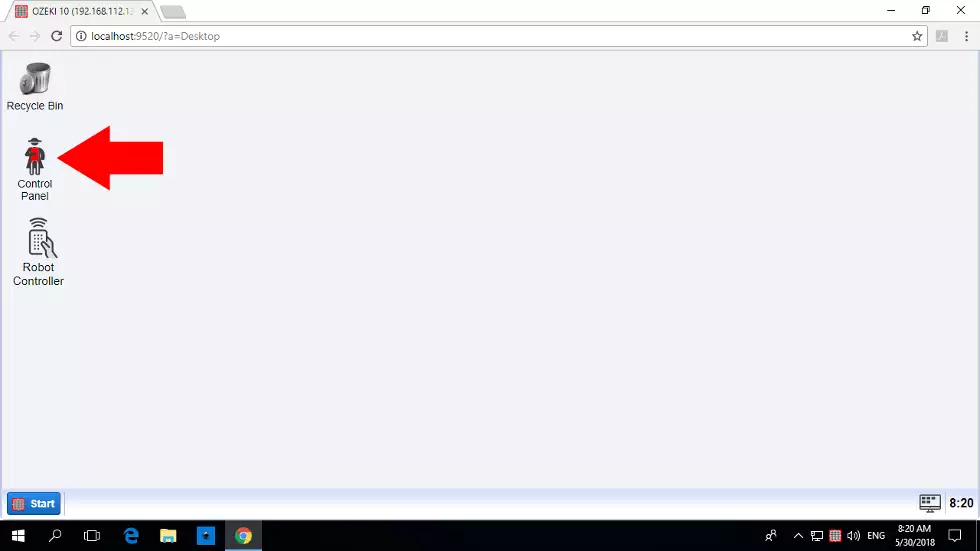
Start Ozeki and you will see the Ozeki GUI opening in your primary webbrowser. In the login form use 'admin' with the password you have provided during installation, then you will find yourself on the desktop GUI. Click on the red Napoleon icon to start the Control Panel. This application autoconnects your YDLIDAR X4 sensor to Ozeki 10.
STEP 4: Connect your YDLIDAR X4 to your machine
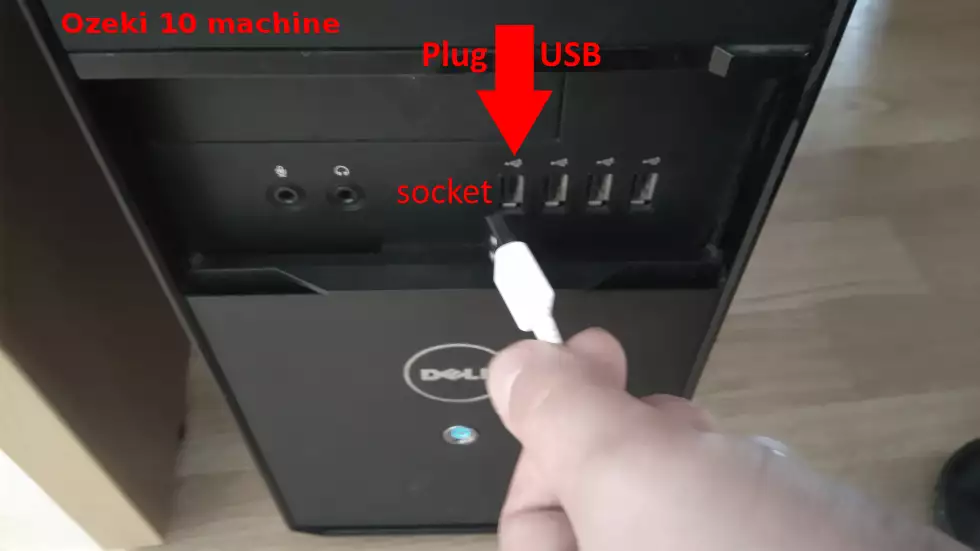
Hold the Lidar sensor contruction in your hand and carefully plug it into the Ozeki 10 server machine as you can see it on the screenshot below. Please use the USB cable to plug it in. Look at the USB converter board from step 1 and see that the mini USB power socket is not used, you will not need it, only the data socket which provides the power as well.
STEP 5: See the Lidar connection appear
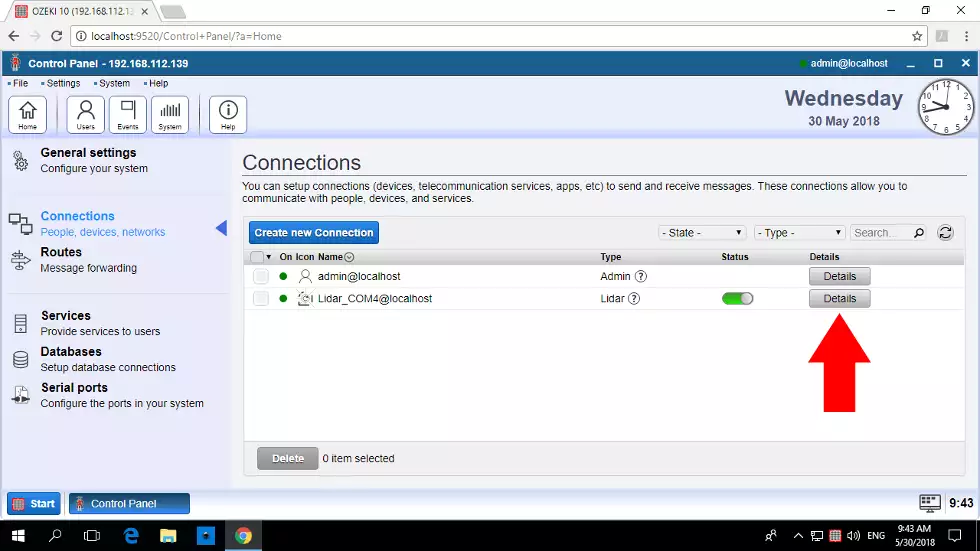
On your computer you should be in the Control Panel at the moment. See the Lidar connection appear in front of your eyes just after plugging it in. Please continue by clicking on the 'Details' button next to the connection. If you have a lot of connections, it can be harder to discover. Look closer, but if it still hasn't appeared, check the USB connection and replug the cable.
STEP 6: Look at the dinamically generated 2D map
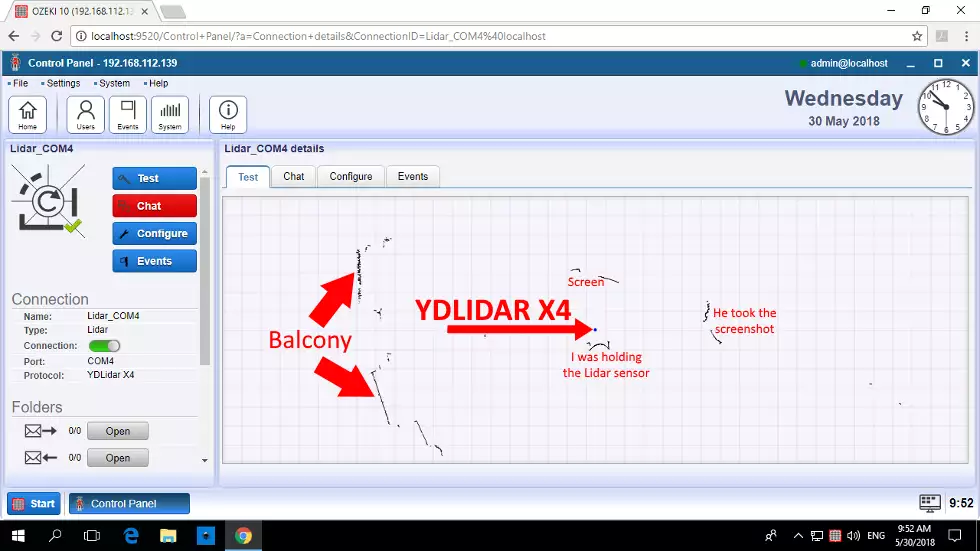
The Ozeki Lidar GUI should appear. You are probably sitting in the room with the sensor next to you. The contours of the room will instantaneously get visualized on your screen. Every wall, object and even your body will appear on a 2D map generated from the 360° sight of the spinning sensor. In this example I held the X4 in my hand and my friend took a screenshot.
STEP 7: Stop scanning by chatting with the sensor
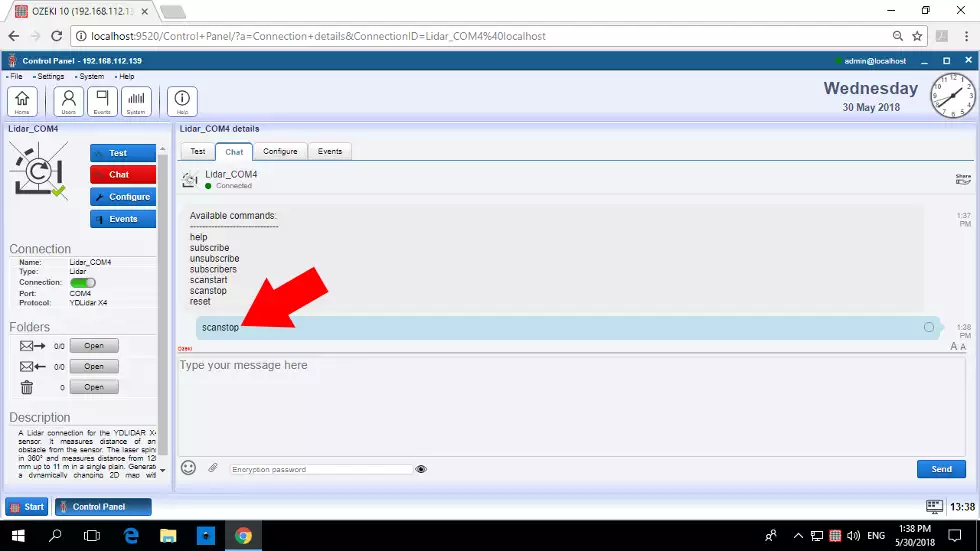
Every Ozeki connection has a 'Chat' tabpage, including the Lidar. This gives you a great opportunity to do things you have never done before: you control devices through chat commands. For example you can stop scanning even though the sensor continues spinning. By typing 'help' you can view all available commands. It is good to know that 'help' is available on all devices. Commands can also travel between connections.
Good to know
By integrating Lidar sensors into moving vehicles, you can make transportation safer for everyone. Both the driver and environment feels comfortable when safe. This can be easily done by high resolution Lidar technology. The car of today is basicly an accurate robot that meets high level of safety standards and Ozeki is the best Robot OS.

