INSTALLATION GUIDE
Ozeki Sms Server is a software-based solution for you to benefit from advanced communications functions with the help of a mobile phone. You can easily connect your mobile phone to a compatible PC for sending and receiving short messages (SMS). As soon as the phone is attached, Ozeki Sms enables you to send, receive and manage sms messages in various ways. You can use the graphical user interface or one of the built-in plugins to handle the messages.
This guide describes you how to install the Ozeki SMS Server software onto your PC and how to start using it. For more details about the use of the software contact our on-line support at the following e-mail address: sms@ozeki.hu.
Hardware and software requirements
To install and run the Ozeki SMS Server, you need the following tools/devices available:
| Suitable mobile phone | A list of supported phones can be seen on the following page:
supported phones |
| Data cable | You need a phone-to-pc data cable or an Infra Red port (IR) or a Bluetooth connection |
| Windows PC | Intel compatible PC Windows 10, 2000,Xp 20 Mb free hard disk space |
| Ozeki SMS | Ozeki SMS Intallation Package (CD or downloaded file) |
Installing Ozeki SMS Server
During the installation, various selections can be made. You will find step-by-step information in the following section. If you want to quit the Setup program without installing or uninstalling, just click Cancel and the Exit Setup window will offer you the possibility of quitting the Setup program. Click Exit Setup to quit Setup. If you want to rerun Setup after having quit the installation before it had been completed, follow the installation steps normally as if you were installing the program for the first time.
Quick installation steps:
1.	Set up the GSM device.
2.	Connect your phone to the computer.
3.	Exit all Windows programs.
4.	Insert the CD-ROM in the CD-ROM drive.
5.	Click the Windows START button.
6.	Select the Run command. The Run dialog box appears on the screen.
Type in the following command line: D:\setup
In the above command line, "D:\" is the CD-ROM drive
7.	Click OK or press Enter . Wait while the system initializes Setup. The Welcome window of the Setup is then displayed.
8.	Click Next to continue with Setup.
Step 1: Setting up your GSM phone
In order for the SMS server to work properly the following settings should be made on the mobile phone, prior to installation:
- All the PIN codes and security locks should be switched off
- The voice and data calls should be redirected to another phone number
- Delete all SMS messages stored in the phone
- The SMS Service Center should be set
When all these settings are done, you should test your GSM device by sending and receiving SMS messages manually.
Step 2: Connect your phone to the PC
In order to send or receive SMS messages from your PC, you need to attach your phone to the PC with a phone-to-pc data cable (Figure 1). The cable is attached to the serial port of your computer. The serial port is located on the back side and has 9 pins.

If you want to use Infrared (IR), you must enable your infrared port on the phone. (Sometimes you have to turn it on in the PC as well). When this is done, you should place the phone within the range of the IR receiver on the PC. When the PC and the phone begin to communicate over IR, you will see an icon in the bottom right hand side of the screen.

Step 3: Installing the application
The Ozeki SMS Server installation is similar to any Windows applications. As a first step, you must exit all Windows applications. After having done it, locate the Setup.exe on the installation CD-ROM. If you have downloaded the application from the Internet, Setup.exe is in your download directory. Start Setup.exe by double-clicking on the icon and follow the instructions:
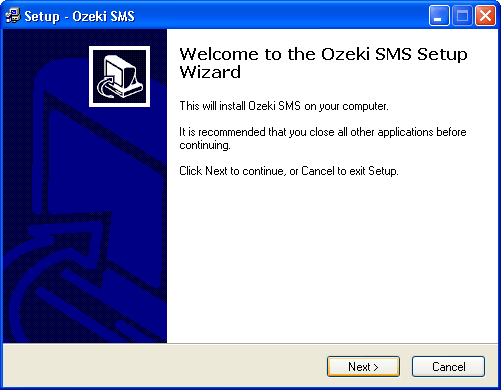
Click Next to start the Installation
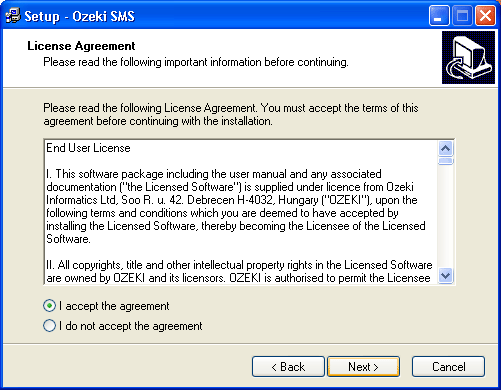
Read the End User License agreement carefully. If you accept the
agreement,
select the I accept the agreement
radio button and click on Next.
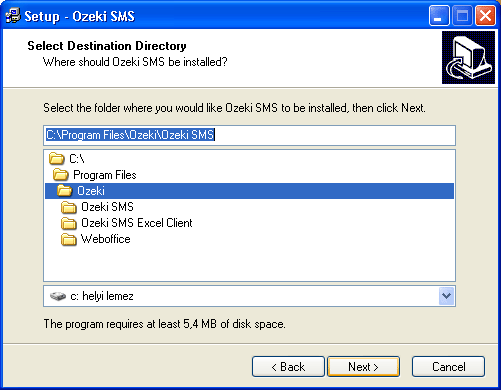
Specify the directory you wish to use. Make sure you have at least 20 Megabytes of hard disk space available on the drive you have chosen.
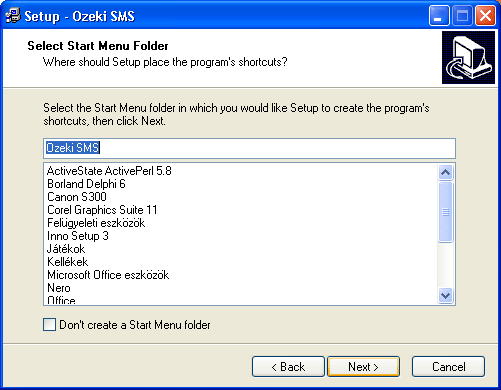
Enter the name of the Start Menu Folder and click Next.
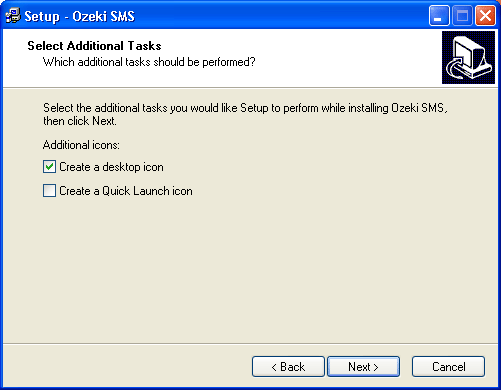
If you wish to have a desktop icon, place a checkmark into the appropriate checkbox.
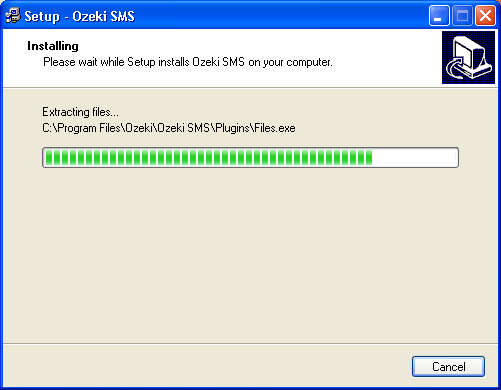
Wait until the installation completes.
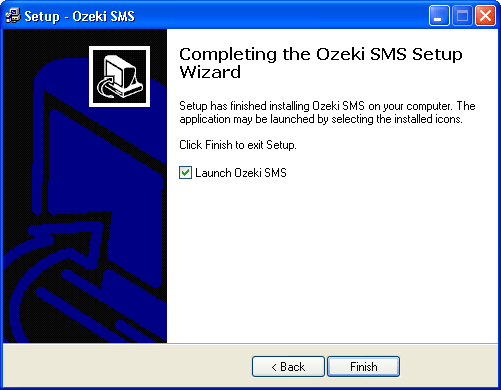
When the installation is finished, a shortcut can be found in the Windows
Start menu.
Use this shortcut to start the application.
Configuring the application
Once the application is started, the graphical user interface of Ozeki SMS appears on the screen. On the main form you should select GSM Device1 Configuration from the Server menu.
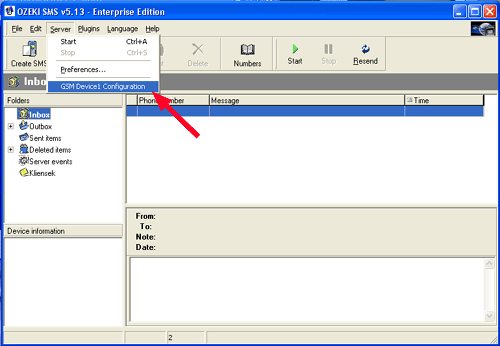
When this menu item is selected, the phone configuration preferences form opens. You can set all the neccessary settings on this form in order to send and receive messages. As a first step select the phone model you have attached to the computer, then specify the serial port. (If you use IR or Bluetooth, you have to find out the virtual port number and use it instead of the real port.). After selecting the phone model you should specify the name of the operator. The operator name is the name of the GSM company your subscription belongs to. (For example it can be Vodafone, Westel, Orange, etc.) When this is done, enter the SIM-card number of the phone attached to the computer and the SMS Service center address. Important: phone numbers should be entered in international format e.g.: +36209937723 !
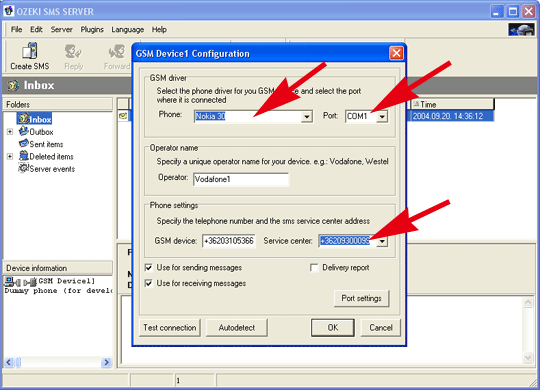
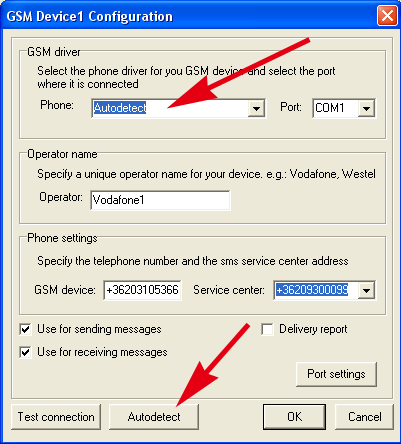
If your phone is not listed in the Phone tab, select the Autodetect option or press the Autodetect button.
The Service Center address is provided by your GSM service provider. For example, in Hungary you would select one of these numbers:
| Westel | +36309888000 |
| Pannon GSM | +36209300099 |
| Vodafone | +36709996500 |
Testing the connection
When everything is set, click on Test connection to see whether your phone can communicate with the PC. If the test is successful, you can start the application.
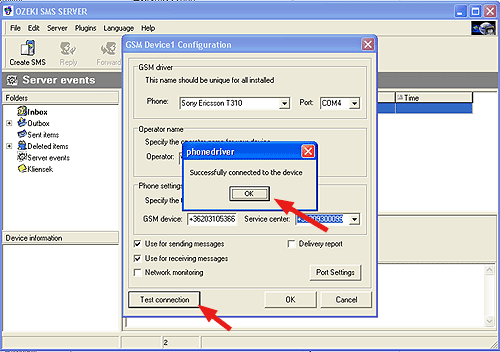
If the test is not successful, please go to our troubleshooting page:
https://ozeki.hu/p_159-sms-for-windows-trouble-shooting.html
Starting the application
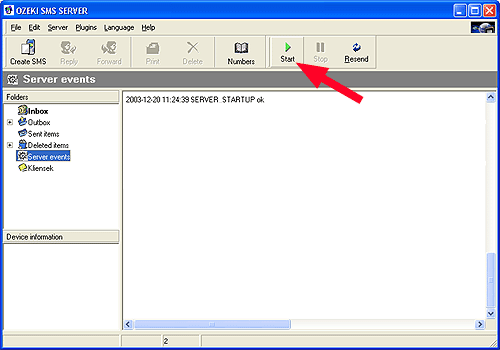
After finishing these settings close the preferences form by clicking on OK and start the SMS sending and receiving service by clicking on the "Start" button on the main screen of the application.
If you select the Server Events folder on the left, you can see the startup message of the server. This message should be: "SERVER_STARTUP ok"
Sending your first SMS
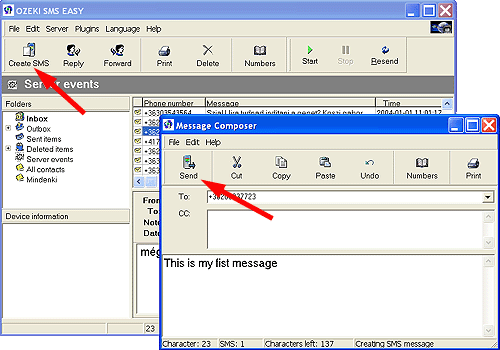
Once the application is installed and configured properly, you can send an SMS by clicking on the Create SMS icon. This brings up the SMS composer, where you can specify the phone numbers and the message text. Make sure you specify the phones numbers in international format. e.g.: +36209937723. When the message is written, you can send it by clicking on the Send button.
Once you installed the server, you can configure plugins or you can start developing applications. Good luck!
Related topics: Configuring SQL support
Related topics: Configuring more than one device
