PBX VoIP SIP Account connection
PBX VoIP Phone connections in Ozeki 10 are capable to accept phone calls and automatically reply to them with digitally generated human voice. The connection can receive DTMF signals by the caller, so it can reply in a pre-programmed way. A VoIP connection can be easily paired with other connections with the routing engine or by running a C# code on your Ozeki Robot Controller.
A PBX VoIP Phone connection can either receive or send phone calls. For you it is easy to interact with these options. You can find examples for the simple use of the routing table and the more sophisticated use of C# codes.
STEP 1: Start Ozeki Control Panel STEP 2: Connect your VoIP SIP account STEP 3: Try out the connectionPrerequisites:
- A PBX software installed on a computer
- A VoIP SIP account added to the PBX software
- Ozeki 10 installed on your computer
- Another phone number to dial or receive calls
How to setup a PBX VoIP SIP connection
You probably already have a few SIP accounts registered on your PBX and are eager to add a few to your Ozeki 10.
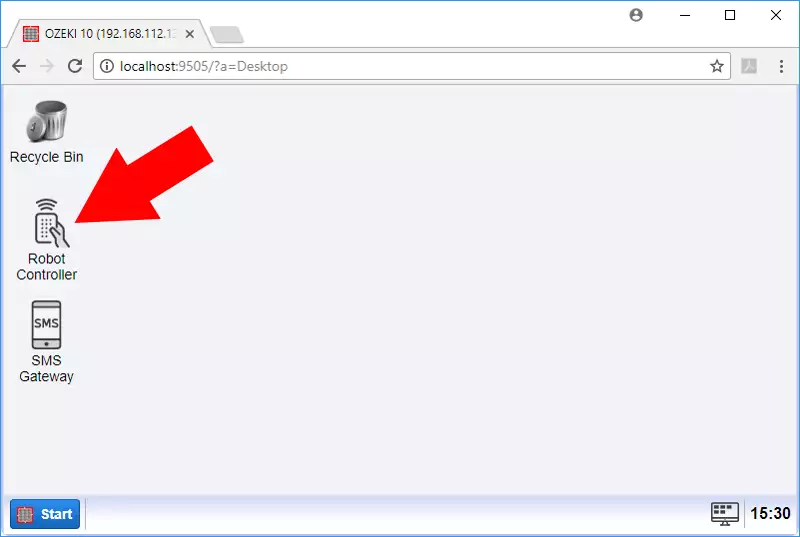
Step 1: Start Ozeki Control Panel
The first step is to start the Ozeki Control Panel from the Ozeki 10's browser GUI (Figure 1). The Control Panel manages all of your connection. You can create routing tables through your. Control Panel between your connection. If you are familiar with C#, you are suggested to use Ozeki Robot Control instead of a simple routing table.
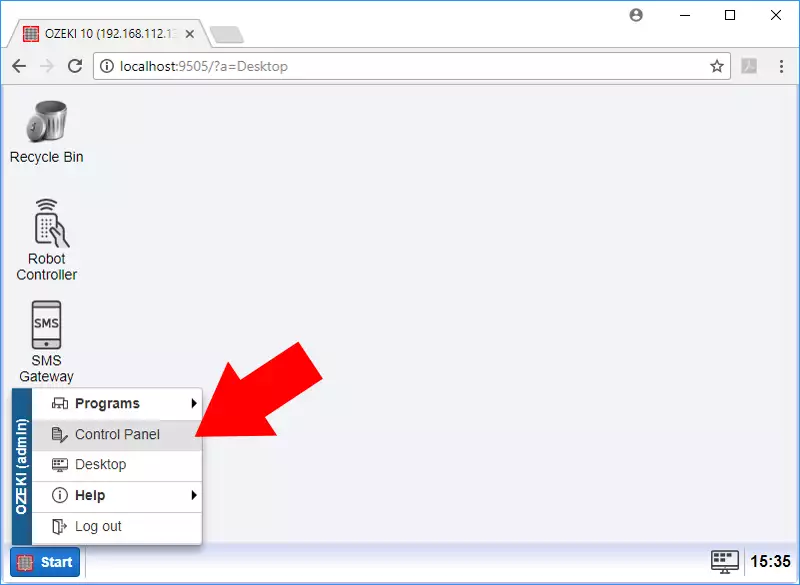
Step 2: Connect your VoIP SIP account
Link your SIP account by clicking 'Create new connection' and selecting the Telephone (Figure 2). Creating connections is the first thing you can do on Ozeki Control Panel's starting page. Every connection you create appears on the connection list. By adding it, it appears even if it cannot connect. It cannot go wrong, so please click 'Create new connection'.
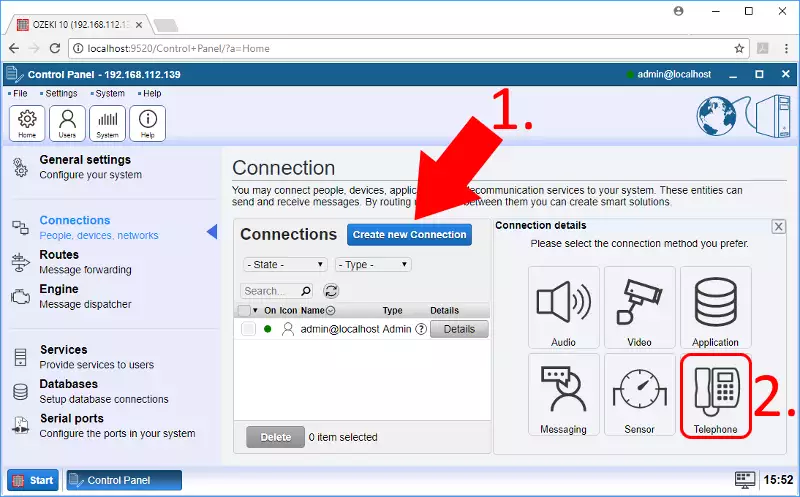
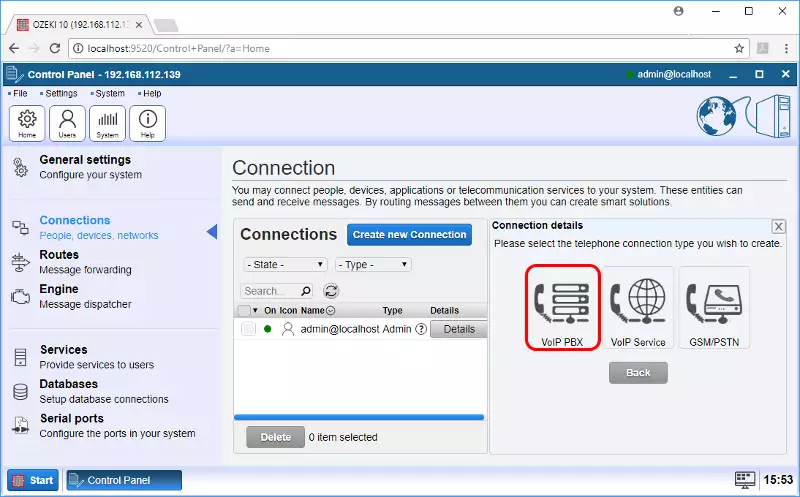
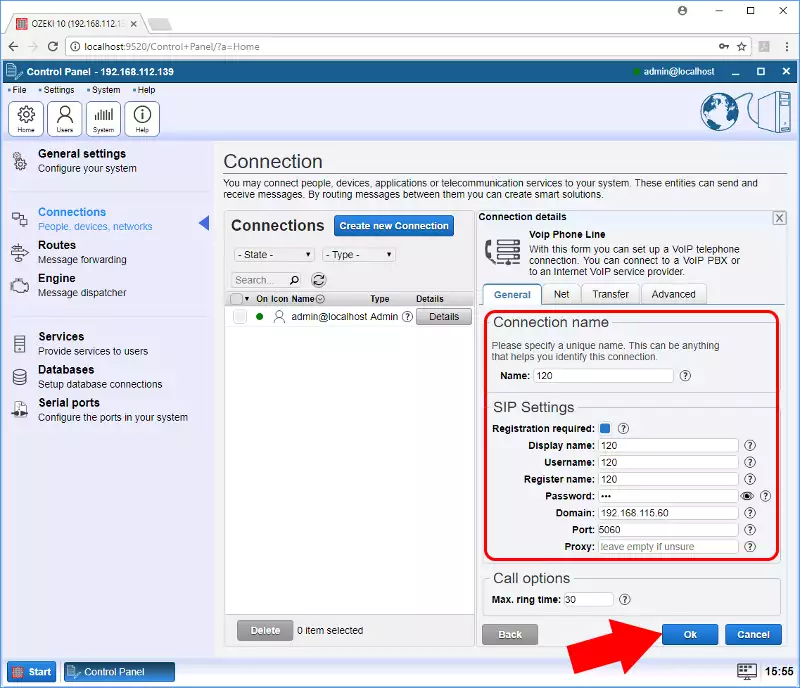
Click 'PBX' connection after selecting the telephone (Figure 3). You should already have a SIP account already running on your VoIP PBX server. If not then please create a VoIP SIP account. The PBX connection connects to one of your SIP account on your PBX server. Jump to figure 4 to see how to fill the connection data.
Fill the connection form with the correct data. If you do not know what is the username and password, you can ask it from the personnel managing the PBX server. The default PBX port number is 5060. Click 'Ok' when ready (Figure 4).
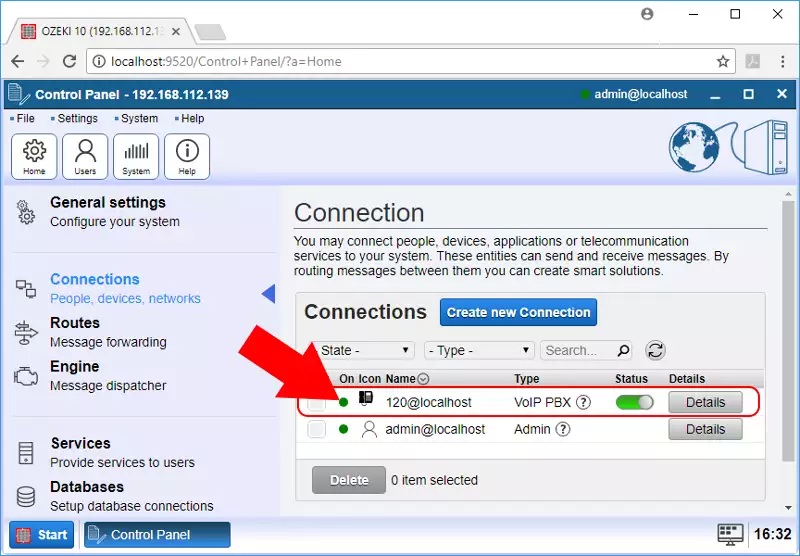
You should see the SIP account added to the connection list. The green dot next to it shows if it was successfully connected (Figure 5). If you see a red dot then either the connection details were wrong or there is a problem with the PBX VoIP server.
STEP 3: Try out the connection
Jump to Ozeki Robot Controller by starting it from the desktop (Figure 6)
