How do I allow SMTP through my firewall?
An SMTP is the Simple Mail Transfer Protocol, which is an application that sends, receives, and relays outgoing emails between senders and receivers. When you send an email, it is transferred over the internet from one server to another, using SMTP. Your Windows Firewall is a security application, which filters the network data transmission. To have a stable and secure SMTP connection, you need to allow the SMTP through you Windows Firewall. We will provide you all the information, in a form of a step-by-step guide, you need to setup an SMTP connection which will not be disturbed by the Windows Firewall.
Allowing SMTP through firewall - configuration steps
Create an access rule for outgoing SMTP connections. Follow the steps:- Open Windows Defender Firewall
- Go to Advanced settings
- Select Inbound rules
- Create a New rule...
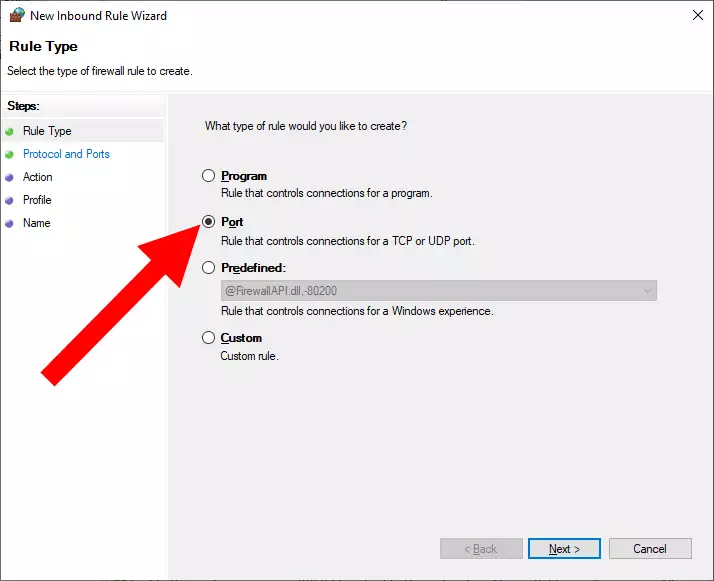
- Choose Port rule
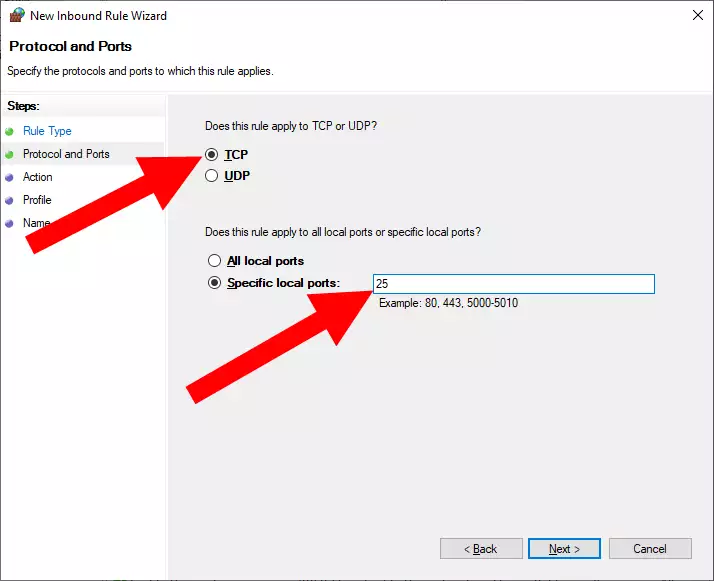
- Select TCP
- Specify the local ports: Enter "25" into the textbox
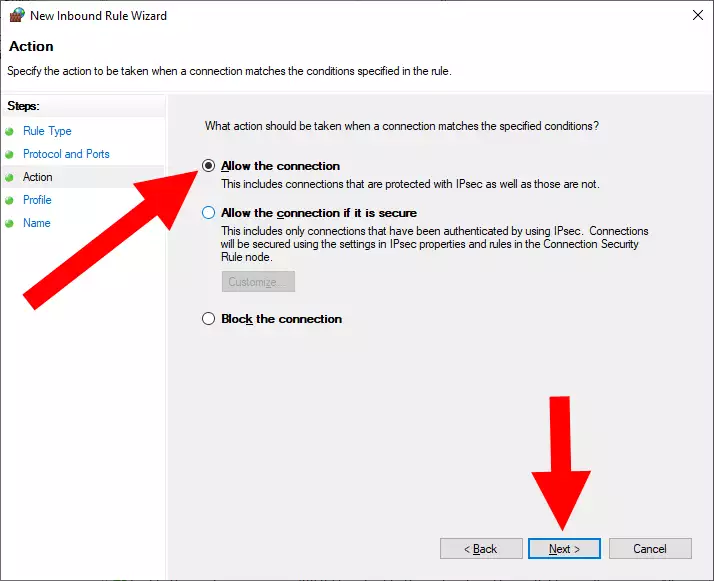
- Enable "Allow the connection"
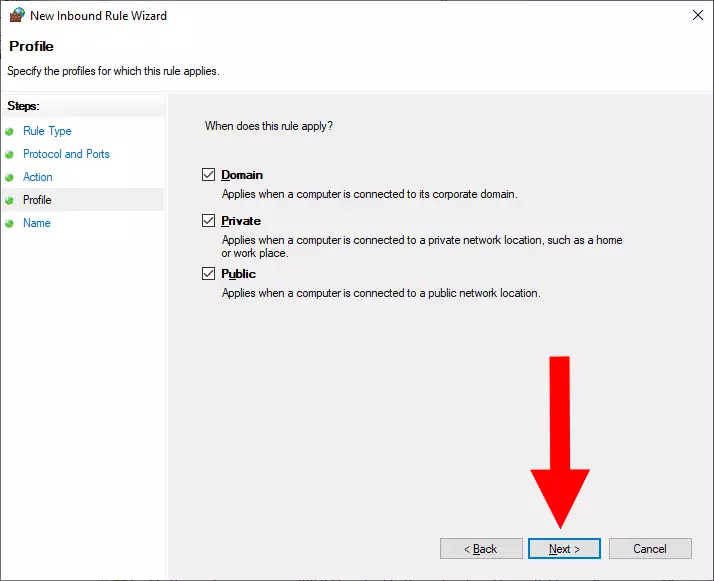
- Tick the Domain, Private, Public checkboxes
- Give name to this rule
- Click Finish
Step 1 - Open Windows Defender Firewall
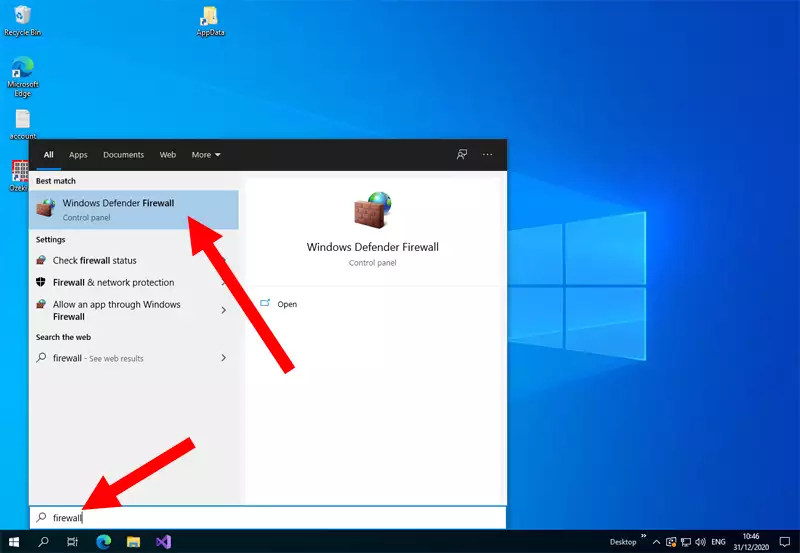
The first step, is opening your Windows Defender Firewall configuration program. To do that, please press the window button, and start typing in “firewall”. Your windows will find the configurator. Click it and the application will open. You can see the whole procedure on Figure 1.
Step 2 - Select Advanced settings
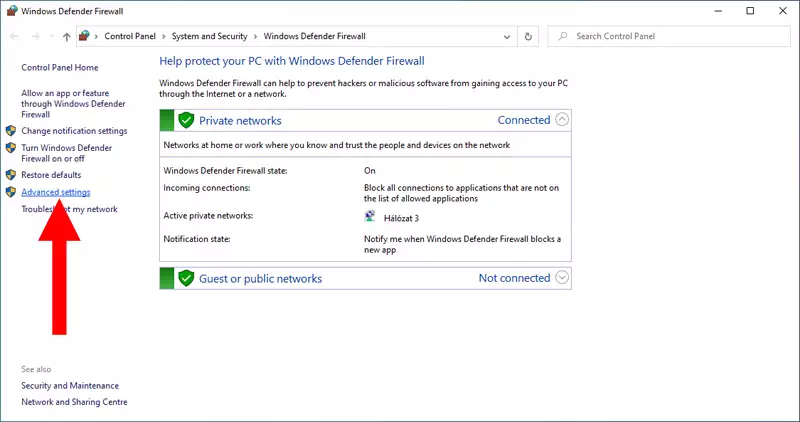
If you have opened the Windows Defender Firewall settings application, you will need to open the “Advanced Settings”. It is located on the left side of the screen. You can find where to click on Figure 2.
Step 3 - Select Inbound rules
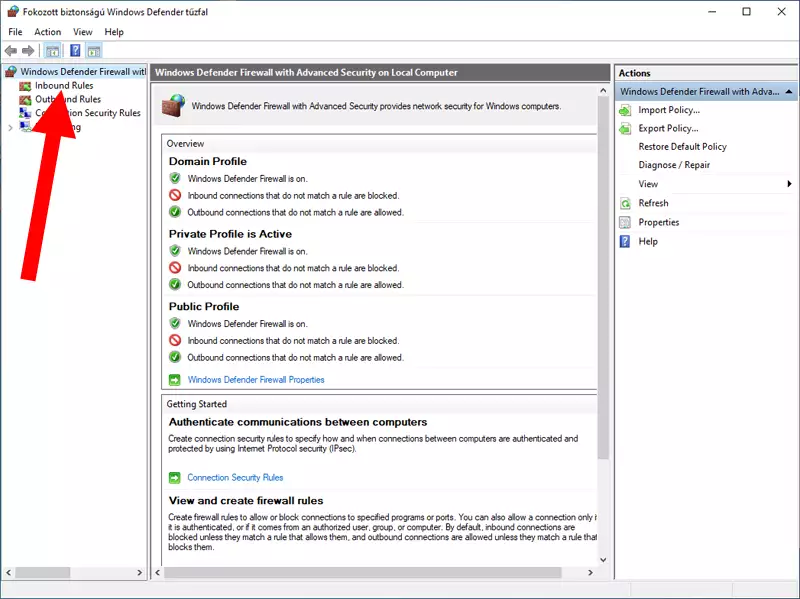
Now you are in the Advanced Settings of the Windows Firewall. Here you can manage the security levels, you can set up and delete rules and import or export policies. Now you need to open the “Inbound Rules” manager. To do that, search for it on the left side of the screen. You can see where to click on Figure 3.
Step 4 - Create New rule
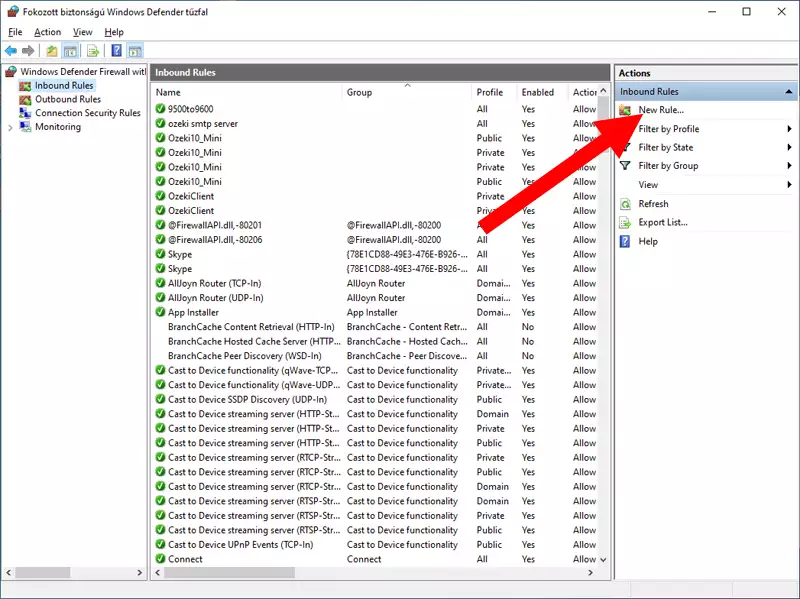
You will need a new rule to provide an exception for your SMTP server. To do that, please click the “New Rule” button on the right side of the screen. It is located under the “Inbound Rules” title. You can find it with the help of Figure 4.
Step 5 - Configure Port rule
Here you can choose whether you would like to create a new rule for a program, a port or a predefined. In this case, you need to choose the “Port” option. You can see the process on Figure 5.
Step 6 - Specify the Port number
TCP stands for Transmission Control Protocol. It is designed to offer highly reliable and secure stream over an unreliable internetwork. UDP is User Datagram Protocol. It is similar to TCP, but it leaves out all the error-checking protocols. In some cases, TCP is slower but more secure,but UDP is faster. In this case, you need to choose TCP and specify the local port number which is in this case “25”.
Step 7 - Specify the action when a connection matches
Here you need to choose what action should be preformed when the conditions match. To make your SMTP work, you need to choose “Allow the connection”. You can see witch to use on Figure 7.
Step 8 - Rule application
Now you need to specify the conditions. This rule should apply whenever the SMTP server connects to anything, so please make sure to tick in every box available. This means that anytime the SMTP want to connect to anything, the firewall will let it do. You could see how it should look like on Figure 8.
Step 9 - Specify the name of the rule
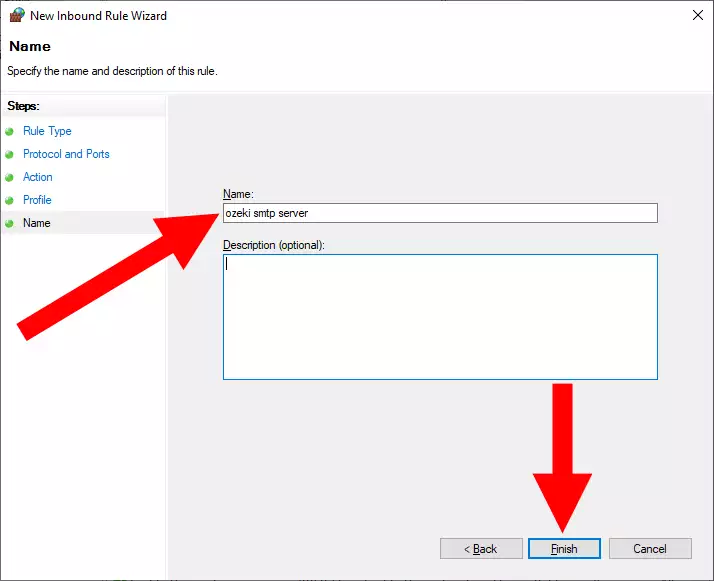
Now as a final step, you need to name your rule. It could be anything you like but be sure to name it something that let’s you distinguish it from any other rules in the future. In our example rule, we named it “ozeki smtp server”. You can see it on Figure 9.
Step 10 - Ozeki SMTP Server rule is ready
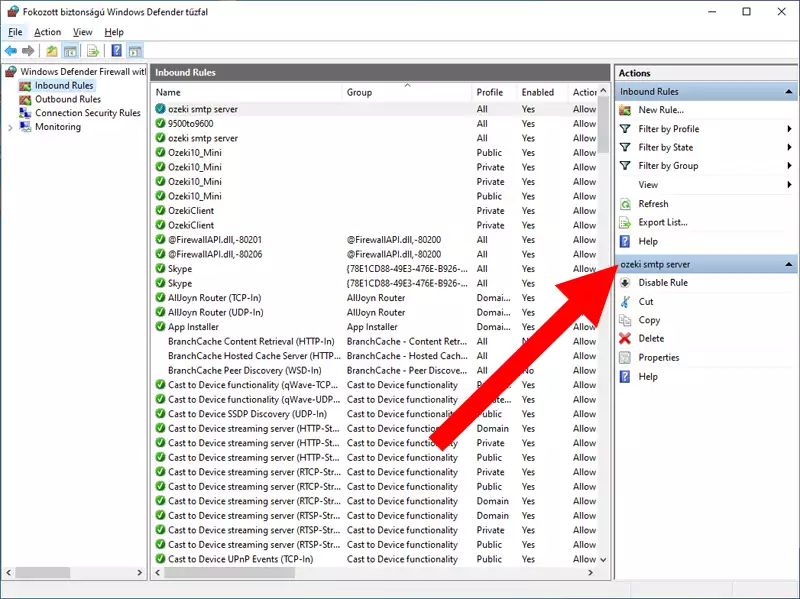
Firewall allows for the SMTP Server to receive e-mail messages via port 25.
Now your SMTP server rule is ready and functioning. You can see in the “Inbound Rules” list, and on the right side of the screen in the “Actions” panel, as you can see on Figure 10.
We hope that this guide was helpfull. If you have any problem with any of the steps, feel free to contact us at info@ozeki.hu
