How to configure a Windows Firewall for Database Engine Access
Allowing SQL port through firewall - configuration steps
SQL is a language used by Database Management softwares. To have a database which could communicate with the internet or any other servers, you will need to enable the information to pass through Windows Firewall. Firewall systems help prevent unauthorized access to computer resources. If a firewall is turned on but not correctly configured, attempts to connect to SQL Server might be blocked. To configure the Firewall, please follow this step-by-step tutorial. At the end, you will have an exception in the Windows Firewall for an SQL Server.
Create an access rule for outgoing SQL connections. Follow the steps:
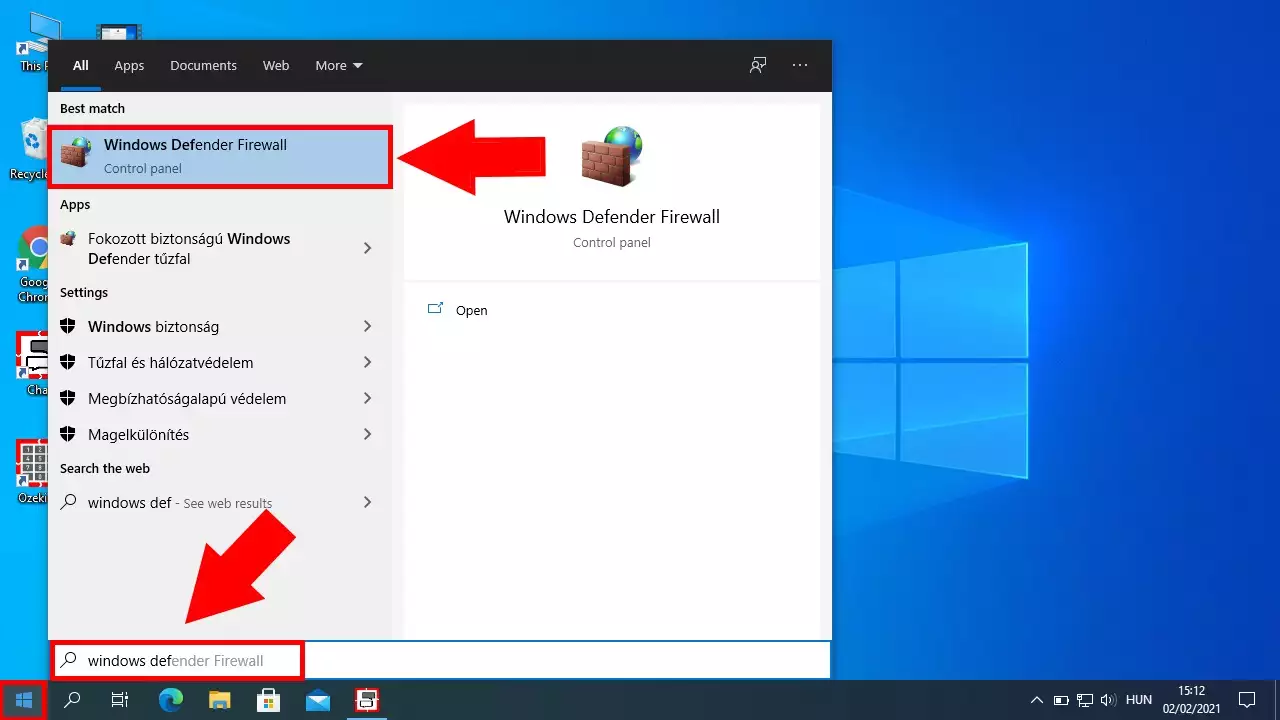
- Open Windows Defender Firewall
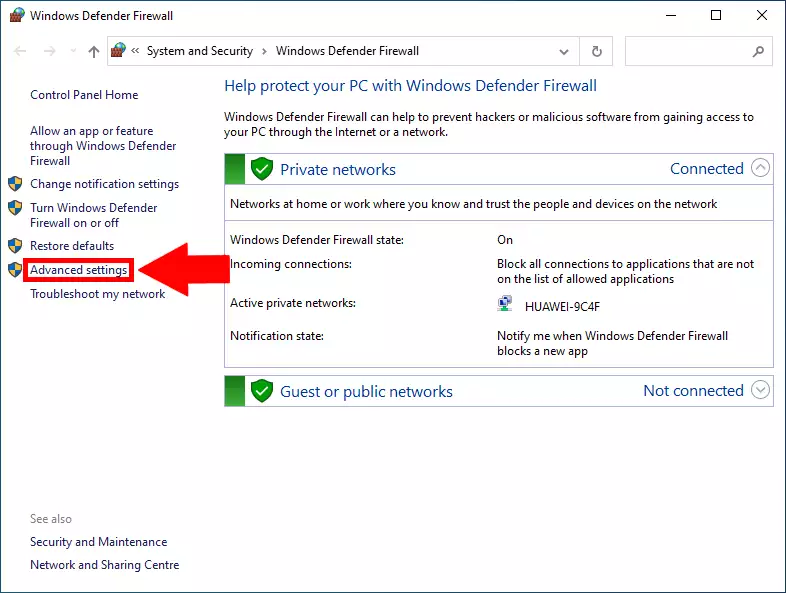
- Select Advanced settings
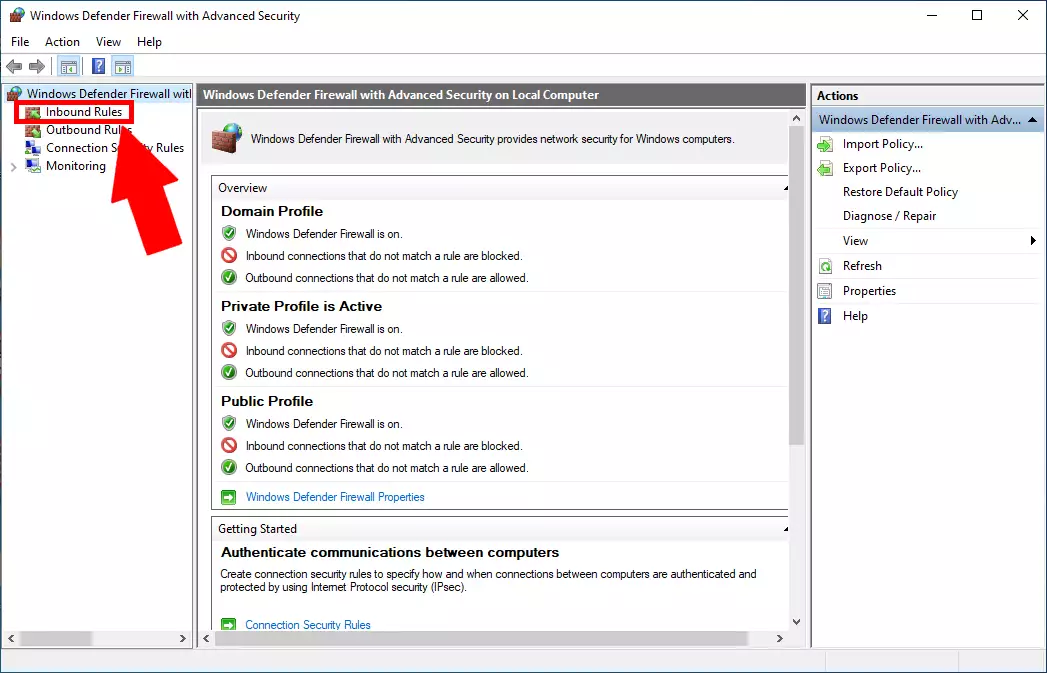
- Go to Inbound rules
- Add a New rule...
- Select Port rule
- Choose TCP
- Specify the local ports: Enter "143" into the textbox
- Select "Allow the connection"
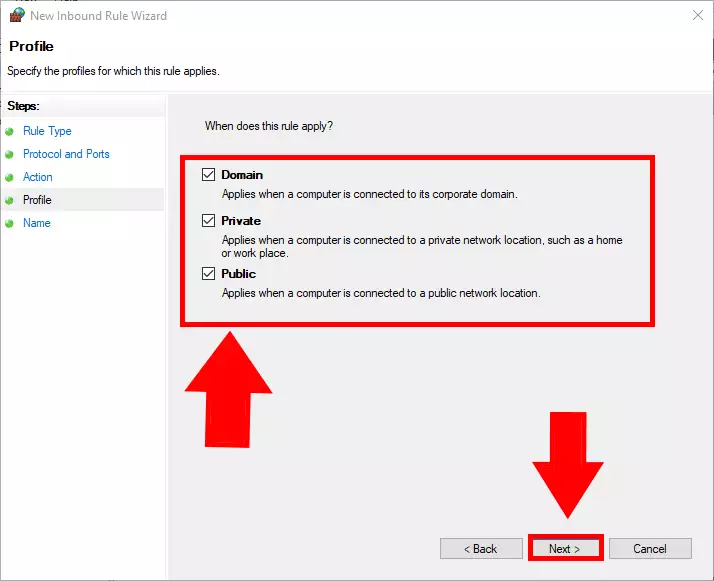
- Tick all of the following checkboxes: Domain, Private, Public
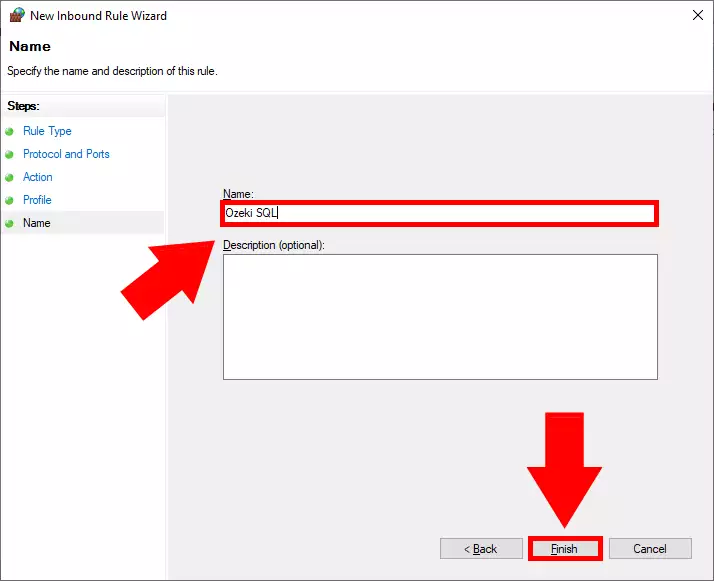
- Give a name to this rule
- Click on Finish button
First, you will need to open the Windows Defender Firewall configuration software. To do that, please press the windows button on your keyboard and start typing “Windows defender”. Your computer will search for the program. If it is found, click it and the program will open. You can see what to search for on Figure 1.
If you are in the application, search for the “Advanced settings”. It is located on the left side of the window, as you can see on Figure 2. Click it and it will take you to the advanced settings panel. There you can customize your settings, monitor your security, and make changes in rules and protocols.
Now you are in the advanced settings menu. Here you will be able to watch your current security conditions, change them and update them. To create a new rule, please click the Inbound Rules button on the upper-left side if the screen. It will take you to the list of your existing rules. To find the button, please see Figure 3.
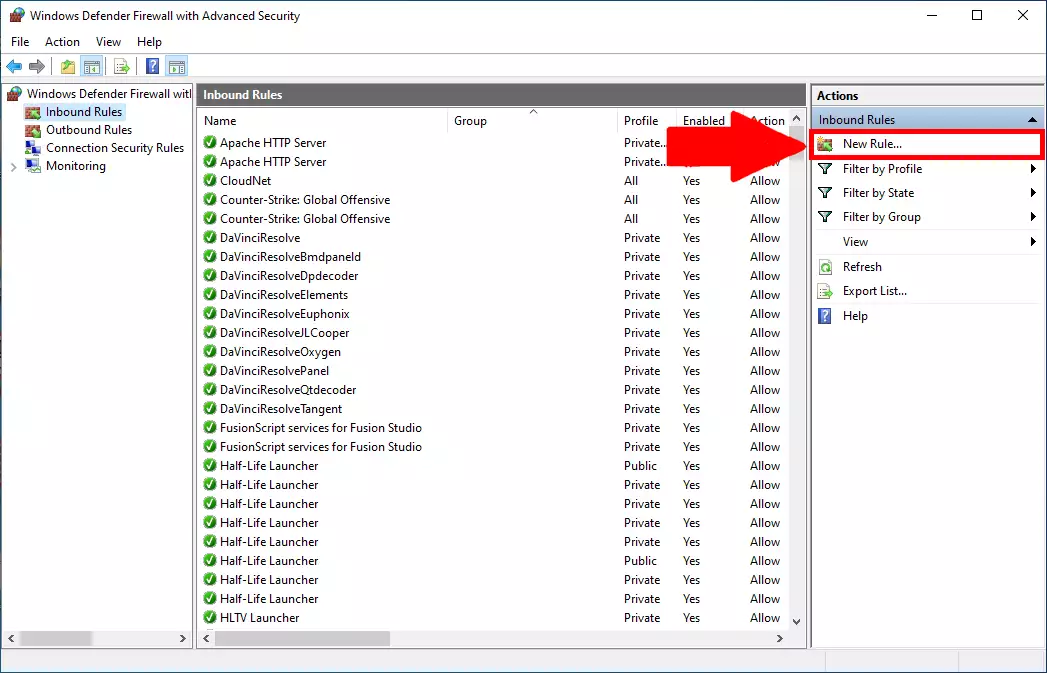
Here you can see your already existing Rules. These are generated by programs that are installed on your computer. To create a new rule, you will need to press the “New Rule…” button on the right side of the screen. This will take you to the rule configuration window. to find the button, pleas look at Figure 4.
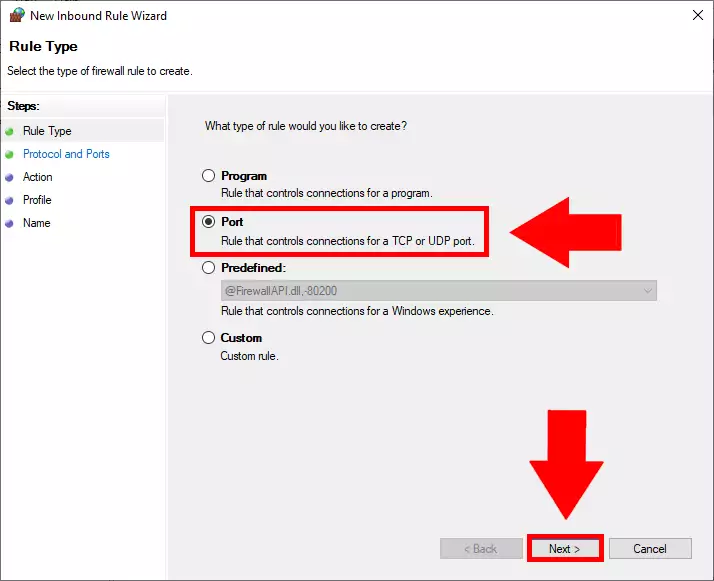
Here you will have the options to set what type of rule you wish to create. It could be Programs, Ports or a Predefined which could be handy if you would l ike to use File or Printer sharing, or Remote Assistance on the exception you are creating. In this case, you will need to choose the port option. To see which one to choose please look at Figure 5.
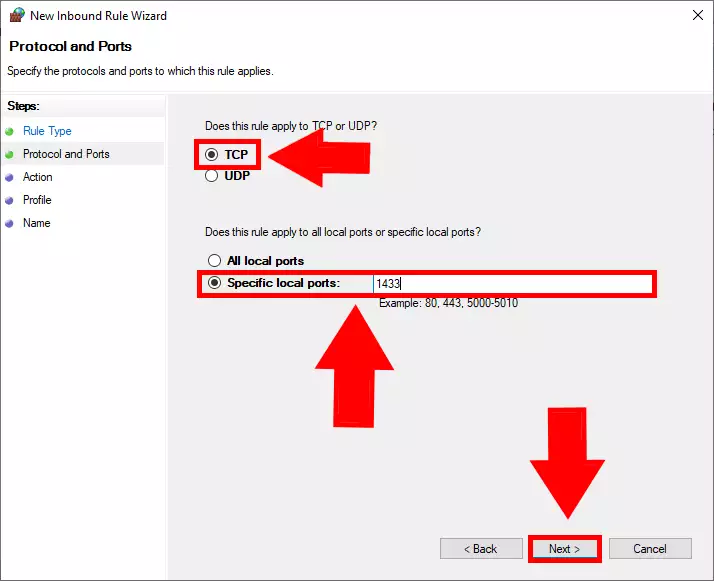
Now you are choosing which type of protocol you wish to use on the connection. TCP is the Transmission Control Protocol, which is designed as a model to offer highly reliable, end-to-end byte stream over an unreliable network. UDP is almost the same as TCP, only it is not using error-checking system. TCP is slower but more secure and UDP is faster. In this case, you need to choose TCP, and specify the local port which will be “1433”. To see how the window should look like, study Figure 6.
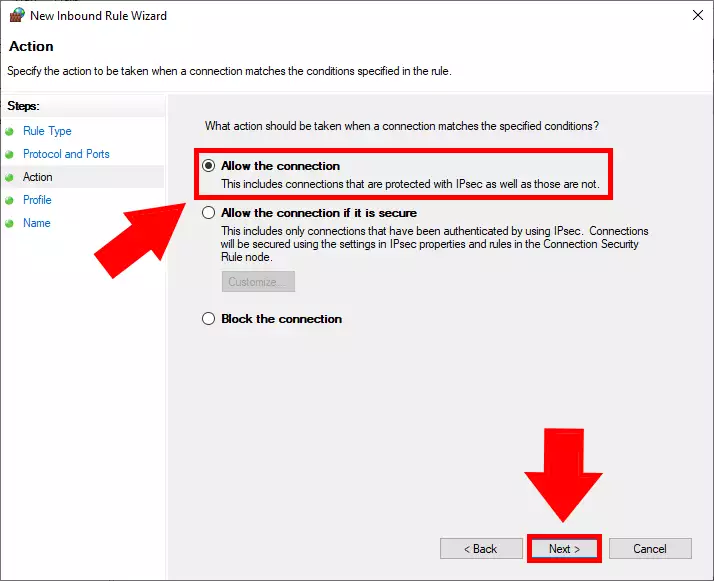
Now you are setting what action should the rule be executing. You could allow a connection, allow it when the connection is secure or block it. If you want to have a stable and secure connection, choose the “Allow connection” option, and click “Next”. You can get help on Figure 7.
Here, you can choose which type of connection you wish to use the rule. Domain is typically a corporate connection, Private is your home Wi-Fi or Internet, Public is usually in a public place like a restaurant or an airport. To have a connection which you can use anywhere, pleas tick in all the boxes. As you can see on Figure 8, click the “Next” button to proceed.
The final step is to name the connection. You could name it anything you wish, just make sure that you can distinguish it from other rules. As you can see on Figure 9, we named the rule “Ozeki SQL”. Click "Finish" to end the procedure.
