How to create video presentation in the Ozeki Virtual Classroom
In the Ozeki Virtual Classroom you have the opportunity to give a video presentation to the students. When you open a video it automatically opens for students and when you start or stop the video it also applies to students.
Step 1 - Open video page
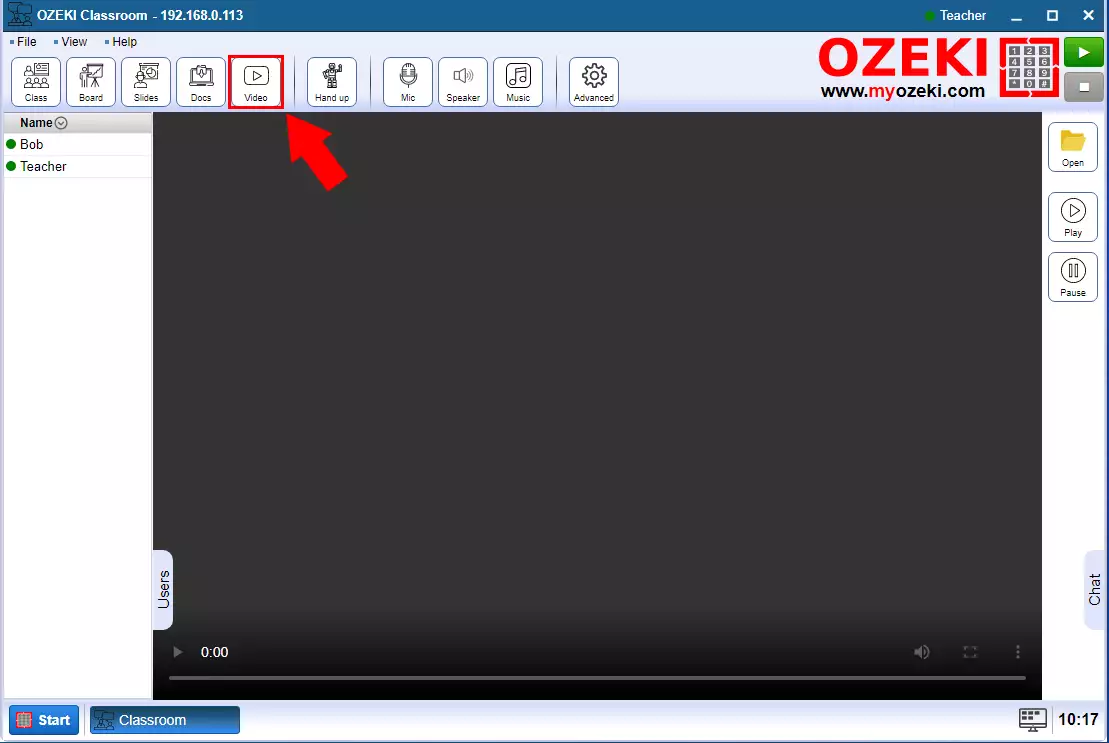
The first step is to open the video page by clicking the Video button (Figure 1).
Step 2 - Open video file
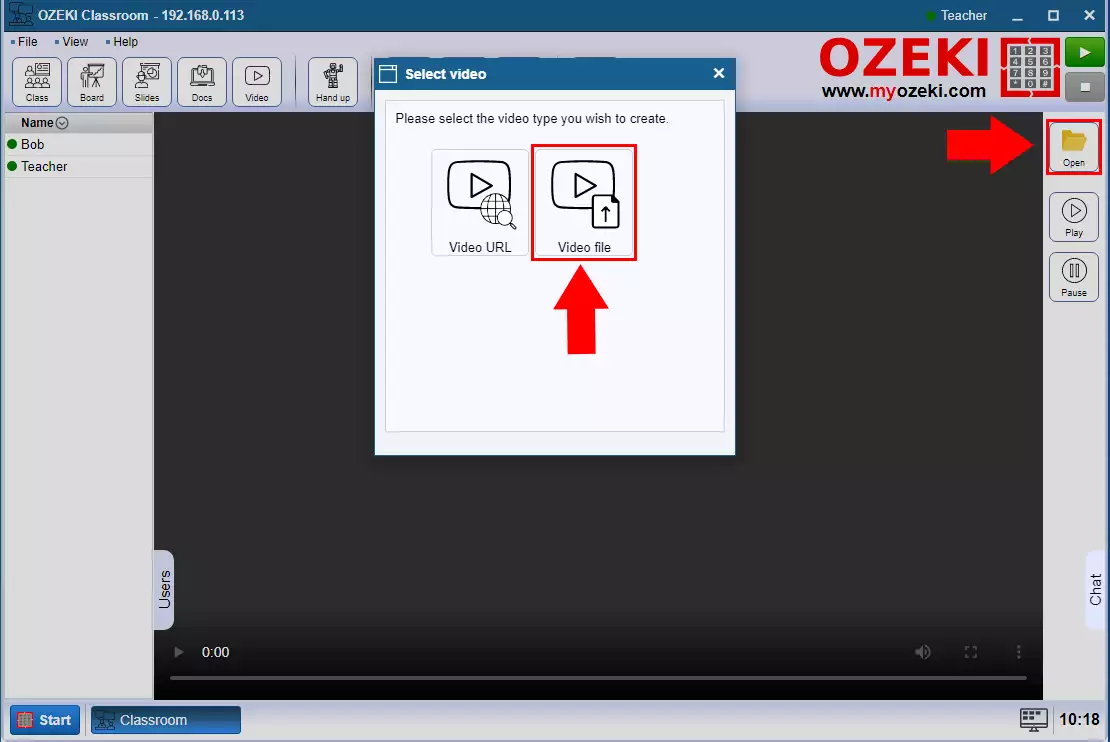
To be able to project a video, you need to upload it to the Ozeki Virtual Classroom. Click the Open button and select the video file option in the window that appears (Figure 2).
Step 3 - Upload video
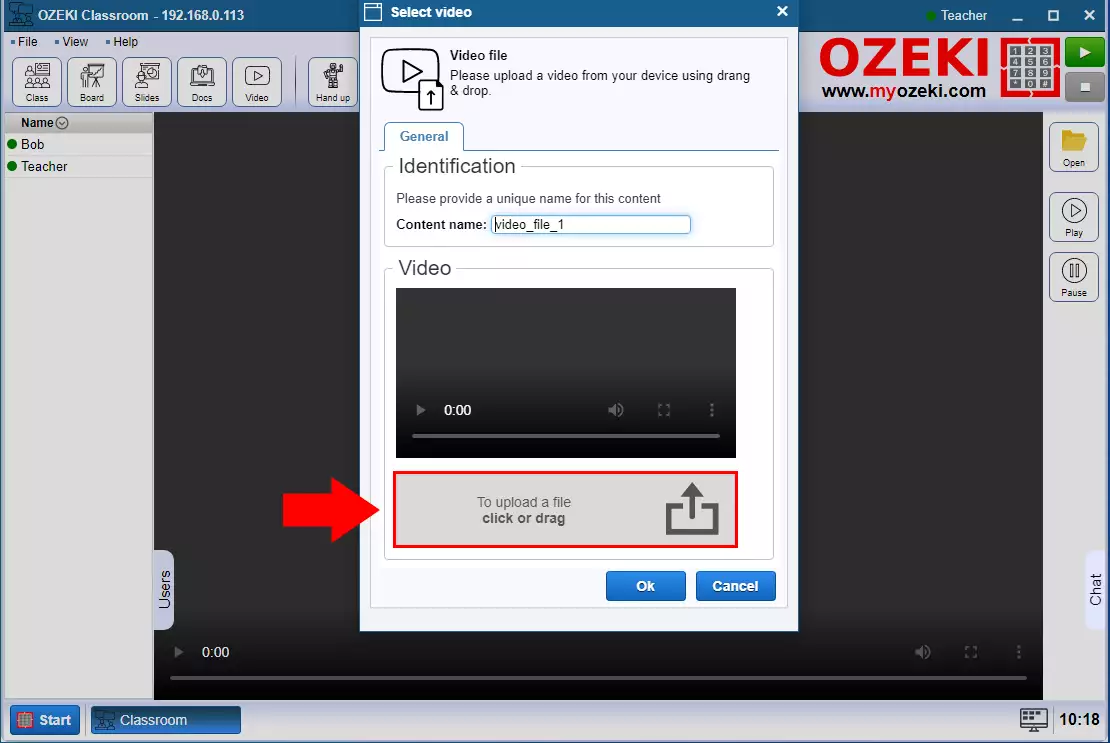
Drag the video into the video upload box or click on it and search for it in windows file explorer (Figure 3).
Step 4 - Video uploaded
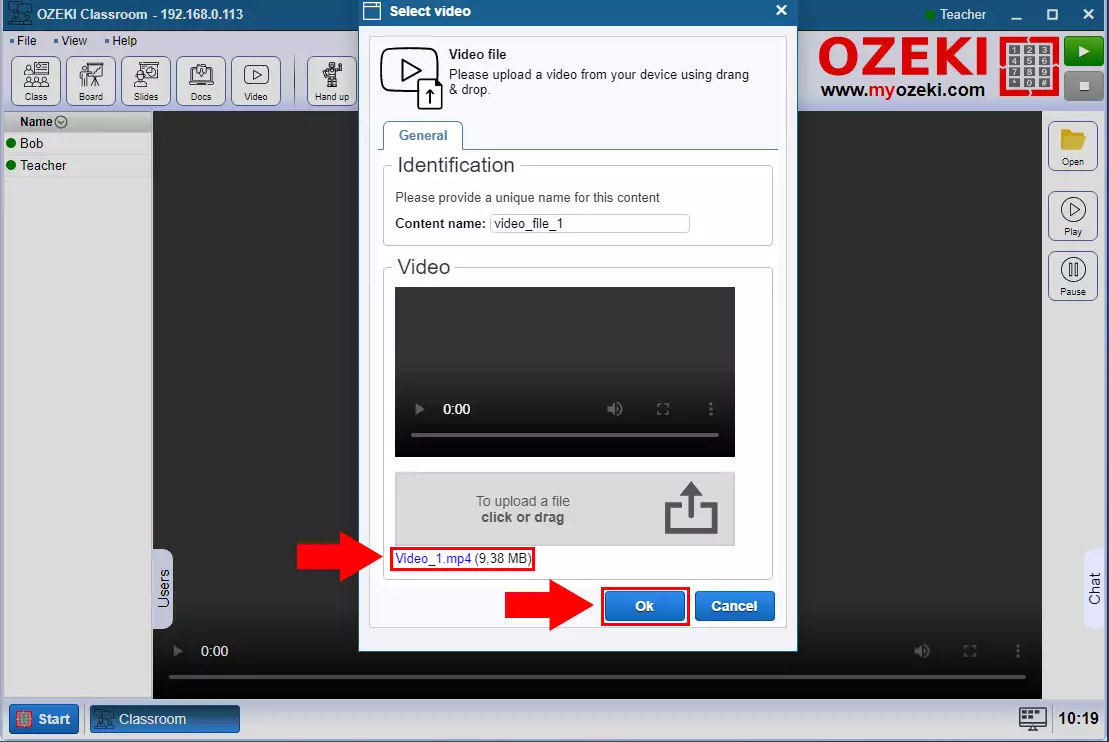
The video name will appear below the box when the upload is complete. Then press OK (Figure 4).
Step 5 - Play the video
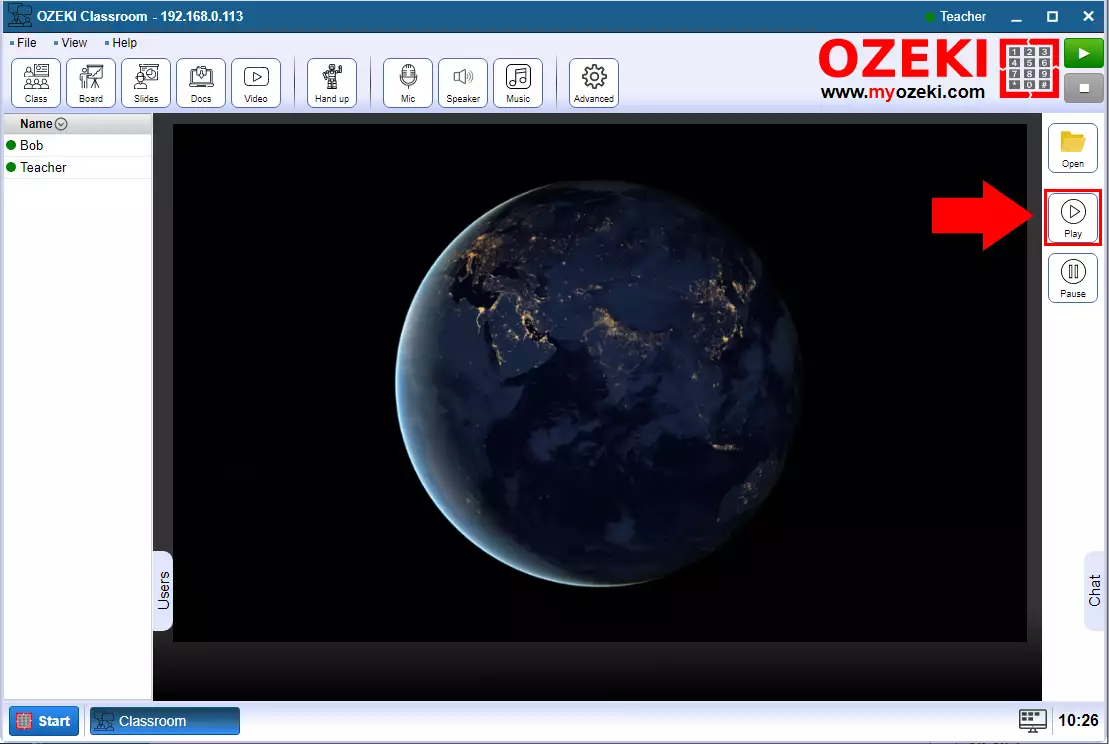
Press the play button to start the video. At this point, the video will also start for students as well (Figure 5).
