Automatic Email messaging
Your favorite e-mail SMTP server can be added to send e-mails from Ozeki 10. You will see how to send e-mails with a simple C# code running on Ozeki Robot controller. Program your ideas to select and forward messages. Ozeki Robot Controller can use every available Ozeki 10 connection.
Before starting this tutorial please add an SMTP connection by using Ozeki Control Panel. You can add a gmail account or any other SMTP server. If you are not using gmail and do not know the IP address and port number to your SMTP provider. You will most likely find these parameters on your e-mail provider's website.
Prerequisites:
- Ozeki 10 installed on your computer
- SMTP server added to Ozeki 10
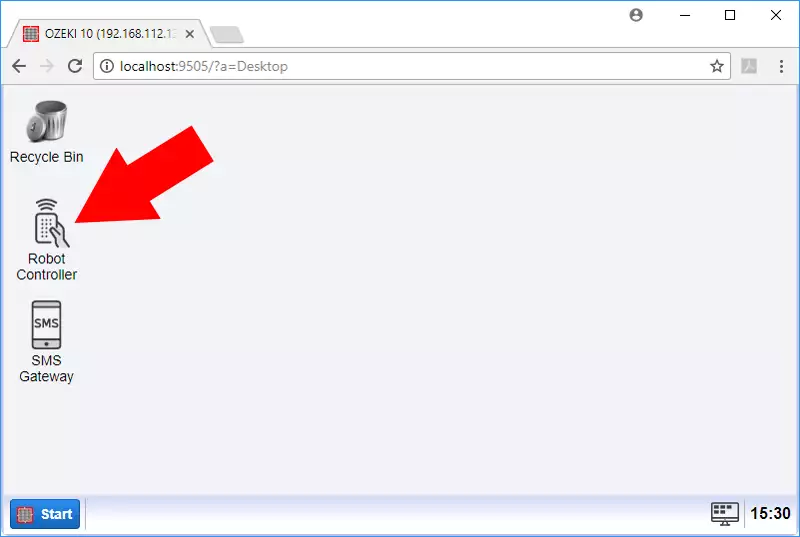
Step 1: Start Ozeki Robot Controller
You should start Ozeki Robot Controller from the desktop GUI of Ozeki 10 (Figure 1).

Step 2: Paste the example code into Robot Controller
The following example code can connect to 'My_gmail_client_1@localhost' Ozeki 10 connection, which is an SMTP connection added to Ozeki 10. You can send unlimited amount of e-mails through it, but now you will only send a 'Hello World' to 'sample_address@gmail.com' (Code 1).
This C# example code to be copied
using System;

namespace Ozeki
{
    public class Program
    {
        public void Start()
        {
          	Log("My E-mail sender is going to send an e-mail");
          	var msg = new Message();
          	msg.ToConnection = "My_gmail_client_1@localhost";
            msg.ToAddress = "sample_address@gmail.com";
            msg.Text = "Hello World";
            Send(msg);
        }
    }
}
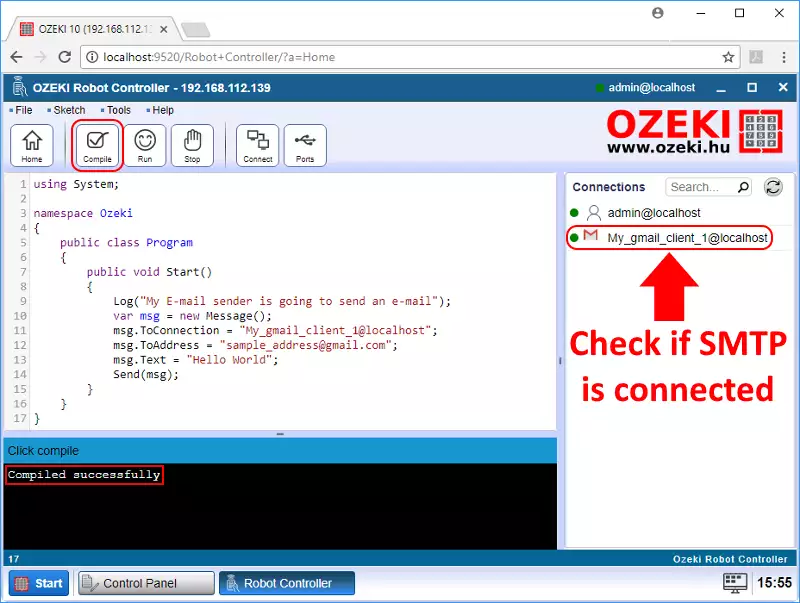
Paste the code and click 'Compile' from the Robot Controller's toolbar. It will get compiled with no errors (Figure 2).

Step 3: Run Code
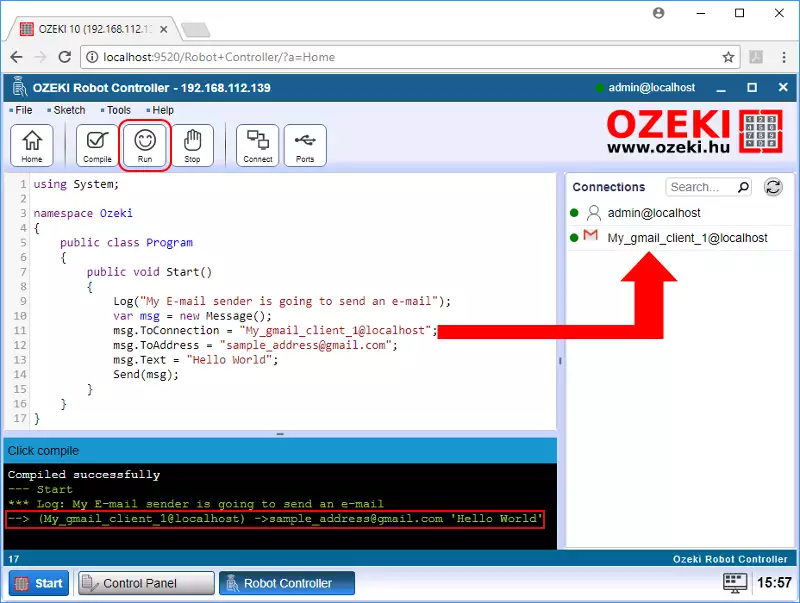
By clicking 'Run' on the toolbar, so you can run the example code pasted into Ozeki Robot Controller.
The E-mail has been sent. Check the green log on the bottom of Figure 3.

