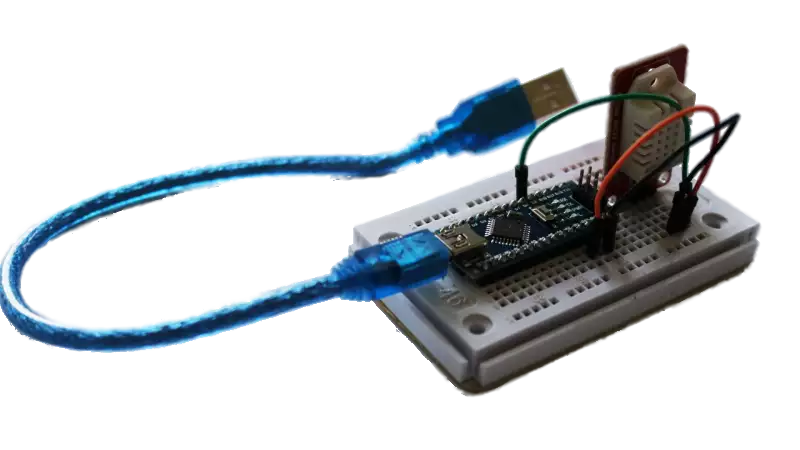
Saving temperature data into a database
Collecting sensor data into SQL database is a common task companies face. Sensor data can be anything from temperature, pressure, voltage, device location, etc. The following steps show you how you can setup a system to collect such data and save them into a database. You can use any standard SQL database, such as Microsoft SQL Server, MySQL, SQLite, PostgreSQL, Oracle, IBM DB2, etc... The guide works with each sensor and server combination, since the SQL INSERT statements that fills the table are the same.
Before adding the database through the following steps, make sure that you have already connected your sensor to Ozeki 10 and also be sure that the Ozeki server can catch every sensor data arriving through the serial COM port. Check sensor events or test GUI to make sure that the measurements are correct and then follow up this guide, which shows how to INSERT data into database records.
SETUP SQL DATABASE
STEP 1 - Create a new database connection
Make sure that the Ozeki 10 client is running in your webbrowser. Log in if you have not done it yet. Now you can open the Control Panel from the desktop of your Ozeki 10 server and click on 'Databases' on the left side vertical toolbar. Click the big blue 'Create new Database connection' to add a new SQL database. You will see how to route your sensor to the SQL database with the Control Panel.
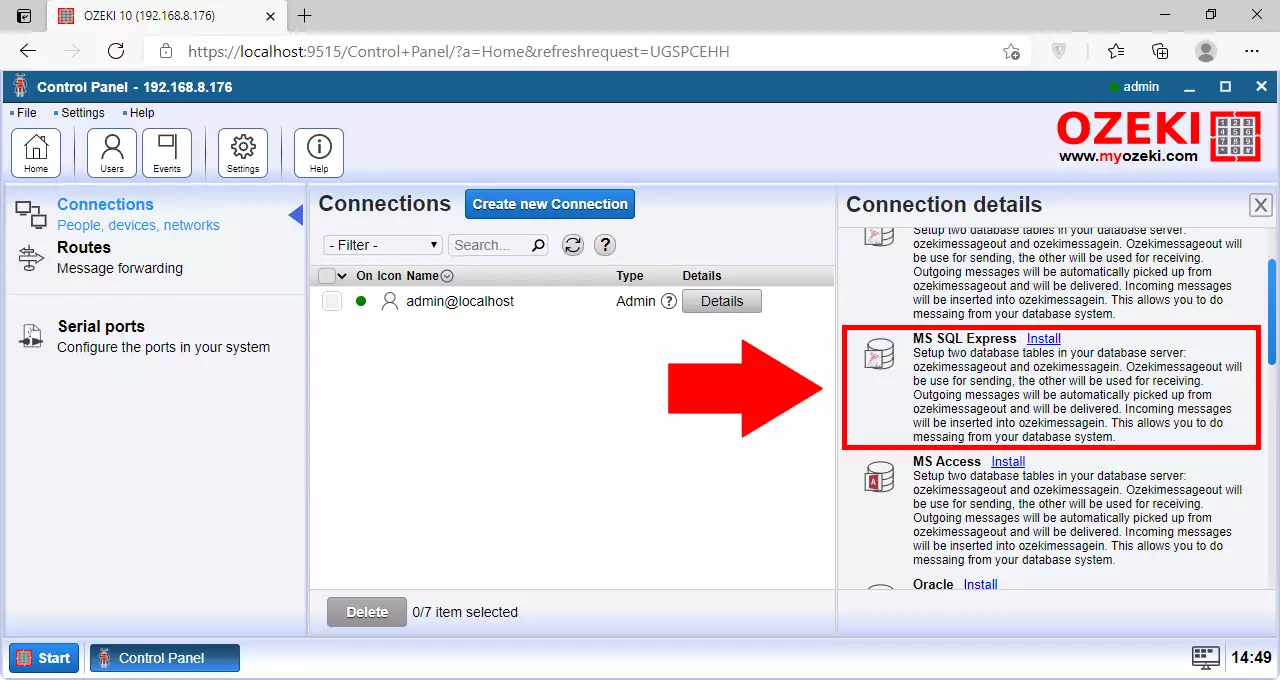
STEP 2 - Fill in the login credentials
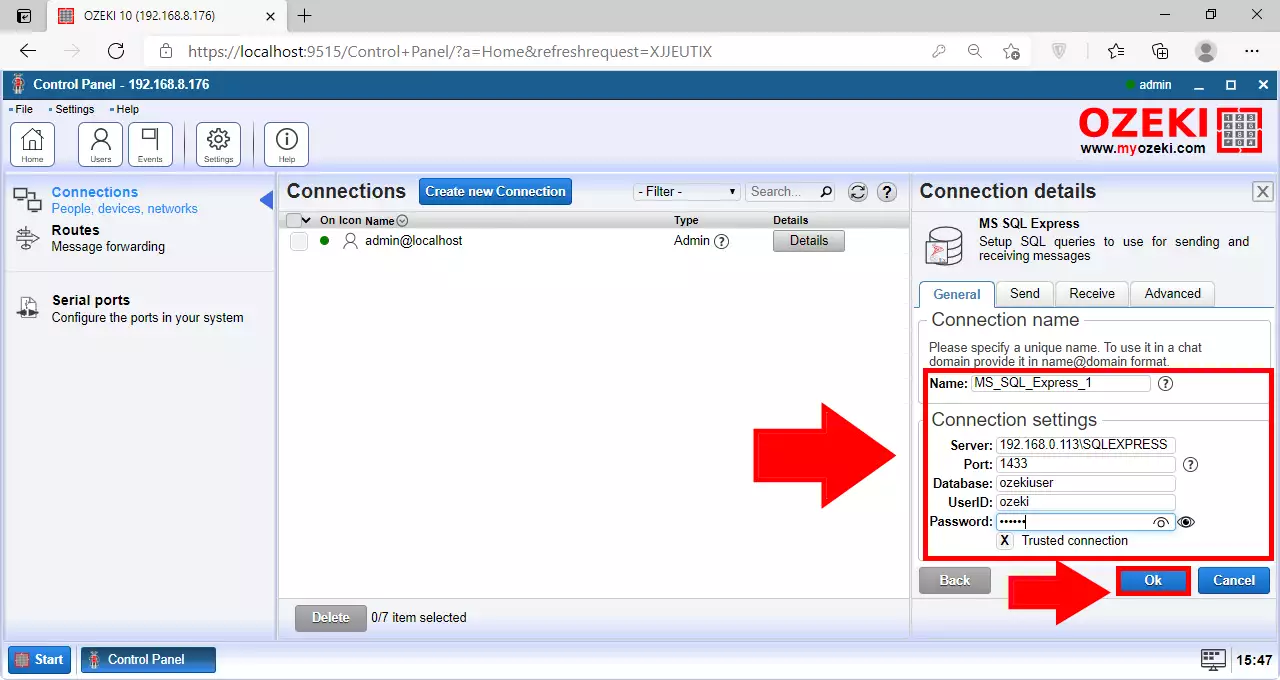
It is advised to select the database server type you are currently using at your company or at home. Depending on which database you have selected, fill the appropriate login details. Most database access require a server IP, port number, database name and a username and password pair. Click 'Ok' and the database will appear in the list. The green LED next to it will show a successful database connection.
STEP 3 - Create the tables
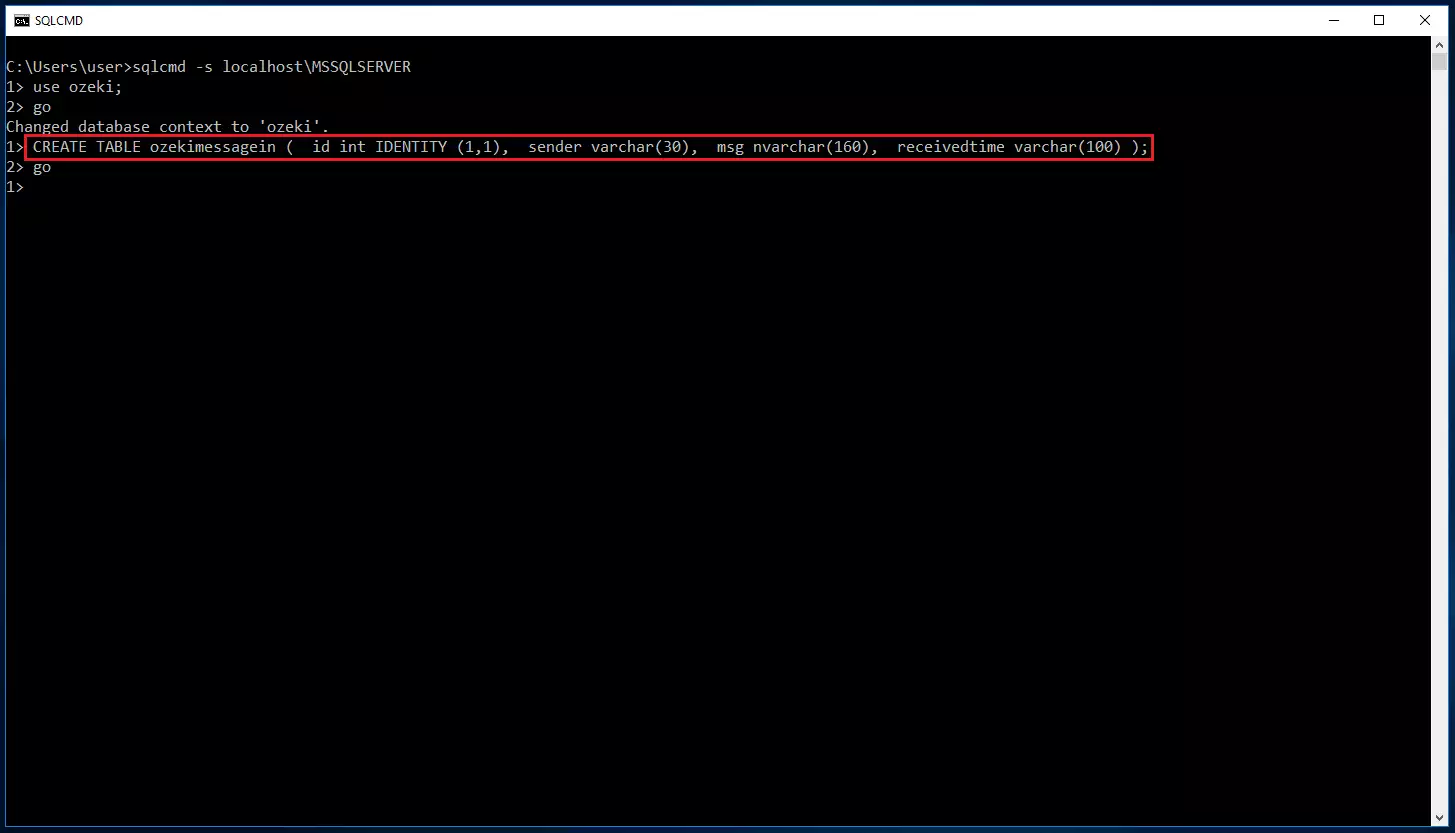
Create a database table (e.g. ozekimessagin) for storing incoming data. Note, that you can use your custom table definition as well, but first look at the definition used in the picture below.
CREATE TABLE ozekimessagein
	(id int IDENTITY (1,1),
	sender varchar(30),
	msg nvarchar(160),
	receivedtime varchar(100) );
STEP 4 - Configure the database
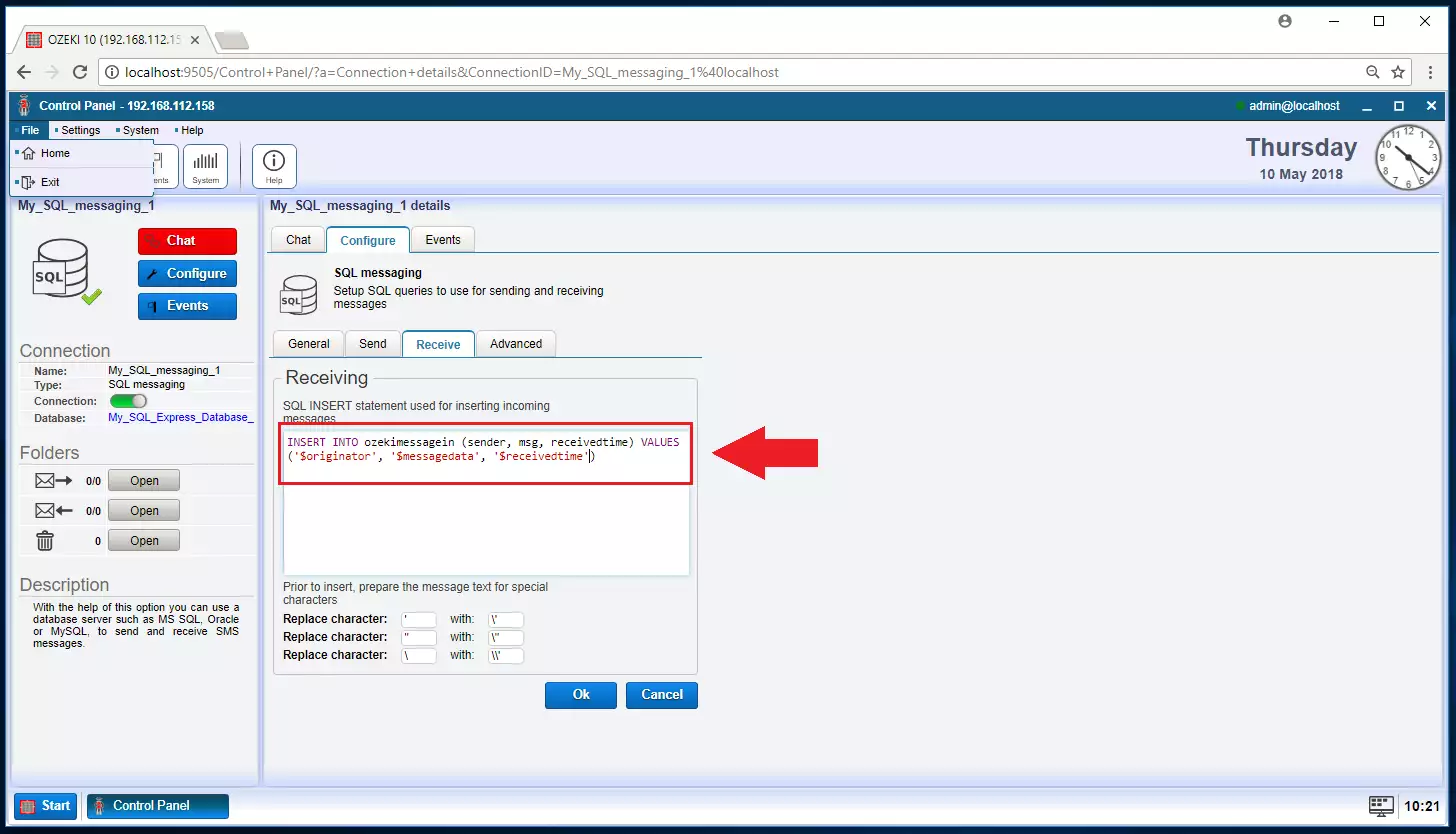
Configure the database you have just connected to Ozeki 10 in STEP 2. Click on it in the database list. You can find a 'Details' button next to it. Then select the 'Receive' tabpage under the 'Configure' tabpage. Check if the SQL INSERT statement fits the table layout you have created in STEP 3. Do this by comparing the table name and the attribute name as well. Anytime a message is received by the database connection, this statement will insert a new record containing the sensor message.
CREATE MESSAGE ROUTE
STEP 5 - Create a new route
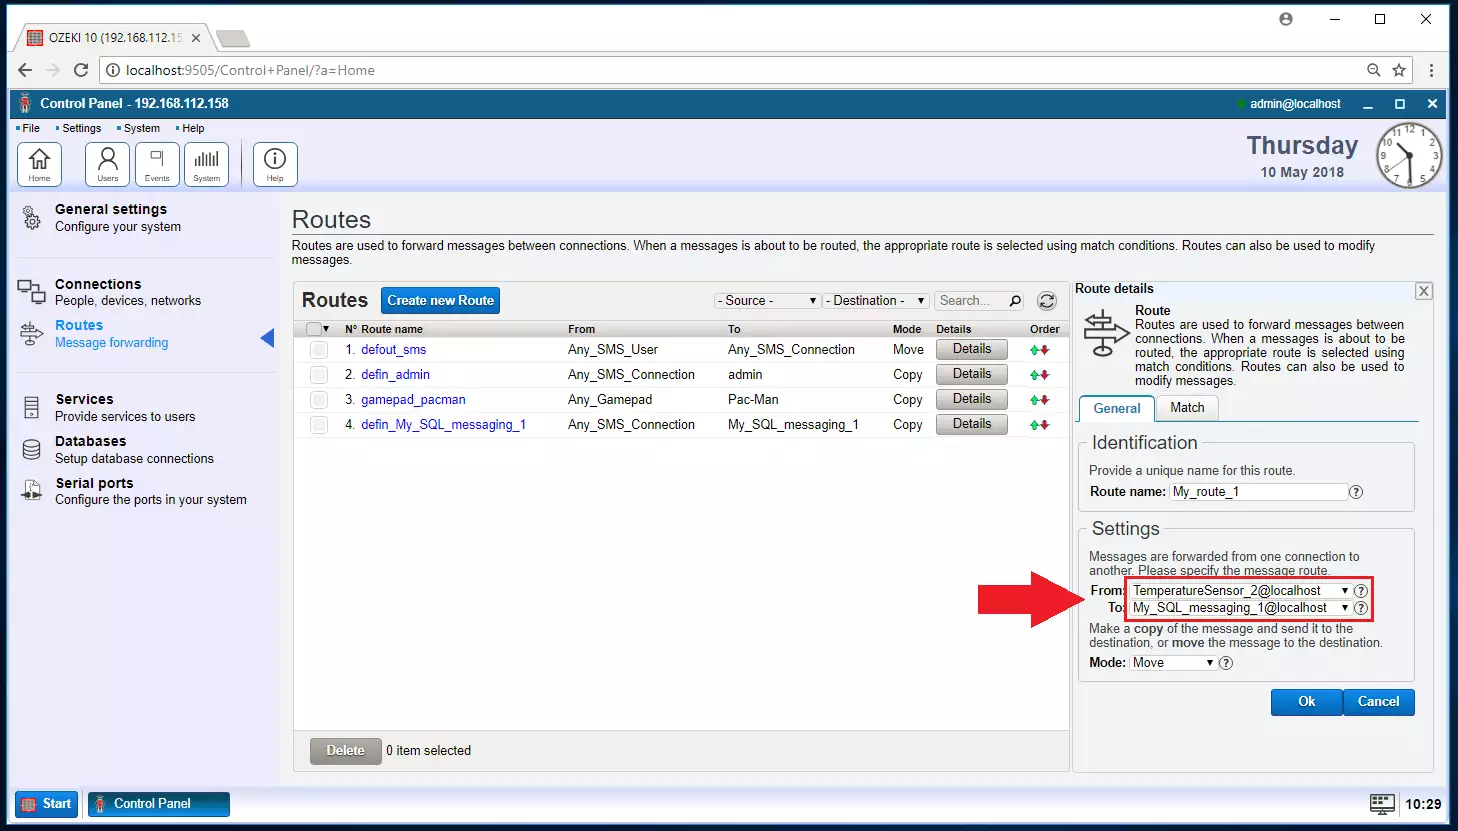
The sensor is hopefully connected to Ozeki 10 and you can probably read the sensor with some test measurements by using the sensor's user interface in Ozeki 10. If it works, select 'Routes' and click on the wide blue 'Create new Route'. Please set a message route from the sensor to the database connection. Click 'Ok'. From now on the sensor measurements will be automatically forwarded towards the database.
STEP 6 - Set the periodic reading
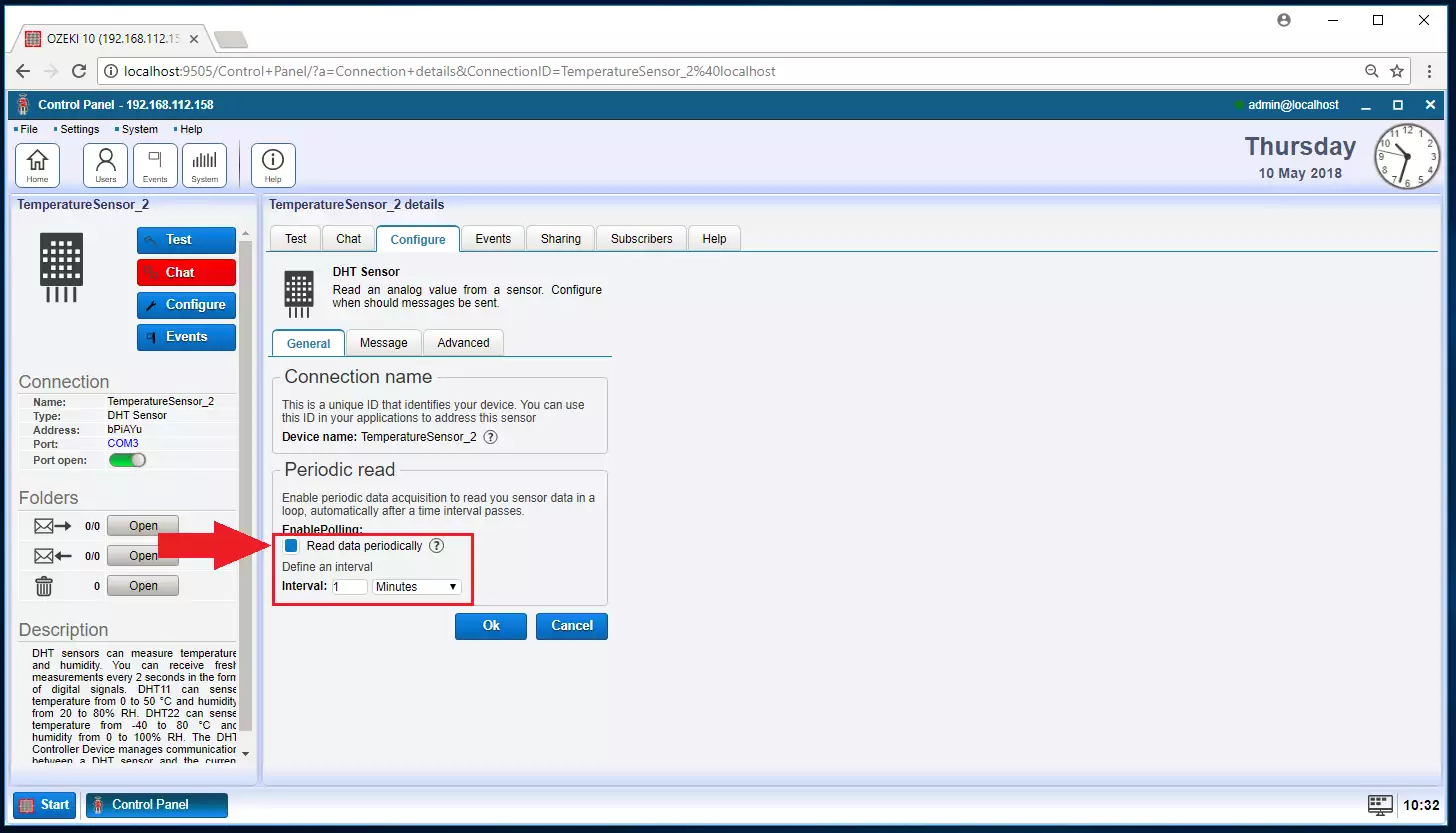
Now it is time to set periodic reading after it is set, the sensor will be read continuously in a given timeframe and since the route is set, all readings will be automatically stored in a database. Let's see how to do it, go to the GUI of your sensor by finding it in the connection list. You can activate periodic read on the 'General' tabpage below 'Configure'. In this example the interval period is set to 1 minute.
STEP 7 - The events tabpage
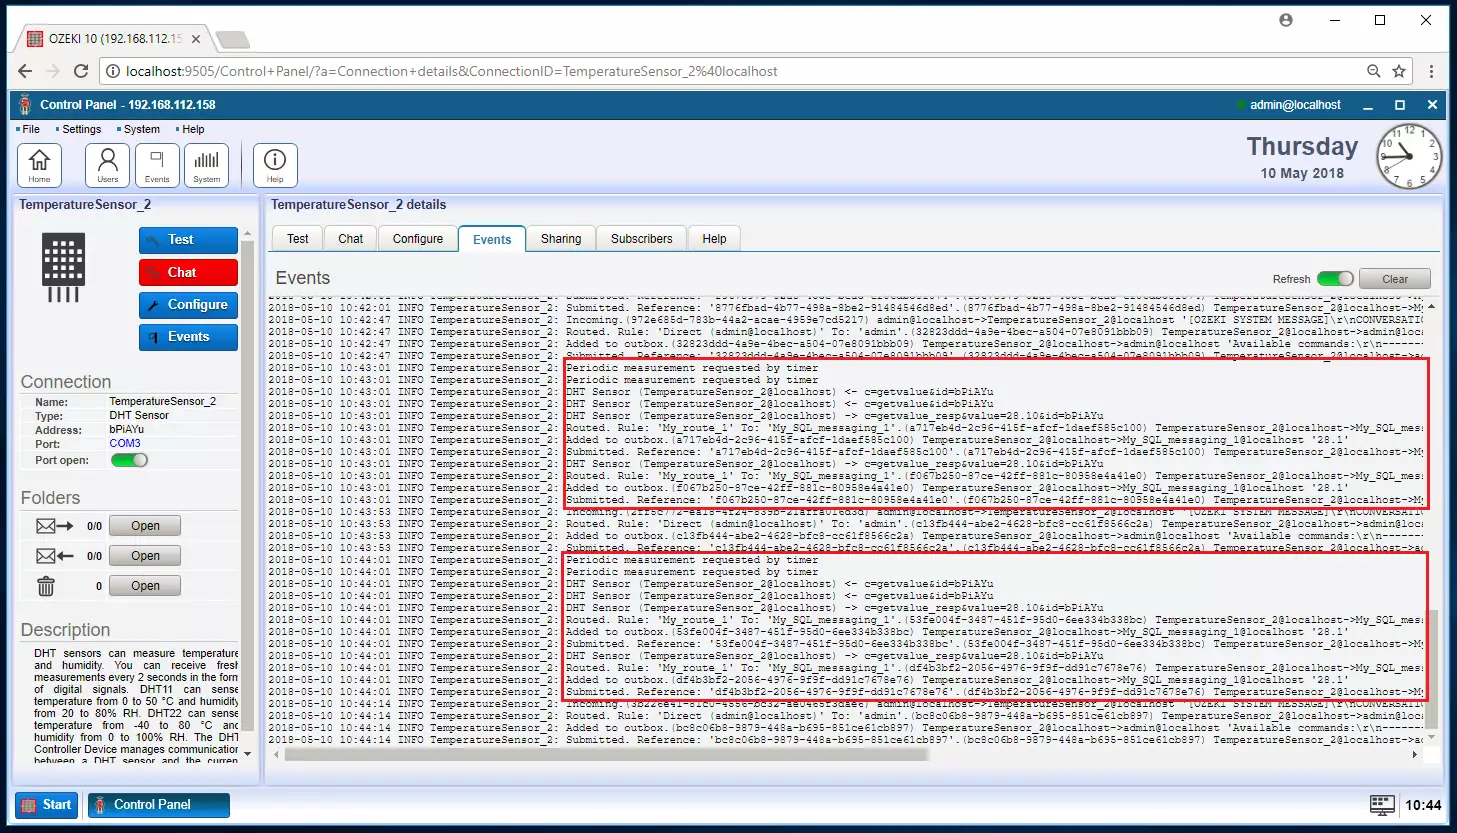
Please select the 'Events' tabpage from the horizontal top menu and watch all sensor events in the log window. You can see that the sensor value is asked every minute, since the reading period has been set to 1 minute. This is a screenshot where you can actually see the Ozeki serial protocols at work. The 'c=getvalue' is a standard serial command that can request measurements from most Ozeki sensors. Find all Ozeki device protocols at http://www.ozeki.hu/index.php?owpn=1557
STEP 8 - Check the database log window
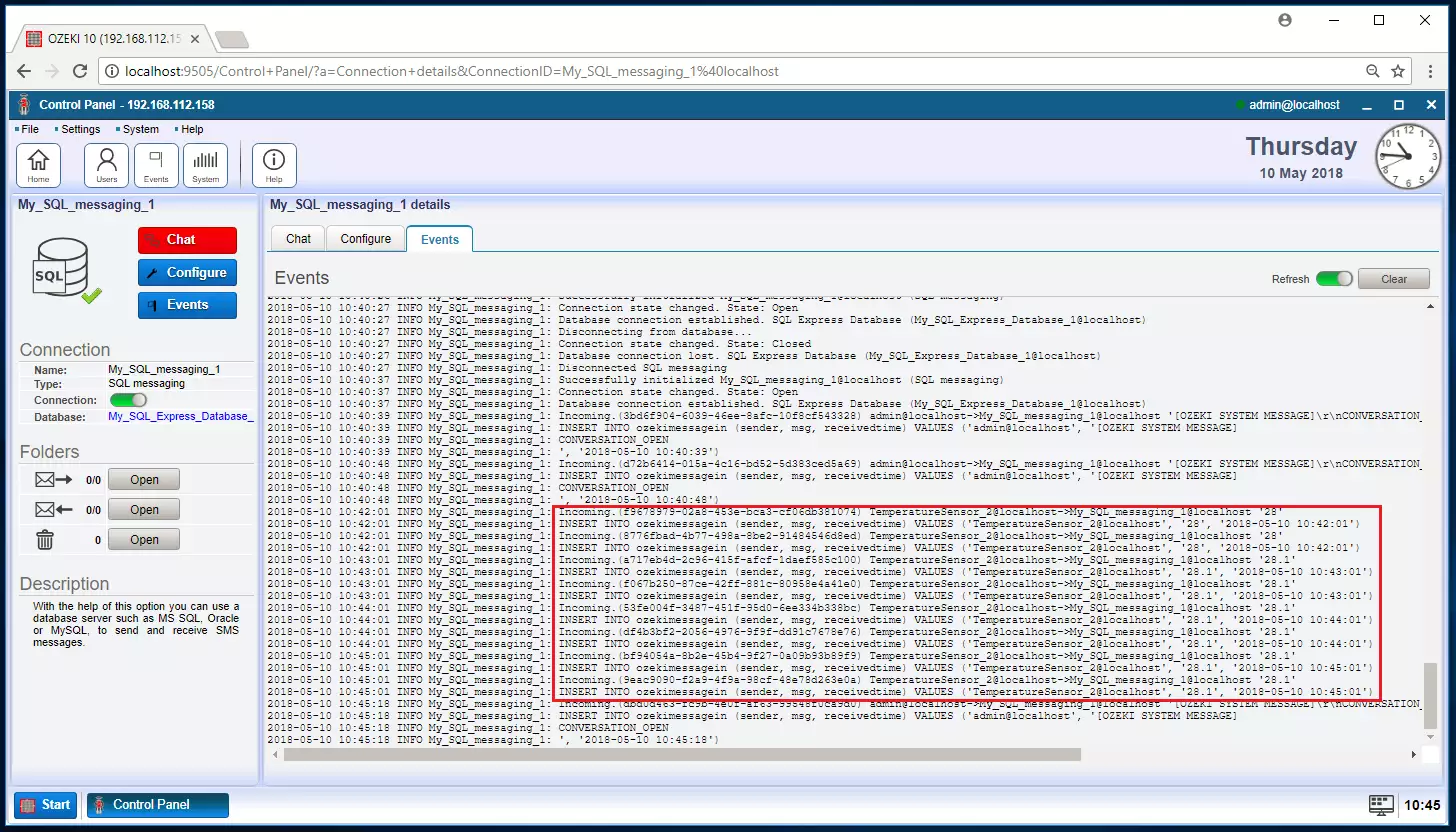
Since the route was set in STEP 5, all measurement data is forwarded through the database connection and added to the database with the INSERT statement you have set in STEP 4. You can find the database log in Ozeki 10 to see if the sensor data has been forwarded. Click 'Databases' on the left side vertical toolbar to find your database connection. Click on the 'Events' tabpage to watch the log window. In this example the temperature is recorded on the SQL database every minute.
STEP 9 - Write the sql statement
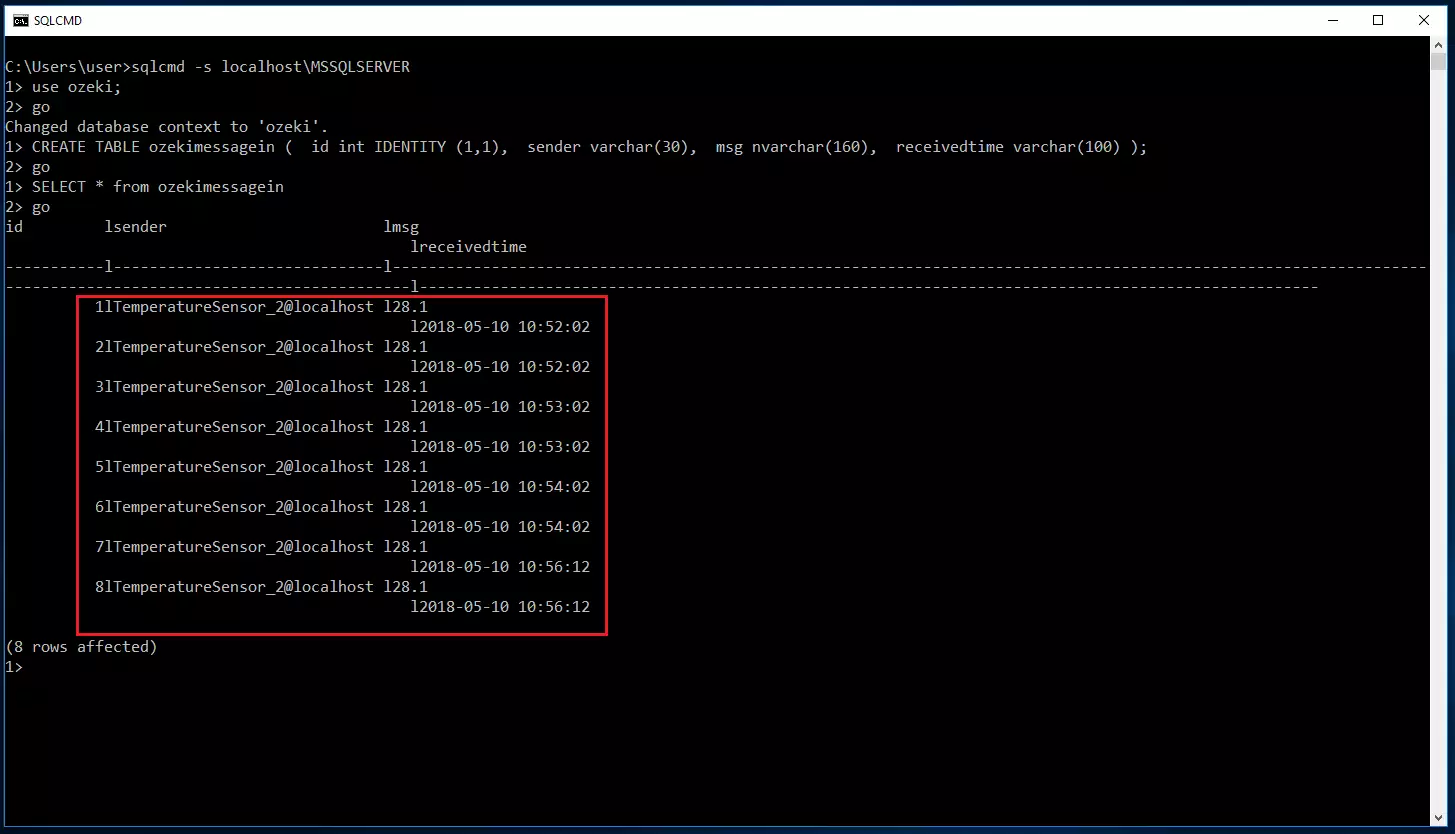
Finally open the command prompt of your SQL database server to read the database records in your table. The SQL SELECT statement finds all records in the 'ozekimessagein' table.
SELECT * FROM ozekimessagein;
You can also initiate a SELECT statement from Ozeki 10 by using the database GUI and clicking the 'SQL' tabpage to write your statement.
Save SQL data from any connection
You can think of using Ozeki compatible Arduino libraries to store data from a DHT sensor like below or an NFC reader, ultrasonic sensor and so on... As a matter of fact all text message received from Ozeki 10 connections can be stored in records. This includes SMS messages, modbus sensor measurements, detected license plates, telephone numbers, lidar sensor distance measurements, Android gyroscope, GPS data and many more.
