How to install Ozeki Classroom
The following step by step guide is shows you, how you can install Ozeki Classroom on windows.
Step 1 - Download Ozeki Installer
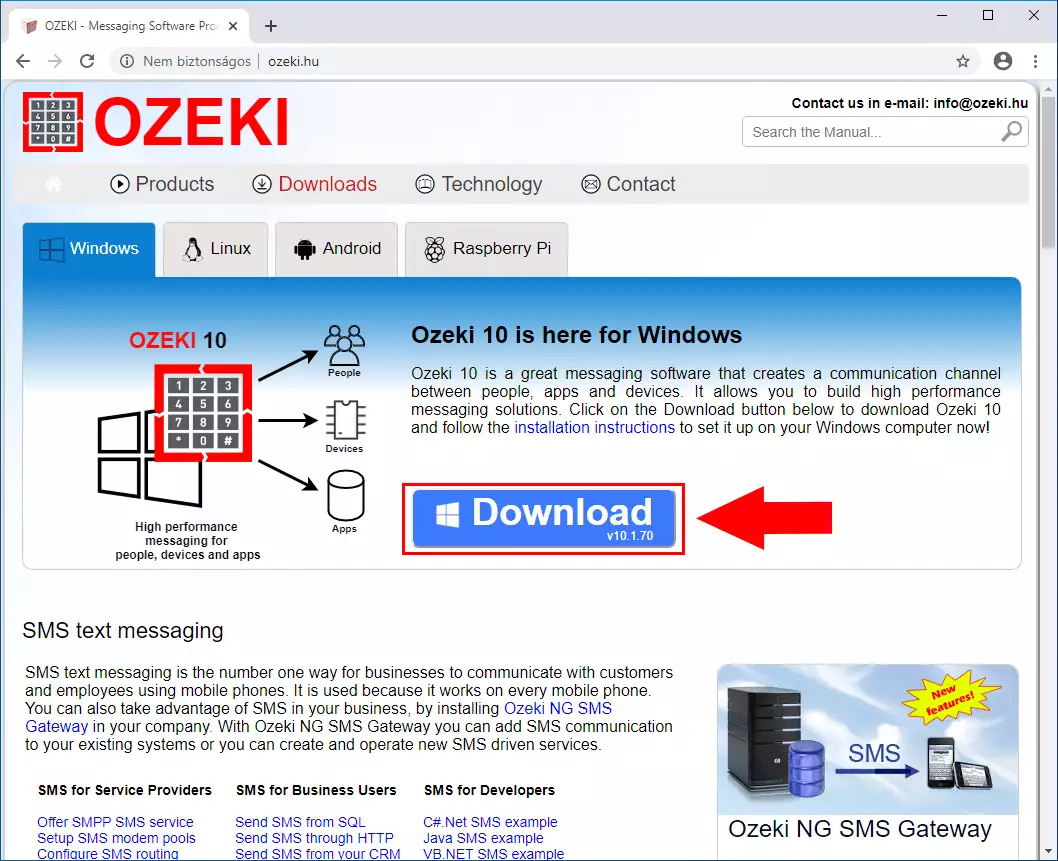
First step is to download the Ozeki Installer from the Ozeki.hu
Step 2 - Start setup
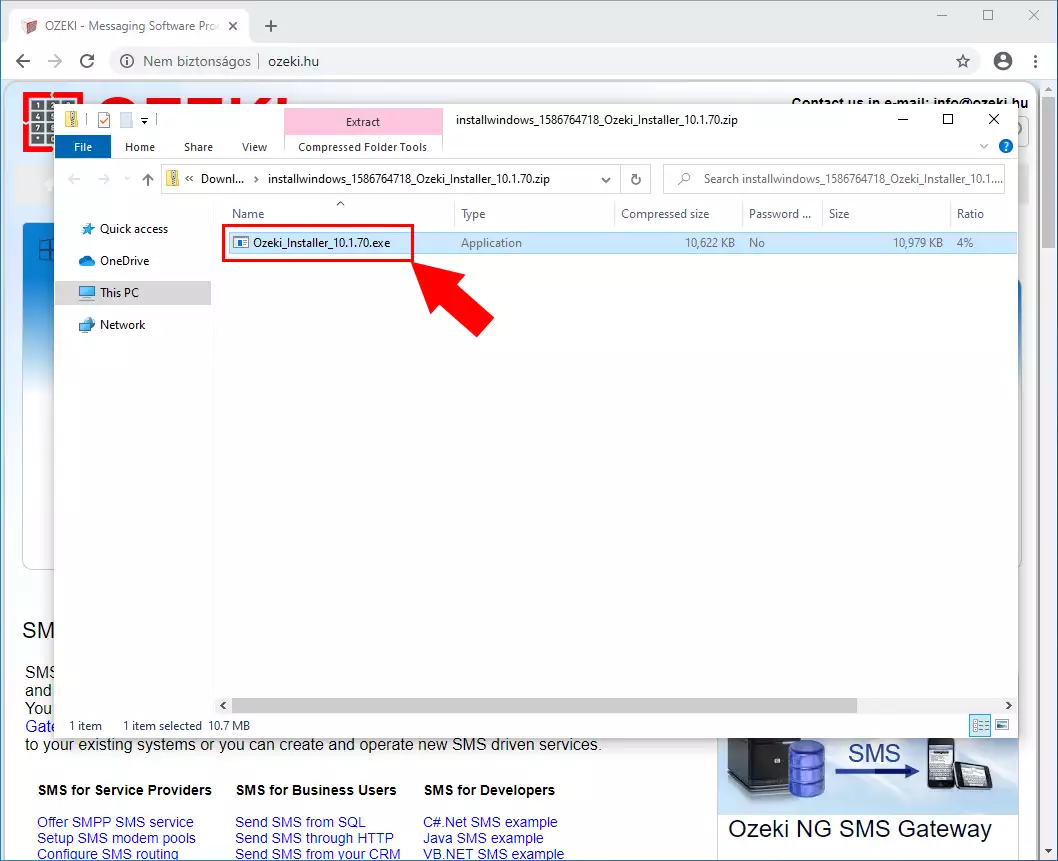
When the download finished, you have to click on the executable file to start the installation process.
Step 3 - Setup welcome page
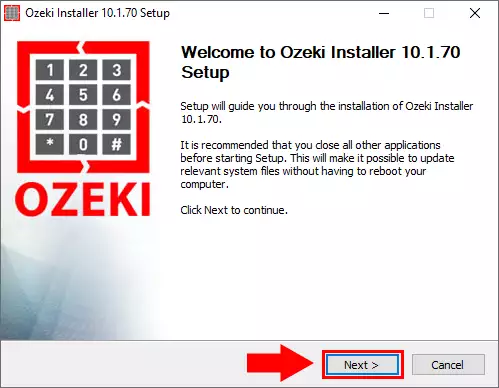
As soon as you clicked on the .exe file, the installer starts with a welcome screen. All you have to do here is to click Next to continue the installation.
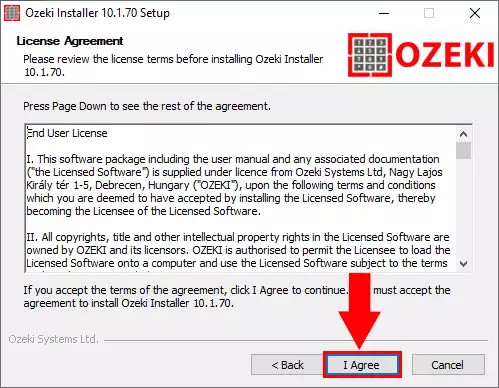
Step 4 - Accept license agreement
To install Ozeki Installer on your computer, you must accept the terms of the License Agreement. Please review them then click 'I Agree' button to continue.
Step 5 - Finish setup
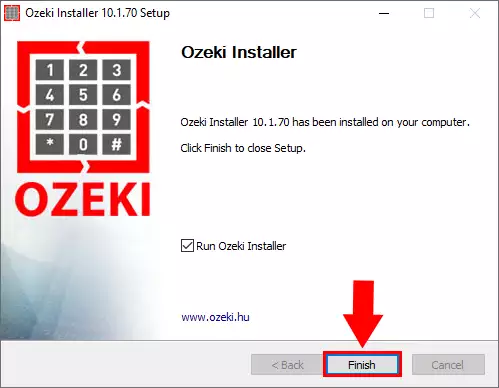
After the installation process is finished the Ozeki Installer service will start automatically in the background. To run Ozeki Installer on your web browser, just check Run Ozeki Installer as you can see it on Figure 5 and click Finish.
Step 6 - Select Classroom
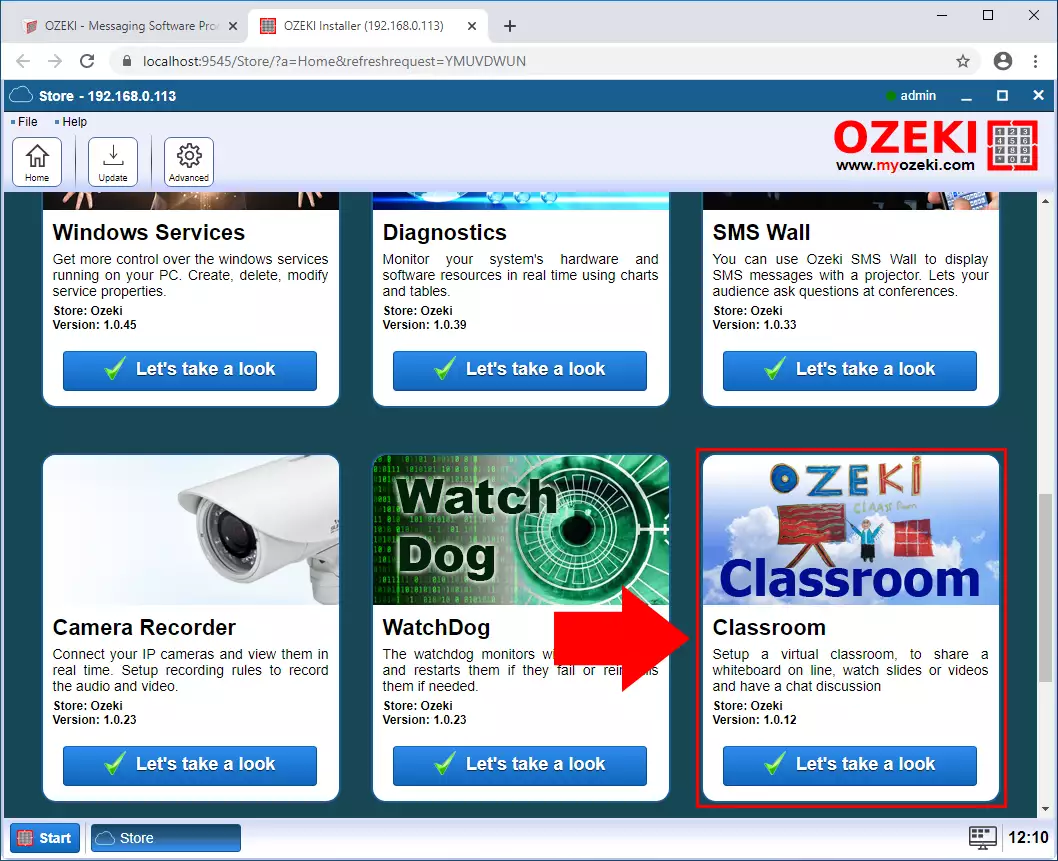
The home page of Ozeki Installer is a great app store, where you can choose from many Ozeki applications as Figure 6 shows it. By following this guide, you can install the Classroom on your computer.
Step 7 - Install Classroom
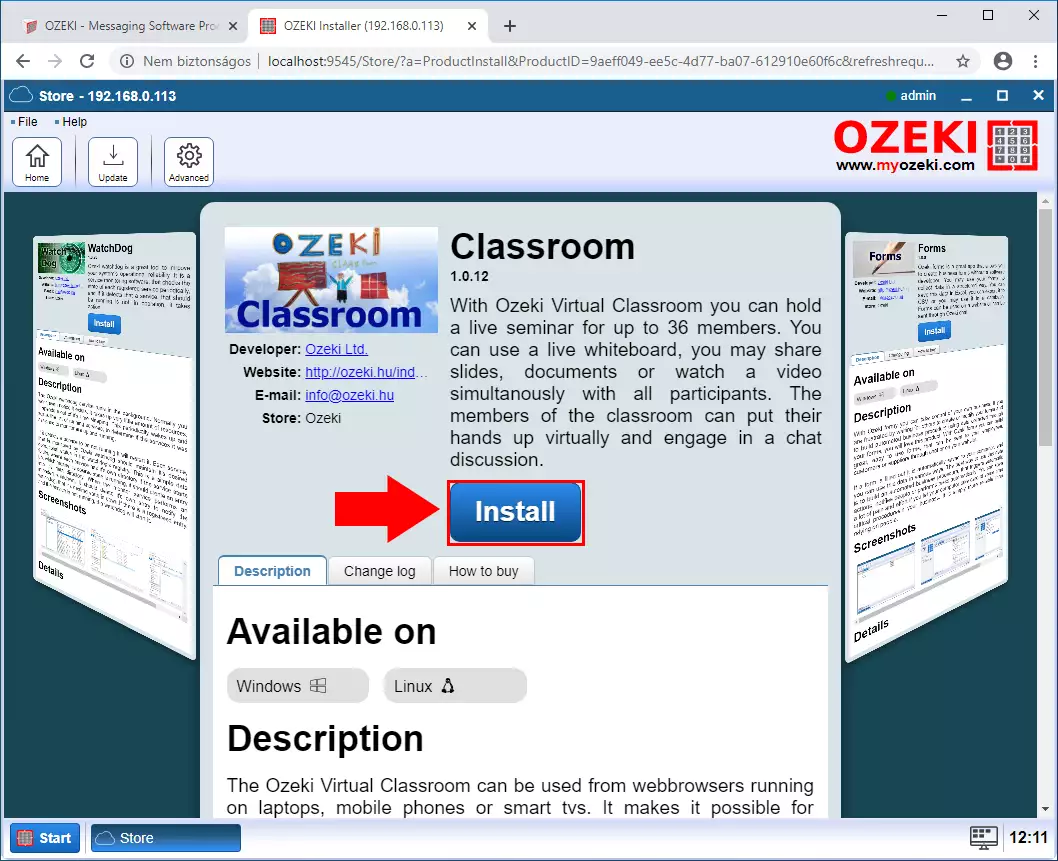
When you select a product, the next page that shows up is the details page of the selected app. Here you can see every bit of detail that gives you a brief description of the purpose and advantage of that application. If you would like to install the product on your computer, just click on Install as you can see it on Figure 7.
Step 8 - Installation processed
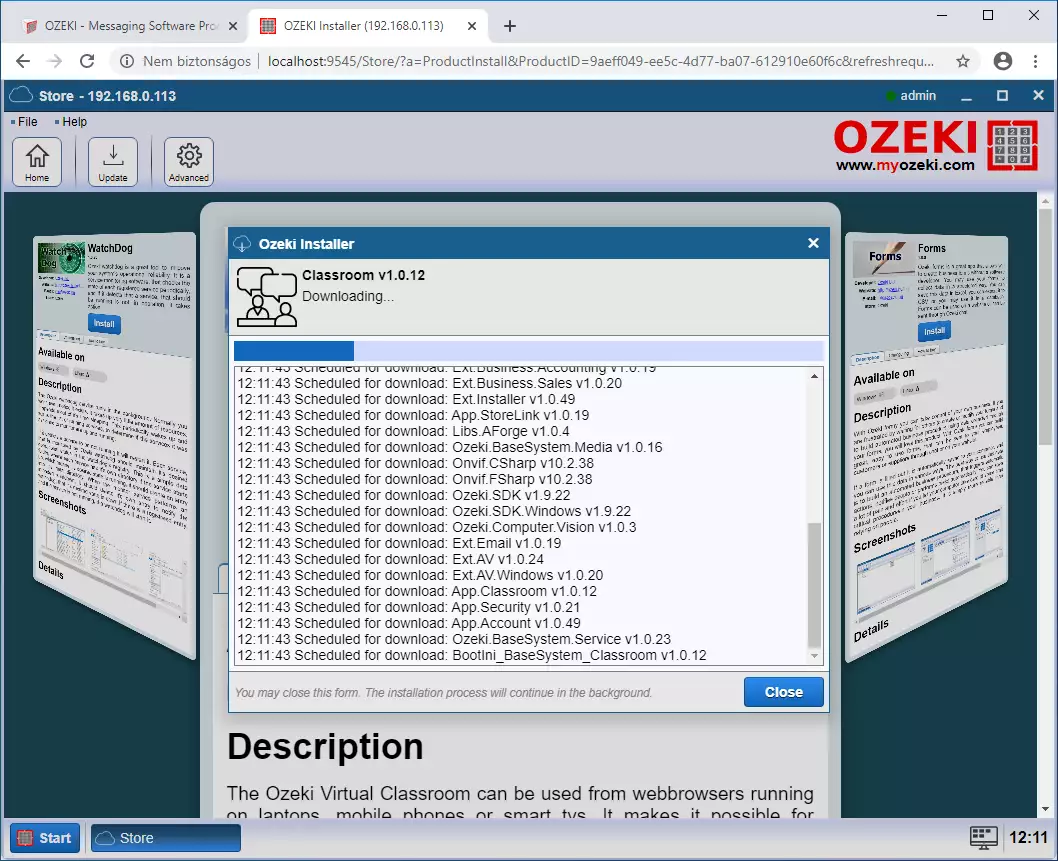
During the installation of the product, a dialog window shows up to inform you about the progress (Figure 8). This window logs you all events that occurred during the installation process.
Step 9 - Installation finished
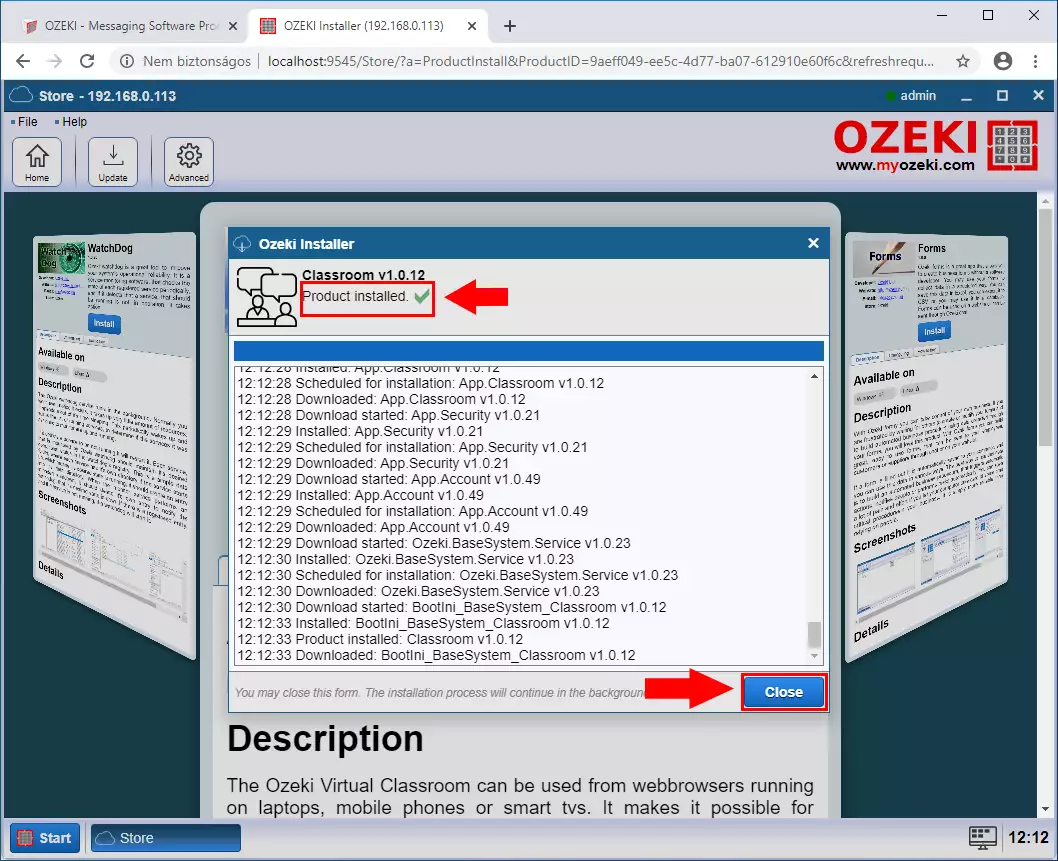
After the installation is finished a green pipe is appeared. to close the windows click on the close button as you can see on the Figure 9.
Step 10 - Open Classroom
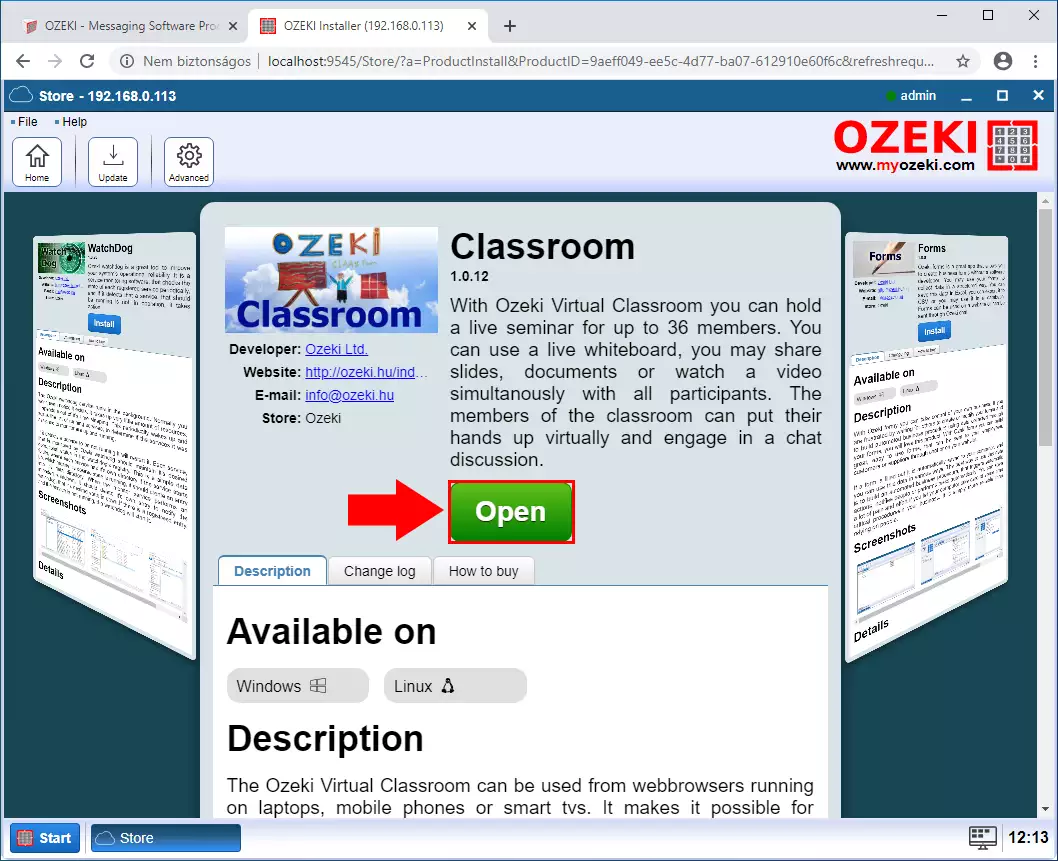
Open the application with the 'Open' button. Click on it like in Figure 10 to open the Classroom product in your web browser. The installed products runs on the port 9515.
Step 11 - Classroom main page
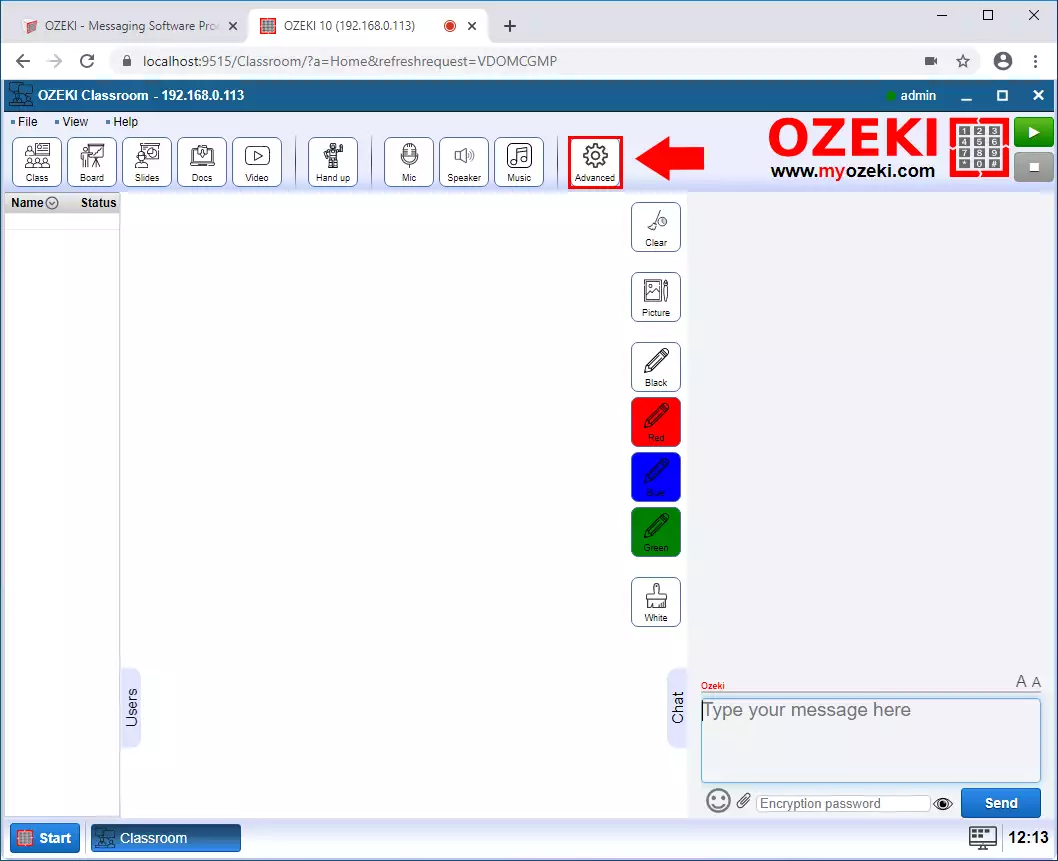
After clicking on the Open button, Classroom start running on the port 9515 and opens in your web browser. If you can see the similar window as Figure 11 that means you successfully set up Ozeki Installer and installed an Ozeki product from the app store. Select the Advanced button to cereate a new teacher user.
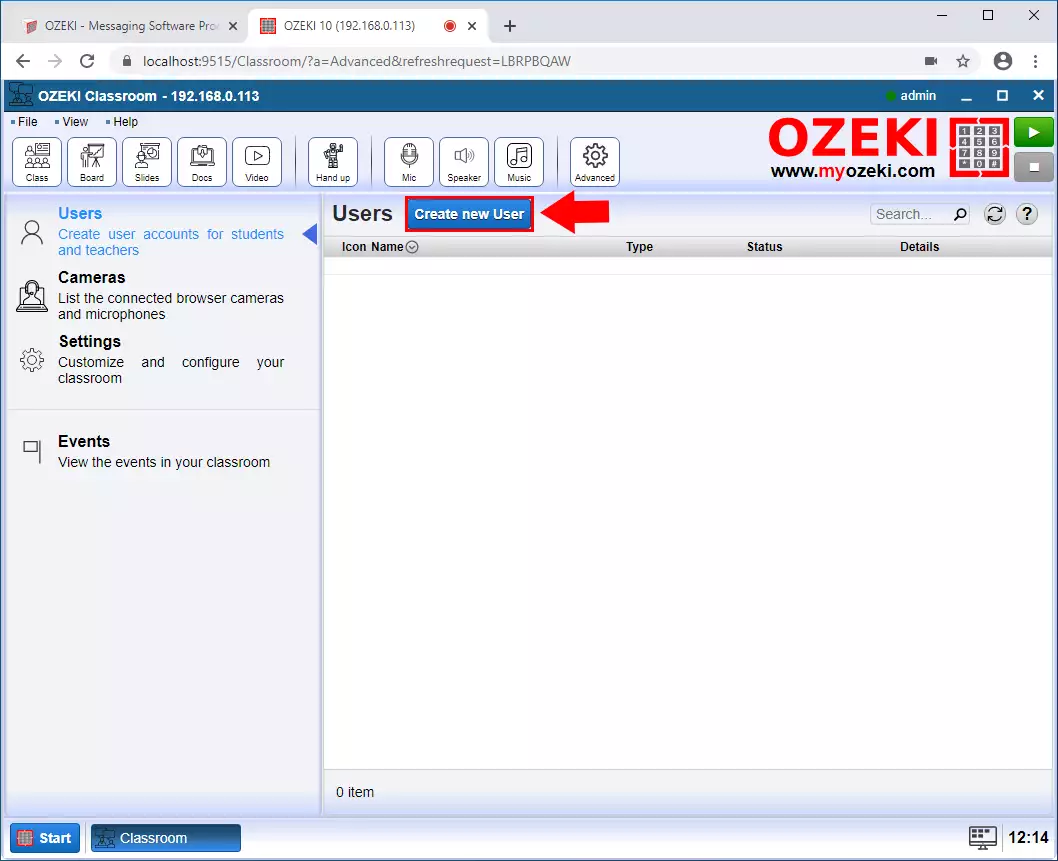
Step 12 - Create new user
In the Advanced menu click on the Create new User button (Figure 12).
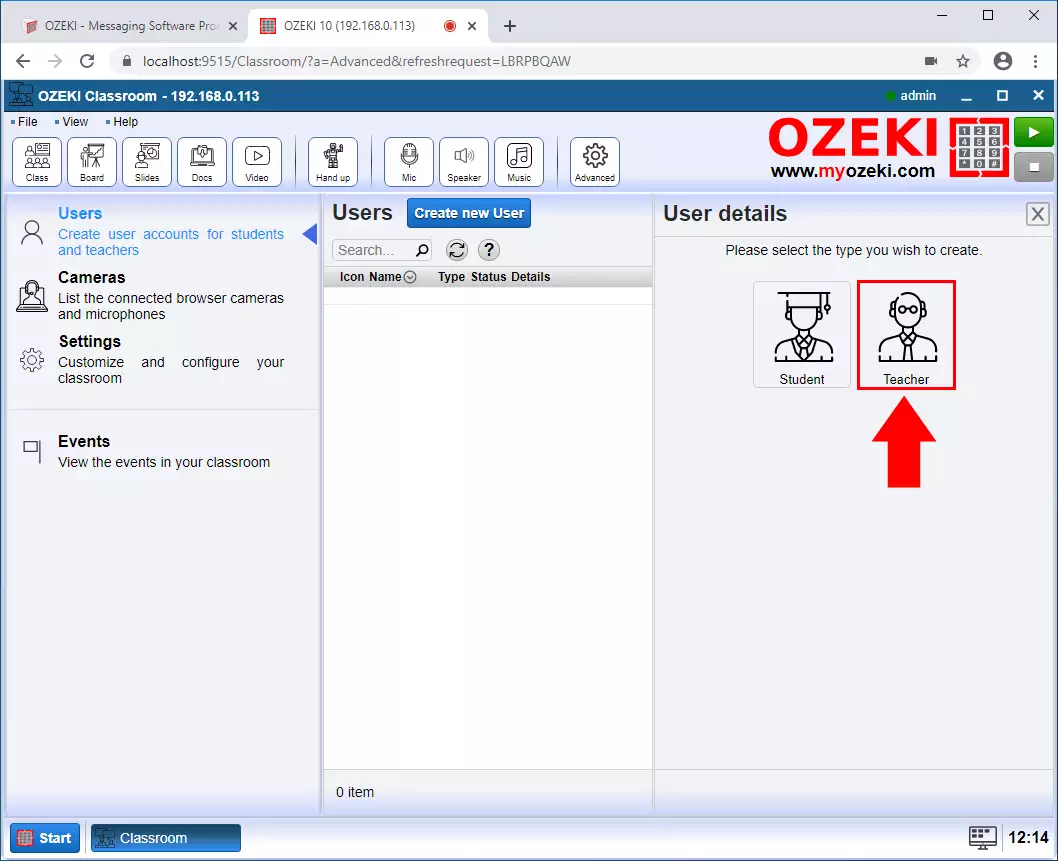
Step 13 - Create teacher user
Then select the Teacher type from the User details (Figure 13).
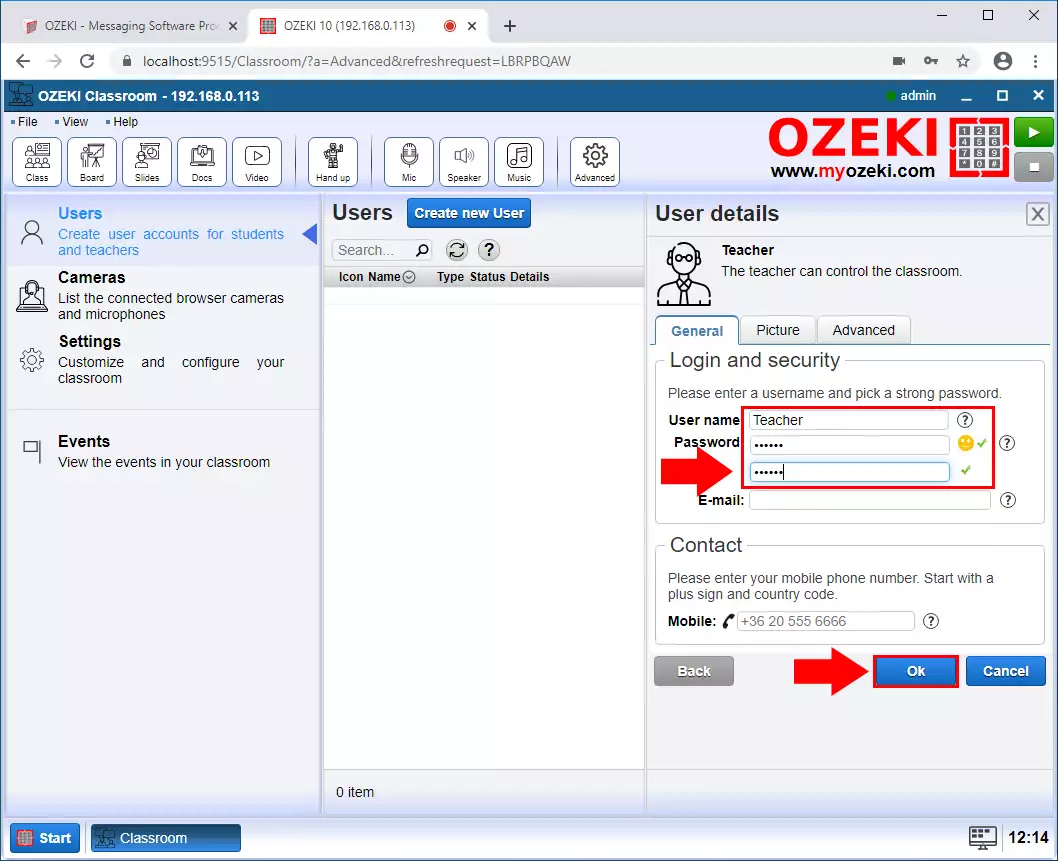
Step 14 - Add user details
The next step is to define the new teacher's username and the password (Figure 14). The password needs to be the combination of letters and digits and it should contains at least six characters for security reasons.
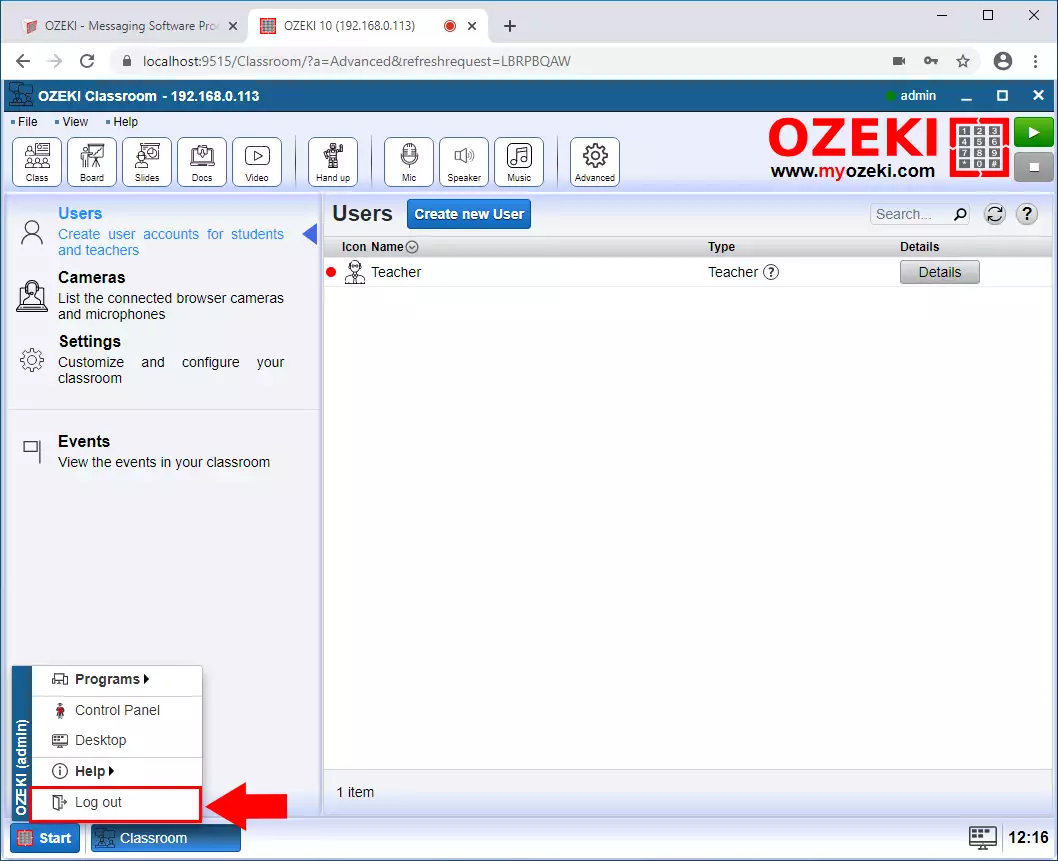
Step 15 - Logout from admin user
Next step is to log out from the Ozeki Desktop. You can do it with click on the start button and then choose the Log Out option as Figure 15 shows.
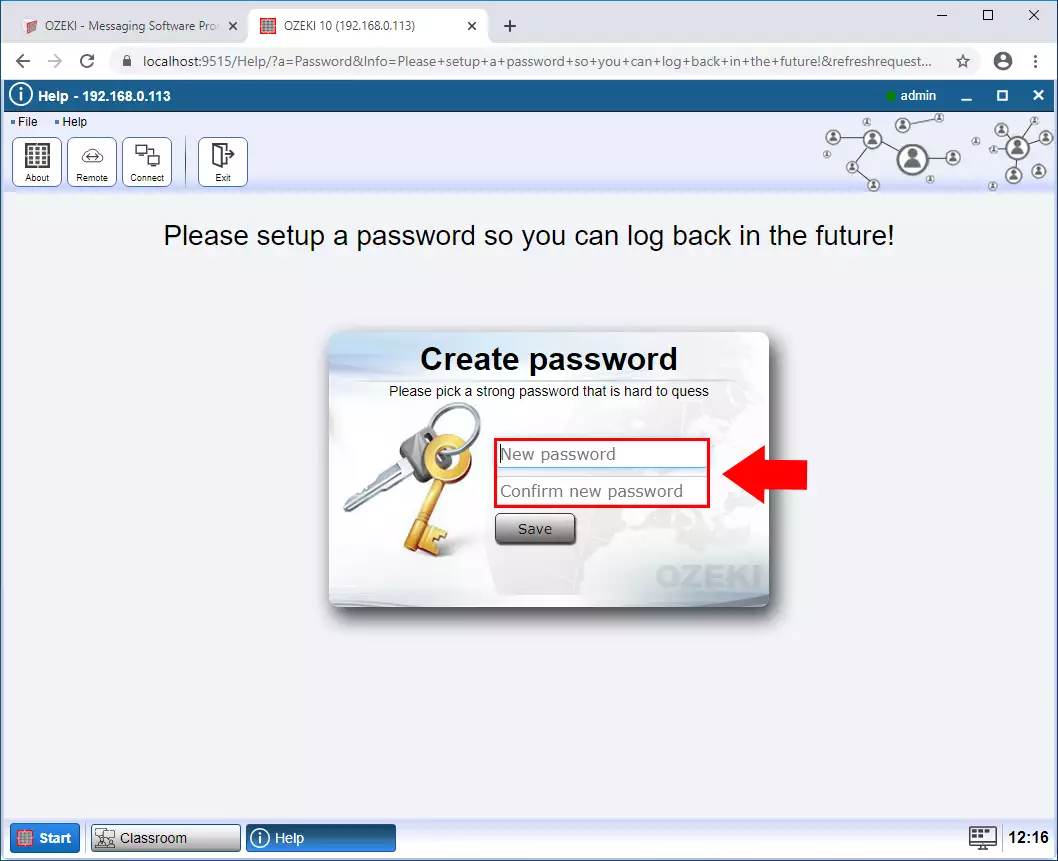
Step 16 - Define new admin password
On the page that appears please enter the new password then click on the save button (Figure 16). The password needs to be the combination of letters and digits and it should contains at least six characters for security reasons.
Step 17 - Login as teacher
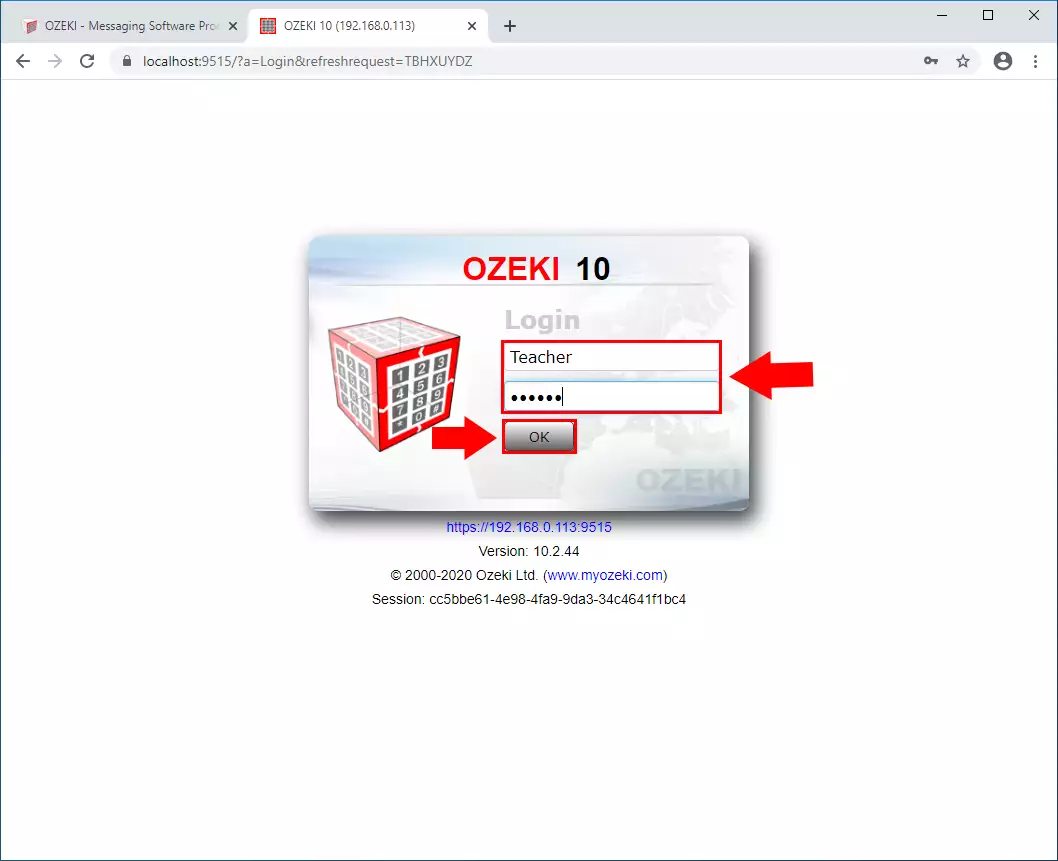
After you defined the new admin password you need to log in with the teacher user. Please add the username, what is 'Teacher' in this case and the password (Figure 17).
Step 18 - Open Classroom app
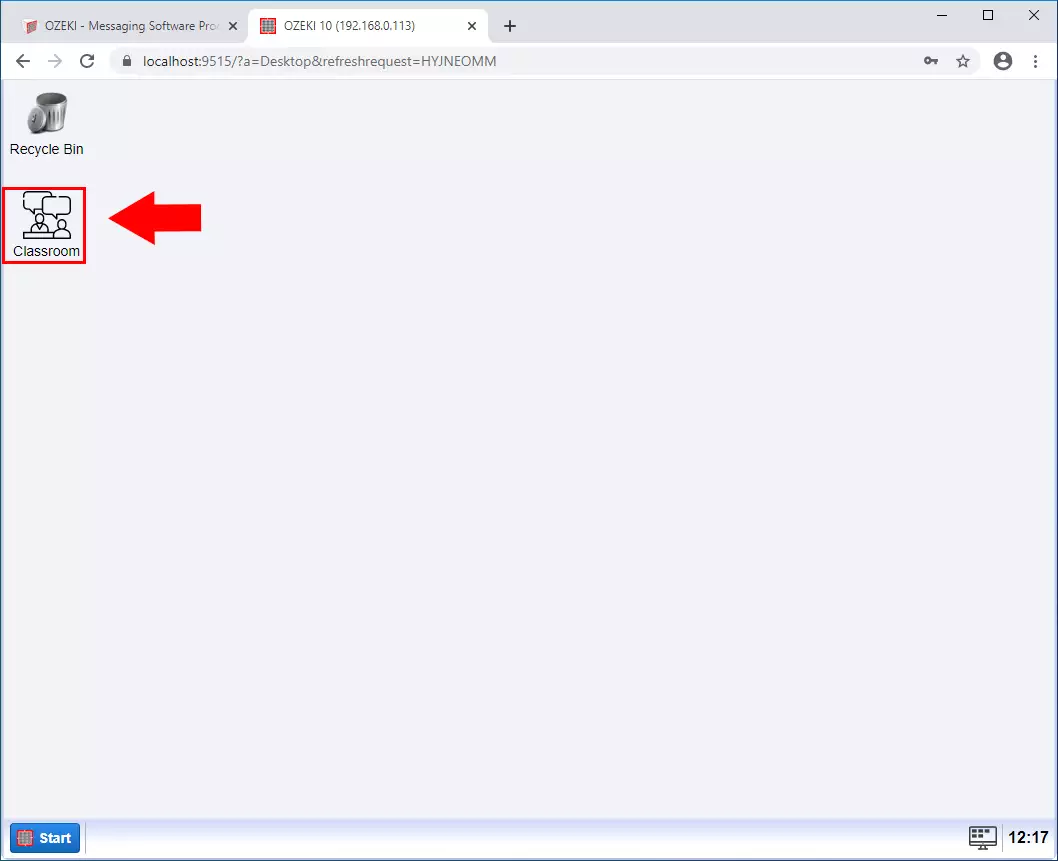
Finally you can see the Ozeki Desktop again. On the Desktop select the Classroom app (Figure 18).
Step 19 - Loged in as teacher user
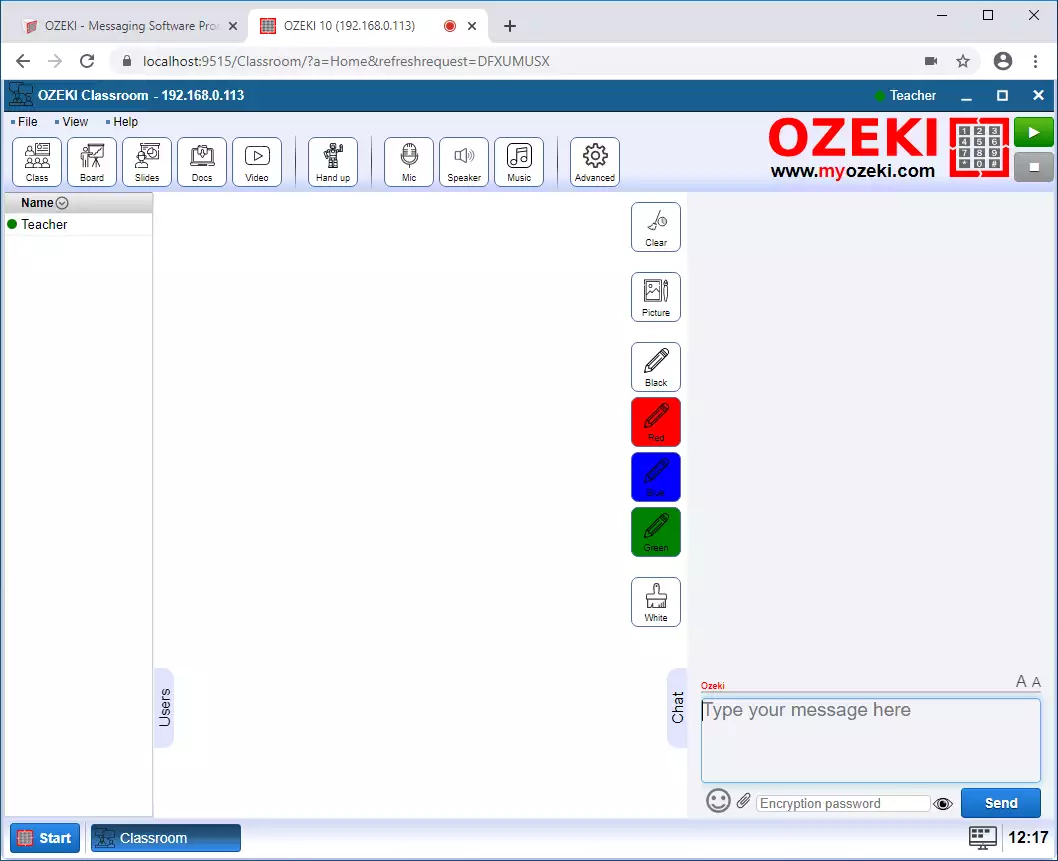
Finally you can see that you log in to the Classroom with the teacher user (Figure 19).
