How to create a DNS entry to point to your public IP
DynDNS services help you to forward the constantly changing IP addresses of your network to a fixed domain name. On this page we will introduce you 3 different free DynDNS providers and you will learn how to set up your own dynamically updated Domain Name.
Dynamic DNS providers
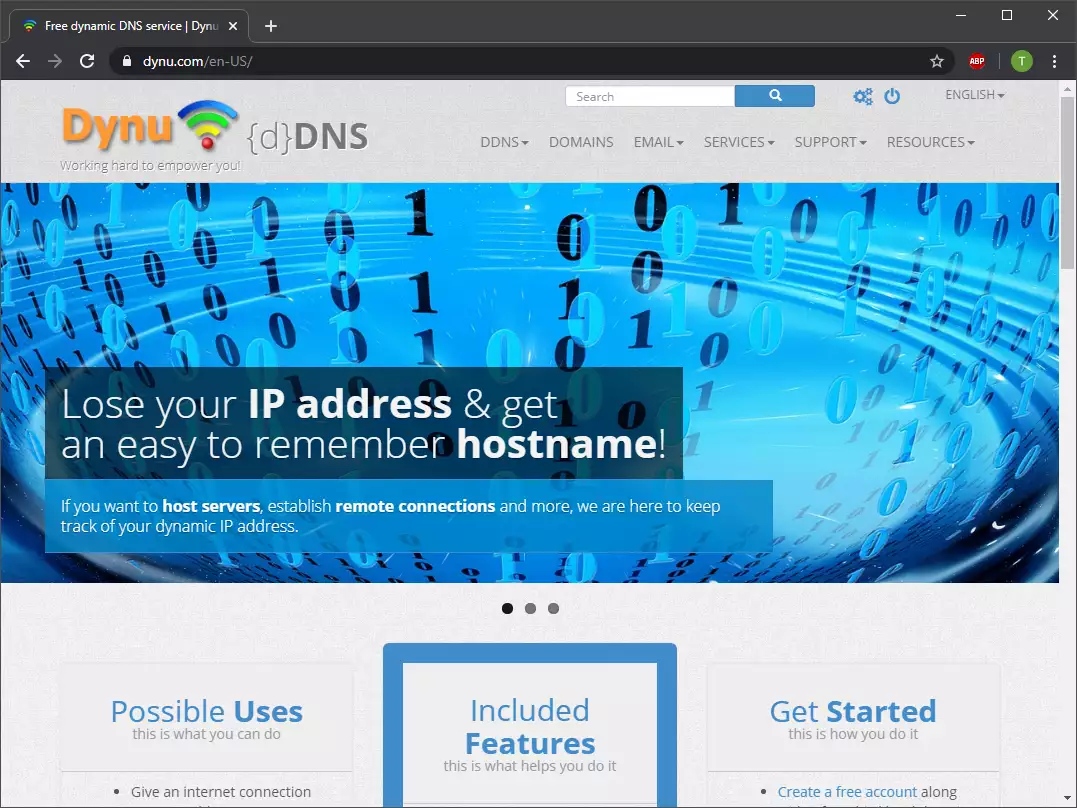
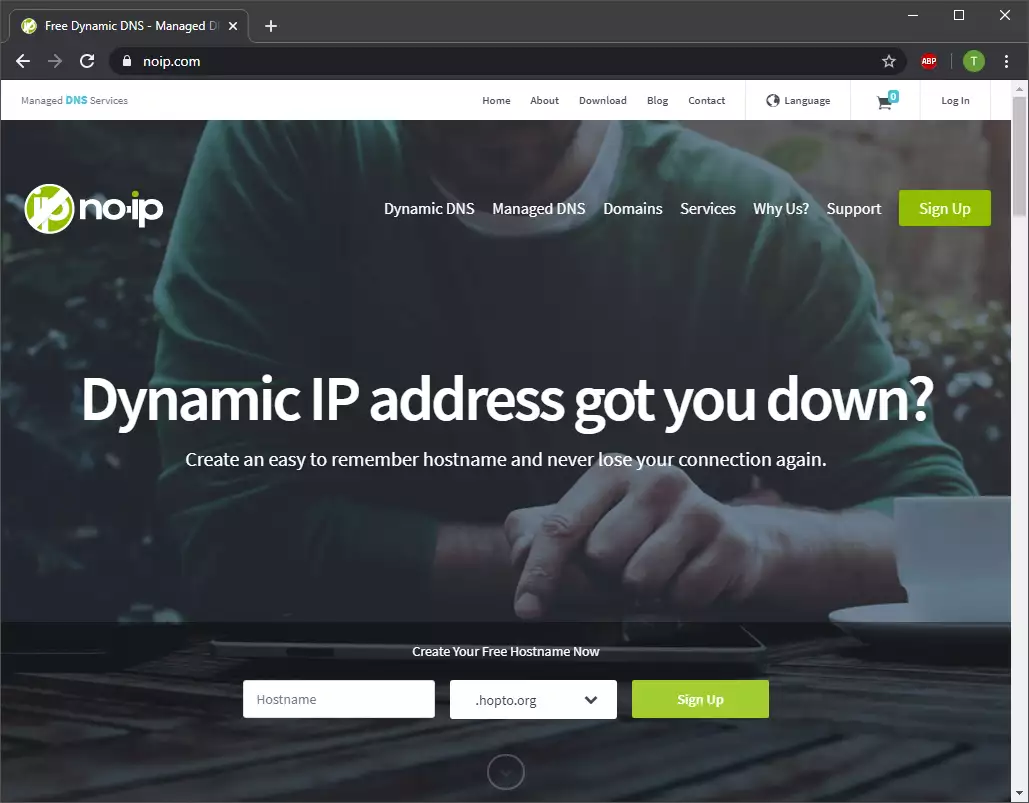
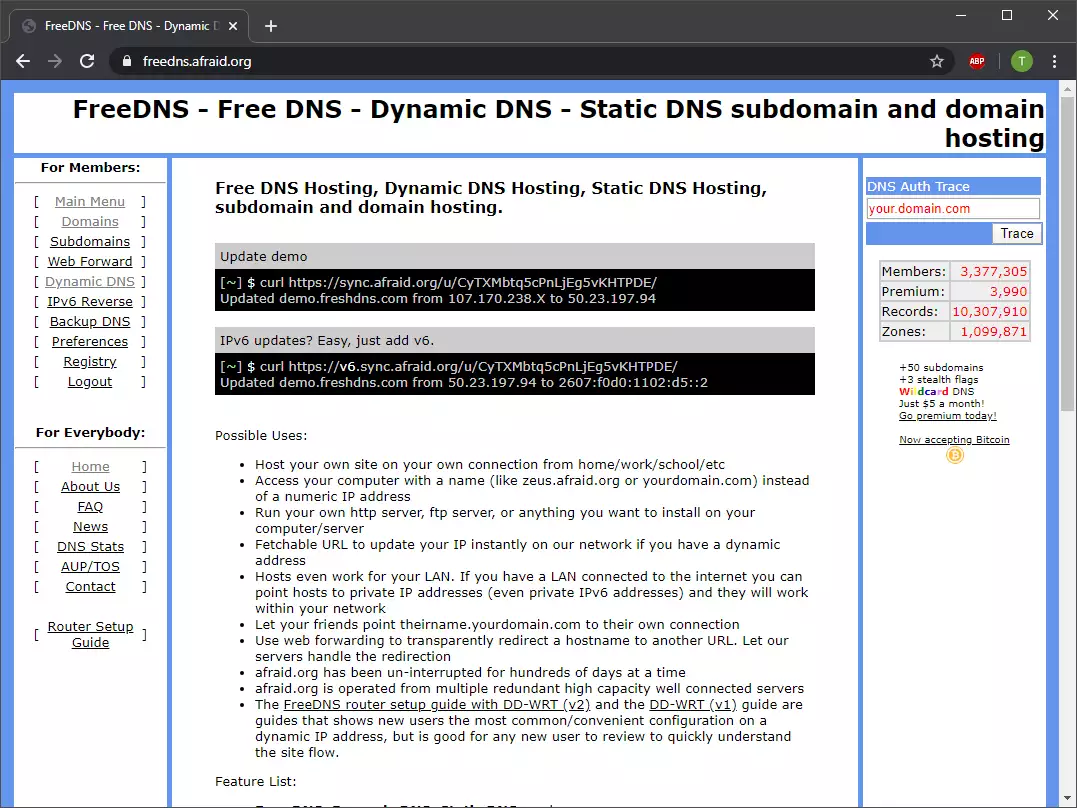
There are many dynamic DNS providers such as Dynu.com, noip.com or afraid.org. You choose the one you would like and this documentation will show you how you can set up your own dynamically updated Domain Name with the Dynu service.
Step 1 - Create Dynu account
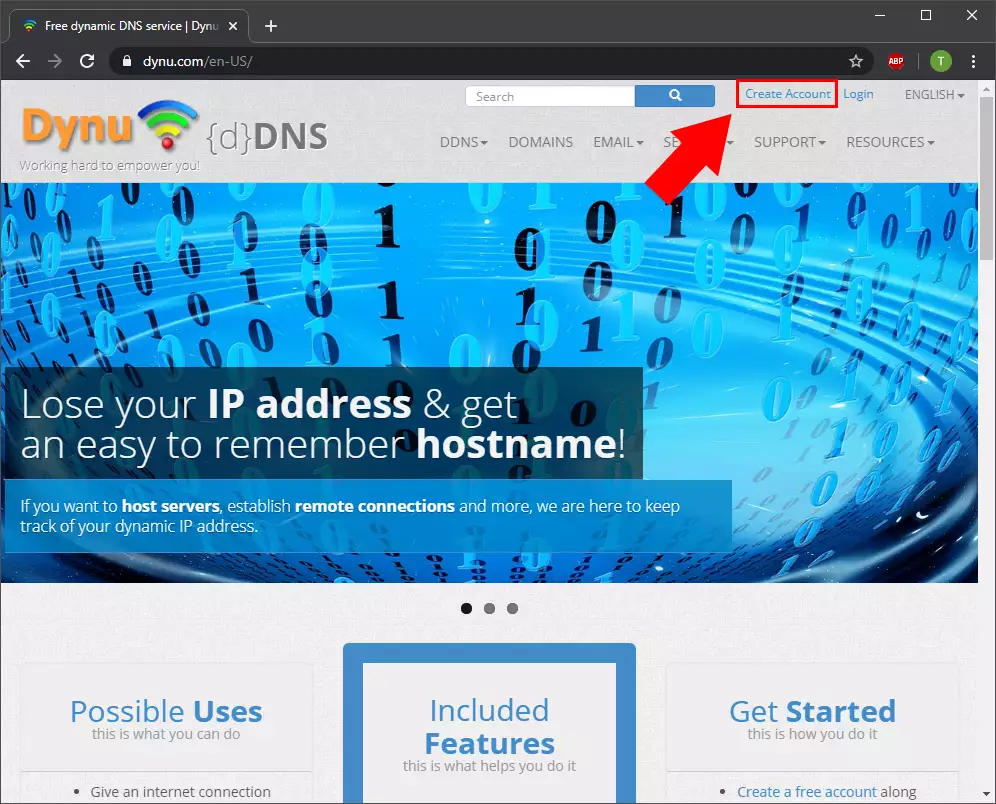
First step is to create your new Dynu account. Select "Create Account" on the main page top right corner (Figure 4).
c
Step 2 - Define user data
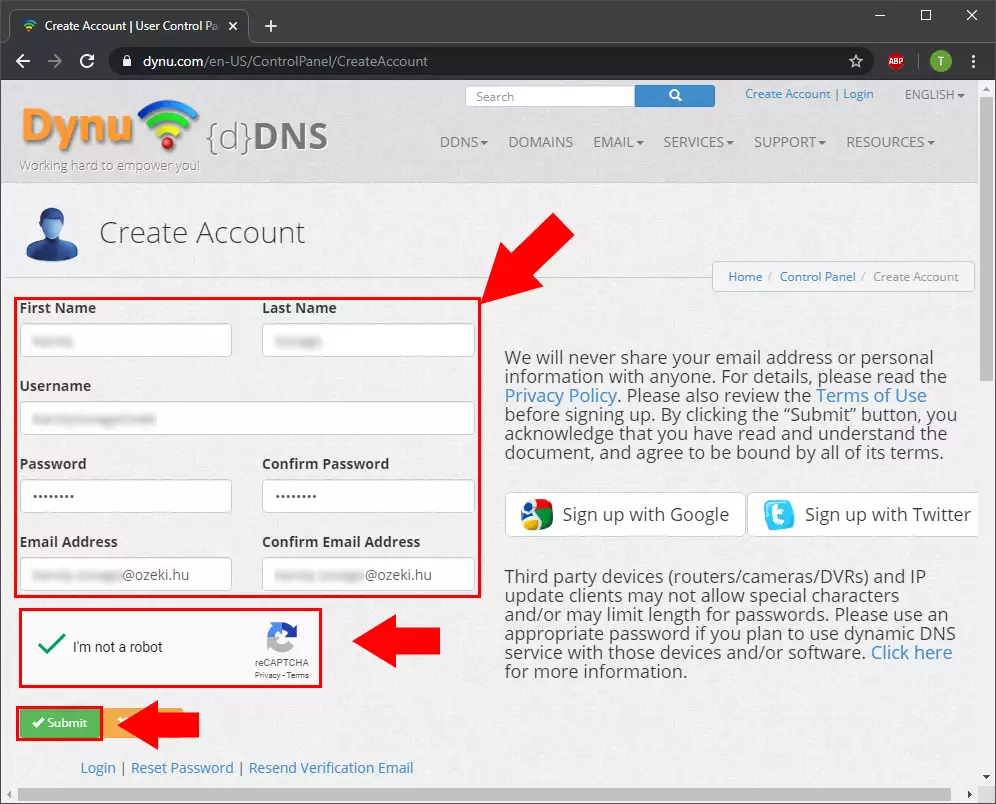
On the next page define your Name, username, password and your Email address. Do not forget to check in the "I'm not a robot" box and finally click on the Submit button (Figure 5).
Step 3 - Verify e-mail address
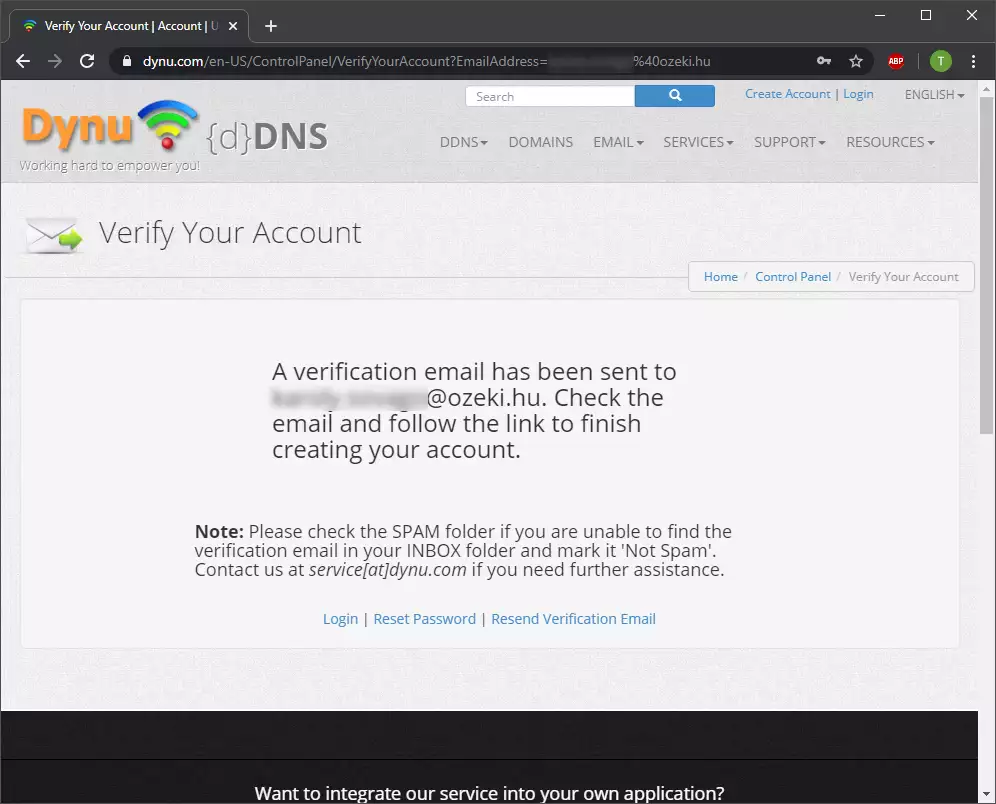
After you registered you need to verify your Email address. Open your Email account and follow the steps in your Email sent from Dynu.
Step 4 - Log in
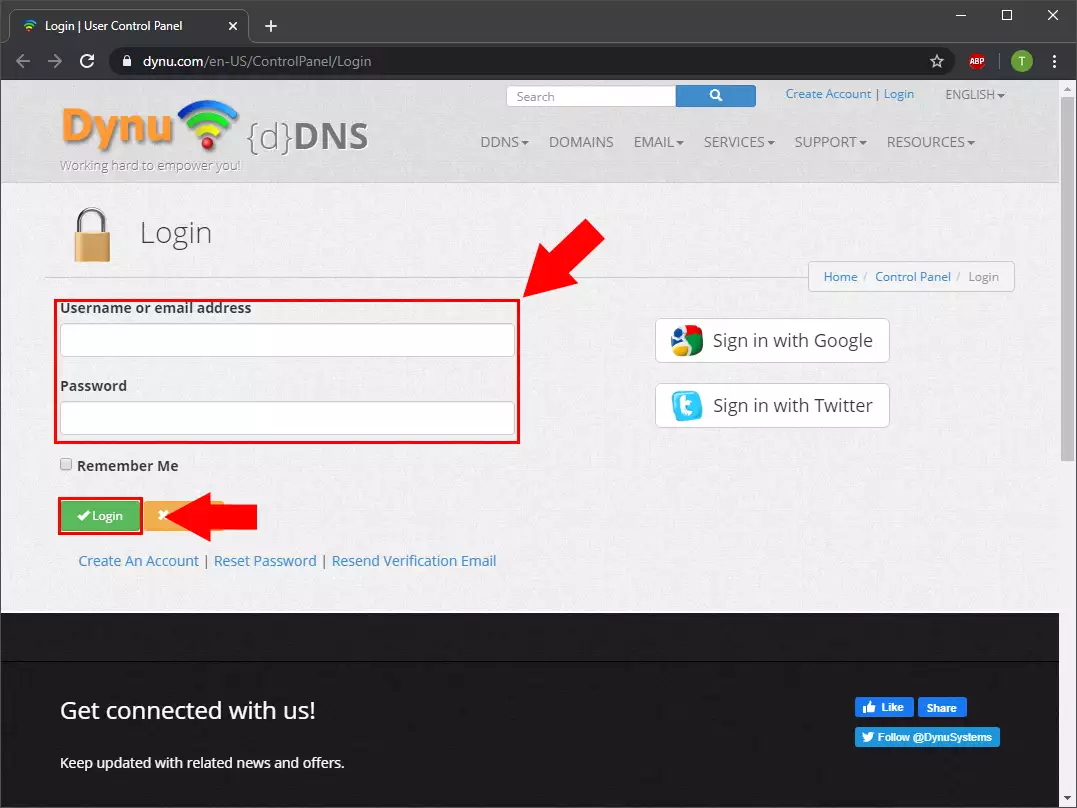
If you verified your Email address you can Log in to your Dynu account. Add your username or Email address and your password. Then click on the Login button (Figure 7).
Step 5 - Create DDNS Service
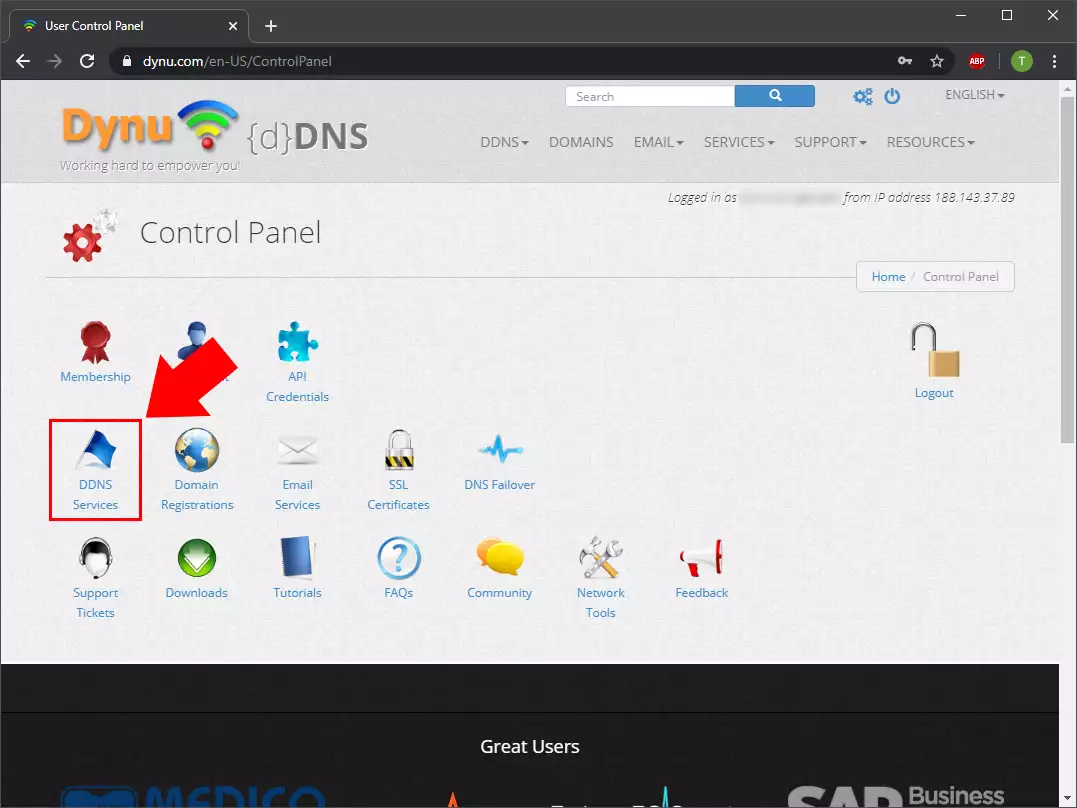
To create a dynamic domain name select the DDNS Service on the main page (Figure 8).
Step 6 - Add new DNS
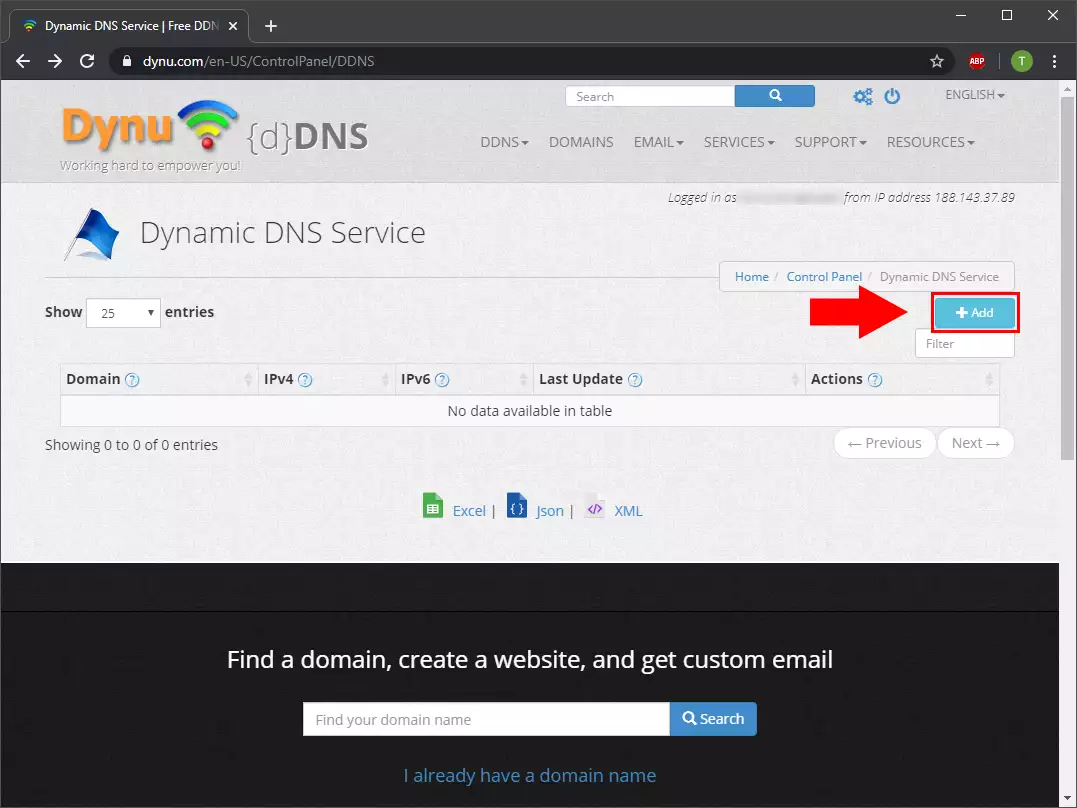
In the Dynamic DNS Service page click on the +Add button (Figure 9).
Step 7 - Define your new domain name
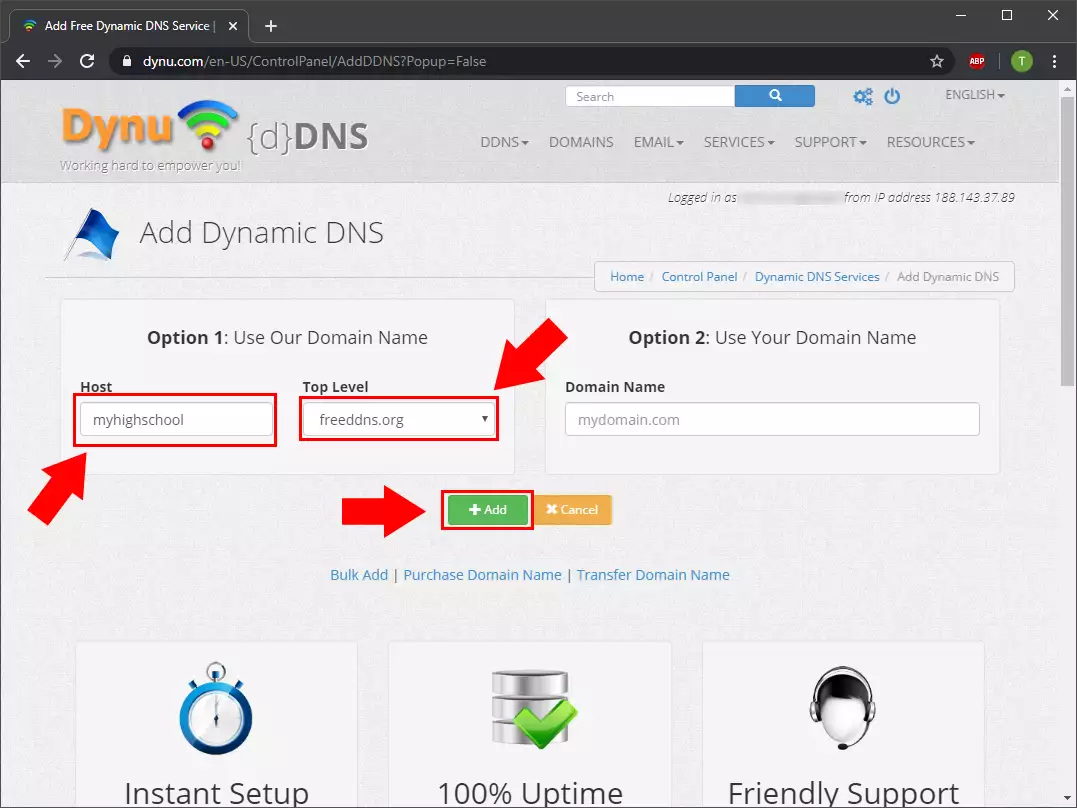
Now you need to definne your new domain name. On the Option 1 Section Type a host name of your choice and select a Top level domain from the list. finally click on the +Add button (Figure 10).
Step 8 - Manage domain
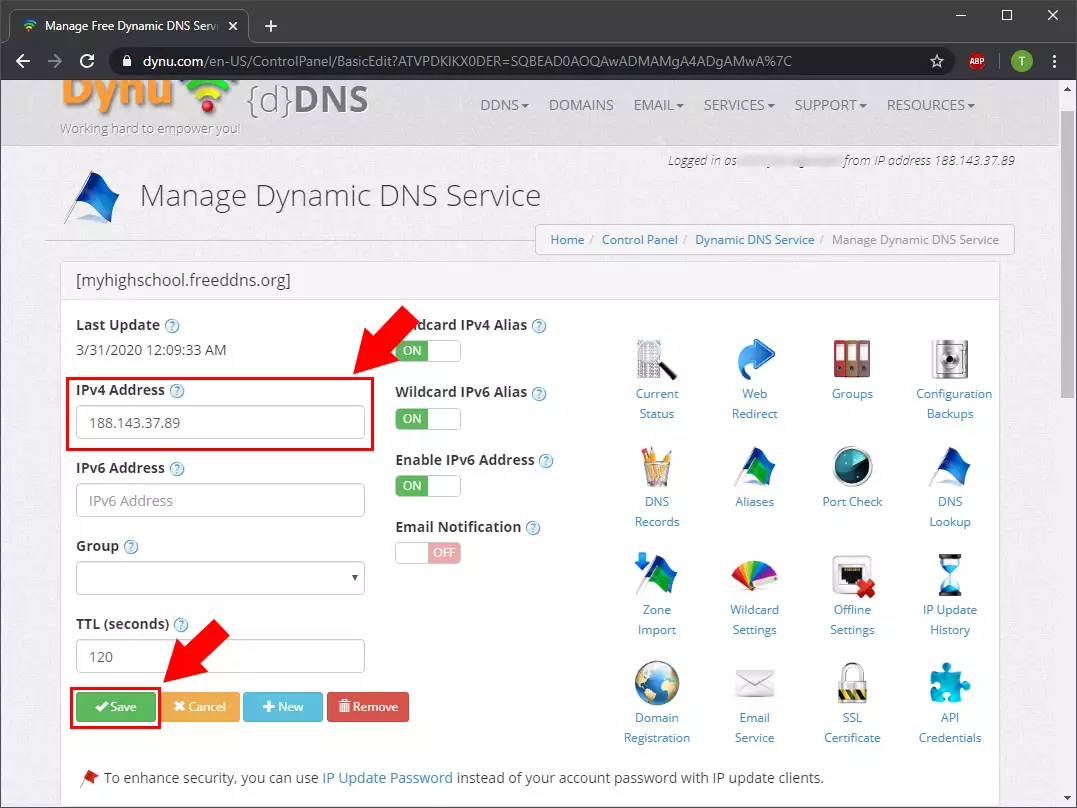
On teh Manage Dynamic DNS Service page if your public ip address is not filled in by default enter it and then click on the save button (Figure 11).
Step 9 - Download Page
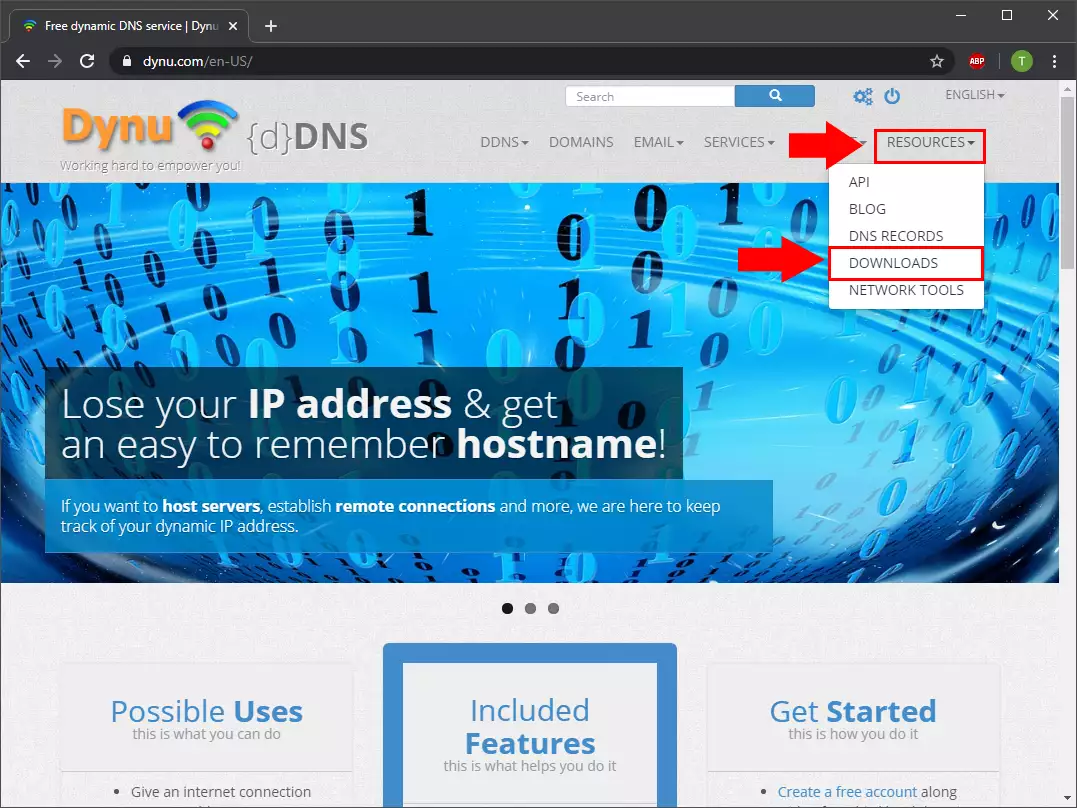
In order to your IP address is dynamically update you need a client software that periodically updates your ip address in the domian name entry. To download it select the Resourses then the Download menu in the Dynu's main page (Figure 12).
Step 10 - Download Windows client
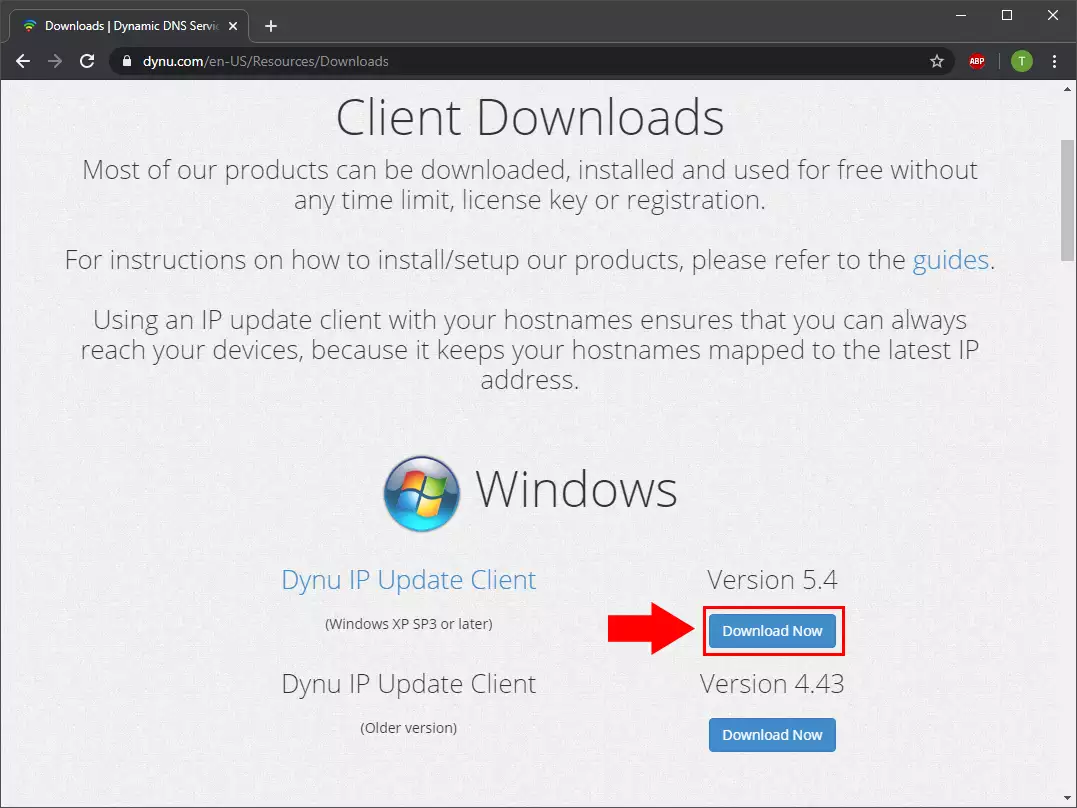
On the Download page click on the blue Download now button (Figure 13).
Step 11 - Start client install
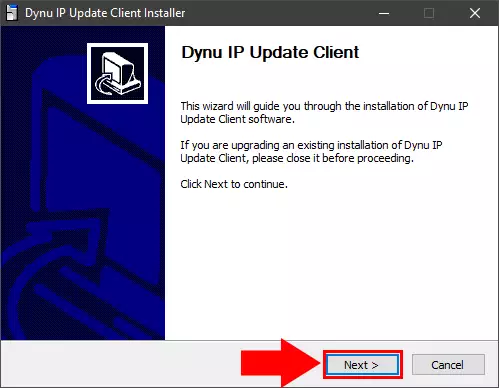
After it is downloaded start the installer and you will see the setup wizard is started click Next to continue (Figure 14).
s
Step 12 - Accept license agreement
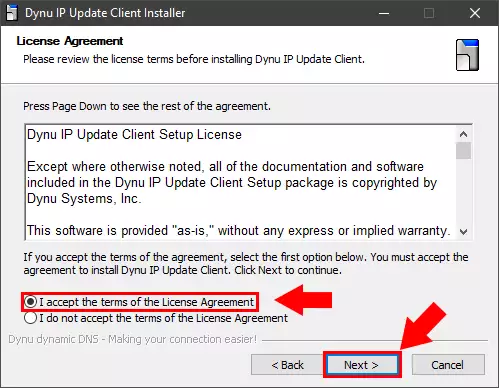
You must accept the license agreement to install the Dyni IP update client. After it click Next button (Figure 15).
Step 13 - Installation path
Define the installation folder of leave it as the default then click on the Install button to start the installation (Figure 16).
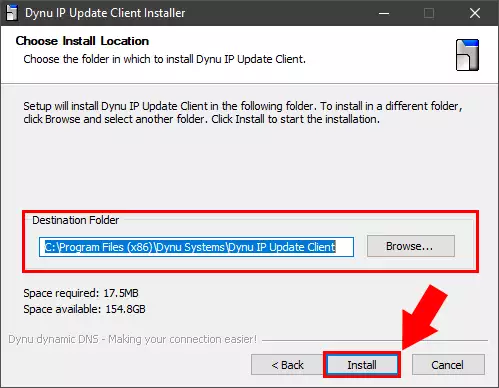
Step 14 - Install finished
When the Installation is finished check the Start Dynu IP Update Client check box and click Finish (Figure 17).
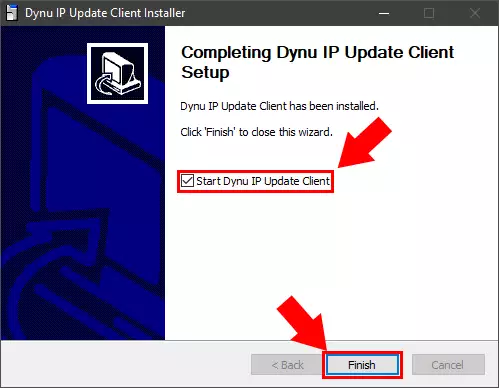
Step 15 - Log in to client
The Dynu IP Update Client will start and in the login page add your Username and Password then click Sign in button (Figure 18).
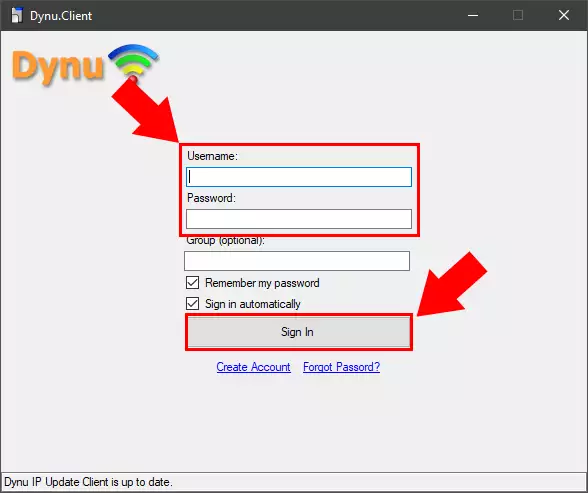
Step 16 - Activity tab
On the Activity tab you can see your last DNS ubdate events and you can Check or Update your IP manually (Figure 19).
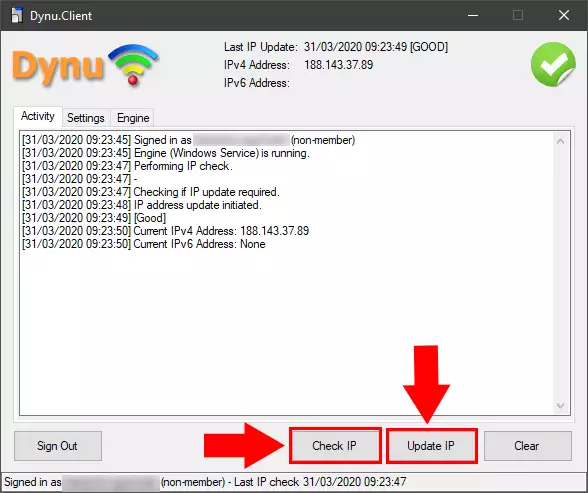
Step 17 - Setting tab
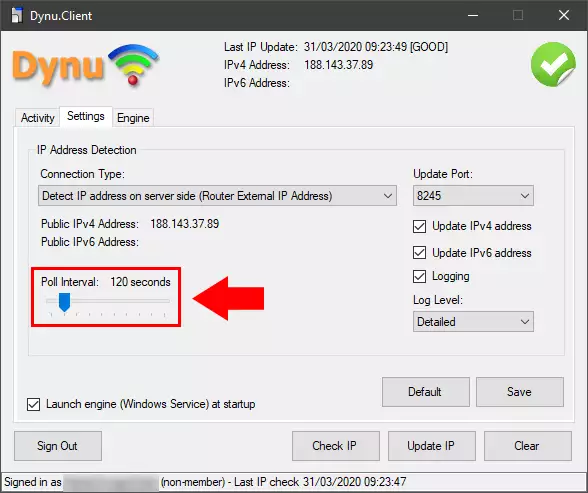
If you cange to the Settings tab you can modify the Poll Interval or other settings (Figure 20).
Step 18 - Engine tab
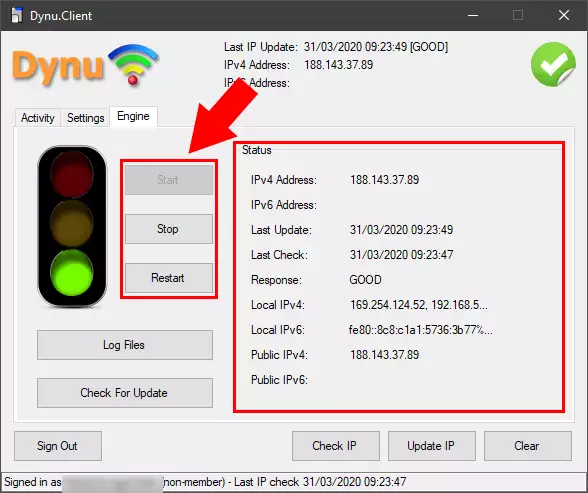
Finally on the Engine tab you can Star/Stop/Restart the Dynu IP Update Client service and you can see the current status (Figure 21).
