SENDING AND RECEIVING SMS MESSAGES USING A MICROSOFT SQL DATABASE SERVER
If you use the Ozeki Message Server, you can send and receive SMS messages using a database server with the help of SQL queries. In order to use this option, you need to have a database server MS SQL installed, and there should be two database tables created: ozekimessageout and ozekimessagein. One of these will be used for sending and the other for receiving SMS messages.
Reqire to install the MS SQL database server software.
Step 1: Configure the MS-SQL database
Summary: 1. start the service, 2. start a SQL Server Manager Studio, 3. create DB, 4 Check the DB exist
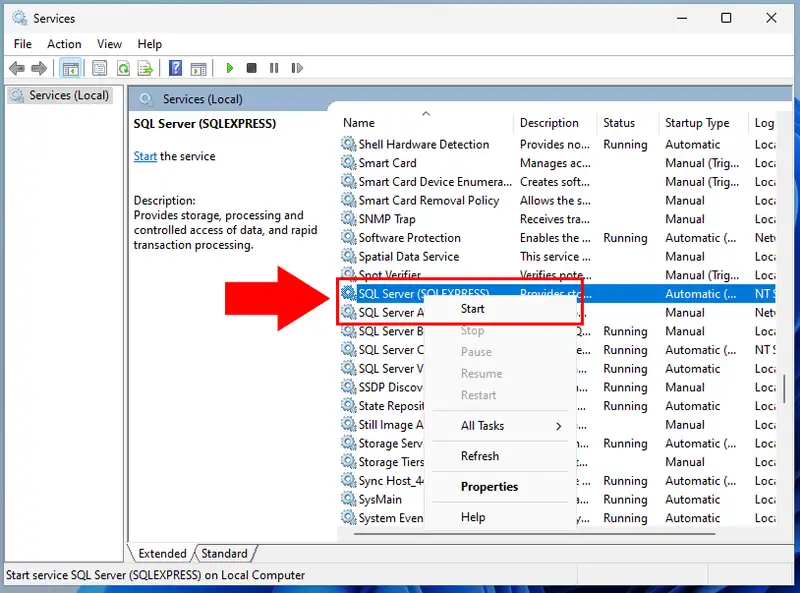
If the MS-SQL service did not start automatically, you set up the Windows Services menu and right click on the SQL Server service. Then click on Start,option (Figure 1).
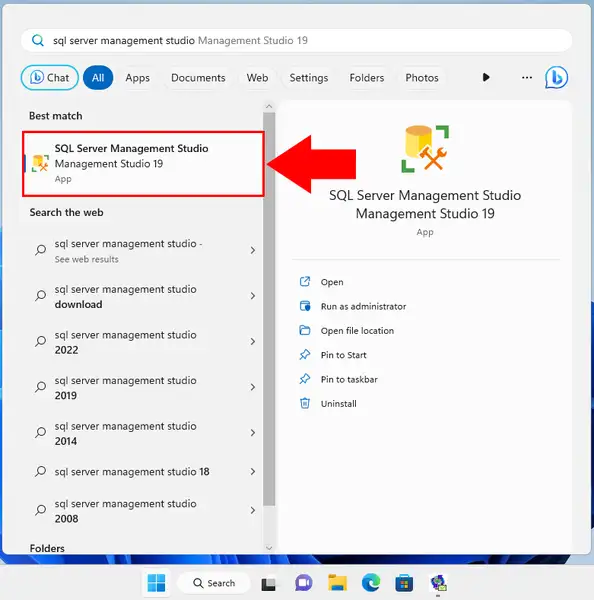
Start the SQL Server Manager Studio, Search on Server Manager Studio in the search menu and click on SQL Server Manager Studio. After this a window opens (Figure 2).
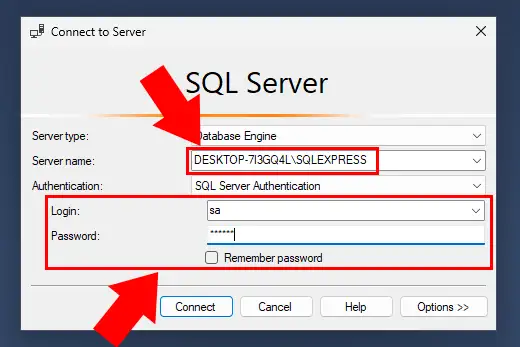
In the Connect to Server menu, select the SQL server name. Place a checkmark into the " Start SQL Server, if it stopped" checkbox. Select the Use SQL Server Authentication and fill the Login name and Password. Click connect (Figure 3).
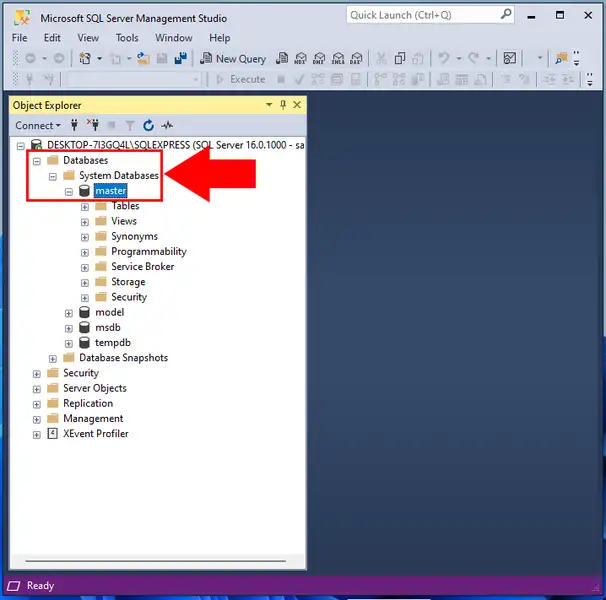
The following window opens SQL Server Query Analyser. In the Object explorer database can be selected. Default is master (Figure 4). Then right click on the database name to open Add New query page (Figure 5).
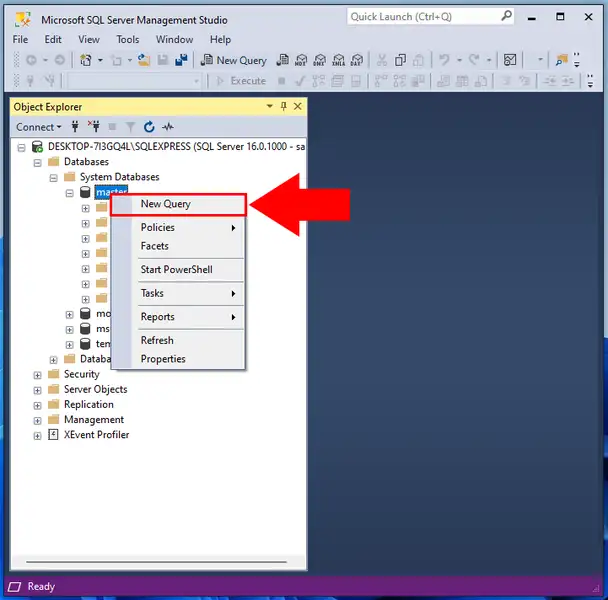
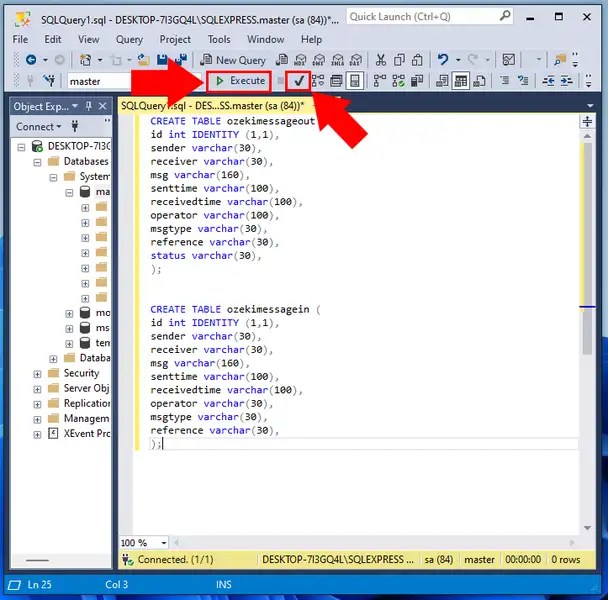
The next form shows, how to create SQL database for Ozeki Message Server. It can be done easy. Just Copy-Paste the script into the Querry Analyser.
The SQL Script (case sensitive):
CREATE TABLE ozekimessageout (
id int IDENTITY (1,1),
sender varchar(30),
receiver varchar(30),
msg varchar(160),
senttime varchar(100),
receivedtime varchar(100),
operator varchar(100),
msgtype varchar(30),
reference varchar(30),
status varchar(30),
);


CREATE TABLE ozekimessagein (
id int IDENTITY (1,1),
sender varchar(30),
receiver varchar(30),
msg varchar(160),
senttime varchar(100),
receivedtime varchar(100),
operator varchar(30),
msgtype varchar(30),
reference varchar(30),
);
When the script is placed to the Query Analyzer, click on parse icon
 .
It checks the SQL script errors. If there were no errors found, you will show
The command(s) completed successfully. Click on execute icon
. SQL Query return
The command(s) completed successfully. (Figure 6 ) The SQL databese was created!
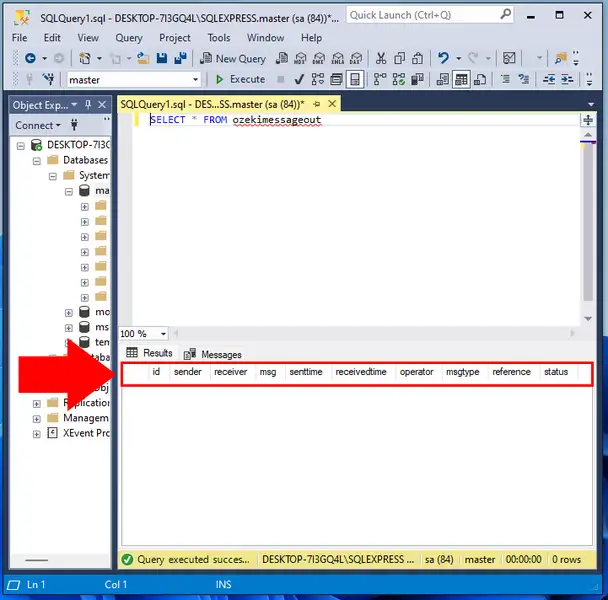
After the script was ran correctly, it means, that DB and tables were created successfully:
The arrows show the created colums (id, sender,...) (Figure 7 ).
You have a created MS-SQL DataBase!
Step 2 : Configure Ozeki Message Server
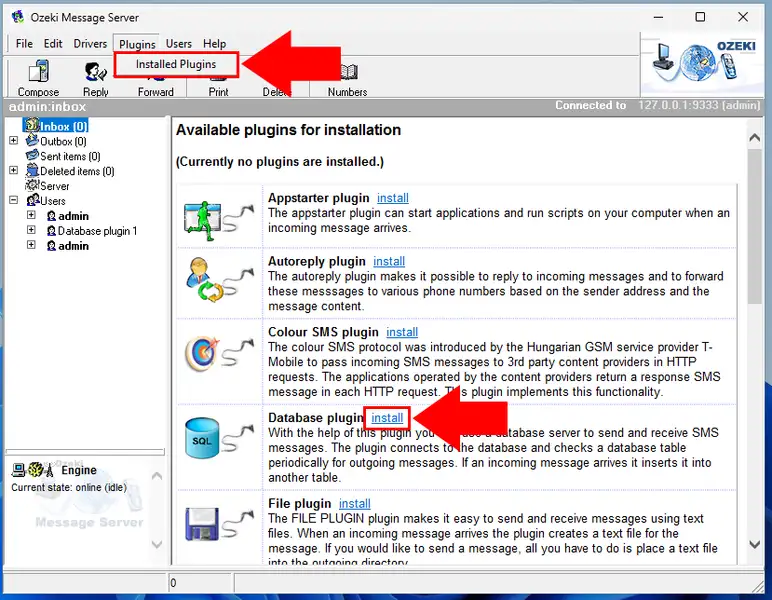
Go to the Plugins menu and select Installed Plugins menu item. Then select the install link which is next to Database Plugin.(Figure 8 ).
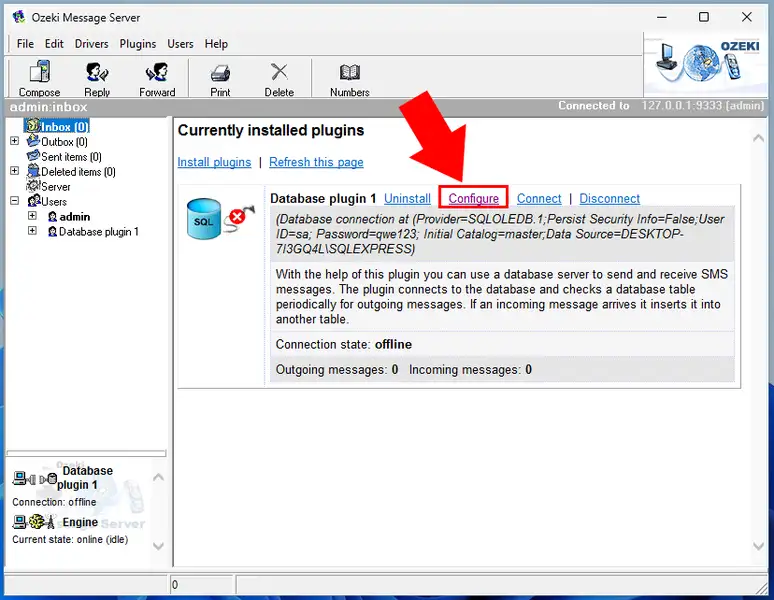
When the Plugin installed, click on Configure (Figure 10 ).
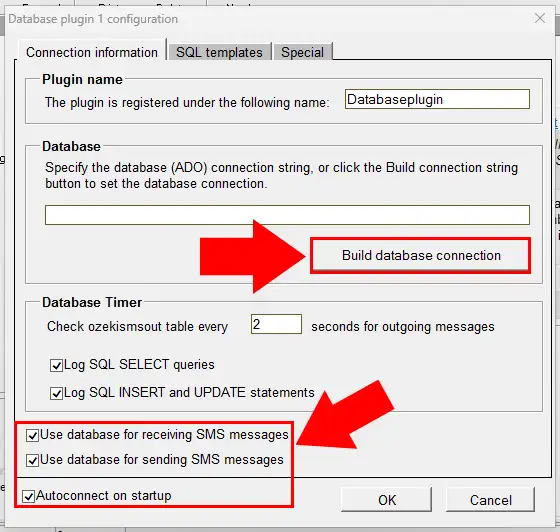
Place a check mark into the checkbox of Use Database for receiving SMS message . (2) It means, that the incoming SMS stored in the Database. Place a checkmark into the checkbox of Use Database for receiving SMS message (3). Place a checkmark into checkbox of Autoconnect on startup . When the Ozeki Message Server starts, then the database connection will be established. Click on Build database connection (1). (Figure 11 ).
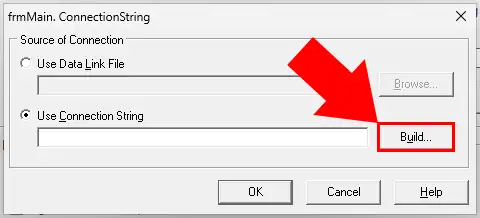
Select the Use Connection String radio button. Click on Build. (Figure 12 ).
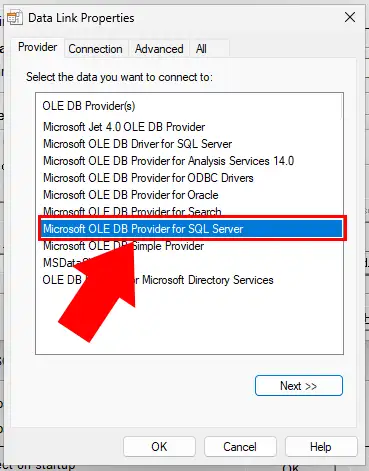
Data Link Properities screen opens up. In t he OLE DB providers list box, you have to select the Microsoft OLE DB Provider for SQL server. Click on Next. (Figure 13 ).
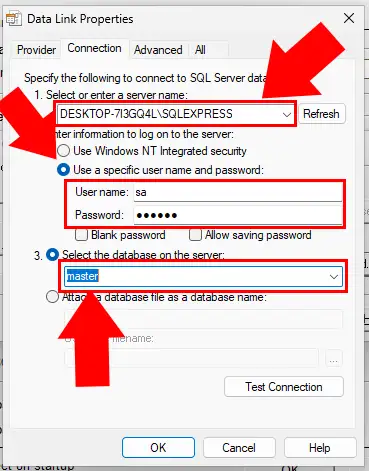
Click on the Connection tab. In the Select or enter a server name combo box, you have to write the MS-SQL server IP address. (1) The MS-SQL server and the Ozeki Message Server are running on the same computer, so the IP address is 127.0.0.1 . Select " Use a specific user name and password" radio button and write sa the input field. (2) 'Sa' is the default. Place a checkmark into the checkbox of Blank password . Choose Select the database on the server radio button and select master item in the combo box (3) (Figure 14).
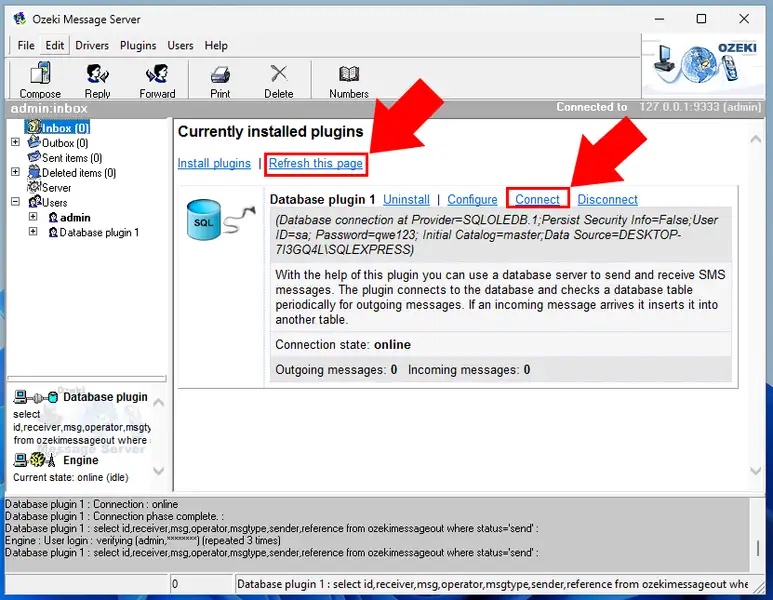
Message Server was configured successfully : Click on Connect (1) and Refresh this page (2) (Figure 15).
As a last step, configure the Ozeki Message Server with MS-SQL database!
