Elastix, how to create a SIP account
This guide shows you how to create 2 extension. One of the extension can be used with Ozeki 10. Before you begin the configuration of Elastix, it is assumed that you have already installed Elastix PBX on your Linux server.
Configure Elastix
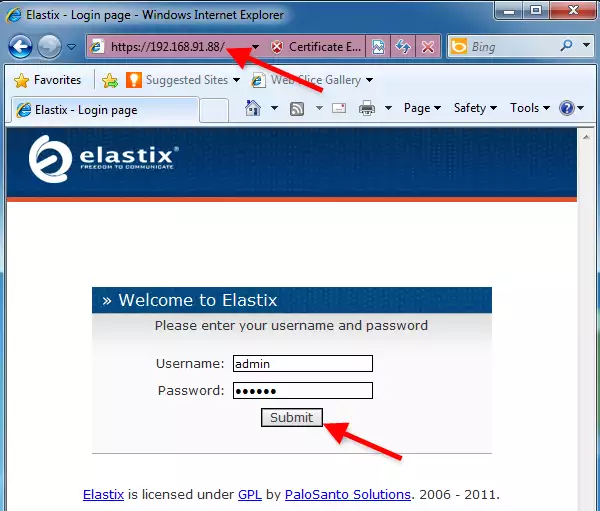
First open your browser and navigate to the IP address of the computer where
Elastix PBX is installed. I installed Elastix on a computer of which IP address is
192.168.91.88. Open your browser and navigate to its IP address. In this
guide it will be
https://192.168.91.88/
Enter the Administrator username and password, and click on 'Submit'
(Figure 1).
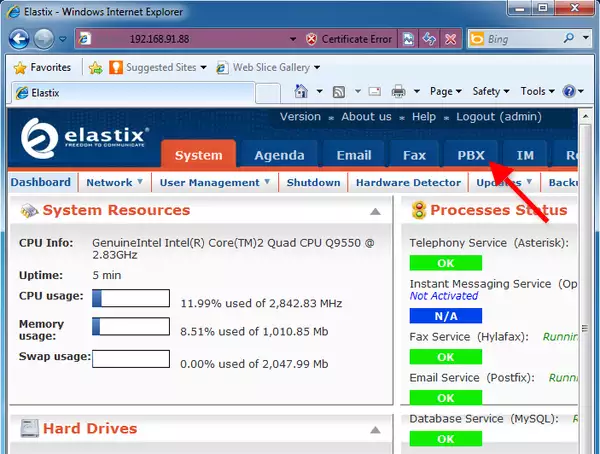
Once you logged in, click on 'PBX' tab at the top of the page (Figure 2).
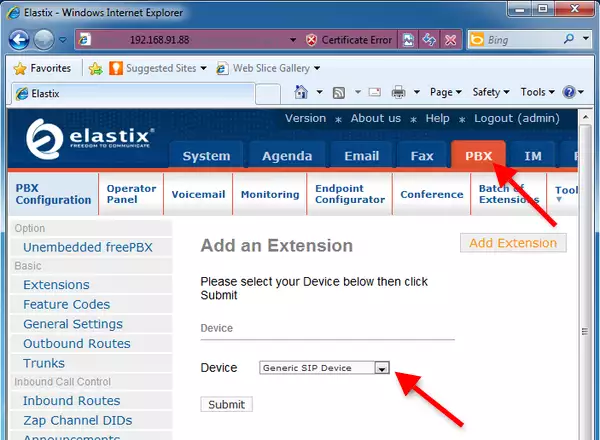
This will take you to the Extension page. On this page you can add extensions to your Elastix PBX. Select Generic SIP Device from the Device drop-down menu (Figure 3) and click on 'Submit'.
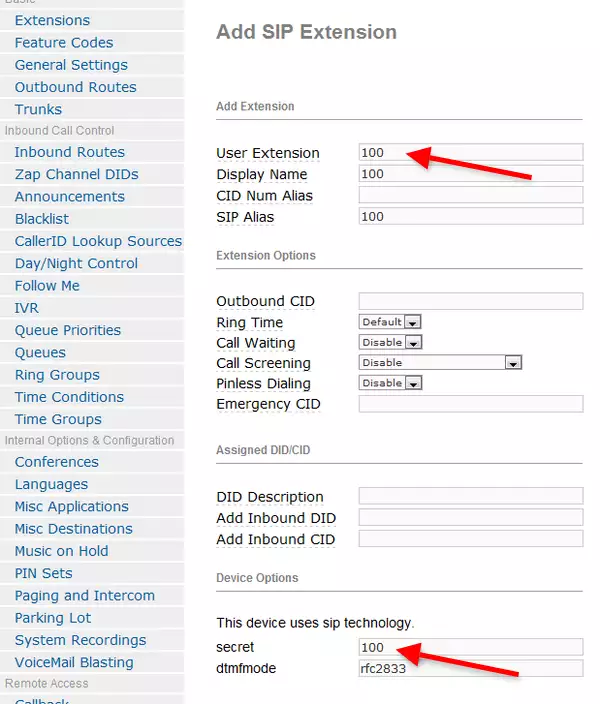
Provide the details of the extension to the User Extension field and its password to the Secret field (Figure 4). Once it is done, click on 'Submit'.
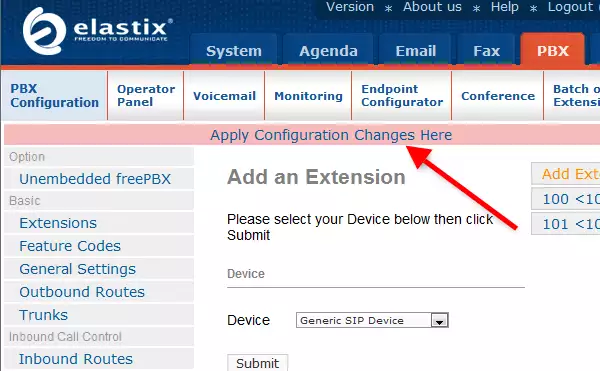
I created two extensions. Extension 100 and 101. Extension 101 will be used by a desktop phone, and extension 100 will be used by Ozeki 10. To apply your configuration, click on 'Apply Configuration Changes Here' at the top of the page (Figure 5).
Now the configuration is complete so you can start your phone lines and connect them with Ozeki 10.
More information
- Ozeki Phone System
- How to create a SIP account in Asterisk
- How to create a SIP account in AsteriskNow
- How to create a SIP account in Elastix
- How to create a SIP account in FreePBX
- How to create a SIP account in Kamailio
- How to create a SIP account in OpenSIPS
- How to create a SIP account in PBXnSIP
- How to create a SIP account in PBXpress
- How to create a SIP account in SipX ECS
- How to create a SIP account in 3CX
