Kamailio, how to create a SIP account
This guide shows you how to install Kamailio on a Linux distribution. By default, you don't need to define any extension in Kamailio, and you can register to it with any username or password. You need to install Kamailio PBX on your Linux server. In this guide we will show you how to do this. You can use the default configuration of Kamailio PBX.
Configure Kamailio PBX
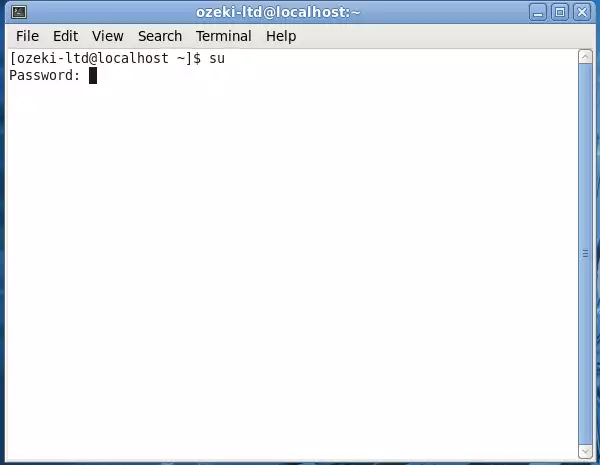
First, login to your Linux distribution, start a terminal, and type 'su' to login as administrator (Figure 1).
su

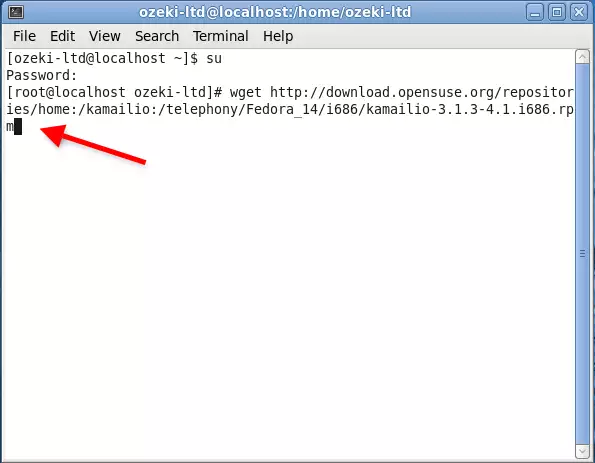
Next, download the Kamailio installation package. Since I use a Fedora distribution in this example, I will need the .rpm package. Download the package with wget in the following way (Figure 2):
1 2 |
telephony/Fedora_14/i686/kamailio-3.1.3-4.1.i686.rpm |

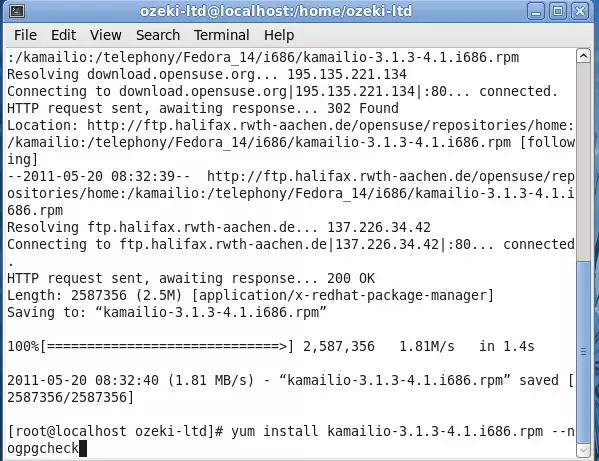
When the package is downloaded, you need to install it. Please note that you will have to skip the gpg check for this package (Figure 3).
1 |
yum install kamailio-3.1.3-4.1.i686.rpm --nogpgcheck |

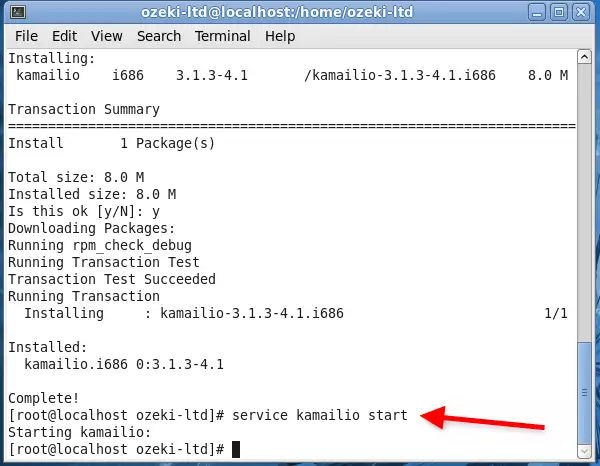
Once Kamailio is installed, you can start using it with its default settings. By default, you don't need to define any extension in Kamailio, and you can register to it with any username or password. All you need to do is to start the Kamailio service in your distribution (Figure 4).
1 |
service kamailio start |

Now the configuration is complete so you can start your phone lines and connect them with Ozeki 10.
More information
- Ozeki Phone System
- How to create a SIP account in Asterisk
- How to create a SIP account in AsteriskNow
- How to create a SIP account in Elastix
- How to create a SIP account in FreePBX
- How to create a SIP account in Kamailio
- How to create a SIP account in OpenSIPS
- How to create a SIP account in PBXnSIP
- How to create a SIP account in PBXpress
- How to create a SIP account in SipX ECS
- How to create a SIP account in 3CX
